Showing posts with label color-block. Show all posts

Tuesday, August 9, 2022

Vintage Color Block T-Shirt: Stretch and Sew 309

For a while I have been intrigued by the old Stretch and Sew patterns. I've acquired a few over recent years and then recently I found one at a guild sale that might become my new favorite pattern. I always say that, right? Well that's what keeps me sewing, finding a new-to-me pattern that I really like. Actually I thought Stretch and Sew and Kwik Sew patterns were the same company, but a bit of research has told that they are not. The two companies were started by two different women in the 1960's and both seemed to focus on knit fabrics. I have about 5 or 6 of these Stretch and Sew patterns now and you can bet that I will revisit them to find some more gems. I have a top/dress pattern that you would think is a current design, so that may get sewn up soon. 

Kwik Sew t-shirt

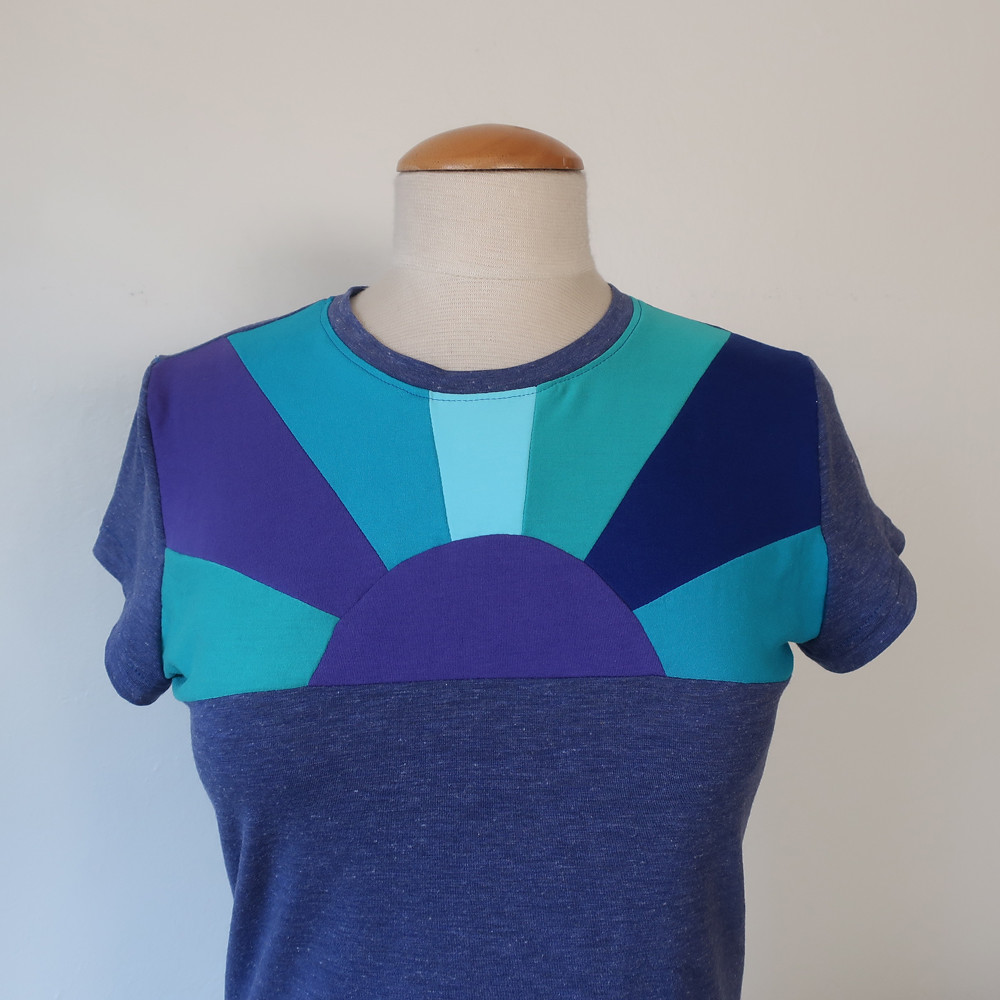
Also this t-shirt was sewn up entirely with scraps and remnants from my stash. Which tells me a couple of things. 1) I definitely have a color palette that I stick to and 2) I keep a lot of knit scraps. For this version I wanted to make something to go along with the July challenge on the SewOver50 Instagram account, the theme was color block. So I was all in - I can never turn down a color-block opportunity. 
You can expect to see this pattern again, in fact I have been collecting old pink/burgundy/wine color cashmere sweaters from the thrift stores for the past 3 or 4 years with just this type of thing in mind. 

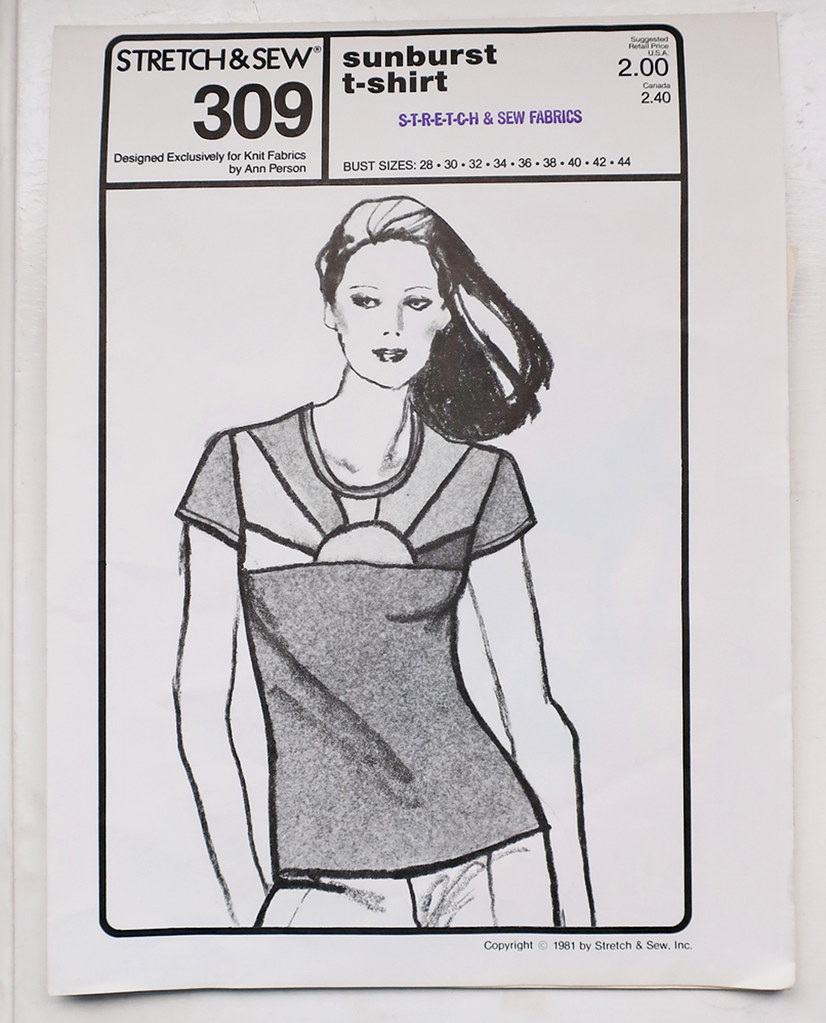
Here's the image of the pattern. I sewed mostly a size 38 with some grading out at the hips and the fit was perfect. Another bonus point for these patterns. Also it has kind of a high crew neck which I like in t-shirts. 

Kwiksew tshirt pattern

The sleeves were just a bit too short for my liking, so I hemmed them by adding a band, similar to the neckline to preserve the length and add about 1/4".


Kwik sew tshirt close up

Even though this seems a bit fussy from tracing to finish I think it took me about 2 hours. That is not including the 30 min or so I spent playing around with the colors. To get that last light color section in the center I did rummage around in my t-shirt drawer and finally cut a small piece out of the back of one of my old Target brand t-shirts which I just wear around the house. 

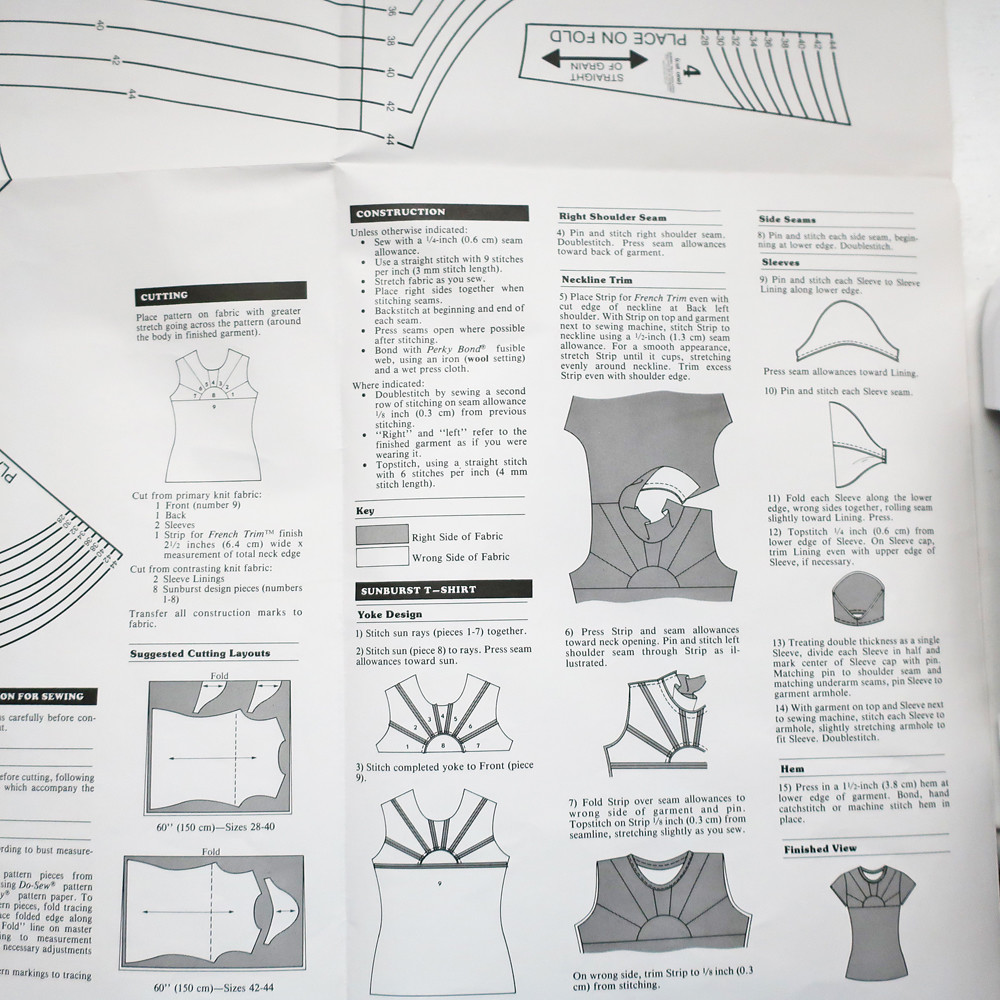
The instructions were excellent, short and to the point but very easy to follow. The seam allowance was 1/4" which worked well for those small pieces. Although I didn't follow them to the letter as I like to sew the neckband in the round. 

Stretch and Sew Instructions


Kwiksew t-shirt back

Back view. Not very interesting but it shows the subtle shaping of the t-shirt. I toyed with the idea of making the sleeves different color knits but I'm glad I just went with the base color for those and kept the color block to the sunburst area. 


Color block tee test

Before I make any color block item I play around with the colors with whatever is to hand, here a combo of colored pencils and sharpie markers. Just to see how it would look. And I decided to repeat the colors which the pattern also calls for. Not sure if I did it just as they did. I just cut them out as I went along and laid them out so I wouldn't get confused. Then it was pretty simple to sew together in order and construct the rest of the t-shirt. 

So that's the latest on my speedy little t-shirt. Up next, I've sewn a couple of summer dresses which I have had some nice chances to wear - so much better than 2 summers ago when we did so much backyard/Zoom socializing. 

I'm teaching classes in person at a couple of shops in the Bay Area, and I'm going to create a page here on the blog so I can list them as they get on the calendar. 
But my favorite class is coming up - yes, Blazer jackets! My online/live class which I did last year is starting on Oct. 4.   Here's the link to register on the Hello Stitch Studio website. 

The never-ending garden project is in the final stage, the back is complete (well is a garden ever complete?)  and the front should be done in the next week or so. Then I can rest, hahahaha, I mean rake leaves, prune shrubs and battle gophers. 

Happy Summer Sewing,
Beth

Today's garden photos - a bonanza of photos at this blooming time of year. 

Kwik sew t-shirt sunny day

I should show you some closeups of the grapevine behind me in that photo - I sewed little mesh bags to protect my grapes from squirrels. 

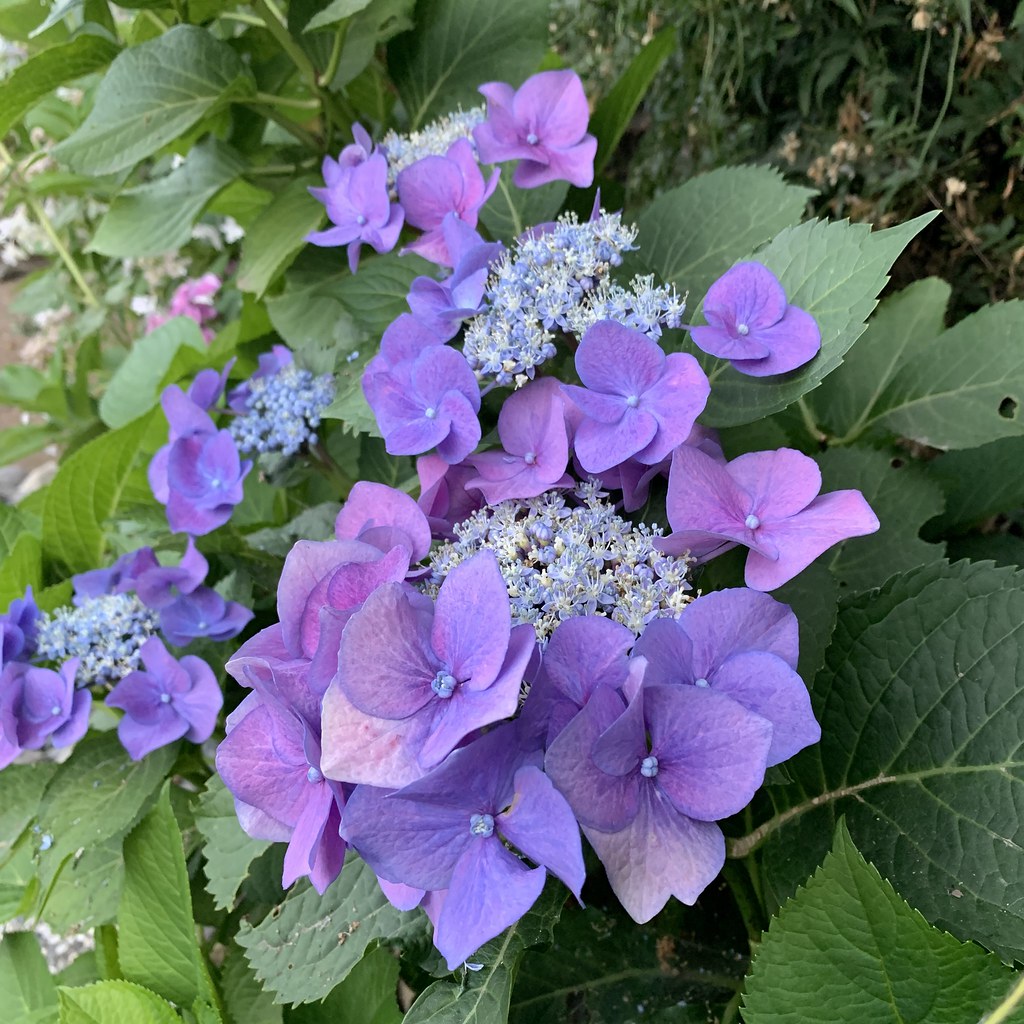
And below, a beautiful purple hydrangea to match my t-shirt :) 

hydrangea purple

Friday, November 27, 2015

Burda Tri-Color coat 12/2012 # 138, part 1

A few autumn leaves, a couple of frosty nights and my sewing mojo is back. With a chill in the air coat season is finally here!
Do you ever have a pattern that have not bought but keep returning to? Over and over again, thinking about, wondering what fabrics might work, evaluating if it right for your wardrobe? This BurdaStyle pattern is from 2012 and I have probably been looking at it since then. I don't get the magazine but I always take a quick peek at their emails showcasing the new pattern collections so maybe I first saw it there.
Recently someone gave me a gorgeous piece of wool coating and I wanted to use it for something really special. Here is the link to the pattern page.
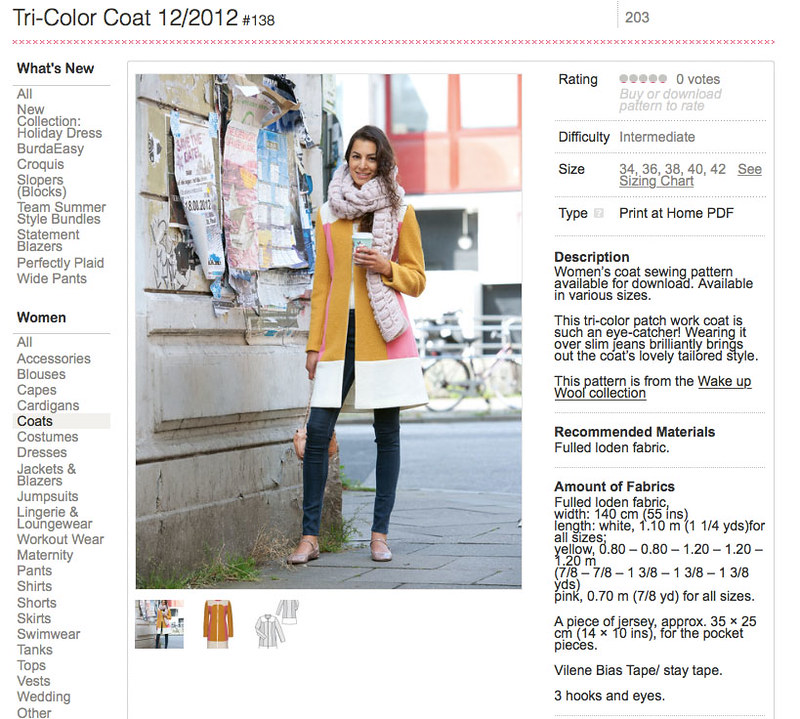
Burda coat page

The gigantic scarf is obscuring the collar details but fortunately they show it in the other image. And this pattern led me to a discovery that may be well known to you but something I never noticed before. More on that in a minute.

Back to the fabric. That beautiful green wool was given to me, it is a perfect weight of coating fabric. Already pre-shrunk and sealed up in a bag - thus you can see a few wrinkles which pressed out perfectly. I started thinking about combinations for the tricolor coat and remembered that I had a very heavy wool coating in my stash which - wait for it - I bought at some rummage sale or something like  that. It is a 4 yard piece of super dark navy blue wool coating. Just sitting in my stash until needed :)
And I probably paid under $10 for that. So....two fabrics ready and one more needed.
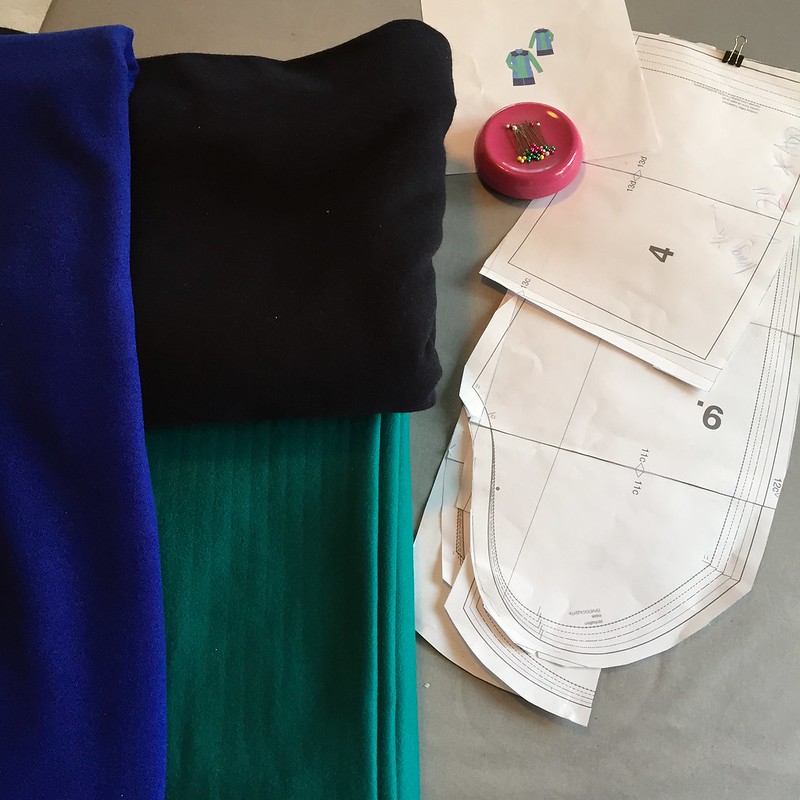
Tricolor coat pics

This is where my silly little discovery happened. I often do a screen capture of the technical drawing image from pattern websites, either to save for a blog post, or to print out and color in with pencils, just to play around with fabric options. This time I had the drawing open in Photoshop and clicked on the paint bucket tool, filled in on the coat and to my surprise it just filled in one section. So I changed color and filled in the other sections. As with so many features in Photoshop (and many many other programs) trial and error or happy accident or crazily frustrated random clicking results in some new epiphany. (or possible erasure of an hour's worth of work but we won't focus on that now). So this may be a well known feature of the technical drawings but it was news to me. And what a perfect pattern to play with this feature.
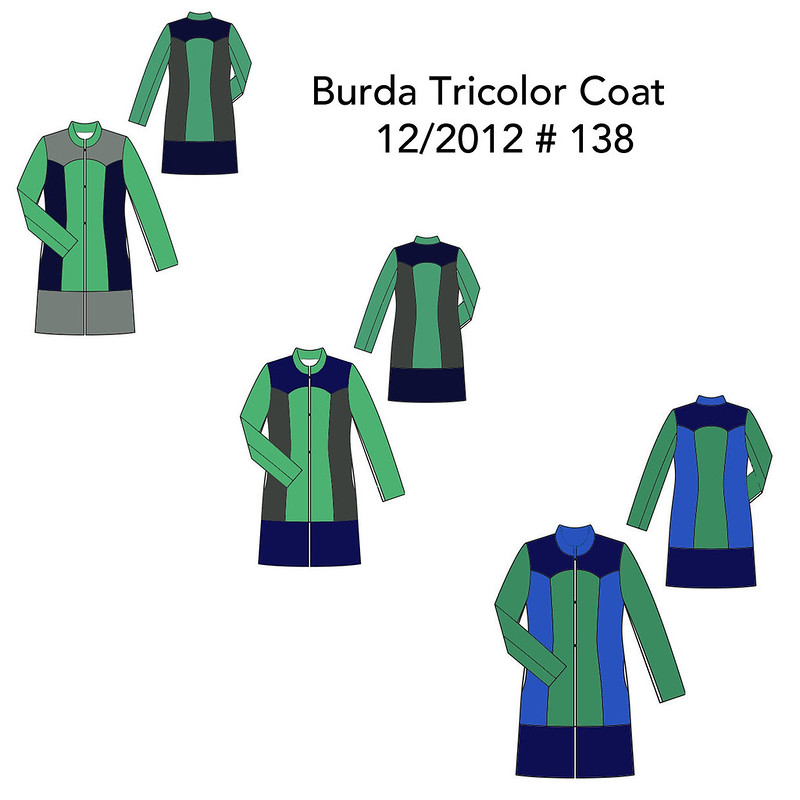

coat color idea2

I was thinking grey for the third color but my newly found coloring tool helped me decide on something a bit brighter (oh what a surprise, when do I choose the understated). Although the grey is nice and I could imagine this coat in shades of all grey - that would be very sharp looking. So something in the sapphire blue was the winner. Which I didn't have so I had to order fabric. Fortunately I found a perfect choice at Gorgeous Fabrics, a wool coating for about $ 23 yard. Just needed one yard so in the shopping basket it went and you can see it above.

I did make a muslin of this pattern before I cut out my nice wools. Using some scraps of various things and not doing the colors in the same array as the pattern, but I just wanted to check the fit and length. I cut out the Burda size 40 with about an inch added at the hip on the side seams and the fit is spot on. Can I take a minute to rave about the Burda sleeves? I have now made a few Burda jackets and so far their sleeves are really great. Although long! which I guess is better than too short.
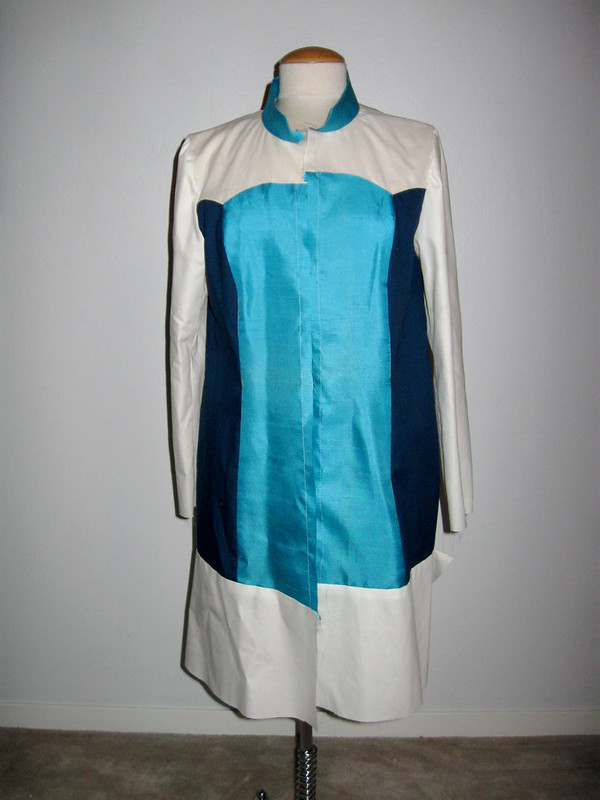
tricolor test muslin

Sewing this coat I have taken a lot of photos - so expect a few more process posts along the way.
Here is the first on my sewing process. When it comes to linings, whether in the jacket or coat, or just the pockets, I am not a fan of novelty linings. Inside jeans or shorts it looks cute to have some contrasting cotton and that's a good way to use up scraps, but when it comes to any "serious" coat (defining serious as something I put a LOT of work into and intend to last years) I want the pockets to disappear, or be hidden and have no chance of peeking out.
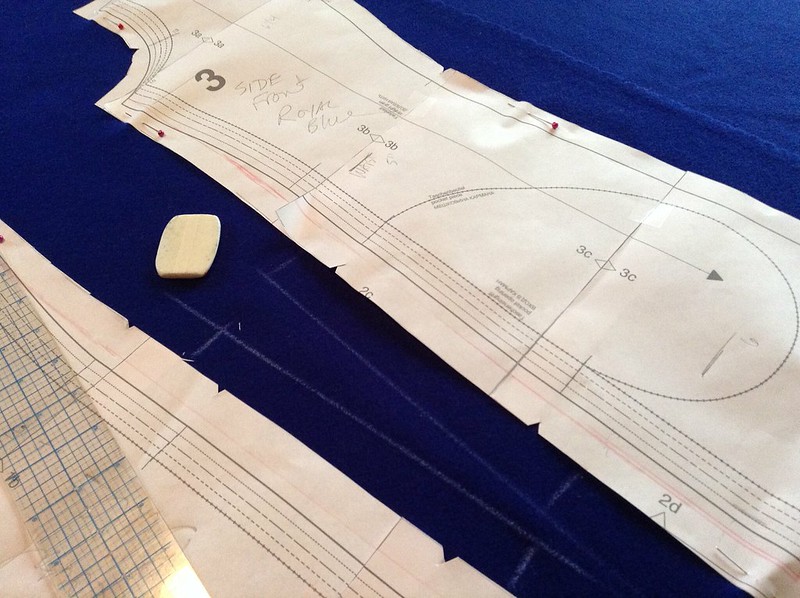
Pocket seam allowance

So for the pockets which are in the side seams on this coat, I add an extra section of fabric and then sew the pocket bag onto that, which serves to have the coating fabric extend about 1.5 inches into the pocket so the pocket lining stays hidden. Although I did use a dark navy for the pocket lining so it is not very visible anyway.
Sewing process item #2, interfacing. While all these wools are quite thick and this design doesn't need much support (no lapel or traditional collar) the 3 fabrics were slightly different in weight and thickness. I wanted them to all behave the same way so the method to achieve that is interfacing. Also my muslin test showed me that sewing those curvy junctions was very tricky and needed some stabilization.  More on this in my next post but for starters I pulled out all kinds of interfacing and did some tests.
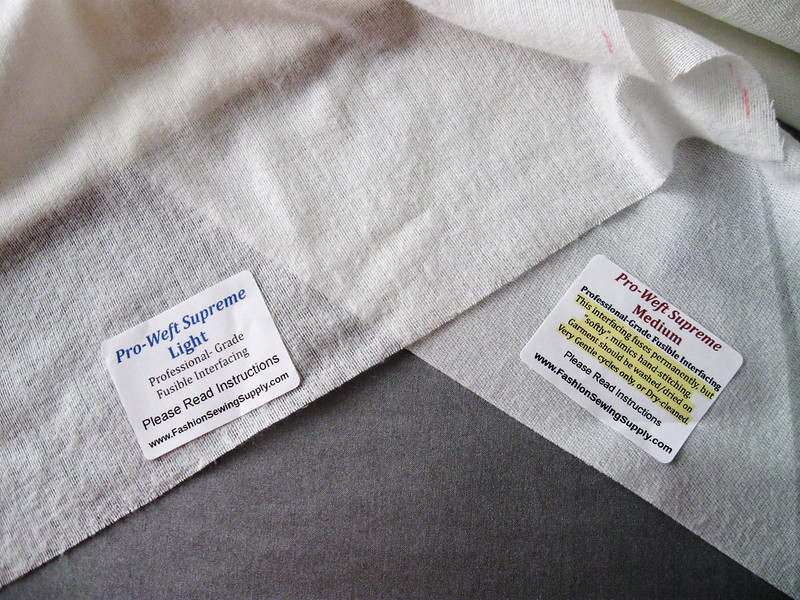
interfacing choices

I always do tests on my fabric and interfacing combos, not just applying the interfacing but then stitching the fabrics together in various combinations to see how they go together. Sometimes I am surprised at what works so the test is always worth the few minutes it takes. For most wools I use this Pro-weft interfacing from Fashion Sewing Supply (note I just got an email this morning they are having a sale, 15% off.

Here is the sample I played around with, front and back.
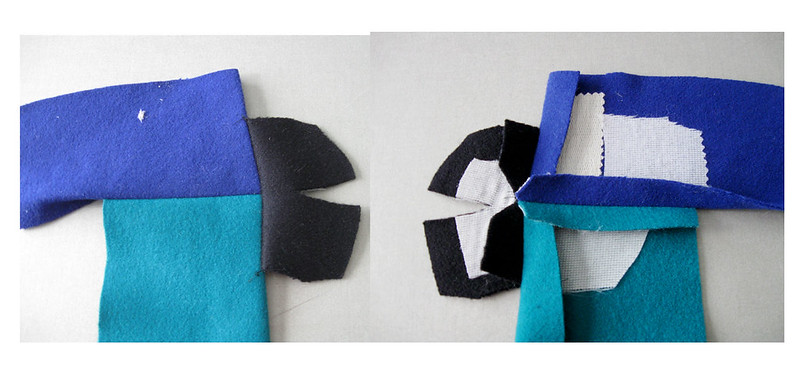
seam interfacing comparison

I tried to create a section that matched the pattern where the 3 colors were joined together, and also included a curve, which I had to snip, making it look like some kind of abstract art face or something. But you can see that the various weights of interfacing applied, then I stitch the pieces together, including where there is interfacing because you want to see how the interfacing does in the seam as well as in the body of the garment. I ended up using several different weights of the pro-weft as well as some knit interfacing in other sections which I will show in a subsequent post. And that image on the left includes a little speck of interfacing on the blue section - something about this wool coating catches every little spare thread or speck of interfacing, which I noticed here on this test and had to be really careful of when I did apply to the real pattern pieces. Also late night interfacing - of course I fused a big piece to my press cloth because it was glue side up. Which is a good indication that it is too late to be sewing and time to turn out the lights, unplug the iron and get some sleep. Also - yay for fusing to the press cloth and not the iron. Thank you Mr. Press Cloth for always being there :).

And now a little sneak peek of the coat in progress.  Lots more details to come for readers who comment that they love to see the in-process sewing and technical details.
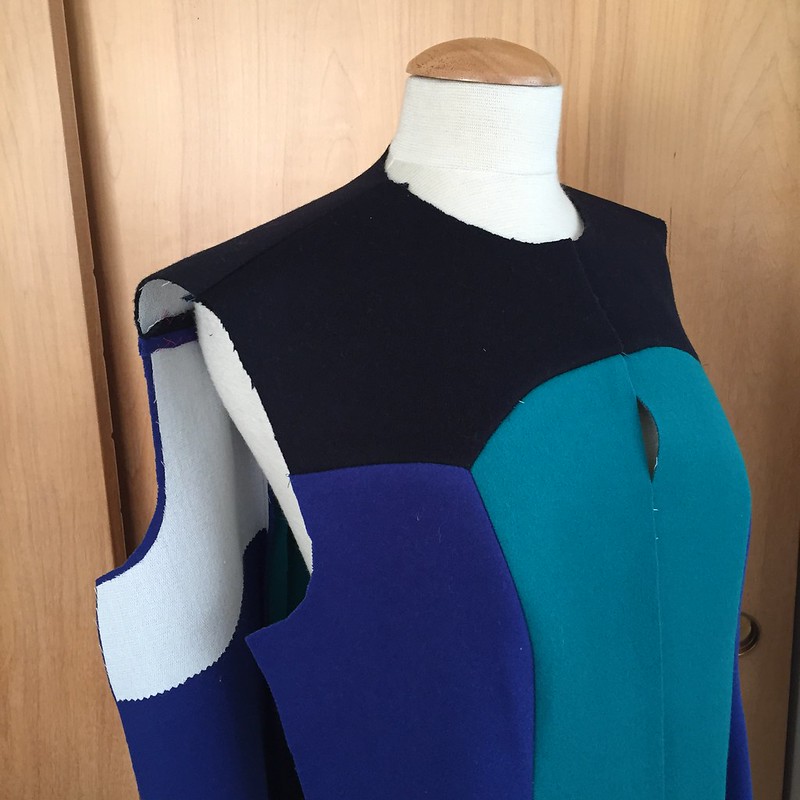
Tricolor coat pics

This morning I got some Christmas shopping done, so civilized with my cup of coffee and my laptop. Unfortunately the "one for them and one for me" habit is hard to avoid. Oh well.....

Now off to the gym and then perhaps some garden work is in order. Or I could stay inside and sew. Decisions, decisions. Oh who am I kidding, I will probably sew.

Happy Thanksgiving weekend and wishing everyone delicious leftovers  - one of the best parts of this great holiday
Beth

Tuesday, August 26, 2014

How to create a color block dress, starting with McCalls 5927

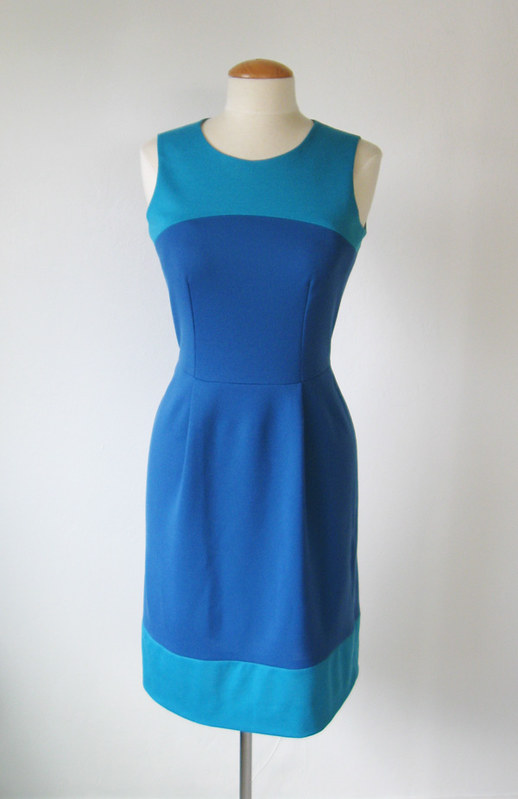
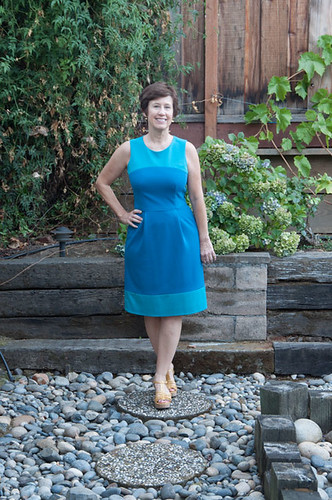
Color block styles always catch my eye. I seem to look at so many patterns as the possibilities for color blocking but it is not very difficult to adapt an existing pattern to make your own version. Recently I was writing a post for Craftsy and after rummaging in my remnants I came up with enough scraps of fabric to make this dress.

CB Front blog crop

It helps to be kind of short but this took very little fabric. I think there were some irregular cuts of the darker blue adding up to maybe 3/4 yard and then about 1/3 yard of the lighter blue. It is ponte knit so was about 60" wide but still - my final design was based purely on what I could do with the fabric.

Considering all that I am rather pleased with this dress. I don't have many items sewn with ponte knits, they are not really my favorite although sometimes the colors are great. And they don't show the wrinkles as this dress can attest. Shortly after finishing it I had to go to Sacramento for the day which is about an hour by car, plus it was scorching. That is the exact combo for lots of wrinkles but this dress made it through perfectly.

The details on how to adapt the pattern are all included in my post today on the Craftsy Sewing Blog so check it out if you want the details. I think it is one of my better explanations - I hope !
color block post for Craftsy

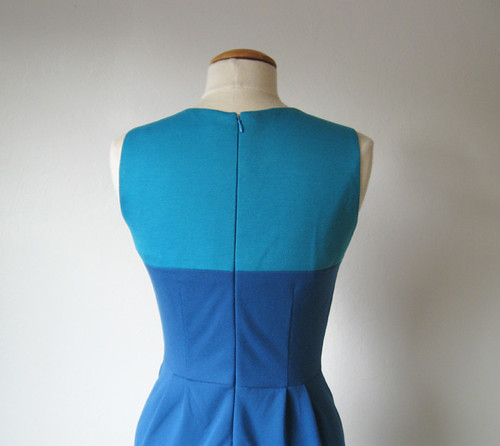
Here's a look at the back which has the same color blocking as the front. Argh, my camera drives me crazy. Does everyone else struggle to take photos for the blog or other places? And then have a zillion stupidly labeled photos in their computer which cry out for culling and organizing.  Project I never get to.

CB Back top blog crop

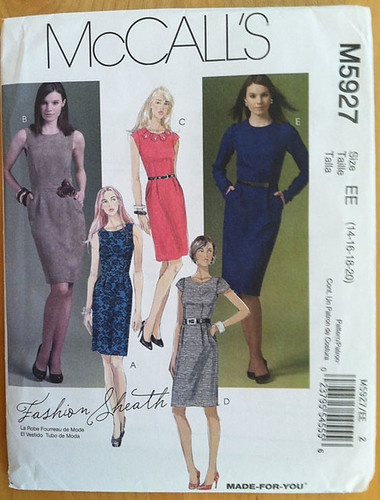
I started with this pattern which is a good one. It has different bodice fronts for the cup sizes but as a style with only waist darts I would be cautious with the larger cup sizes.  It has pockets in front (I have a sneaky feeling it is almost the same skirt block as this Butterick pattern. But I didn't want the pockets, mostly to conserve fabric so I changed the front to pleats and also changed the back skirt dart to pleats. I see this all the time on RTW dresses and it looks so cute plus HOW EASY to sew and look good on a variety of shapes. Note to self for future.  

McCalls 5927 pattern envJPG

Side seam color matching. If you're gonna do a color block dress the intersections have to match, right?

Color block Side seam view

And now a look at the dress on me. I don't like this photo but it was the best of a bad bunch. And it was still about 102 degrees in the shade at 6pm so no wonder, we were all feeling a bit limp that day. I actually think it is a bit tight but I was speed sewing to get the Craftsy post done. Although when I look in the mirror it doesn't seem tight. Photos can be so....informative (I was going to say cruel)

Color block on me 3

Back to the topic of patterns. WOW...........just wow.  So many great comments and lots of interesting opinions on traditional patterns, indy patterns, pricing, availability etc.  I will definitely write about this more in the coming months. Two things really stood out to me. First, now I know why people on vacation here in the US make a trip to the big box store to buy patterns at the US prices. Secondly, I can't believe that Simplicity patterns are so often unavailable outside the US. That is odd to me as they are really a basic here. In fact this morning I was looking at the Simplicity site (which is terrible, could it be any slower?) and I think I will try buying a PDF version just to see how it goes. Now my business side is driving me and I am really curious about this pattern marketplace, 

Thanks for all the comments and contributions to the discussion. 

Happy end of summer sewing (is it almost fall? that went fast)
Beth

Tuesday, May 22, 2012

Color Blocking, Part 2 of how to adapt your own pattern

The previous post showed how I take an existing dress pattern and make new pattern pieces to create a color block look. Now it's time to do some sewing. I will show the sequence only on the back of the dress, but sewing the front is the same as the back. Easier, as there is no zipper to match there!
Before you do any sewing, some preliminary steps.

  1. Interface all the band pieces.  I didn't do this on my first test dress, and found it really needs it.  
  2. Mark all the dots on the pattern pieces. Matching the dots on the band and dress insures that the band pieces lay smoothly and the curves fit together properly.
  3. Stay stitch all the edges of the band pieces and the dress pieces. Since we are going to clip the curve, this is necessary, plus it keeps the band pieces from losing their shape.
OK, finally some sewing!


Step 1: Clip the curve on the band piece (the convex curve). 


Color Block part 2 step 1

Step 2: Pin the band to the dress piece, matching the dots. Stitch the seam.

Color Block Part 2 step 2

Step 3: Trim and clip the seam, press seam allowance toward the band. Now it's starting to take shape.

Color Block Part 2 Step 3

Step 4: Similar method for the upper band.  Clip the band (convex curve). Here it is shown on the fabric right side, so you can see how the dots match up (marked with tailor's tacks, yellow thread)
Color Block Part 2 Step 5

Step 5: Same as Steps 2 and 3 above, pin and stitch seam, then clip and press toward band.
Color Block Part 2 Step 6

To finish, use the same process for the front of the dress, doing the side bands first and then the neck band.  Of course if you have designed a different color block it may be different.  Another color block look that I like is horizontal bands of color and that is a little easier to work with. To do that, divide your pattern into separate pieces, add seam allowances and sew together.

And now we come to a slightly less fun part of this project, the zipper. For any zipper that bisects pattern pieces you want the lines to match up, but it is so much more noticeable with the color block layout. I was pretty happy with the result, although I didn't get it on the first try.  My method for this type of zipper is to just sew the top 5 inches or so on each side of the zipper, get that intersection point just right, and then proceed with sewing in the rest of the zipper. No need to rip out the whole thing if it is not right. Definitely another reason I don't use an invisible zipper foot.  To see how I do the invisible zipper with a regular zipper foot, check out this post

Color Block Part 2 Step 7
Normally on a dress like this I would apply the facings (which are matching bands with no interfacing) however I wanted to put the zipper in right then. Once the zipper is in then you can't pull through the shoulder seams.  Here is a look at the facing.  I used the regular facing for the dress.

Color Block Part 2 Step 8
So here is the finished dress, side view and front view. That is another spot where the seam has to match, under the arm where the bands meet again. For a simple dress there are lot of little details to consider!

Color Block Side ViewColor block blue dress bodice view

Anyone interested in trying to adapt their TNT pattern with this style of color-blocking?
It's a great way to get more mileage out of a great fitting pattern with a whole new look.


Here is the previous post, on how to make the pattern pieces.

Here is today's garden photo, not really matching but a very nice spring color, gladioli in front of the pink jasmine. 

Pink gladioli

Saturday, May 19, 2012

Color Blocking, How to Adapt your own Pattern

A few readers have asked me to explain how I made the color blocked dress shown in a earlier post, so here is a look at how I adapt an existing pattern to create it. The great thing about adapting a pattern that you have previously sewn is you know how it will fit, the shape of the neckline, etc. so those variables are put aside and you can focus on designing the color blocking.


Color block blue dress bodice viewMy dress in black and turquoise was a bit of a dry run because I had a request to make a dress like this in shades of teal/turquoise.  I just completed it the other day, and took lots of photos during the patternmaking process, so here is the teal blue version.  My details below will show you how to do this style, with a contrast color band around the neck and armhole, but you can do just the neckline or change the width of the bands quite easily.  Lots of possibilities.


So here we go, and excuse the photography, I did edit the images as much as possible so you can see the details.  I will show the steps to make the pattern, and then my next post will give some sewing details.  I have only photographed the back pattern pieces, but the process is the same for the front and back.  I suggest using a very simple sheath dress pattern that has a nice fitting neckline.  This teal dress and my first version are in rayon-blend ponte knits, which are perfect for this and a good choice for testing this out.


Step 1:  Trace your pattern piece. Mark the straight of grain lines. Here I am just working with the upper part of the dress back, and then I will overlay it on the pattern when I cut out. I suggest you use the waistline on the pattern, draw that line horizontally across the pattern and then use the top part you create and the skirt portion of the dress.  Does that make sense?


Color Block dress step 1
Step 2: Draw in your seam allowances.  I find this is really helpful so I can visualize the width of the bands when it is finished.
Color Block dress step 2

Step 3:  Draw in the bands.  For this style, do the neckline band first, and then the armhole bands. I decided on 2" wide for the bands, it seemed to create the correct proportion.  If you can see on my notes, I adjusted the neckline band to be a smidge wider, 2 1/4 inches, as I didn't want it to end too close to the shoulder seam.  Draw in the straight of grain lines on the 2 band pieces (parallel to the original straight of grain line)
Color Block dress step 3

Step 4: Draw in the modified dress back, shown outlined in green. In this step,you are drawing the seam allowances, so the back dress piece will be stitched on the black pencil line, and cut out using the green line.  At this time I also make some marking dots, which really help when matching the pieces for stitching.

Color Block dress step 4

Step 4: Draw in the shapes for the bands.  Neckline band is shown in red, and side band is shown in turquoise.  So now it looks more like pattern pieces, you can see where they will match and be stitched together.

ColorBlockdress all 3 sections

Step 5: Trace off the separate pattern pieces.  Here I am tracing the neck band. Be sure an mark the dots.

Color Block dress step 6

Step 6:  Trace the remaining pattern pieces.  I find it helpful to trace in the colors I used to design the pieces.  Colored pencils are my new favorite sewing tool :) Be sure to trace your straight of grain lines on the band pieces.

Color Block dress step 7

Step 7:  Double check your pattern pieces.  I overlay them on my Step 4 tracing paper to verify that they fit and match. Here they are side-by-side so you can see the finished pattern pieces.

Color Block dress step 8

Step 8:  Repeat for dress front.   

Give it a try!   Next post I will show the steps for sewing.

And for this dress in shades of blue, a photo of something new in my garden, Delphinium.
I took this photo around 7pm, when the two tones of blue really pop.  It almost doesn't look real, but the flower petals are both blue and purple. Maybe a new color block idea?

Delphinium