Showing posts with label sateen. Show all posts

Tuesday, September 18, 2018

Simplicity 1586 Amazing Fit Dress in Cotton Sateen

Yesterday the subject for the #sewphotohop in Instagram was Fitting S.O.S. Which is a topic we can all relate to. Fitting really is a challenge, and shows you how much goes into a sewing pattern. In the past few years I've expanded my knowledge of fitting so much, and I think sewing for other people lets you take a very critical look at fit without getting hung up on how a thing might look on you personally. Fortunately I have a my very own muse, in the person of my friend Heather. Now that I've been making things for her for more than 5 years we are at the point where I just pick out the patterns and styles, and she says yay or nay. But mostly yay. Or she will give me an idea of what she wants, or show me something on a website and then I find the pattern and/or adapt to create the look. Which I just did tonight for a simple silk blouse that will appear in the future.

Today's item is a simple dress pattern that will make a lot of appearances in the future, as I'm so happy with the fit and a basic princess seamed sheath dress can be adapted to work in any season, with so many fabrics and with sleeve and neckline variations.
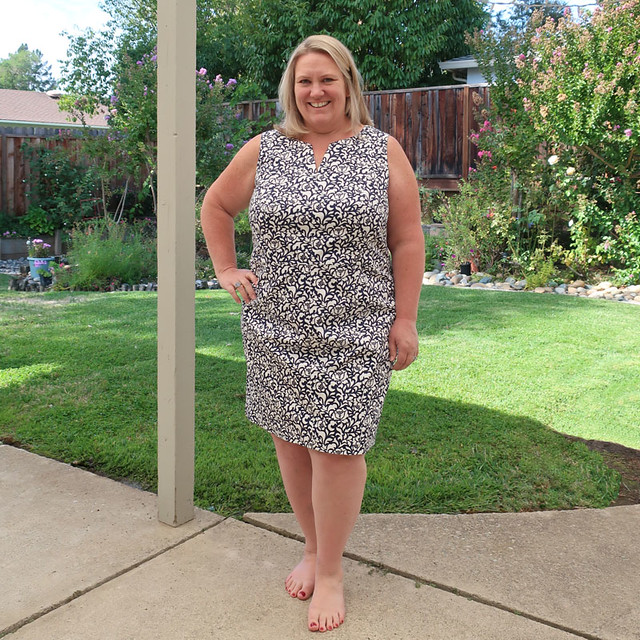
Blue white sateen squaref

I saw this fabric on the Mood website and knew it would be perfect for a sleeveless summer dress. It's a cotton sateen with a touch of lycra. Here's the link, still in stock. It would make a cute summer jacket as well. It really is navy blue and white even if it looks black on the screen.
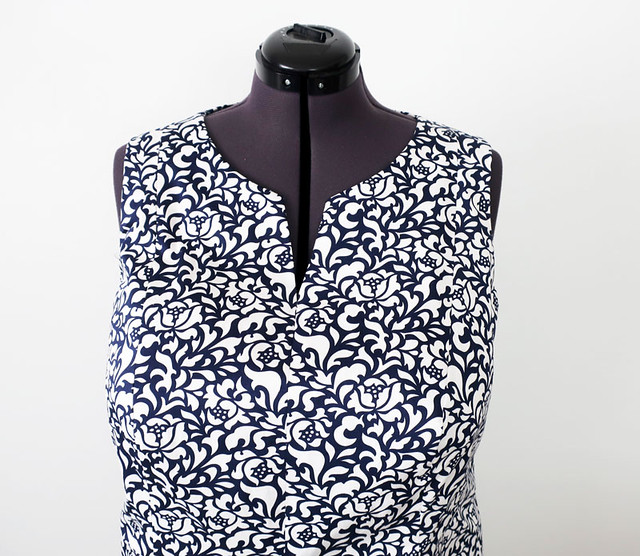
blue white sateen front close up on form

But what about the neckline? Yes, you know I can't leave a pattern as it is, and also I was trying to go for the look of another pattern.  See below, this Vogue 9167 which has shoulder princess seams and a center front seam which creates that V-notch neckline.
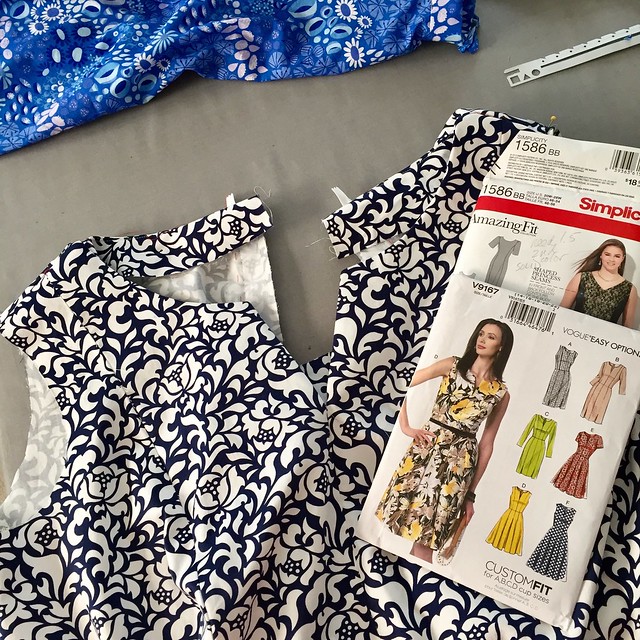
IMG_4361

Let's work backwards. Since this fabric is such a busy print it's a bit hard to see the detailing of the dress. And I worked so hard to add the waist seam which totally disappeared!!
Here is the dress inside out, before lining was added so you can see the seam lines.
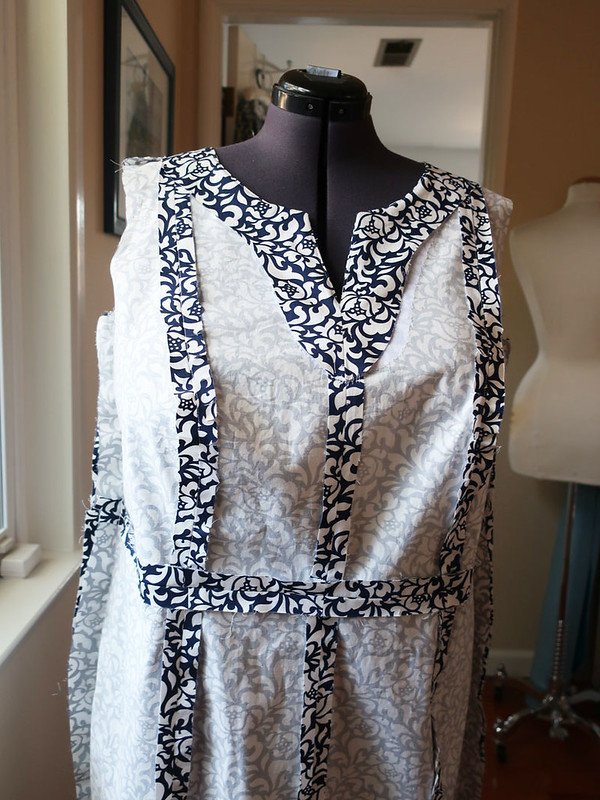
blue white dress inside on form

And here is the pattern that I used as the starting point. I made a dress for Heather earlier in the summer in a beautiful Loro Piana wool we bought at Britex, it's so nice and I can't seem to find the photos I took. For that dress I made the pattern as is, with the armhole princess seams.

This is the pattern I used as the starting point. These Amazing Fit patterns are really useful.
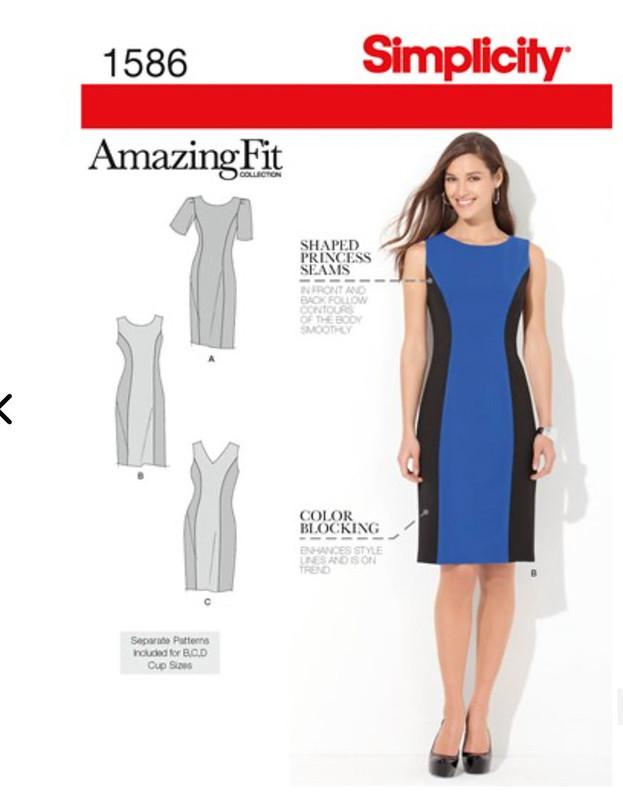
Simplicity 1586

I know that some of these patterns from Simplicity and McCalls, Vogue etc get criticized for having excess ease - but they give you the final garment measurements on the envelope or on the pattern pieces. I try to teach in my classes to the multi-size to adjust as needed and get the amount of ease that you want. Although I tend to err on the side of more ease because I think most dresses (wovens) should kind of float around you instead of being really form fitting. It actually reduces wrinkling and drag lines.

In order to have the style of the Vogue pattern (which I could have used but would have needed to start fitting for Heather from scratch) I made a pattern alteration on the Simplicity pattern pieces to have shoulder princess seams instead of the armhole princess seams.
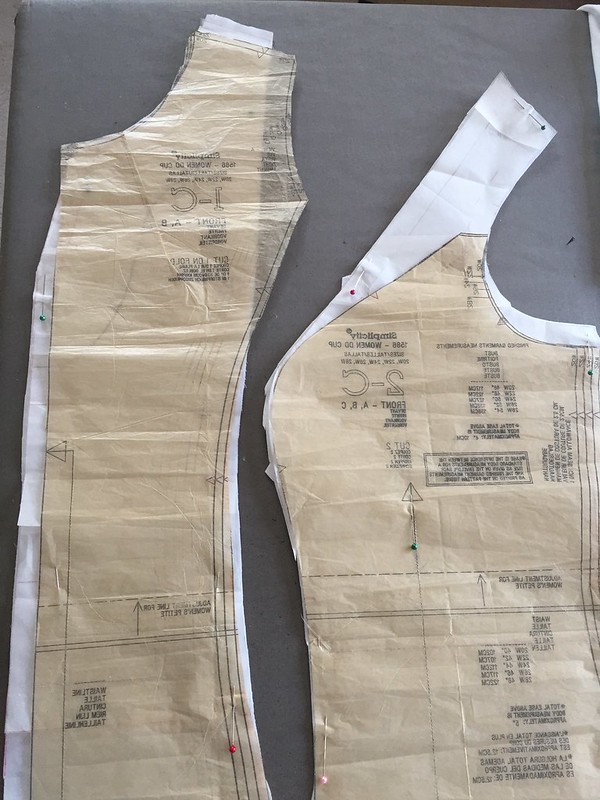
IMG_4370

I'm pretty sure that somewhere in my photo stream are the photos of the work on this - as I made paper pieces with no seam allowances, pivoted the seams and then derived the new pieces. Another thing to look for in my giant file of photos ;( The white paper below are the new pattern pieces.
Also I raised the armhole slightly, added a seam allowance on the center front instead of cutting on fold, and added the V-shape notch. I also added more seam allowance at the shoulder just to be able to play with that on final fittings. The back is done similarly, actually a bit easier as it doesn't have the bust shaping.
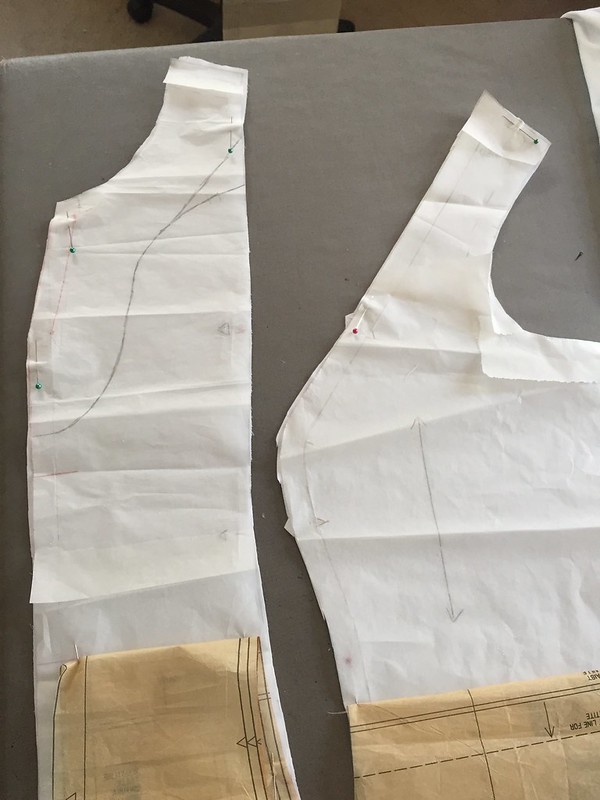
IMG_4371

Here I'm cutting out the dress lining in plain white cotton batiste. When I do these types of neckline or upper body adjustments I just make a half body pattern piece, and attach to the regular pattern piece since there is no need to remake the skirt portion. You can also see the front facing that I drew on the pattern piece and then traced onto the fabric. With these V-notch necklines it's important to have sufficient interfacing, I usually use fusible on the facings as well as sew some silk organza on the dress side. Then I sew on the facings and under stitch as far as possible on all seams.
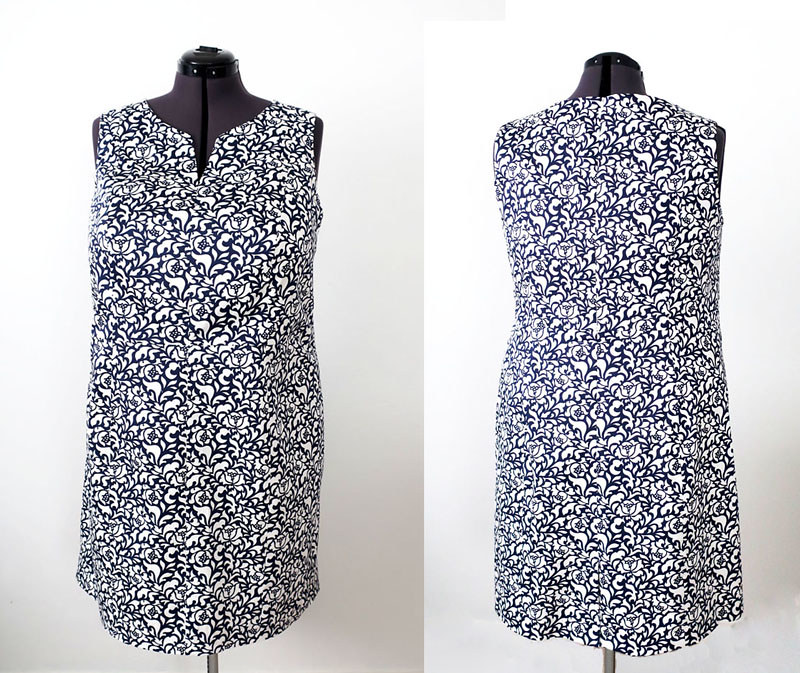

Blue white sateen front and back on form

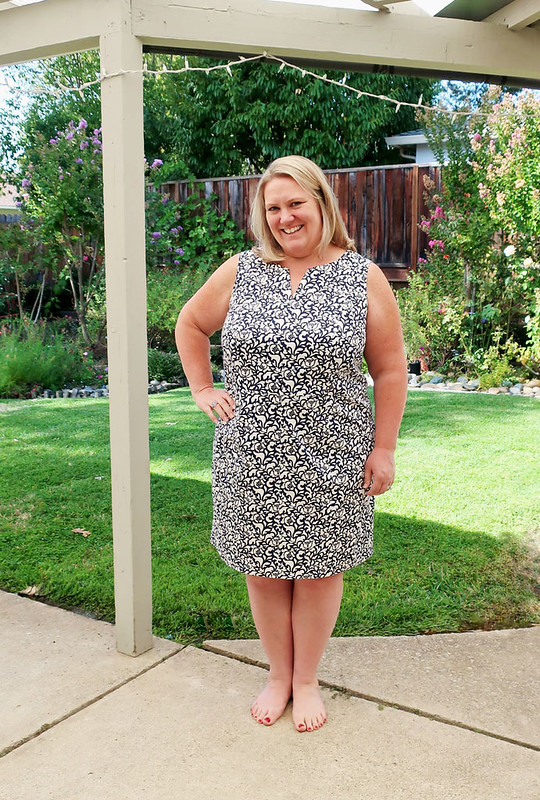
You can see that all that seaming gets lost in the print, but it did allow a very nice fit and this pattern will be so useful in either way for future dresses. I'm even thinking I can add a bit of ease and use it to create a top as well.
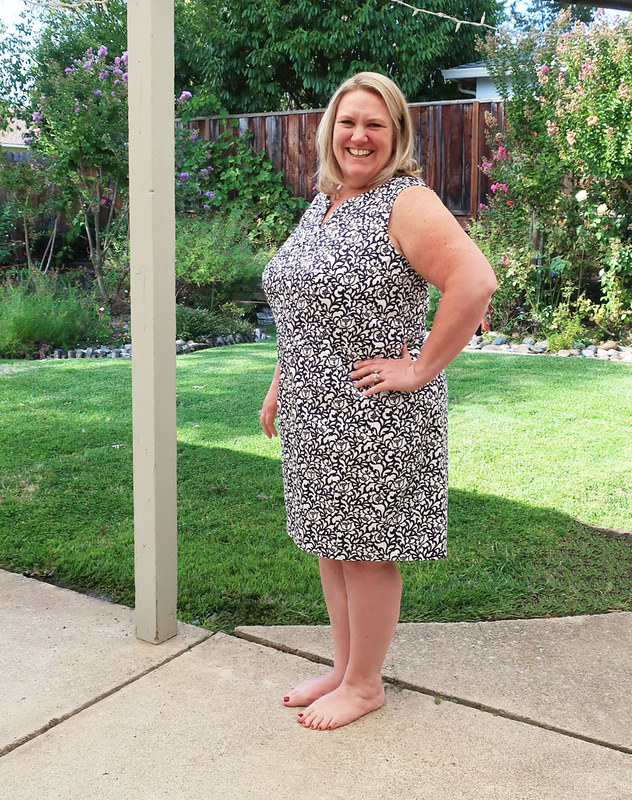
Blue white sateen side view on H

Of course she doesn't plan to go barefoot but when she came over she was wearing jeans and sneakers so those shoes wouldn't quite go for taking pictures - plus we are still enjoying a bit of summer here.
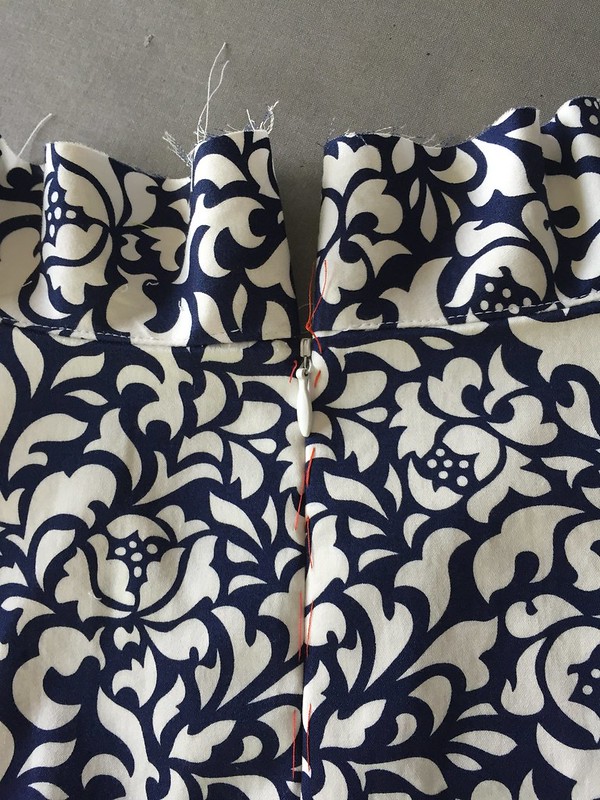

IMG_4368

If you look closely in this picture you can see the red thread. I'm a bit thread tracer, I use a bright and contrasting thread to mark stitching lines on all kinds of garments. It takes a few minutes but it is just so stable - and you can mark where you are going to sew, or where you pin fit a garment and then set it aside knowing you can pick it up again without pins falling out or otherwise shifting. In fact you can then take apart what is pinned together and sew the pieces in the order you prefer, allowing for linings/facings etc to be put in as you go. Sometimes I construct the whole top of a dress, sleeves, lining etc and then add the skirt and skirt linings, and then zipper last.
Anyway - this zipper came out really well. I always aim for perfection but there is good and then sometimes just right :).
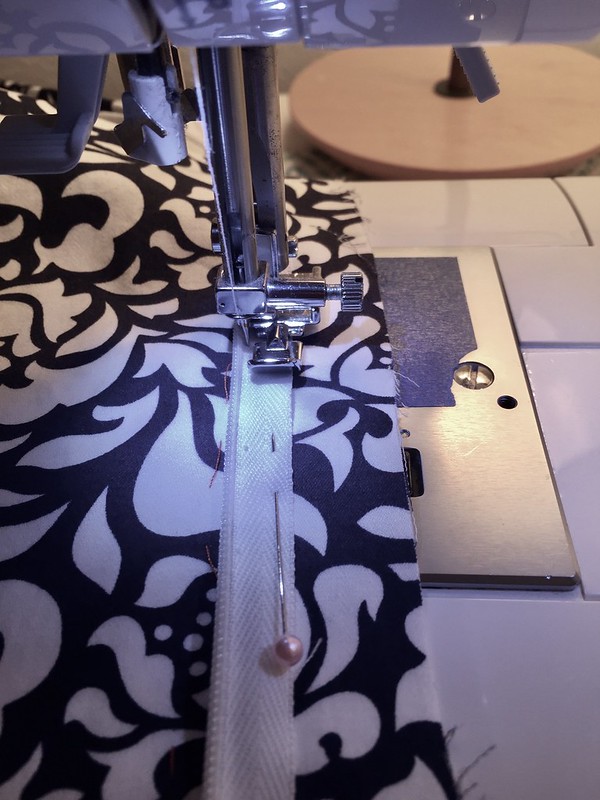
IMG_4363

Note that I don't have an invisible zipper foot - I just use the regular zipper foot and move the needle as needed. (Although the sliding zipper foot on my vintage Singer machines is actually the best of all and I sometimes use that).

Yes you are seeing that right, no serged seam allowances on this dress. I just don't like serged edges on a lined garments, all that thread bulk for what? But I think I might be in the minority with this opinion. All the notches and markings, how to you see them if you have serged all your fabric pieces?
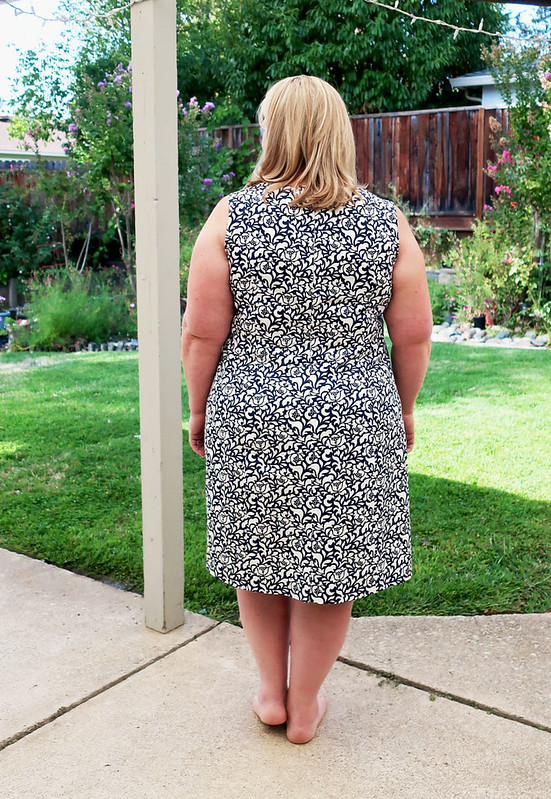

Blue white sateen dress back view on H

One other tiny fit adjustment was to sew on the lining at the back armhole with a very small seam allowance, which added about 3/8" just above the armhole. With tightening up the center upper back at the zipper that can take away at the outer edge. I like where the back armhole has landed but wouldn't want it any further in towards the center back. Conversely if it was further out I think it would look block-y. These tiny proportion adjustments are things I fuss over (and drive myself a bit crazy) but I think they make such a difference in the finished garment. Things you don't notice but give an overall impression of nice fit and proportion.

One more weird photo because I took it and it shows the neckline.
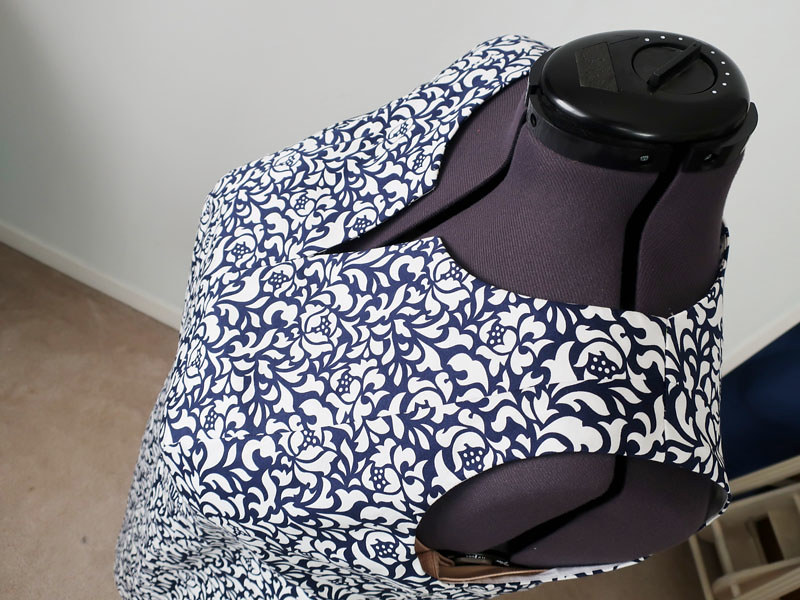
blue white sateen top view on form

So that's the latest on this dress. Expect to see this pattern again with variations in design and fabric.

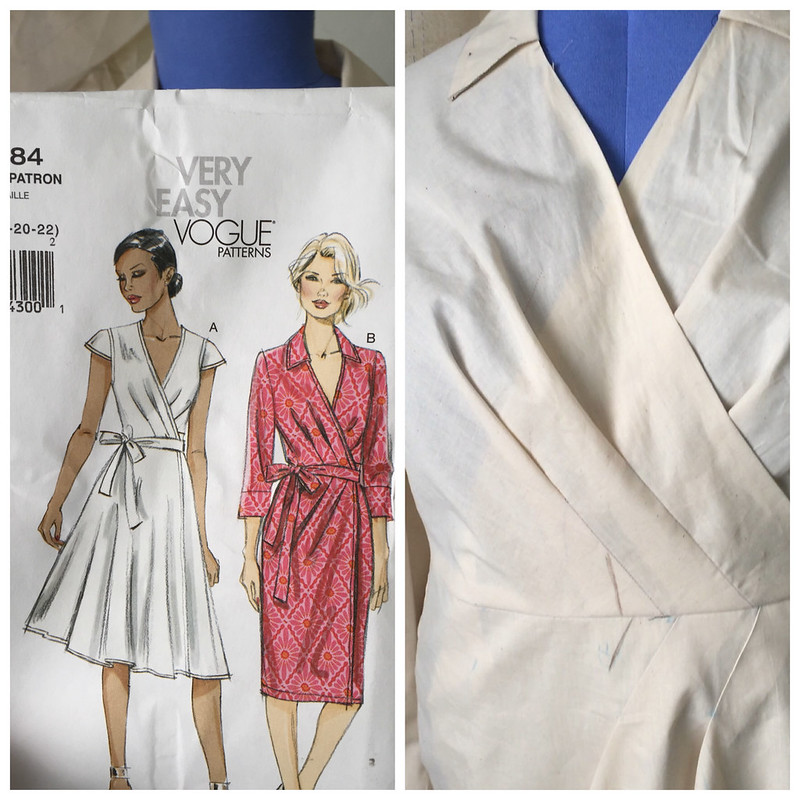
I just made a test garment for a completely different dress for Heather, a wrap dress and this one, after a fair bit of work is going to be fantastic. Vogue 8784 I'm making the slim skirt long sleeve version in a printed silk.
IMG_4417

So Simplicity Amazing Fit patterns, I frequently recommend. And it drives me crazy that they have discontinued so many - thank goodness for eBay where I have been buying so many recent patterns.
Blue white sateen dress1

Up next, I'm sewing a shirt for myself in another Mood fabric, a silk/cotton Liberty voile. And then it's on to jacket sewing - my class is coming up in early November at Hello Stitch in Berkeley. It's a weekend workshop, with lunches included.

I wrote about all my upcoming classes in this post if you want to check that out. We've added some more in the schedule since I wrote that so you can look at the Hello Stitch website for all the latest. Including a Fit Lab Pattern Fitting class on Oct. 14 which wasn't originally on the calendar but we have added - so you could fit your jacket or coat then.

Happy almost fall sewing,
Beth

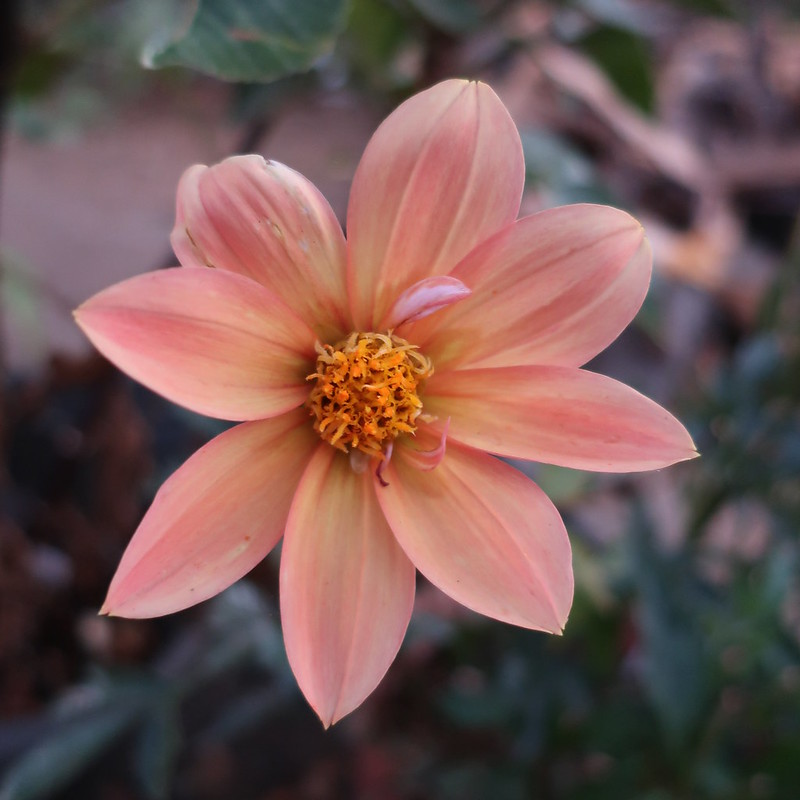
Today's garden photo, more of the dahlias. This one I bought at the junior college horticulture department May sale. Typically I like the dahlias with lots of petals but this is so cute and it's been a great bloomer.
IMG_0382
SaveSave

Thursday, July 21, 2016

House of Pinheiro Brasilia dress, version 2 in cotton sateen and some info on ribbon

To my great surprise a lot of you commented on my previous post - adding your voice in the debate between ruffle or trim. And the vote was fairly evenly split with perhaps a slight majority for ruffle. Which really surprised me - I didn't think anyone would like that at all.

Speaking of voting - it's a long way until November with only a brief interlude of the Olympics to distract us. Please distract us!!! Thank goodness for the Olympics, I love them. The hunky swimmers, the amazing gymnasts, the split second drama on the track and so many other great contests. The broadcast does have a lot to get through but I do wish they would show a bit more of some of the less well known sports. Like synchronized swimming. Weird but fascinating. What sport do you like to watch?

OK back to sewing. This is another item that I sewed in order to illustrate the topic for a Craftsy Sewing blog post. And a pattern repeat. When I first sewed this dress I did plan to come back to it and it has taken me 2 years but here it is.

This is the Brasilia dress by House of Pinheiro, also know as Rachel, if you read her blog. I made this in 2014 and did a lot of pattern fitting. Here is the link to my fitting post and then the finished dress post is here. It is only available in one size but it is not all that difficult to fit, plus it has that interesting seaming in the front.

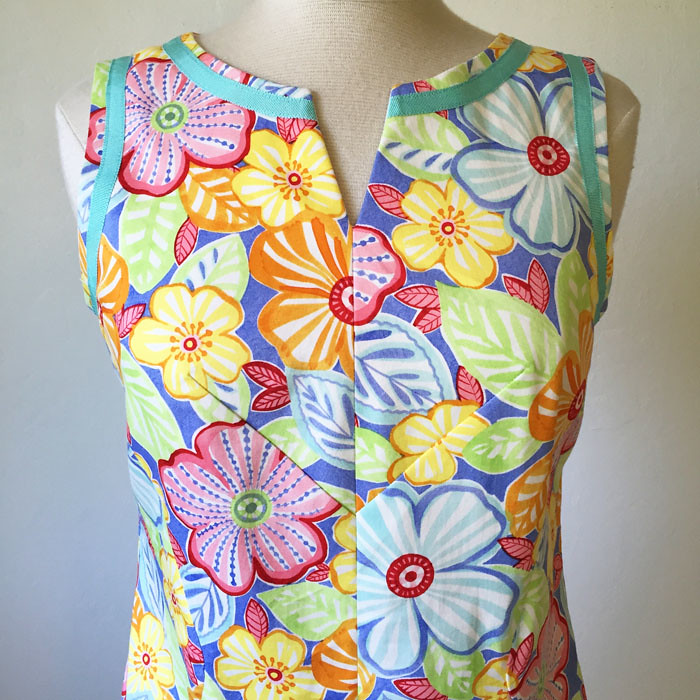
ribbon dress on form front bodice


I used this slightly juvenile cotton sateen with 2% spandex. Which has been marinating in my stash for a while because I could only envision it as a children's dress. But one day I decided the flowers were hibiscus, which is tropical, which is just my style. Kind of a Tori Richard look (my favorite Hawaiian designer - their fabrics are so gorgeous). Plus I had the right color of ribbon in my ribbon box - purchased for something else but nice for this project. That is how my Craftsy blog posts go - either I am making something already and use that for a post or I want to do a post and then rummage around for the raw materials among stuff I already have.

Ribbon dress1

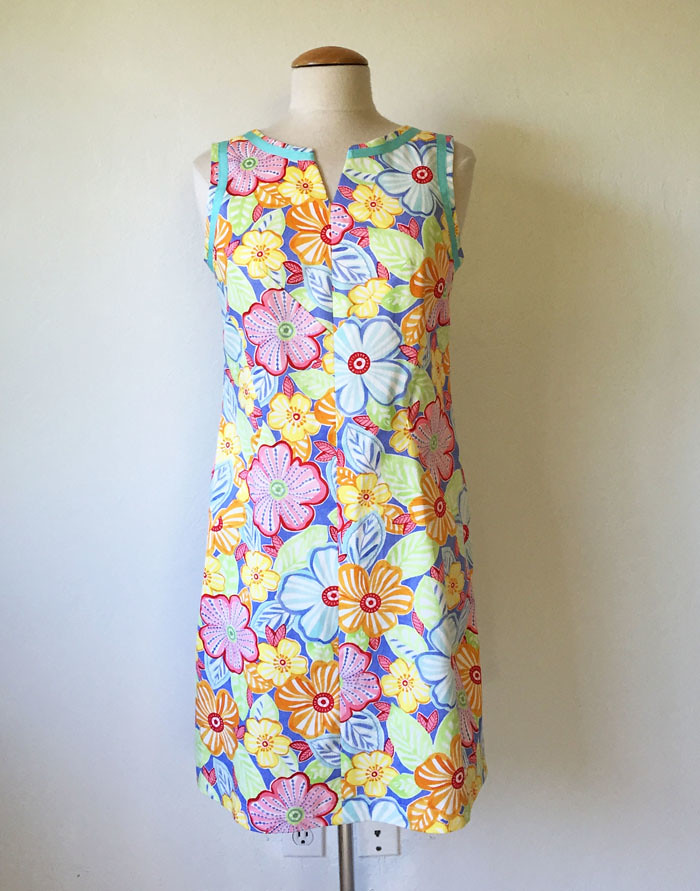
Here is the dress form pic so you can see the actual colors. I did make one change which was to lower the front neckline about 1/2 inch, since I felt the original was a bit high for my comfort, and then I decided to add the V neckline detail, which is super easy as there is the center front seam.


ribbon dress on form front

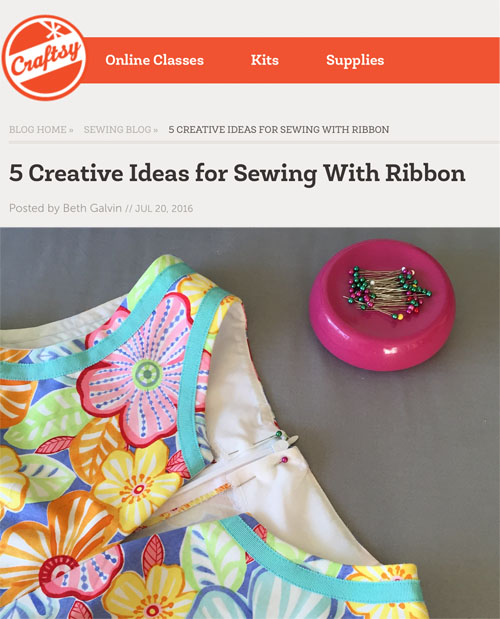
In case you can't tell - my post for Craftsy was about sewing with ribbon. I have a lot of ribbon which I always think I will use but so far not so much. The occasional ribbon sash or something like that but doing this post got me thinking about it and I have some ideas for incorporating a ribbon accent into a shirt.


craftsy photo ribbon post

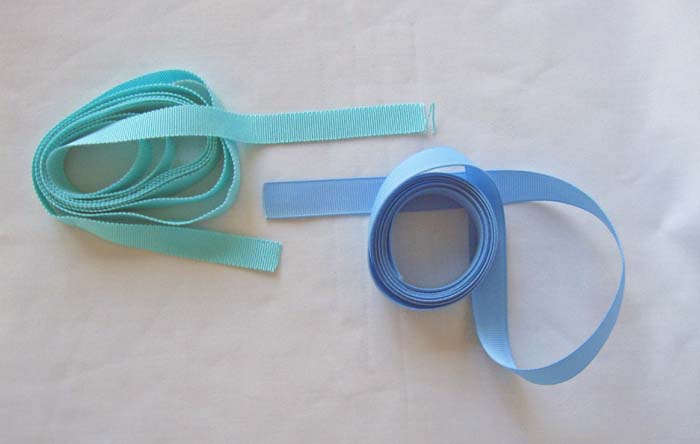
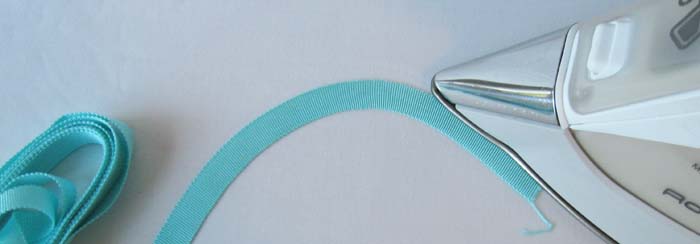
I read a post by Nakisha recently and she was commenting on the type of ribbon found on a ready to wear skirt that she had. I am pretty sure it is petersham ribbon which is quite different from grosgrain in how it behaves. You can shape petersham ribbon with the iron as you can see in the photo above, you could not do it with grosgrain. It is kind of hard to find petersham in chain type fabric stores but I am lucky that Stone Mountain has lots, plus I think you can find it at various places on line. Be sure to get petersham if you want to do this treatment.

On the left, mint green is the petersham - see how the edge is not finished. The grosgrain (light blue) on the right has that distinctive ridge and you could not bend or shape that no matter how hard you try.

grosgrain and petersham


petersham ribbon  example

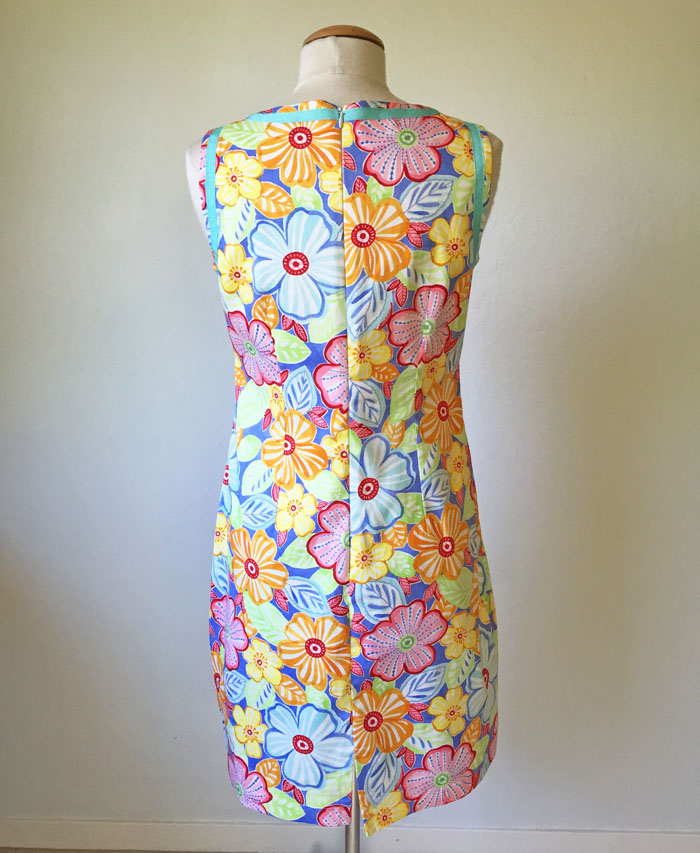
Other than adding the ribbon this was a very straightforward project - my pattern was all fitted and I just had to sew it up. I put an all-in-one neckline and armhole facing of white cotton which I sewed, pulled the dress through the shoulder seams to have a clean finish and then under stitched where possible. I am a big believer in under stitching, never skip that. I sewed the ribbon on the neck edge first and thought that would do it, thinking maybe some on the hemline. But once it all finished but the hem I thought it needed the ribbon around the armholes as well. So that is sewn through the facing. Not that it makes any difference. And no ribbon on the hemline - just didn't need it. I do a lot of evaluating as I sew - sometimes walk away from things or leave them on the dress form so I see them as I walk by and get ideas for changes in proportion or shaping that way. In any case - I rarely sew up a pattern as is so those ideas need a little time to percolate:)

Back view, it is a simple sheath dress with waist darts. I did tighten up the center back seam about an inch at the very top as the first version gaped a bit there.

ribbon dress on form back

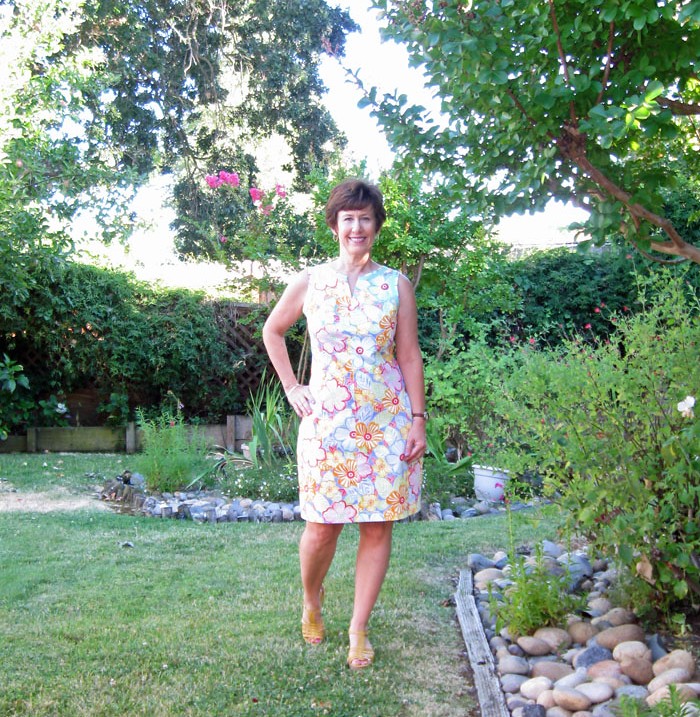
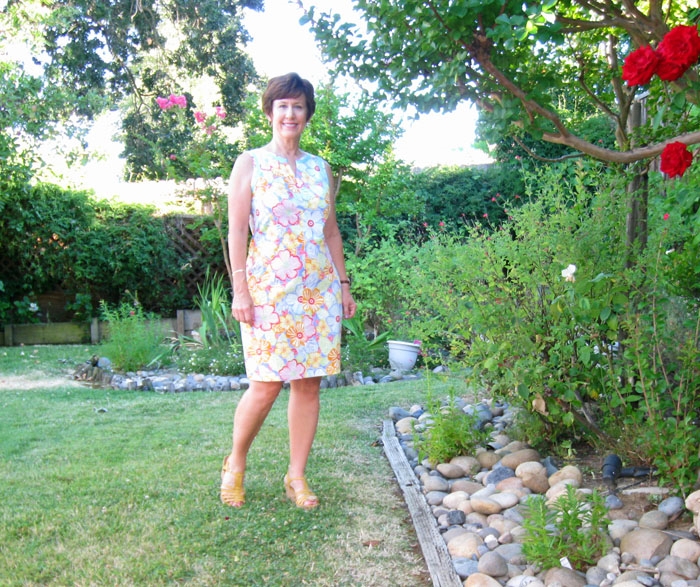
This is such a perfect summer daytime dress for me - great for hot weather which we are supposed to have plenty of this weekend. I tried to make it a bit more fitted, sometimes I think I make things a bit too loose as I have a mania about stuff that is too tight, so like Goldilocks says - this one is just right.

dress with ribbon1

Just to prove that now and then I do like a ruffle, and that I am no stranger to wild tropical print cotton sateen, here is a link to a previous summer dress. Which I really like but every time I think of wearing it I feel that I will be dazzling people with the bright colors. So what, right?

Sports. Ribbon. Wild tropical fabrics. All over the map in this post. As I said I have more ideas for using ribbon - as embellishment and also to create a lattice detail. Not sure if I will get to them but it's good to have those ideas swirling around.

Happy Summer weekend - unless you are in the southern hemisphere, (talking to you Australia) where I have a sneaking suspicion that your winter is a lot like ours here in the bay area. In the sense that you can sew and wear a cute coat and get those gloves and scarves out, more for fashion than anything else but don't have to worry about frostbite or the polar express. Or maybe I have that all wrong. Anyway - we are heading in to the 100's ˚F so I plan to float in the pool and maybe catch up on some novels.

Beth


Wednesday, December 5, 2012

Breaking my own rule, the Little Black Dress

Curse you Vogue Patterns! Just when I have put a moratorium on making dresses I was tempted by this  one.  It is Vogue Easy Options 8280, which is their version of the designer Roland Mouret's Galaxy dress. Very popular among celebs and others who can afford $ 2000 for a little something to wear. Certainly that is not me, having neither $ 2K to drop on a dress nor a list of red carpet appearances. Such a pity. I will have to settle for wearing it to some holiday parties.

Black dress final version
And double drat. I broke my own rule of not wearing black. A non-color so visually uninteresting, so fade into the background, so blend in with all the other females wearing black dresses at parties. But wait...I am having a bit of an epiphany here.  Black, well deployed can really work. I suppose the same can be said for beige also. Last week I had to laugh because Tasia from Sewaholic mentioned me in her post about her new Cordova Jacket Pattern which she sewed up in beige.  I feel the same way she does about beige - neutrals are just not my thing and she is a fan of the colorful and flowery as well.

However this dress is so, so something - very fun to wear and not difficult to make. I did enter in the Pattern Review Little Black Dress contest - I swear, the last contest for me so I would really like to win! Wouldn't that be ironic... with the wardrobe piece I used to scoff at but now love. So if you are a member surf on over and vote, my PR name is "sunnysewer".

The fabric I used is a cotton sateen that has been in the stack for ages, ordered from Fashion Fabrics club and when it arrived I was surprised to see it had a faint iridescence on the fabric, so not really suitable for things I would use cotton sateen for. But just right for a dressy item. I did lighten these photos a bit since it is so difficult to photograph black and it is looking a bit wrinkly here. Something about the sleeves give me a toreador vibe.
                   Vogue 8280 front of dressVogue 8280 back view

I made a couple of changes with the pattern. The skirt has front hip darts which always bug me and in this slightly stiff fabric never want to lay flat so I actually used the skirt portion of my blue wool vintage McCall's dress which fits well and has cute pleats on the hip instead of darts. This dress needs to be very fitted so I took in the skirt quite a lot. The sleeves are my favorite feature and I think they may reappear on some future dress. In these images you can see the slight shimmer on this fabric.

Vogue 8280 skirt front pleat detail

Vogue 8280 sleeve view

As I have mentioned in the past, I have a drawerful of vintage goodies which have been passed down from my nana and my Aunt Jo (nana's sister and my first sewing teacher).  This dress seems perfect for some of the sparklies that only see occasional outings...actually I can't remember the last time I did wear any of this stuff, but I swear I have done so.  
These are all rhinestone pieces from the 50's or before.  On the left is a bracelet, and matching earring. I can't find the 2nd earring, sob.  It has to be somewhere in one of my dressers.  On the right are a set of earrings and dress clips.  The dress clips are such a cool item, they have a frame so you can clip them both in and then wear them together as one pin. On the right I am showing the dress clips and matching earrings plus the bracelet.  Lots of sparkle, these old pieces are incredibly well made and comfortable to wear.  

Costume jewelry setsBlack dress with vintage jewelry

Here is the Vogue Pattern, one of their Easy Options patterns that has more than 40 reviews and looks great on so many.  One of my favorite recent versions was done my pal Amy of SewWell blog when she entered the Tessuti contest.  I LOVE her version. Check it out.  Fabric choice MAKES a dress! 
V8280 pattern envelope

And now back to my regularly scheduled sewing, finishing the little girl's coat from my previous post. Then onward to some Christmas gifts. It is pouring rain here and I was thinking about planting some tulip bulbs but not today!

Happy rainy day sewing, Beth

P.S. For a very funny take on the original designer version, here is a link to a short UK newspaper article.
P.P.S. my hair is driving me crazy - soooo close to calling for a "please cut my hair today" appointment instead of waiting patiently for it to grow.  Based on comments on one of my previous posts - everyone knows the feeling!

Wednesday, October 17, 2012

One hit wonder - the grand finale

Here you go, the dress that got me started on this series of "One Hit Wonders".  Back in May during a break from teaching, I showed my sewing student Karen a few of my previous makes. These are dresses that I labored over but only had limited wearings - sometimes just once.  This is the one that she was wowed by, and I have always loved this dress, in all its 90's glory. 
Navy party dress on me
I made this dress to wear to a wedding, of course,  Seems quite a theme with my fancy clothes.  This was one of the first garments I made in response to seeing a dress in a store and thinking "I could make that".  It was a dress from I.Magnin, a store I miss to this day. Described as a "San Francisco, CA based hi-fashion and luxury goods department store with roots going back to 1876" it was sad when it disappeared but I have many memories of shopping there with my mom and sister.  The dress I saw there was solid navy blue but otherwise exactly the same as what I eventually made.  I think the price tag was about $ 200 which was an enormous sum to me at the time, just starting my career and not having a lot of money to fling at a party dress. 
This was in the pre-cell phone camera era so I went back to the store twice to try it on and the second time I took my measuring tape to note some details, such as the width of the binding and the specifics on this surprising detail:
Navy party dress back full view
The bow !   and the cutout.  Looking at it now I am kind of amazed that I pulled this off, and got it to fit so well.  I can't remember at all how I did it.  We are talking 1990 so 22 years ago, eek.  I takes up a bit of space so why it is still hanging in my closet I cannot explain, except that I love it and have such good memories of wearing it.  Confession time - I wore it twice. So not exactly a one-hit wonder but the amount time it took to make it versus the wearings puts it into the category.
How about some details? The upper half is a basic bodice, with a drop waist. I think I took a plain sheath dress pattern and used that to make the bodice, fitting it very snugly so that the cutout in the back would stay flat.  The fabric is cotton sateen, and the binding is packaged double fold seam binding. I think I bought the fabric at Britex. I lined the entire bodice in navy blue cotton and then finished all the edges using the white binding, stitching it on the right side and then turning it and hand stitching on the inside, which took a lot of time.  I was so proud of myself as I mitered the inside corners on that back cutout, after a bit of practice on scraps. The neckline fastens at the top back with a hook and some added snaps for security.  I made sleeve heads of net to maintain the proper poof in the sleeves.  

       Navy party dress front close upBack opening

Under the bow is a center back zipper so the dress is quite easy to wear.  The bow is stitched to the dress on one side and then has snaps on the other side.  It is not a tied bow so if you turn it over you can see it is the loops and tails all stitched in place firmly to stay perfect.


Bow close up
Oh yeah, that waist is tiny!   Not exactly my size today.  I couldn't quite zip it for the first photo but all in all I am pretty happy I can still get into it (mostly).

More fluff underneath.  The skirt lining is bright fuschia and then on top of the lining I attached some hot pink tulle, but that wasn't quite enough so I added the lighter pink netting which has a bit more oomph and give that full skirt look I was going for.  For the last detail I used horsehair braid in the skirt hem, first sewing that in by machine since the stitching would be covered by the white binding.  I think that gave the skirt the proper shape and showed off the fabric. 

Navy party dress hem and tulle
I wish I could find a photo of me wearing this at the time but so far no luck.  This is the one-hit wonder that will stay in my collection, too many good memories to ever part with it.  Although I would like a cute summer skirt in that fabric.  But don't fear, I won't be repurposing this anytime.  
Navy party dress side view

Here are links to my other One-Hit-Wonder posts, first: a wearable winner, second; an epic fail, and third: reworked and just right.  I sound like Goldilocks don't I?

My Vogue 1143 suit is finished, hurrah.  Photos and blog posts soon, many thoughts on that pattern so that will be up next. 

Here is my SunnyGal Garden photo, my dahlias were very late this year and so I have blooms now, this year I think I will take the plunge and order some of the very showy ones online.  I really like these bi-color ones. Now I just have to find a space for them in the spring.
Happy Sewing, Beth


Dahlia

Monday, September 3, 2012

One Hit Wonder # 3, Refashioned and wearable

Time to revisit my sometime series of One-Hit Wonders, which are dresses I worked hard to make for a special occasion, wore one time and then put in the closet, never to be worn again.  In this instance I knew I loved this fabric too much for it to be shut away. Consequently I did some refashioning and now am more than happy with the result.

Pink green dress

A double treat to wear my "new" dress, for my birthday dinner, on vacation.  I originally made this dress in July of 2010, to wear to a wedding. (that seems to be a pattern for my one-hit wonders,  see the previous ones here and here.)  I think I have mentioned that when Karen was in California sewing with me she was wowed by my collection of super-bright floral dresses. Being a fan of the colorful and floral, she urged me to revisit them and this one had the most possibilities for refashioning.  Actually the refashioning is pretty subtle, but makes it so much more wearable, or at least suitcase packable!

The original dress has the same bodice, but I took off the skirt and cut it down considerably. The skirt on the first version was 120 inches in circumference, with 1 inch pleats at the waist. Very heavy in this cotton sateen. At the time I was going for a retro early 60's technicolor movie style, and it was OK, but a bit too much in retrospect. Removing the skirt I changed it to a much narrower straight skirt, slightly gathered at the waist. It may be difficult to see, but I left the center front of the skirt flat, and then started the gathers near bodice princess seam. I like this look on a dress which makes a gathered skirt look a bit sleeker. I cut the pockets off the first version and restitched them into the new side seams on this, total recycling for this project :)

Pinkgreen front view original pink green dress on form

Lastly, this dress seemed to need a belt so I used one of my belt kits (purchased from A Fashionable Stitch, so glad she has these as I used to find them all the time locally but now they are very scarce). On the left is the fabric covered buckle, half finished so you can see how it looks once you get the fabric stuck on. These are really easy to make, if you have never tried one give it a go. I suggest a very thin fabric (cotton or something similar) for a first try.  On the right is my Singer buttonhole maker which I use to make the eyelets. The smallest template makes a 1/4 inch buttonhole. OK, it is not circular, but it is fine with me and very sturdy.

pink belt bucklepink green belt buttonhole

Not having made one in ages, I made a slight boo-boo on the the little tongue-y thing which is sticking out a smidge too long, but after a few minutes with the pliers and not wanting to snap it off I decided it was just fine.  When I make belts I put the little loop on the buckle side of the belt, stitched in place as the end of the belt always wants to stick out and this makes it look more finished.

pink green dress belt

To see how full the skirt is on the first versionand all my other one-hit wonders see this set.  I used New Look 6457 for the bodice, and here is a previous blog post featuring this same pattern. 

No actual sewing for me for a while, but I was busy in July and August so I have a few blog posts coming up on completed projects, including a few knits (starting to see the possibilities - and instant gratification sewing with knits provides).

The grand finale to my one-hit wonders is coming up soon and you don't want to miss that. Floral, tulle, piping, shoulder pads. . . and you are asking why I don't wear it more often? ha ha. Wait and see!

Summer is not really over but it kind of seems like it on this weekend.  Time for thinking about winter projects?   Say it isn't so, at least not here in the 50th state :) 

Happy Labor day and/or unofficial end of summer sewing to all,  Beth

Tuesday, July 27, 2010

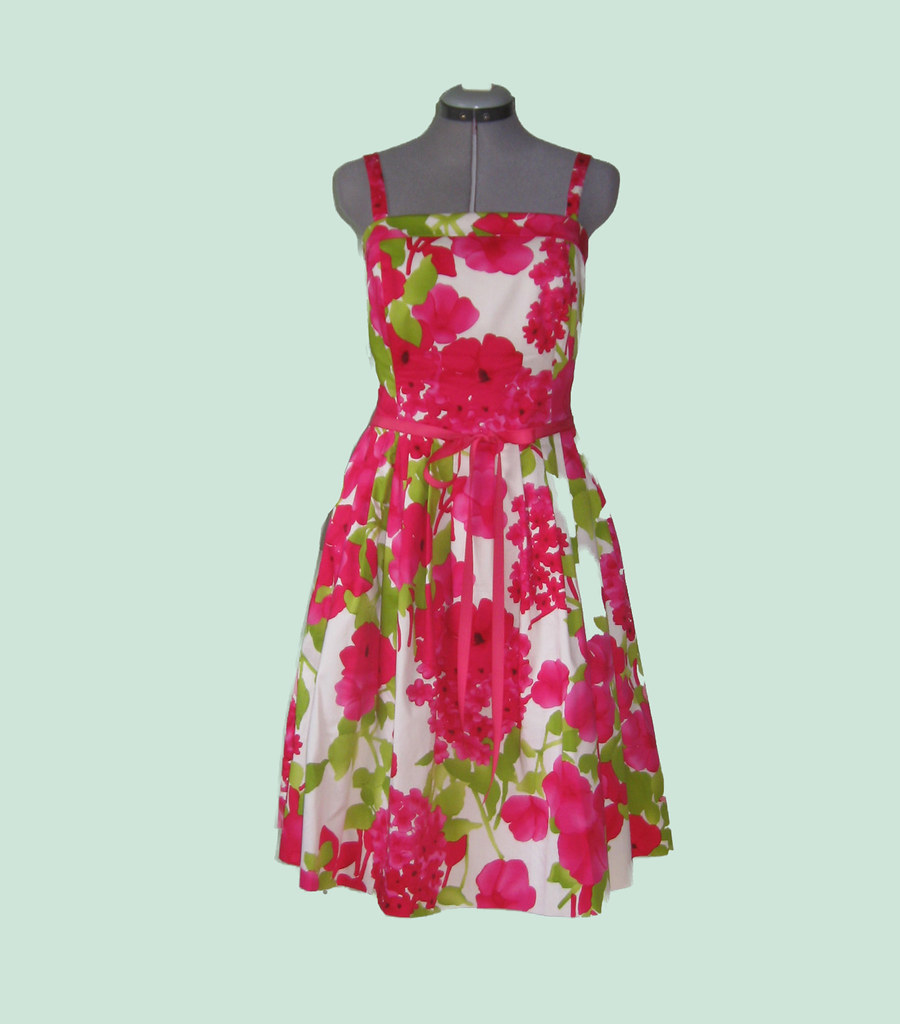
Floral Dress for a Sunny Day

Last Saturday I went to my cousin's wedding in Napa, CA.  I don't think I have ever been to a wedding with a yellow color theme, and it was beautiful.  The flowers were gorgeous and the cake was delicious, frosted in butter yellow icing with white snowflakes as a nod to their Colorado connections, with a Mr. and Mrs. snowboarder on top.  So cute.


In between my other projects, I quickly finished the dress I wore.  


The fabric I had written about in another post.  (purchased from FashionFabricsClub)  For this dress, I decided to do a simple square bodice and then add a full skirt.  I used New Look 6457 for the bodice, and raised the top seam up about 1".  I was not sure where the waist should end up, so I lengthened the bodice pieces which ended up causing a lot of extra work later because I had to fiddle around with the placement of the skirt, and I was not totally happy with it, could have been up another 1/2" or so.  (But only I would notice it.)
I used the dress form to fit the bodice, and then fit the lining pieces the same way.
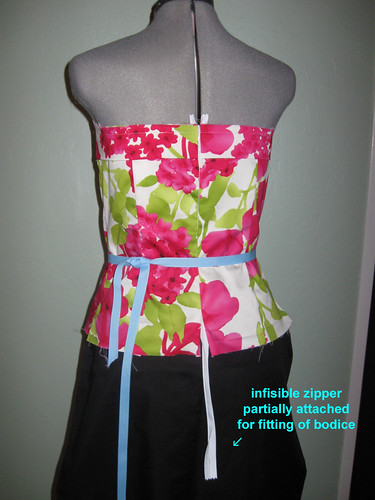
The one construction tip that I have been using lately is to sew the zipper into the bodice and then the bodice can be fitted on the body or the dress form, without the skirt being attached.  After I am happy with the bodice fit, then I take out the stitches about 1-2" above the skirt placement, sew on the skirt and then finish sewing in the zipper.  Here is a photo of that process, with the zipper shown unattached to the skirt.  I was so clever and put some text on the photo with Photoshop to indicate the zipper and now I see I spelled "invisible" wrong, and can't figure out how to re-edit in Photoshop.  oh well.


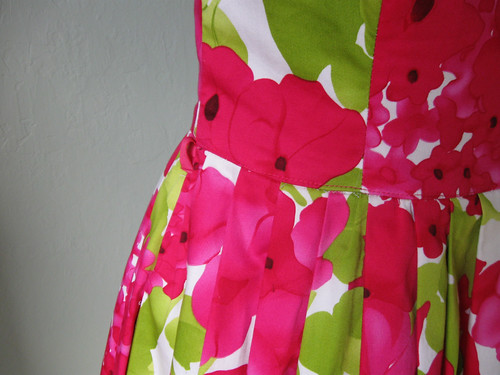
For the skirt pleats I just cut the front and back, and then made 1" pleats using a clear ruler.
After I sewed on the skirt, the waist was a bit bulky, so I trimmed it a lot and did a row of stitching to hold it together. 


I used my favorite construction method of sewing all front pieces and then all back pieces, adding the zipper, and then fitting on the body.  Patterns rarely have you do this, but it makes fitting so much better.   See below, the top facings are sewn into the side seam, but I hardly think it makes any difference.  Added shoulder straps as I am never comfortable with strapless dresses.   Under the back facing, there is a hidden strip of elastic across the top, which is a clever idea that gives it a bit of hold.  I will have to remember that for future dresses.


And in honor of my very flowery dress, today's SunnyGal garden photo, some lavender hydrangeas that live in a shady corner of the yard.