Showing posts with label buttonhole. Show all posts

Saturday, March 26, 2016

Silk Blouse with hidden buttonholes in teal green, Simplicity 2339

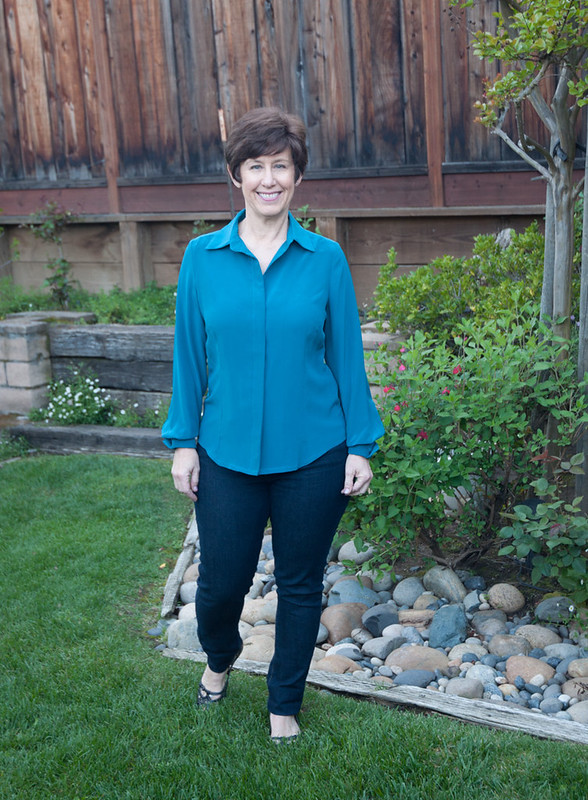
This teal green silk blouse has been a while in the making. Actually I should clarify, it is probably this post that has been a while in the making. I had the idea to make another silk blouse with the hidden buttonhole placket which I first did in 2011 where I used a silk charmeuse that had a bit of stretch. I had never been quite happy with that version - although I wear it all the time and the color is definitely one of my favorites. So earlier this year I decided to try out this project again, starting from scratch and worked out all the details on this blouse in a printed silk. And then I figured it would make a nice how-to post for Craftsy in the solid color. So here it finally is. Plus I have been wearing it a lot! Quite surprised at the frequency but it does hit all my sweet spots - bright jewel tone, luscious silk, goes with a lot of other stuff in my wardrobe, looks dressy but wearable with jeans.

teal silk blouse full length

This is my 8th version of this pattern, Simplicity 2339, an Amazing fit pattern. The one with the hideous version on the envelope.
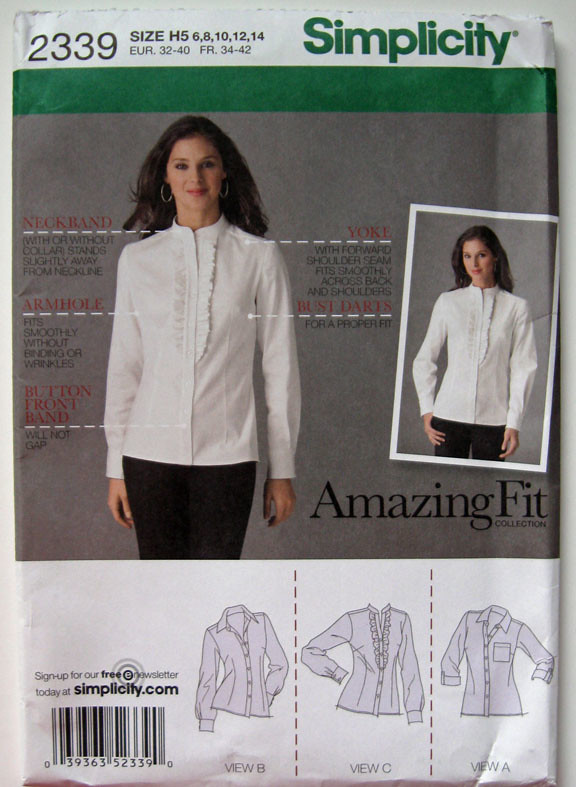
Blue silk blouse pattern S2339

I really like these Amazing fit patterns although the more recent ones have seemed a bit wacky - like they used up all the really nice basic ideas in the beginning and now are just adding peplums or other details to previously existing patterns. (but on the the other hand isn't that the case with all patterns?)
Anyway - if you can figure out what size to make for your shoulders and work your way down with fit (usually taking out some ease) then I think they are really useful as basic patterns.

Back to this shirt pattern - I have never made it as designed - with the button band sewn on as a separate piece. Every time I have fiddled with the front to change the placket. This version is the biggest change, with this hidden buttonhole placket. Today on the Craftsy blog there is my step-by-step post on how to create this placket. It takes a lot of photos to explain it so instead of adding them all here I will just link to that post. Plus it is color-coded! (Ok don't laugh if you look at it and please let me know if it makes sense)
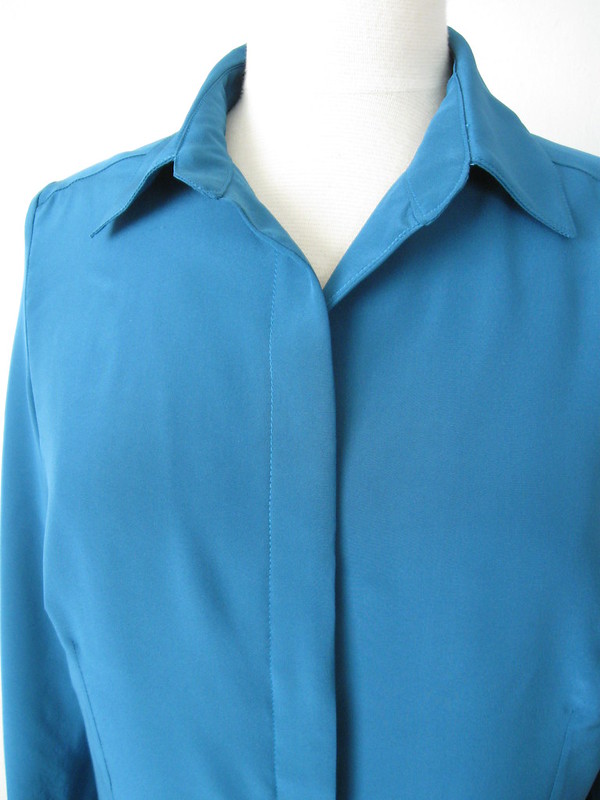


silk blouse hidden buttonholes teal

Every time I look at this I just feel relief that any potential buttonhole mishap in this delicate fabric is hidden from view. Plus the sleek front seems right with silk crepe de chine.

A few other construction details, and how rewarding is it to press silk? Am I weird to enjoy this? It is just so satisfying to get that nice crisp crease on a silk fabric. Of course sometimes the iron is in the wrong place and you create a crease where it is not wanted but in a nice silk fabric it usually presses out again. I bought this fabric at Fabric Outlet on Mission St. in San Francisco during one of their 40% off sales. By the way, Tanya did a great post recently on fabric shopping in the bay area, here is the link.  Check it out if you are traveling this way.
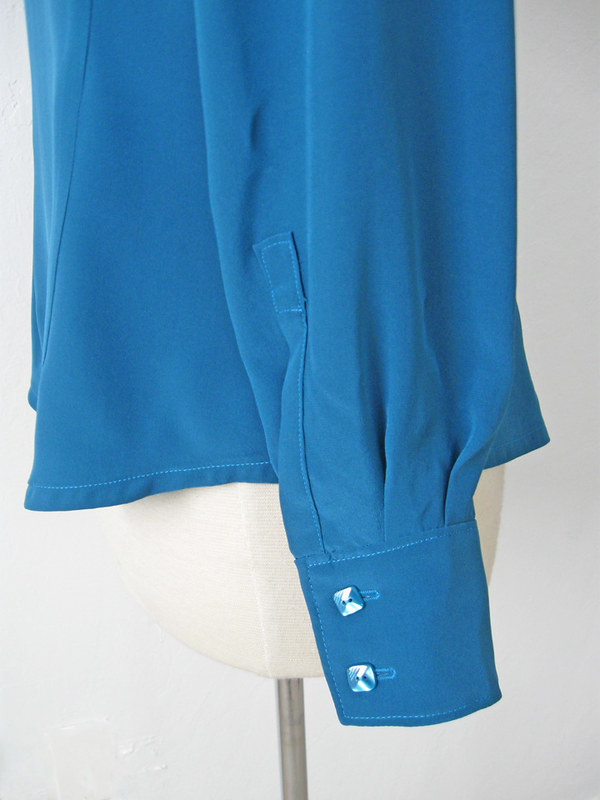

silk blouse cuff

I had these buttons in my button box. Score! I have no idea what I bought them for but I had 12 so perfect quantity for cuffs and center front. Plus they are square which is a detail I like. Also I finally figured out (sort of) my stupid buttonhole foot on my modern Singer machine. Although I still prefer the vintage attachment on my slant needle 1950's Singers but sadly it is not working properly (things don't seem to do as well after you drop them on the floor from height).

There are a few different ways to do cuffs, such as attach from the inside and topstitch down on the outside, plus the reverse of that. I like to attach right sides together and then press in place, lastly stitching all around the cuff to enclose the inside. Though before I get there I press the seams open using my pressing stand.
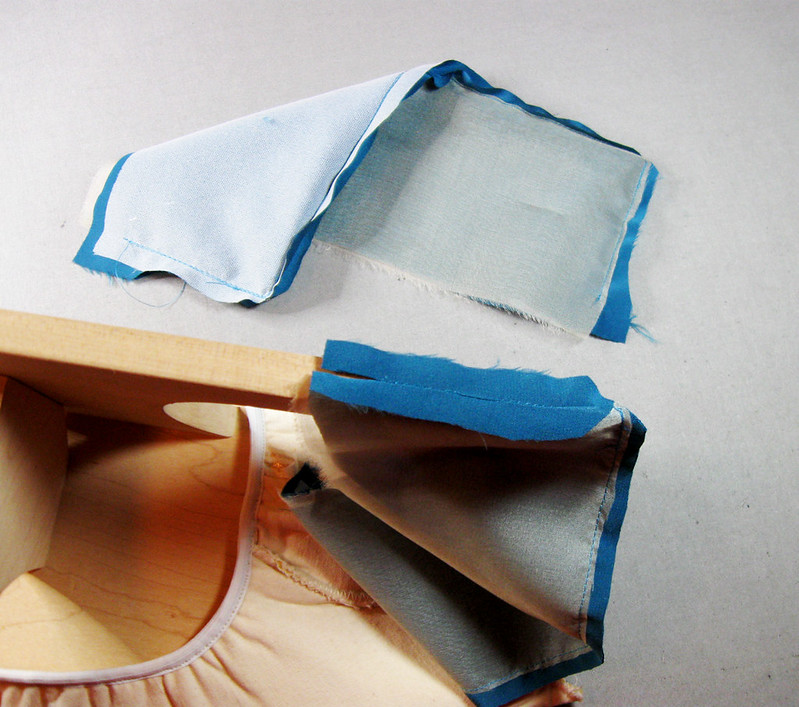
cuff pressing1


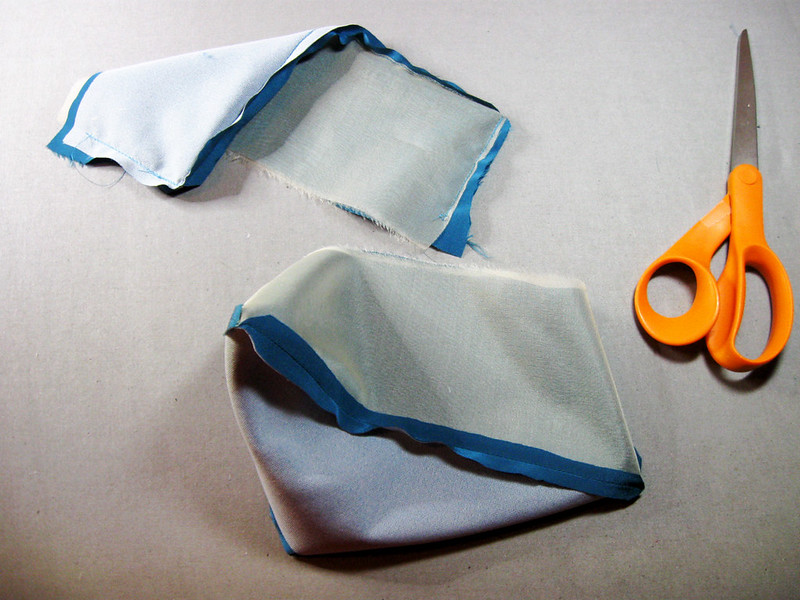
cuff pressing2

This is the same technique I use on lapels, collars etc. Press the seam open and then flip over and press on the edge - it is the way to get the sharpest edge possible.
Looking at this photo I see that I used 2 types of interfacing in these cuffs, a lightweight fusible on one side and then silk organza on the other side as they seemed a bit wimpy with only the fusible.
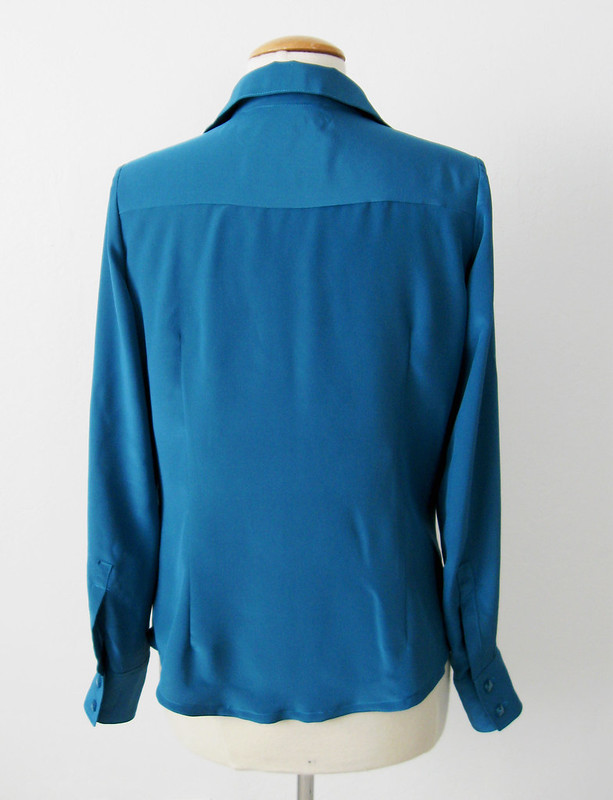


silk blouse back view on form

For the hem I stitched about 1/4" from the edge, which makes it easier to press and then turned and pressed again about 3/8".
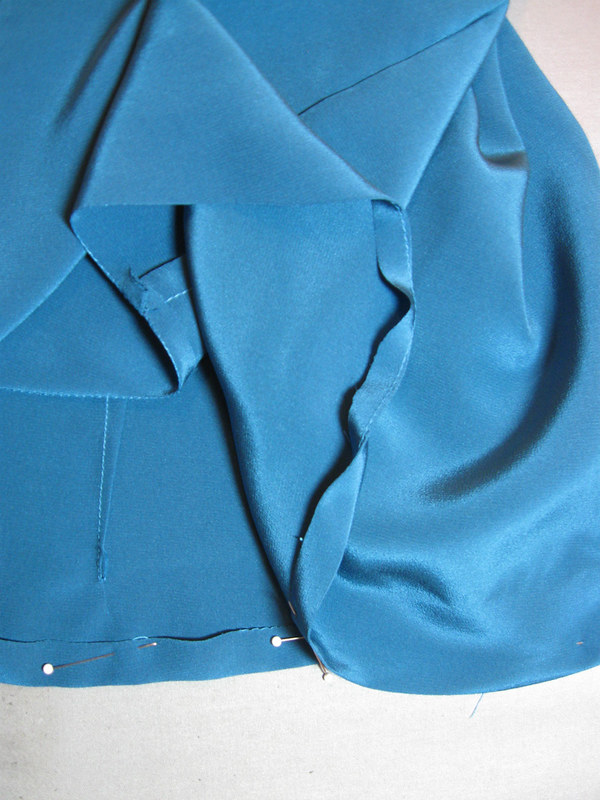

hem stitch

Typically I don't get that worked up about inside finishing but with a silk shirt it is nice to do french seams and there are really only the side seams and the sleeve seams to do that way so it did. I have narrowed the sleeves on this pattern a good about - like 1.5' as they seemed way to big around the arm for my liking.  The shirt seemed too long when I tried it on so I cut off a bit of length and now wondering it is a smidge too short. And the other silk one I thought was too long! I am like Goldilocks - when will it be just right?
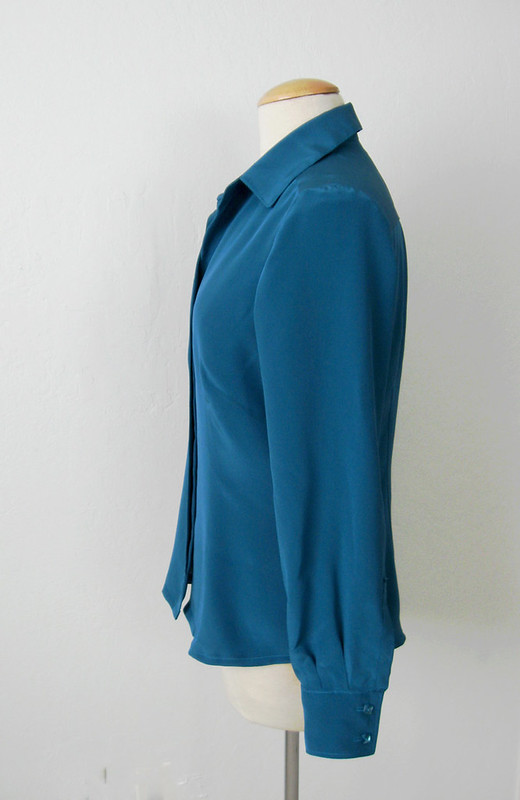

silk blouse side view on form


Here is the link to the post on Craftsy.   I just noticed that I didn't show the hidden buttonholes :) but you can see them in the photo below.
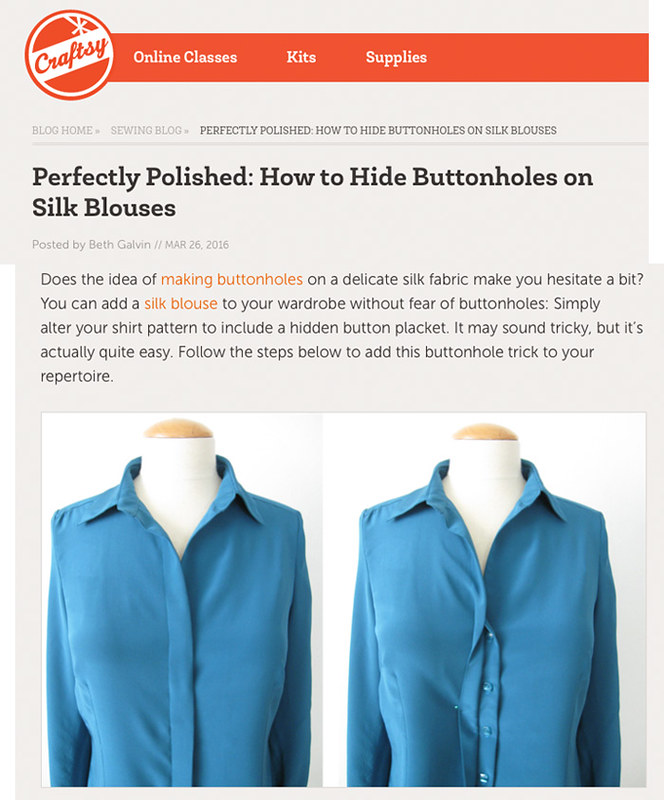
Craftsy silk blouse post

So all in all, I think this is my new favorite colors. Plus I have some wool in this shade with a black pencil stripe plaid which will probably make an appearance in the fall for some type of jacket.
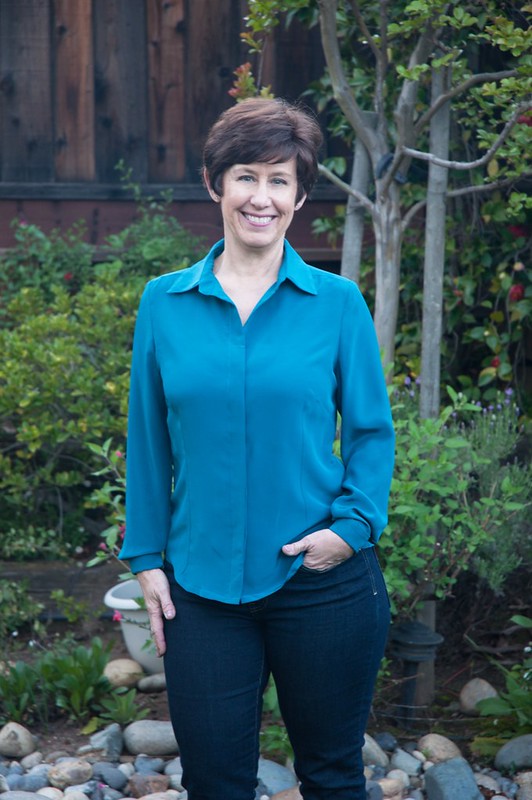

Teal blouse1


Up next - I am sewing up a dress using fabric I designed on myfabricdesigns.com.  I'm far from being an artist but it is interesting and of course you can choose the colors you like - prepare for some eye-searing fabrics in the next months. Although the first one is not crazy at all and came out really nicely, quite lovely and sewing up into a spring dress. Although not in time for Easter - which may be rainy but we are not complaining!  Check out all that greenery behind me - the roses are loving it.

Happy Easter to all,

Beth

another gorgeous tulip appeared this week. I think I planted a few irises as well but they have yet to appear.
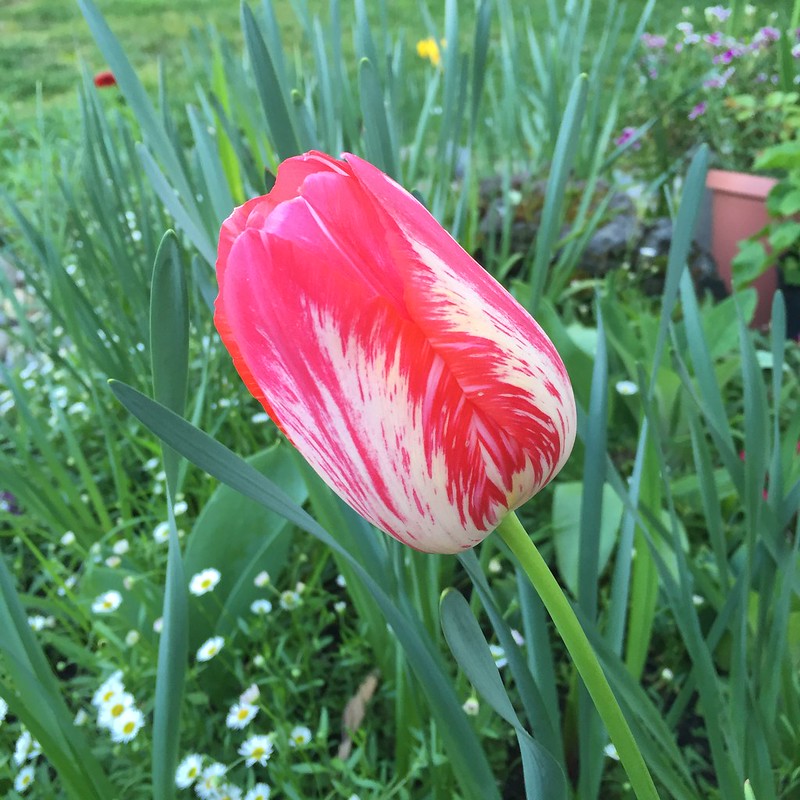
Tulip March 2016

Friday, February 27, 2015

Button sewing, more that meets the eye

Hi and Happy Friday. Thank you so much for all the nice comments on the Quart coat, I really appreciate it. It probably goes to show that I really like making tailored wool items. I am about 3/4 of the way through making the Burda coat which I mentioned way back in November, the pattern is Shawl Collar Coat 11/2014 # 111 however mine is turning out to be more of a jacket than a coat. Which is probably just as well as a jacket is more wearable for me. 

How about buttons? That Quart Coat has 8 buttons, it is a double breasted coat and I made 4 working buttonholes on the outside plus one on the inner side so that it would stay closed if buttoned up all the way. When I was sewing on the buttons I had some issues and thought it might be interesting to see. 
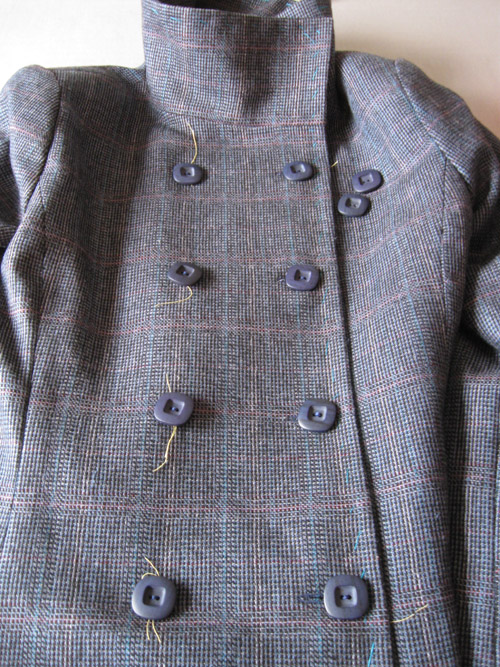
Here it is all buttoned up, and the two extra buttons. I always buy two extra buttons for something really nice, it would be so annoying to lose one and have to replace all of them. Plus a coat is the garment most likely to lose a button, at least in my experience. 

finished all buttons

Note these buttons only have 2 holes. I find that this type of button is slightly more troublesome to sew on and have it stay in the orientation. As you can see these are square - they go nicely with the plaid but wanted to turn and twist after being sewn.
Why? because buttons are tricky. Kind of like Goldilocks, you can sew them too tight, or too loose, or just right.
I sewed these buttons on so many times I lost count. I am kind of fanatical about button sewing, and yet I really dislike it. But if sewed in the wrong place - even by a few millimeters it just ruins the front of the coat.

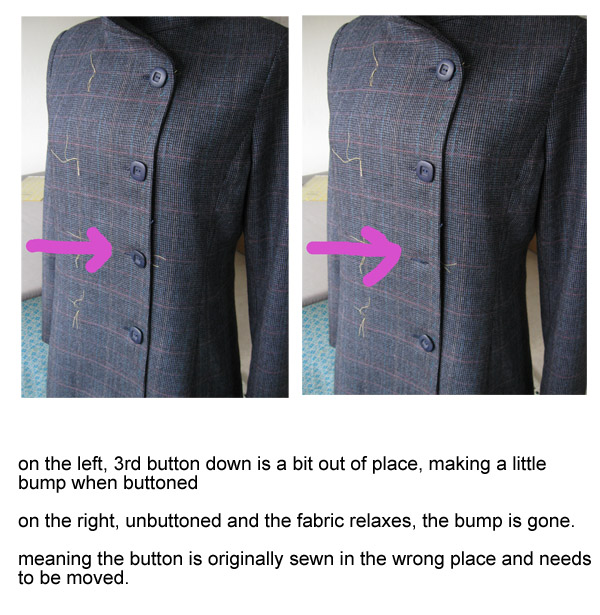
Probably hard to see but here is the example. When a button is sewn just slightly in the wrong place it can create a bump or ripple, or can offset the whole row of buttons and have the front be crooked. In this case I worked my way from the top down, sewed them all, and checked each time that they were OK. I thought they were fine but the one indicated there is a troublemaker.

button comparison edit

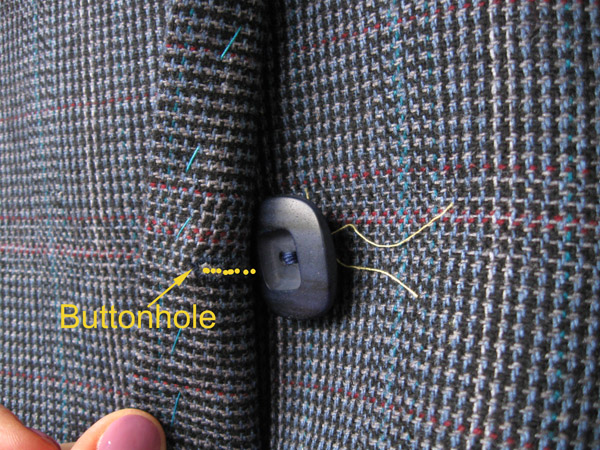
Here is a super closeup view of the button and buttonhole. I put the yellow dots so you can see the actual buttonhole opening. So even though the button is not too tight on the garment, meaning it has a little thread shank of about 1/8 - 1/4" it still was not in the right place. I think I sewed it on once more and then had to adjust another one as well.

buttonblip closeup edited

Whew! finally got them all in place although as you can see in the first photo it is a bit of a conflict because if they are sewed very tight so that the plaid lines up exactly then they would make a pucker at each buttonhole. Sewing buttons too tight causes just as many issues as sewing in not the exact right place. No wonder I dislike sewing buttons, my least favorite thing!

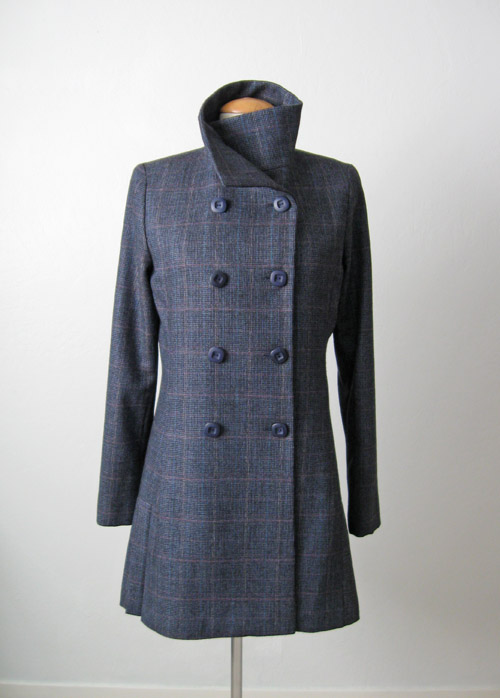
All's well that ends well, and I think these buttons are just perfect. Stone Mountain fabric store in Berkeley to the rescue once again.  Here is the finished coat although better views in my previous post.

front buttoned collar up copy

Spring is just around the corner here - or actually here, a bit early with daffodils in full bloom and tulips getting ready. I read all the snow zone blog posts with sympathy (horror) and know I would not last more than a minute any further north than, let's say, the Napa valley. Ok slight joke but I can't take winter. Hope it warms up for all of you very soon.

Happy weekend sewing, Beth

The last week or so has had the most amazing sunsets, the other day I was driving home from Marin and the sky looking out over the water towards the Golden Gate bridge was the most gorgeous shade of pink and gold. It does seem like living in a postcard sometimes as I travel around the bay area.
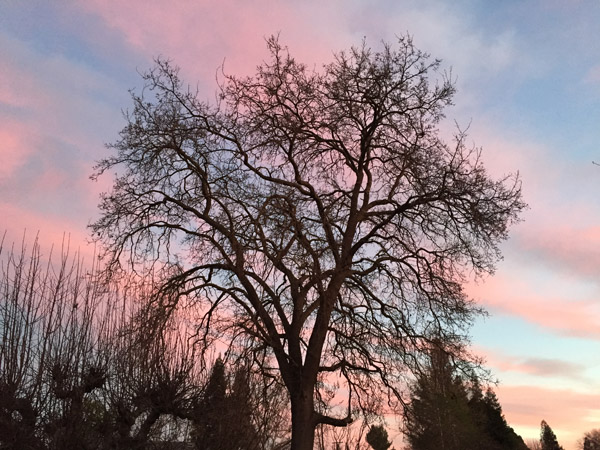
Behind my garden is a beautiful old California oak tree, three times as tall as my very large apple tree and home to an amazing number of birds and squirrels. Live nature entertainment just outside the sewing room window!

Oak tree at dusk

Saturday, February 22, 2014

Final version: V7975 wool jacket with Avoca handwoven fabric from Ireland

Hello and welcome to so many new readers this month. This project was finished a week ago but I have been slow with my blog posts despite intentions in 2014 to post more often. In any case here is Vogue 7975 made with vintage handwoven wool fabric from Avoca Mills in Ireland. (note: this jacket is not for me, for one of my sewing clients)

Looking at this photo I see a need for a bit more pressing which I have done after I took the pics. This is such a great pattern, very easy to fit and I recommend it if you are wanting to try a first lined jacket. I did stray from the pattern design a bit and lined to the edge instead of any facings, mostly because this wool has the potential to be so itchy and I prefer lining against the neckline.
jacket front4

Whew, it is hard to photograph this color and have it look the same in each image. I am basically a rotten photographer and also very impatient when it comes to taking photos. I have read lots of blog posts about improving your photography - and one recommendation is always to take many many pictures so as capture the one very best one. However I am way too impatient for that and usually snapping away at the end of a project where I want to be done!  After all taking photos reduces sewing time, right? 

Do you love these buttons?  I do, they are just right. Thanks again to Stone Mountain in Berkeley, and their lovely wall of buttons. I took the finished front piece with me so that I could actually see the buttons in the buttonhole and how they the shape and size worked with it. I had intended to make smaller buttonholes but this was as small as could be done in this very ravel-y and springy wool.

close up buttons pocket
I said ravel-y and yet it was a pain to get that fringe to separate. This is one tough wool. 

Inside of buttonholes. There are a lot of variation on bound buttonholes but I prefer the one with the least layers, if that makes sense. So no windows or squares cut. I sew on the welts, slice, turn, and then make the full lining. The very last step is to slice the lining and turn and hand stitch. Using this method you can control exactly were the lining is joined to the buttonhole, I think if you made little windows in the lining and they were not exactly centered over the buttonhole then what? I don't know as I have never tried it. Looking back through my previous blog posts I have not shown the step where I attach the lining so I will have to document that next time I do it. For more details on bound buttonholes here is a post with the steps shown. 

buttonholes both sides

View of lining. It does look a bit bigger but that is intentional in this very fitted jacket, I often make the lining with a smidge more room than the outer layer to allow for a bit of movement. 

inside jacket lining

Side and back view.  Please ignore that big crease in the lower back. Ok now I am chagrined but I did press after these photos. However also note the great lines in this pattern, such perfect fitting sleeves and the princess seams allow for so many fitting options. 

jacket side jacket back

One tiny tip for making patch pockets. As you may know I love my Chalkoner chalk markers and I like to make templates from pattern pieces, and then trace the seam line to make for super simple sewing.
So I made a template from the pocket pattern piece, including the seam allowance and them trace the line so I could attach the lining by sewing on the chalk line and get a smooth even balanced pocket.

pocket template


Here are links to the previous posts on this jacket:


I made this same Vogue 7975 pattern back in October in plaid for myself, so if you want to see a different version and some details on working with plaid, here is the post. I wore this version a lot back in the fall but it was eclipsed by my wool herringbone tweed Burda jacket which is more of a neutral color so can be worn with more outfits. 

Up next some simple and happy sewing, t-shirts and other separates which are so much more useful than a sparkly plaid jacket, right?  I just got an order of super cute knits from Girl Charlee so I am itching to get started on those.

There has been a woeful lack of garden photos and I fear that this year will be a low point for my garden. Despite a bit of storm last week it is dry, dry, dry. No rain and nothing but sunshine. Which may sound good if you are suffering in the latest polar vortex but we will be in trouble this summer. In any event there are daffodils and a few tulips just starting. Also I have a new pet. OK, not really as I am wildly allergic to cats and only like to see them from a distance but for the last month this guy has been putting in a 9-5 day on my garden furniture with occasional attempts at gopher hunting. I wish he would catch that darn gopher which has eaten all my pansies in the front yard. I just makes me laugh to see him out there snoozing on his apparently favorite chair and drink water out of the bird bath.

cat in daffodils

Happy almost spring sewing,  Beth

Thursday, June 6, 2013

A new aquisition

It is taking all my will power not to start this post with the phrase "they don't make them like they used to".  Look what I did there, snuck it in anyway.  What does this refer to?

new quantum

My new acquisition. Which is here on approval, at least in my mind. A few weeks ago I had an incident with my very well-loved buttonhole making attachment. After that a little voice in the back of my mind was whispering about a new machine with the built in buttonhole feature.  After some research I ordered this Singer Quantum Stylist 9960 from Costco and few days later here it is. 
I have been playing around with it for 3 days and tonight I made a top from start to finish which came out fine. For the first hour I really did not like the machine at all and was sure that after a week of fooling around with it I would be standing in the return line at Costco to get my refund. I think with anything I buy these days I kind of dislike it on principal and then slowly get accustomed. 
Maybe the reason I dislike new equipment is that I am the person that reads the manual, a study-er of the printed material, a consumer of instruction booklets. From the Cuisinart to the new printer to the Iphone to the assemble-it-yourself stuff from Ikea, I like to open the box, take out the instructions, examine all the pieces and go through the process of setting up or connecting or whatever else is indicated. Totally nerdy, huh?  As compared to family and friends who mostly fall into the "just open it and plug it in, lets see how it works" camp. 
Oh well, for my new sewing machine I could do it my way, and to my surprise after a few days, I think I like it. It may be a keeper. Except for one nagging little problem which I will get to. But I have to say the manual is not very useful. Really skimpy on the explanation of how to use all the myriad features. 
Let's remember that I have been sewing on this machine since I was 8 years old. This very one! In fact I have 2 of them, one inherited from my grandmother and one which used to live at my mom's house but she never used. Plus I have my Singer 503 which I brought back from Hawaii.

Singer 404
Look at that baby...that soothing coffee and cream color, the warm golden glow of the lamp, the nice open deck, the incredible punching power, the easy maintenance.  It is not going anywhere!

All that Singer love was not the reason I chose the new one, it just happened to be a great deal, had all the features and was at Costco (for you overseas readers - a warehouse store with great deals, lots of gigantic bulk packages, and the most amazing return policy ever).

But my lifelong habituation to a straight stitch only machine may explain why I am starting to bond with this new machine. Please don't laugh now...here are some of the gee whiz features that I am having fun with.
  • it cuts the threads
  • push buttons for backstitching
  • slow stitch mode
  • needle up/down button
  • did I mention it cuts the threads !!!
Ok, so as I said these are not exactly new developments in sewing machine technology but they are new to me.  Not to mention all those stitches at the push of a button. So far it is actually quite easy to use, although stitch length of 3.5 lingo is not computing in my brain yet, as someone who thinks in 8-12 stitches per inch.  Can someone translate for me?
There are some things I don't like, the light is kind of glaring, the presser foot is clunky and the 5/8" marking, which I actually use is not easy to see. Also the whole thing feels so plastic-y, which I guess is to be expected.  

Recall I mentioned one teensy problem. Ha, a big problem. So far the buttonholes are  #%*$ (swear words).  Here is a example of my attempts. Mostly they came out like the one in the upper left corner. It does one side then goes up the other side and instead of doing the 2nd half it wants to keep going until I stop it.  I am wondering if the problem is the attachment.  I do notice the little bar gizmo you pull down to engage the buttonholer track is wobbly and doesn't seem quite right. I will play with it a bit more and then maybe decide there is a problem. Also see on the sample buttonholes the bar tack at the end is overzealous, a big lump really so that is not acceptable. Doesn't it just figure that the one thing I thought I wanted is not working properly? Although reading lots of blogs or forums on buttonholes has convinced me that the old buttonhole attachment makes vastly superior buttonholes so that is probably the way to go.

buttonhole samples

This weekend I will play around with it a bit more and see what else it can do. As for actual sewing this time of year I am always busier with custom sewing, so I have been making things mostly for others.
Here is a peek at something I am just completing for my friend Heather. It is rayon jersey that she bought at Britex, kind of light navy blue on white. Super soft and flowy, perfect fabric choice. This Vogue 8787 is a winner in my estimation. For once the construction order is actually reasonable! Also the cowl neckline is very well designed and falls very nicely when worn. I know I will be making this one again. 

                      V8787 blue white knit dressV8787 pattern envelope

I would love to hear your thoughts on new sewing machine selection. What did you choose? and are you happy with it?  Are the old machines better?  (in a word, yes)

Here is an unexpected pleasure in the garden. I used to plant pansies in the late winter but switched to violas (smaller version of this plant) and they are much more hardy, plus reseed all over, in a good way. So this spring I had lots of tiny jewels like this pop up in the lawn.

Viola in lawn

Happy summer sewing. It is supposed to be over 100 F here this weekend so I anticipate a lot of lounging by the pool and not much sewing.  Well maybe a little.
Beth

Wednesday, March 27, 2013

Finishing Details: Bound Buttonholes on a wool coat

Let's start with a photo for a change.

Finished buttonhole
I gave a peek recently at this winter coat at the end of a post and it is nearing the finish line. As I sewed the coat I didn't really take many photographs. A black wool coat is not the best subject for detail photographs and I was really concentrating on progress not documentation. However I have been doing the last steps before hemming and thought the back of a bound buttonhole is worth a look.
Bound buttonholes are my go-to solution  on this type of fabric. My Singer buttonhole attachment works really well but the thickness of the finished coat front precludes its use. Also the feed dogs on the attachment tend to shred the fibers a bit, although I have a little trick using a piece of cardstock that I should remember to show one of these days.
Here is the inside of the coat front, with the bound buttonholes sewn.  But not completed! In fact the front is only half the story.
Bound buttonhole inside
To complete the back here are the steps I use.  
  • sew the facings to coat front and give them a proper pressing
  • baste the garment edge together in a long running stitch (see below in pink silk thread)
  • while coat front is flat on the table, baste around each buttonhole, securing the coat front to the coat facing. This is to keep the facing in the right place relative to the coat front and the buttonholes. (see below in white silk thread)

Bound buttonhole front basted to facing

Now to find where I am going to cut, I place pins through the end of each buttonhole and mark with chalk. 

Bound buttonhole marking where to slice

Then I cut along the chalk mark. The actual cut is very similar to the inverted Arrow shaped cut that is done on the actual buttonholes on the garment front.  Sorry for the out of focus photo here but you can see the chalk marks and the triangle shape cuts.  The most important point here is NOT to cut those buttonhole lips on the front of the garment...which is a bit tricky as the whole thing is sandwiched together with that circle of basting.  
Bound buttonhole back facing sliced

The last step is to tuck those 4 triangle-y bits under and hand stitch all around the edge. It might sound a bit fiddly but it works really well and in this type of fabric the stitches disappear.  Here is the finished buttonhole reverse, just needs some steam to smooth everything out.

Bound buttonhole back hand sewn

Here is another example, on the olive green corduroy jacket I recently made. It is a little easier to see it and I admit, easier to sew it. The black wool plus fusible interfacing made the fabric a bit bulky and not easy to flip those little quarter inch wide flaps inside. 

buttonhole back cord

After all the bound buttonholes are done I like to take a break...or shall I say a sigh of relief? They do make me a bit anxious, despite making them for a good long while. I think because it is so definite - once you make the slice in that coat or jacket front you are commited, no turning back. So time for a small celebration, preferably involving a twist of lemon and some ice cubes tinkling in a glass. You get the picture.
But that is only one side of the coat front, we still have to sew on the buttons. Easy-peasy, right?  This is one of those simple tasks that can elevate a coat to perfectly classy or class clown. I know you have tried on a coat in a store and the buttons were sewn on a bit wonky so that the coat front tugged all the wrong ways, ruining the look. Sometimes sewing students have the tendency to sew the buttons on too tightly causing this same problem.  Buttons need breathing space :) 

Button sewing with pencil
For these large buttons a pencil is the perfect size to use as a spacer. I also have a gizmo which I showed in my corduroy jacket post but I find the pencil works really well too. Prior to hemming I sew the buttons on lightly, with just a few turns of the thread, so that in case they are not exactly right I can easily move. It never fails that there is one rogue button needing to be moved by the teensiest eighth of an inch, but what a difference that makes (see above - button wonkiness).
If I haven't convinced you yet that the button needs space, here is proof. That button shank needs to hold the button through almost 1/2 inch of coat front.   On the right is the button sewn on, looking like some weird flying saucer, surverying the sewing room. Getting a look at my yet unfinished fuschia wool jacket in the mirror. But really it's just to show that the button thread shank is important. 

Buttonhole depth rulerSewn on button

When I finish this coat I will take lots of photos and give details on the pattern(s) used.

Enough about all things button related.  That twist of lemon is calling me.
In other important news, we have Tulips !  oooh I love this photo, so green. We need to enjoy it while we can when the brief green season is here.
Happy Spring sewing, Beth

Tulip pink1

Friday, December 7, 2012

Winter Coat Time - Simplicity 2534 completed

Some speedy sewing has transpired around here and I have finished the child's wool coat I started in this post. Some detailed info there on bound buttonholes if you have a coat or jacket in the works. I am happy to have it done in time for the recipient to wear it for this holiday season, even though I took a detour to make my Little Black Dress.  Hey, I am on a roll these days...I better start with some gift making while the sewing is on a hot streak.

Grey coat front

Oh I love this little coat (children's size 6, Simplicity 2534)  and I had to give it a lovely blue lining. The collar and cuffs are from a piece of velvet (luscious quality stuff) I have had for ages. No idea where I bought it and the stuff I see available today is nowhere near the quality.  Maybe next time I go to Britex I will buy a yard of the good stuff, so worth it to have when inspiration strikes. The grey wool I bought at Stone Mountain in Berkeley, a lovely weight of wool and very cashmere feeling. I know - I petted all the cashmeres when I was there. Something on my lifelong sewing list, a cashmere coat.  One of these years.
Coat lining view

This pattern does call for cuffs and I made them about 3 inches longer than the finished sleeve length I was going for, that way as my little friend grows a bit the sleeves can be made longer by flipping down the cuffs.  
                                  grey coat back

I did quilt the bodice portions of the lining with fleece, just to give it some more warmth. Not really tricky, I cut out fleece pieces using the pattern, trimmed away the seam allowance, drew the stitch lines with pencil and stitched away.  On these tiny pattern pieces it took very little time.  The piece on the left has been sewn and on the right you can see my pencil lines.

Quilted lininggrey coat with lining pleat for ease
When I sewed the lining at the hem, I first pressed the lining to get a nice crease, and then pull that back and stitch about 1/2 inch from the crease to get that nice bit of ease that you need in a coat lining.

Real leather knot buttons, because after all that work with the quilting and the buttonholes only the best will do. Actually I am crazy about leather knot buttons, always have been and they may be repetitive but I tend to use them often on jackets and coats for myself.  Classic and if I lose one I can find a replacement.  
Grey coat velvet collar

As I mentioned this coat is going to a little friend who lives in Seattle but I did want a photo of the coat now, so my friend's daughter was very nice to model it for me and she did a great job. 

Holiday coat front
Another coat finished - my favorite thing to make. Strange, huh?  but it has been that way for ages, since I made the first one I don't know when. 
Up next, some more knit tops and and a couple of mystery projects.

Plus some planting - I went crazy at Home Depot today with the tulip bulbs which were on super sale. Which is great when you are looking at all the pretty pictures on the package, but they don't grow in the package - so I will be digging some holes this weekend. 

Walking out of the store - here was the view. I had a nice moment with 4 other shoppers who were all stopped in their tracks. Beautiful the way the autumn trees show up against the pink clouds.
Happy December sewing, Beth

Sunset