Showing posts with label wool. Show all posts

Thursday, April 24, 2025

Burda wool blazer with patch pockets 03/2024 No. 106

Back in cold and rainy February when it seemed that spring was far away I had the urge to make a wool blazer. Something I absolutely do not need but I do tend to wear this one a lot. I wanted a different color family, something that goes with blue jeans so I searched a lot online for some nice wool tweed and finally found this fabric on Etsy. It was listed as a vintage piece so I ordered 2 yards and hoped for the best. I was really pleased with the color and decided to make a jacket with patch pockets for a change. 

Burda blazer 03/2024 No. 106

I am really out of practice for blogging however I did take a lot of photos as I sewed this jacket so I might as well post them here. For starters I only ordered 2 yards as I am kind of a cheapskate when it comes to fabric purchases and I feel that I can squeeze any jacket on that amount. So here it is laid out on the floor for a test of that theory.  It was successful as you can see from the finished jacket. Missing on the test layout are the pockets and the collar pieces which I put in the blank spaces. Note that I am 5'3" and often have to shorten sleeves so it works for me as a relatively short person.

Squeezing jacket onto 2 yards

Here are the pattern details. I chose this pattern as it has patch pockets and Dior darts in the front princess seam. I made a test version, just to test fit and I think I recycled the muslin sleeve from a different Burda sleeve just to save time. I compared and they are all pretty much the same. 

tech drawing blazer patternMagazine version and test version

Now some interfacing and construction details. I have posted about a lot of this before so just a few photos to show the insides. All the photos are in one album on my Flickr page if you want to see more, here is the link. 

weft interfacinggrading seam on collartwill tape on lapel crease

Patch pockets ready to hand stitch on


seam grading on lapel

Here is a look on the dress form. The lining is bemberg rayon which I had in my stash in a gray/blue color.  (also on view is my new hobby which is getting orchids to rebloom, and I am having some success and think this particular windowsill is just the right amount of light for orchid happiness). 

IMG_1006

IMG_1007

I should press things better when I am going to photograph on the dress form but I think I have already worn this a couple of times so now it has that lived in quality and it's going to stay that way :) 

Burda blazer 03/2024

That's it for winter sewing. We thought spring had arrived but it is really chilly today and definitely not shorts weather yet. I have been so busy with garden projects but it is looking great now and I am pretty much caught up on all the outdoor projects I wanted to do before it gets blazing hot. Time to think about summer sewing! 

I have a couple of sewing classes coming up with Hello Stitch, How to Copy your Favorite Shirt on June 21 and a Knit T-shirt Class on July 13.

Happy Spring Sewing,
Beth

Today's garden photo, this nerembergia continues my purple theme. I bought this a couple of summers ago and it is living happily in my drought tolerant front garden. In fact I just propagated it with a cutting so I can have a couple more. 

IMG_1055

Sunday, February 2, 2025

Winter Plaid Jacket: Burdastyle 126 Nov 2023

Right after Christmas it was a gloomy weather weekend, just the time to stay in with a sewing project. However I didn't have anything in mind so I went through my stash of wools and came across this Pendleton plaid, 2 yards, which I had bought at an ASG stash sale last year. Because it was a very nice fabric and I couldn't pass it up for $ 4. 

plaid721

In this case I was "influenced" by a post on Instagram, as I frequently look at the #burdastyle hashtag and I kept seeing the same post with this jacket in a green brocade that looked great. (Boo to the algorithm that shows me the same posts over and over again instead of new posts in chronological order, but I guess that complaint is old news now).  
This style is a bit different for me but with our very mild recent winters a lightweight wool jacket might be something I get to wear more than anticipated. The pattern went together really well and the plaid matching worked out perfectly. I do really hate to sew separating zippers, it's just my least favorite thing to do but I got over my fear on this one. 
IMG_0793


IMG_0036

I put a little fusible interfacing on the center front edge where the zipper is, I find that makes the zipper sew in more smoothly. And then the hand basting to get the plaids to match across the center front. The pattern has a button band which is applied after the zipper/lining are done, and I sewed it but then I just didn't like the way it looked. Although perhaps I will go back and add it, as I have saved it. Mostly the reason I skipped it is I didn't really have any good buttons in the stash and didn't feel like shopping for any. It does mean that the lining shows up at the top where the collar turns back but I think it looks OK. 

BLouson Jacket Burda
My favorite thing about this jacket is the plaid matching which I think is fun! Burda patterns have always worked out very well for me with plaids which I think is an indication of a well-designed pattern. 

IMG_0694
To get the pockets to match perfectly I cut out the jacket pieces and then overlaid the pocket pattern pieces on the jacket front to draw in the grids, then cut out the pockets/flaps so they would match. 

plaid back 0762
The sleeves have a seam down the top of the arm to the wrist, and they matched well also. When in doubt use an even plaid, one that is equidistant squares so there is no shift across the plaid. I think I wrote a post for the Craftsy blog about plaid matching (I wrote so many articles for that site and most of them have vanished, a few are still there). Also on the blog here if you search plaid matching in the sidebar I have several posts with tips on working with plaids. 

IMG_0792
The bottom of the sleeves on this jacket seemed a bit odd to me, I thought they had a cuff or maybe elastic but no they are just finished like a coat sleeve, which I guess works and is less to do. 

Plaid with sunglasses0765

I am glad I tried this pattern, it's a nice change from my usual winter style of a blazer or coat. I could even see making it again in a lightweight version for spring/summer. 

Sewing classes:  I have a few classes coming up in the next months with Hello Stitch. A Chore coat class next weekend, Feb. 8-9 with a couple of spots left.  Sunday March 9 is my "how to read a pattern" class, which is a great intro to sewing patterns, choosing sizes, how to measure yourself, and then a bit on some basic bodice adjustments. Then on March 22-23 is a Shirt Class. Those are the links for more info and to register. 

Up next, I'm making a couple of things for Heather and perhaps a new pair of corduroy jeans for myself. 
This time of year I am in garden maintenance mode - there is an unending pile of fallen leaves to rake up and then lots of pruning, weeding and planning for spring. 

Happy Sewing,
Beth

The first daffodils for today's garden photo. With many more to come. 

IMG_0821

Thursday, February 29, 2024

Remnant Fabrics to Coat: Part 2 Finished Look Burda 6845 coat

What is it about making coats that is so satisfying? I think they are my favorite item to make but I'm starting to think I'm getting to coat maximum - or at least my closet is saying so.  But if they are all as nice as this one I will keep doing it.  This blog post is a look at the finished coat, for lots of fitting and construction details see my previous post here.

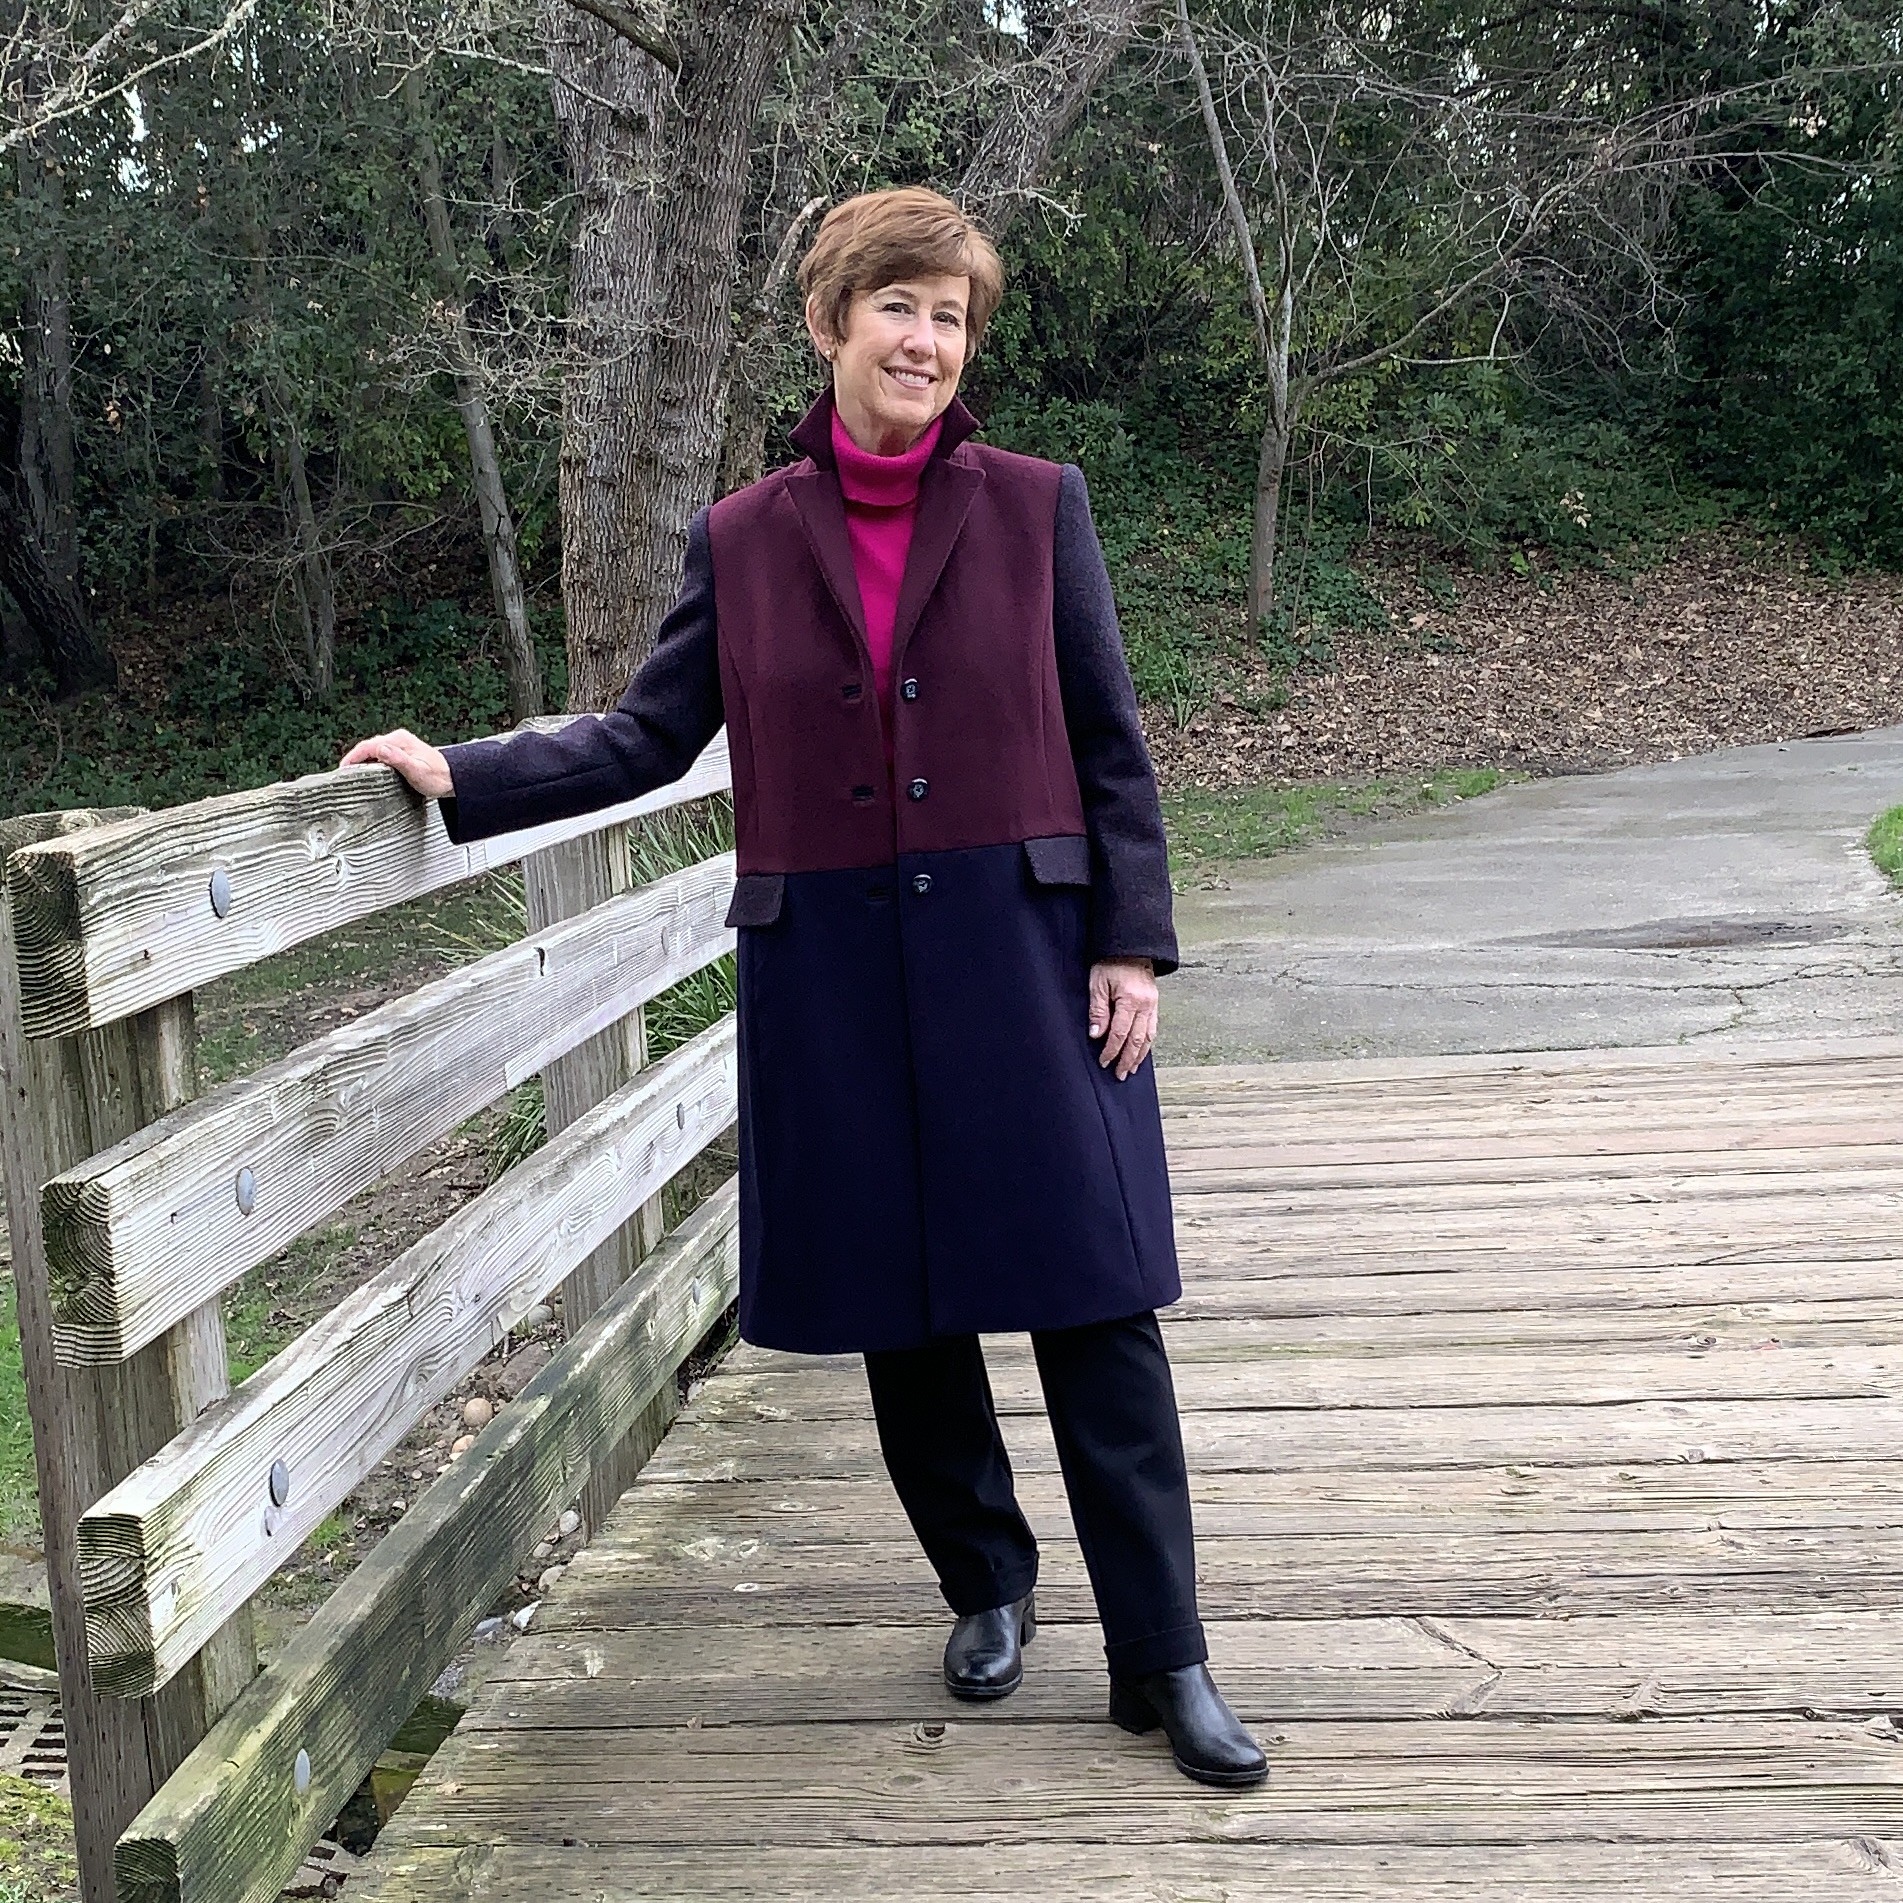
Remnant coat on bridge
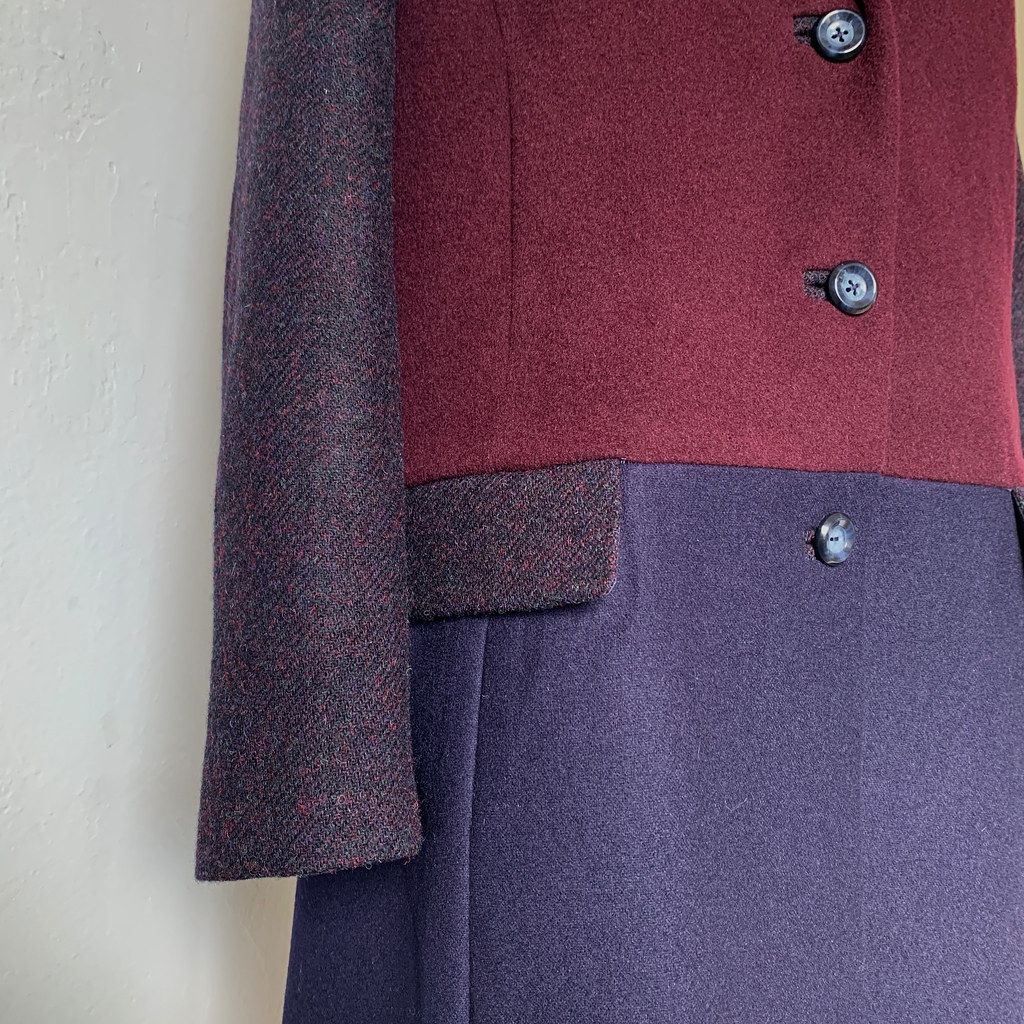
I still can't get over how nicely the colors of these various remnant fabrics go together. In my previous post I have links to the blog posts of the previous projects that resulted in these remnants. 
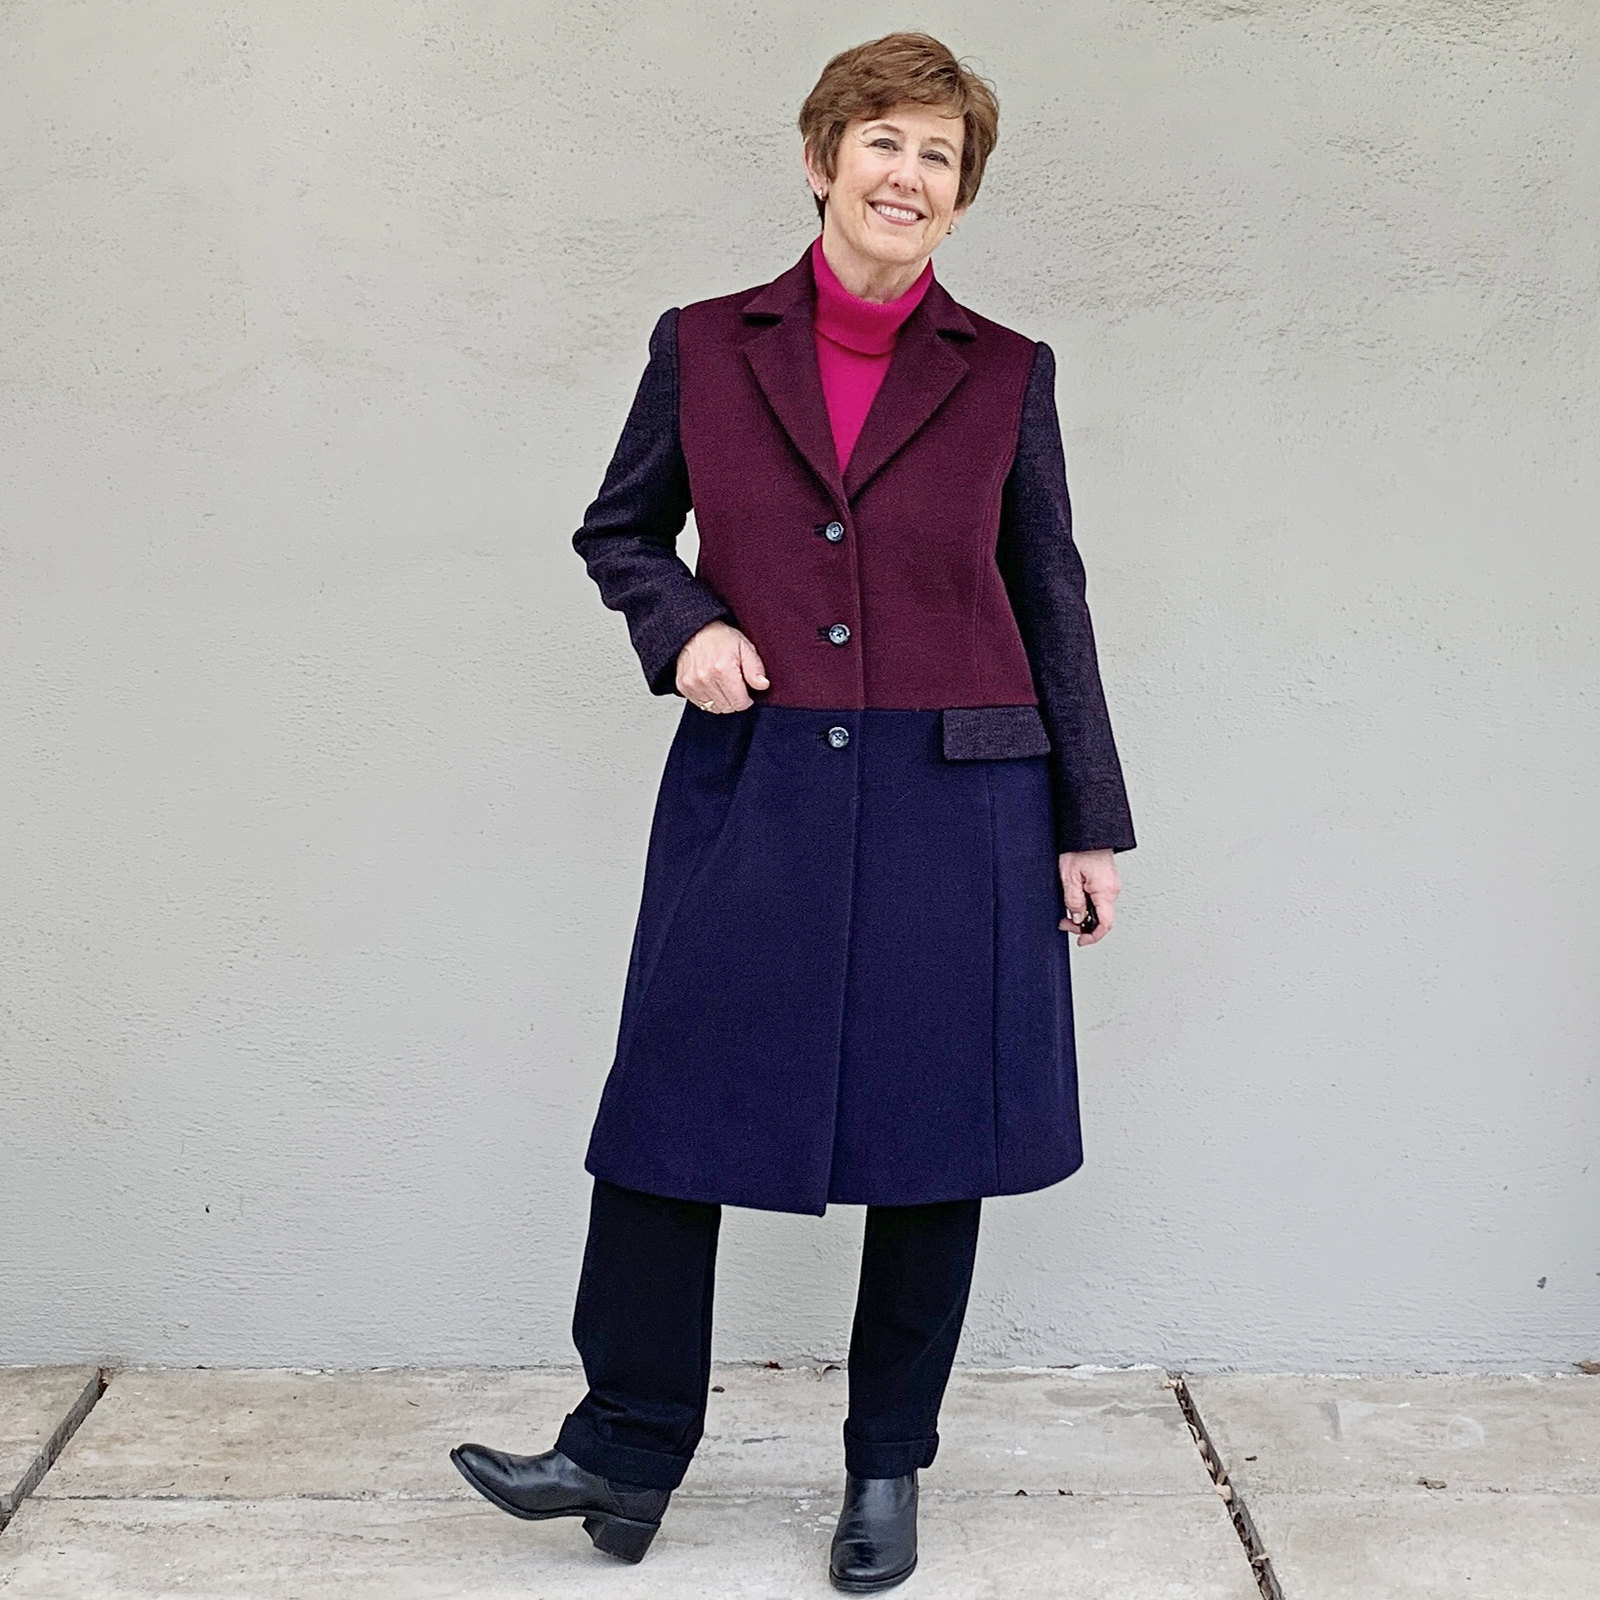
Photographing this coat has made me crazy, the colors looks different in every image and various times of day, sunny or cloudy etc. These photos in the park on what was an almost rainy day are the most accurate of how it looks in person. 
I lightened the shadows on this one to make the collar more visible. I used Burda 6845 which is an envelope pattern with princess seams and option of the horizontal seam which I used. If I was being really picky I think the lapels are a tiny bit on the narrow side but that's just my style preference. 
remnant coat 2

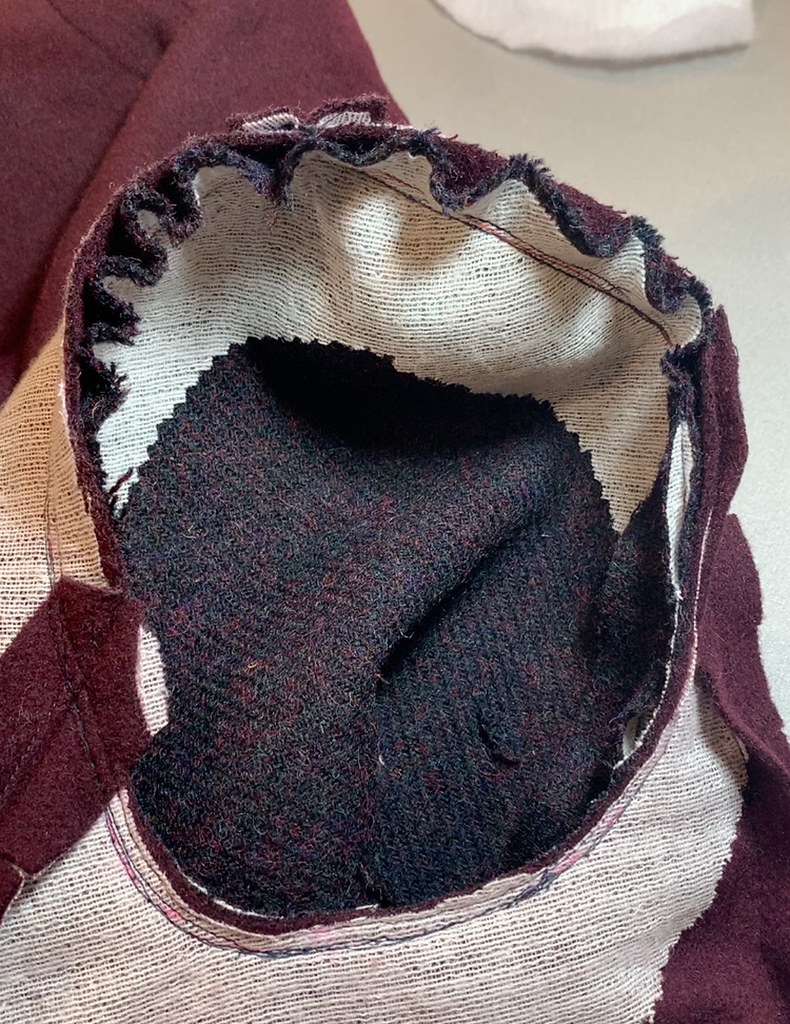
I wrote about fitting and construction details in the previous post so I don't have much more to say about that. But if I can give some outerwear sewing tips they are 1. plenty of interfacing 2. grade the seams and 3. press (with care).  Also I really like this photo which shows how it is the stitching lines that match on a sleeve, not the edges.  Confession time - I almost never do any gathering of the sleeve cap or press it to shape before I sew the sleeves in. Which is contrary to sewing wisdom but my method seems to work for me!
  
Inside sleeve


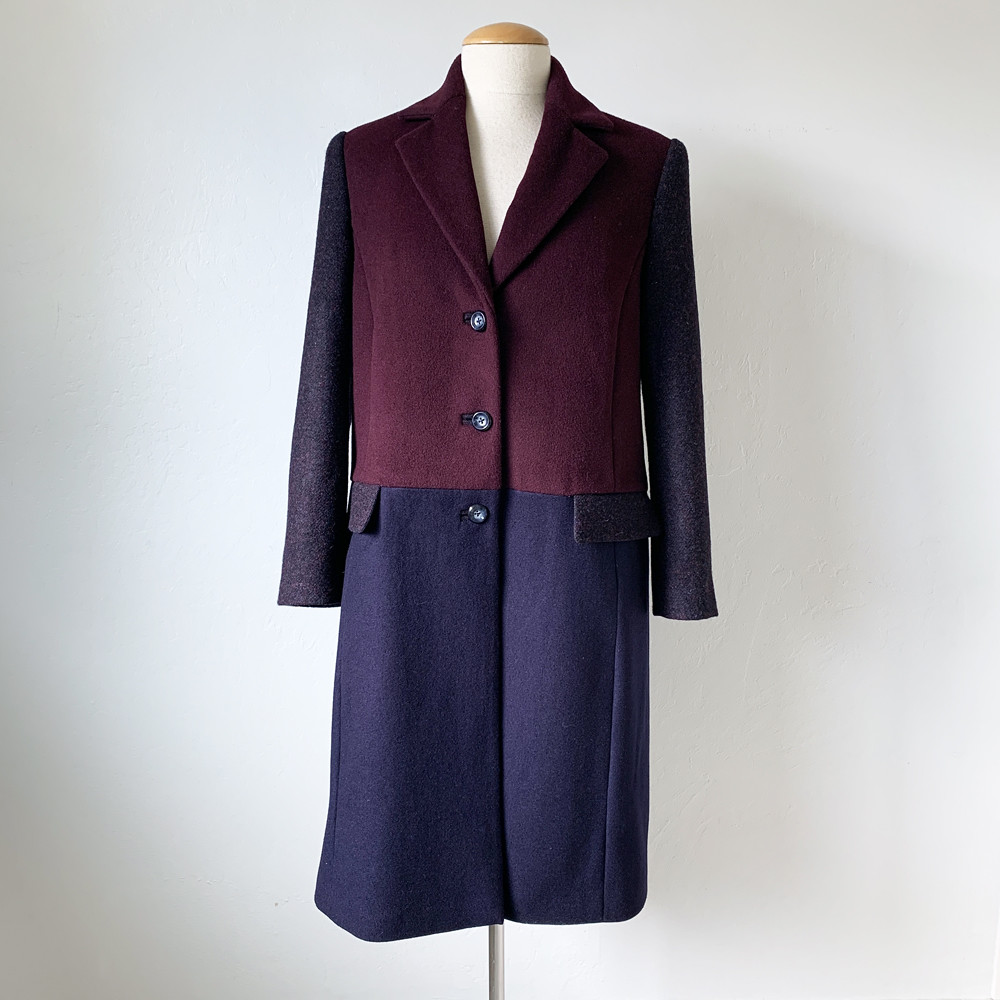
Coat on fomr
It took some time and concentration to get that horizontal color block seam to line up precisely when buttoned and I am very satisfied with the result. FYI,  3 buttons, probably sewn on a total of 8 times, on/off, move a tiny fraction of an inch, sew again, etc. The seams all line up as well which also entailed some unpicking and restitching with some tiny adjustments. But that is the point of this coat so it was worth the time. 

coat sleeve and pocket

For the lining I used navy blue bemberg rayon throughout.  I have done a coat with a color block lining to match the outside but as this coat was remnants I thought it was a bit silly to buy more lining fabric when I already had this navy blue. 
remnant coat lining


IMG_1031

So that's about it for my latest coat project, a very satisfying one on many levels. We are in the midst of a big rainstorm but I think spring is right around the corner and I have a couple of new t-shirt patterns that I might try out next.

IMG_1099

Happy almost Spring Sewing,
Beth

Today's garden photo, a camellia that needs a good trim once all the flowers are gone. But I can't do it now while all these beautiful flowers are on it. And the bees are in heaven. 

Camelia 2024 Feb

Tuesday, February 20, 2024

Remnant Fabrics to coat, Part 1: fitting and details

Looking back I see that I haven't made a new coat for myself since April of 2021 so I feel a tiny bit justified in starting a new one. With the caveat that it is not often coat weather here and when cold it is likely rainy too so I will probably be wearing a rain jacket. But I was reorganizing my fabrics and realized that I had some sizable remnant pieces from other projects that gave me an idea to combine them in one coat. I am so glad I did as I just love how this turned out and thought it was time for a detailed blog post with some fitting details.

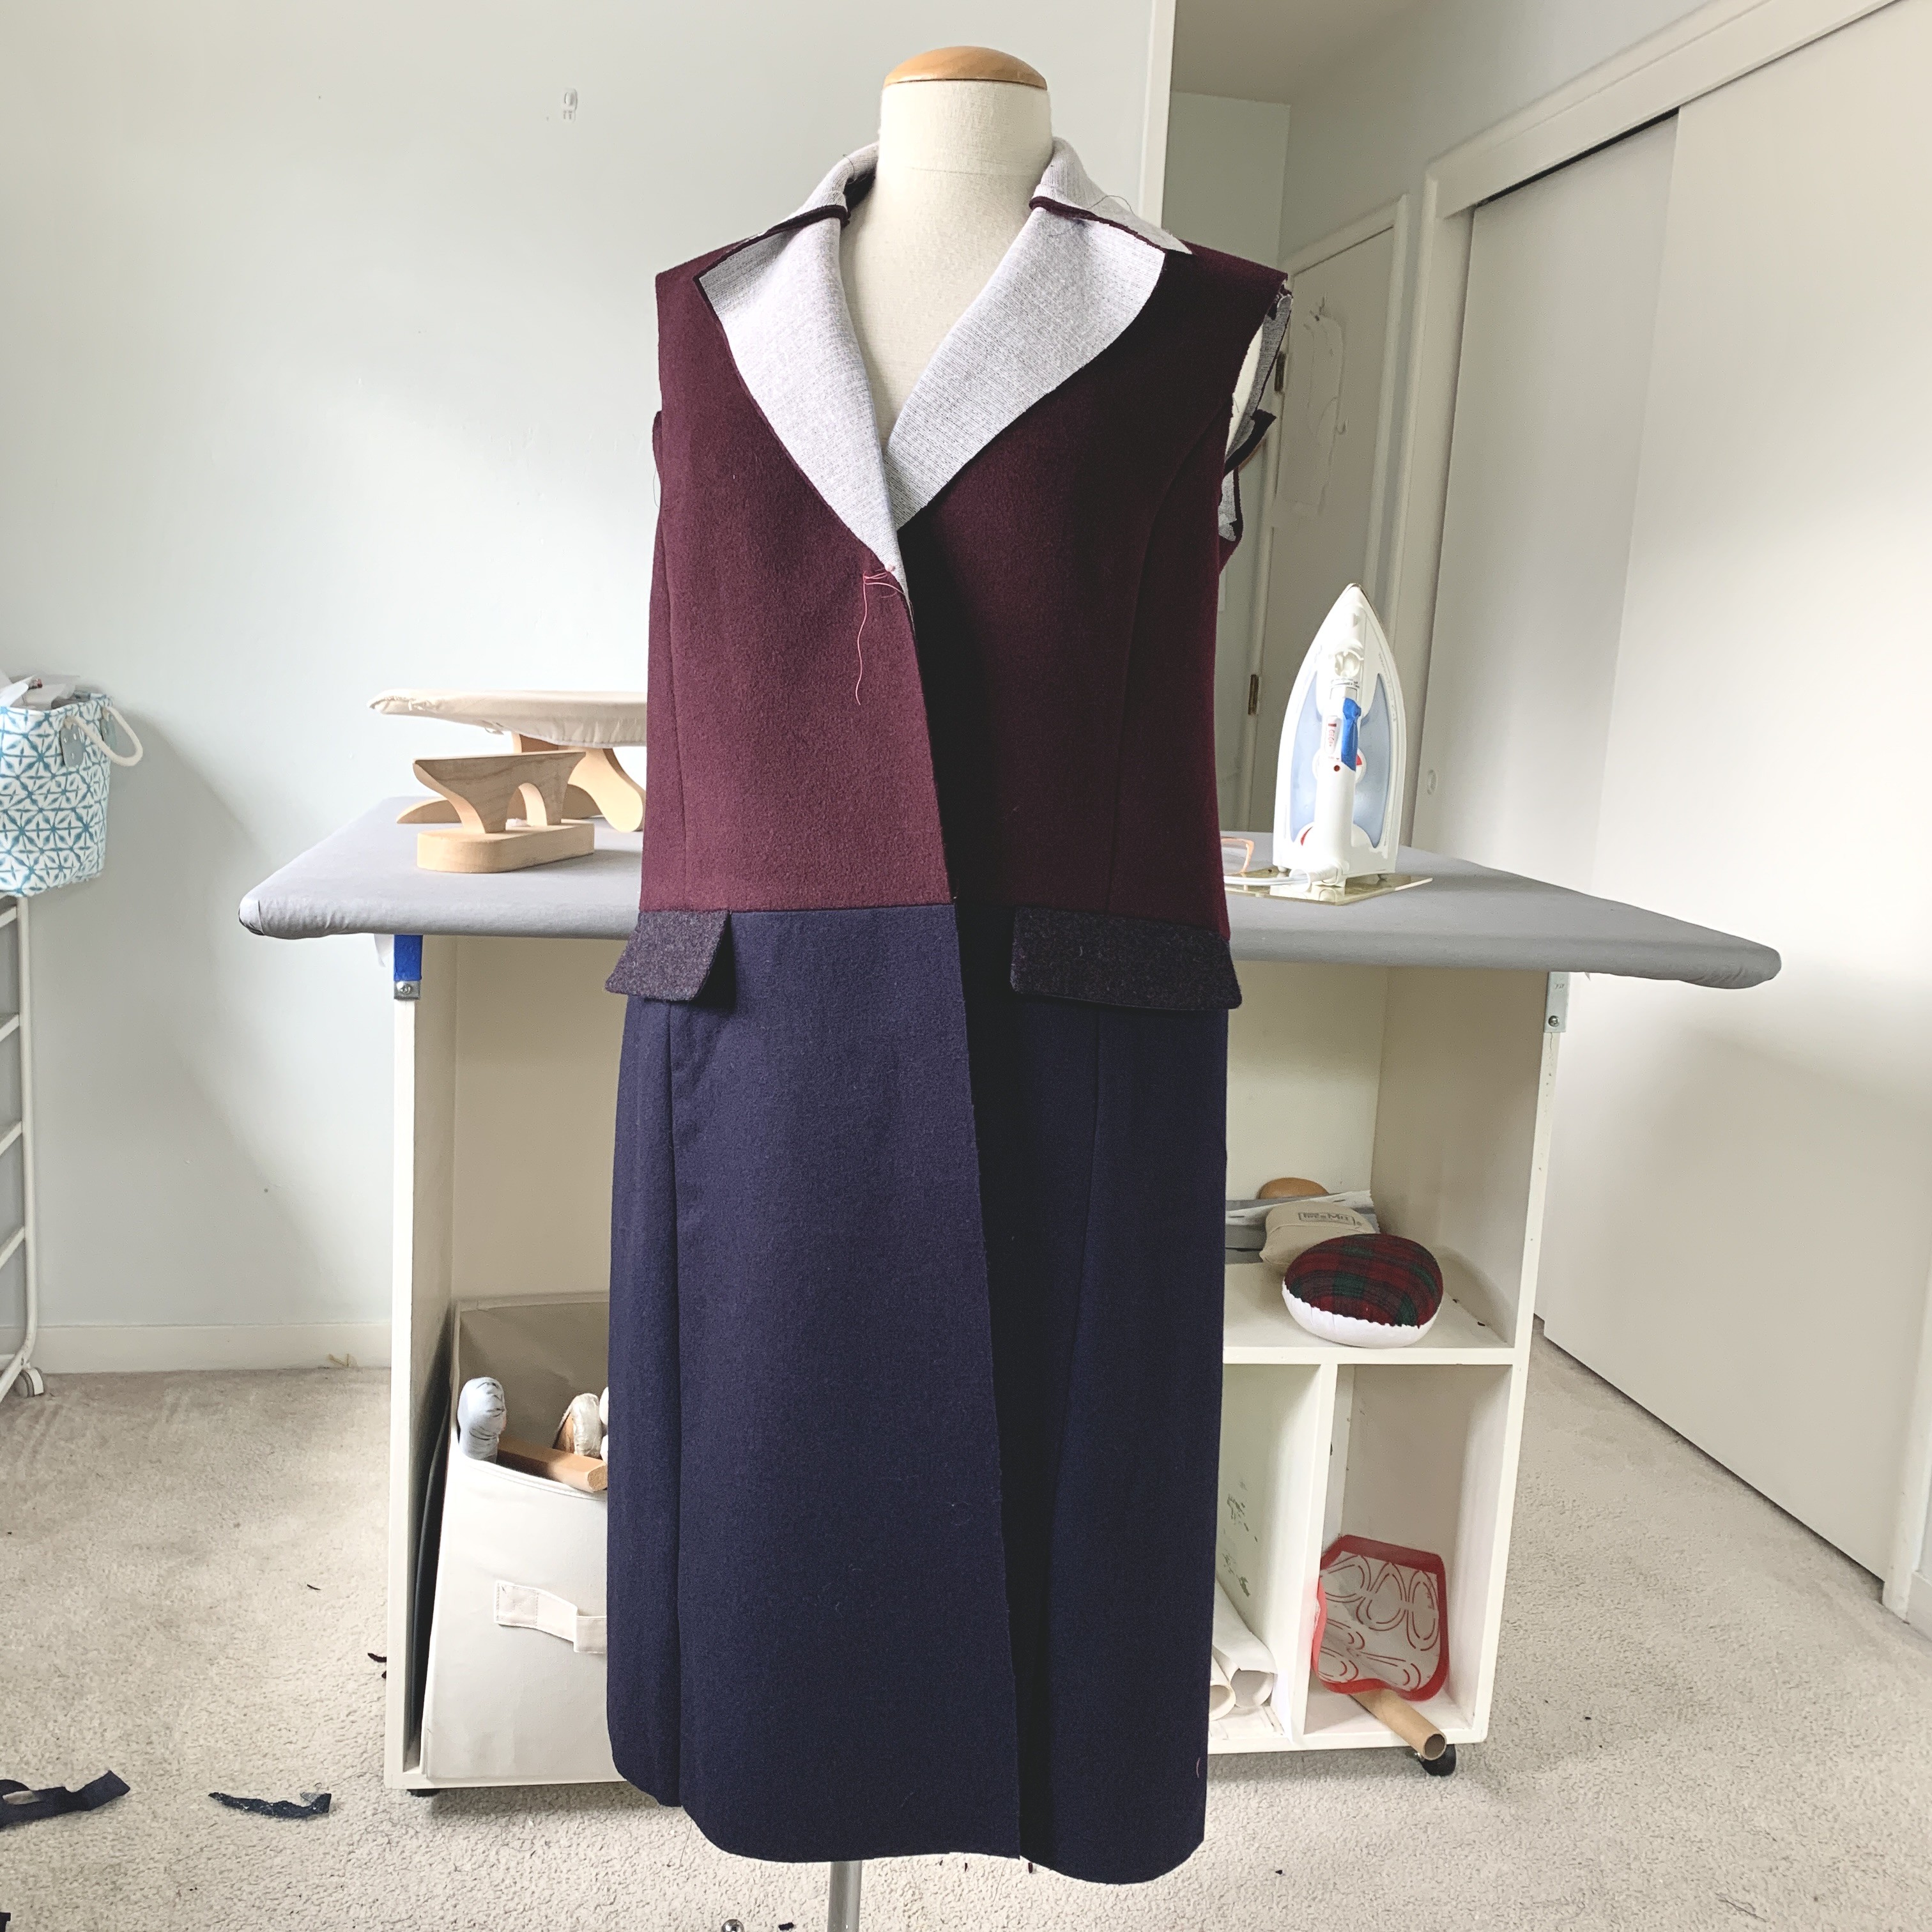
outer shell finished

Here's a look at the coat in progress (with a very good view of my rolling worktable behind it).  I had the navy blue fabric leftover from this project, the burgundy wool is from this project, and the tweed sleeves are from a blazer that I made myself last year, although I didn't put it on the blog. But the fabric is the same as this one I made for Heather. I liked the fabric so much I bought some at Britex for myself. 
Something about the 3 fabric color ways goes together well and if I were an artist I might understand why, but I just knew they complemented each other. 
Here's the pattern that I used, and envelope pattern Burda 6845 which  has lots of versions online and is a really nice pattern. And it had the two-fabric version already in the pattern. 
IMG_0690IMG_0691

Let's talk about fitting.  This pattern has plenty of seams which I like as it makes adjusting for multi-size a bit easier. I made a muslin in size 38 graded to 42 in the hip and then evaluated that for adjustments. 
One of the reasons I like using Burda patterns is that the neck/shoulders/armhole etc of the size 38 is just right for me and I only need to adjust a bit in the circumferences.

I give a lot of credit to new sewers because if I was starting out and tried on some muslin test garment I might say nope as the test version is always so hideous and you really have to use your imagination to know the final product will be nice. I skip the sleeves (which I do not advise but I know they will fit me already) but I do put in the shoulder pads since that affects the drape and bust location. 
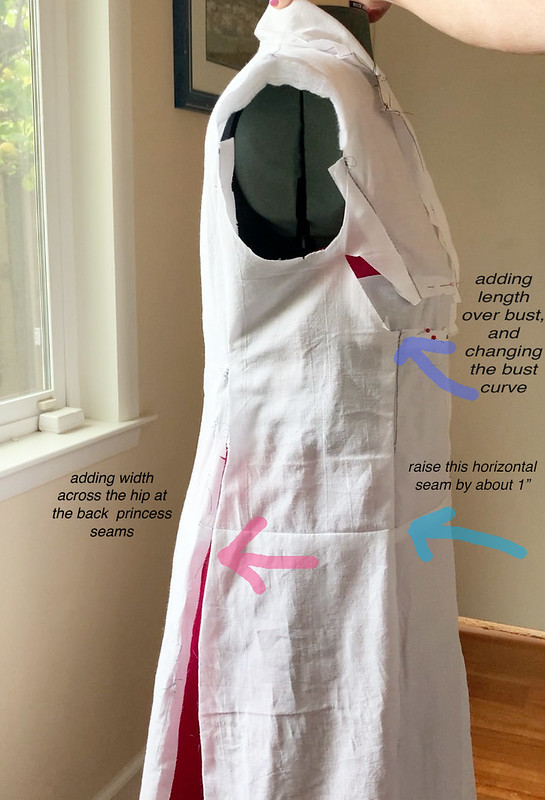
To resolve those drag lines indicated by the blue arrow I split the front horizontally and added more length and width at the princess seam bust area. 

drag lines coat

Here's another look at this adjustment. Actually not the adjustment but cutting across the muslin to create space. I pin fabric in the gap created and then check again. The major change was to add more length across the front princess seam, also to add some width at the back hip.  Keep reading to see the changes on the actual paper pattern pieces. 

fitting on form coat copy

Explanations in paragraph below. 

coat mods pattern copy

Here are the upper pattern pieces for this coat. I added length and a bit of horizontal distance in the front princess seam, using a wedge that tapered to nothing at the armhole. Then I added the similar amount of length to the center front piece. I remade the muslin test version and decided that the front princess seam edge was a bit too long so I pinched out a small wedge noted with the purple arrow. This just removes some length along that area and made it sew to the other edge better. Then I added to the center back princess seam down to the bottom, particularly around the hip area. However when I sewed it up it in the wool was a bit to big and shapeless at the back waist but it was easier to take in that seam in the final garment. Lastly I shortened all the upper pieces shown in the yellow sections above. I think I shortened about 1.5 inches. The seam needs to be below the waist but not too low so think I raised up that seam by the similar amount that I lengthened the front. 

I spoke about a lot of the sewing details on Instagram and have saved the series in an Instagram Highlight called "Remnant Coat" so you can see a lot of the sewing and construction details there. my Instagram is:   beth_sunnygal
This coat has a particular sewing order and the dart under the lapel is incorporated into attaching the collar. Which for some reason I don't like and since I rarely read the instructions I almost missed it. Although it probably would have turned out just fine sewing dart and the attaching collar. But their method is smoother in the sewing so I'm glad I took a quick look at the instructions. 

Collar and dart instruction

collar seam instruc

When it comes to working with coating fabrics I think the trimming and grading seams is the key to a good finish. If there is any spot with more than 2 layers of cloth and it can be trimmed, I trim it. Even tiny corner squares like this one. 

trimming upclose


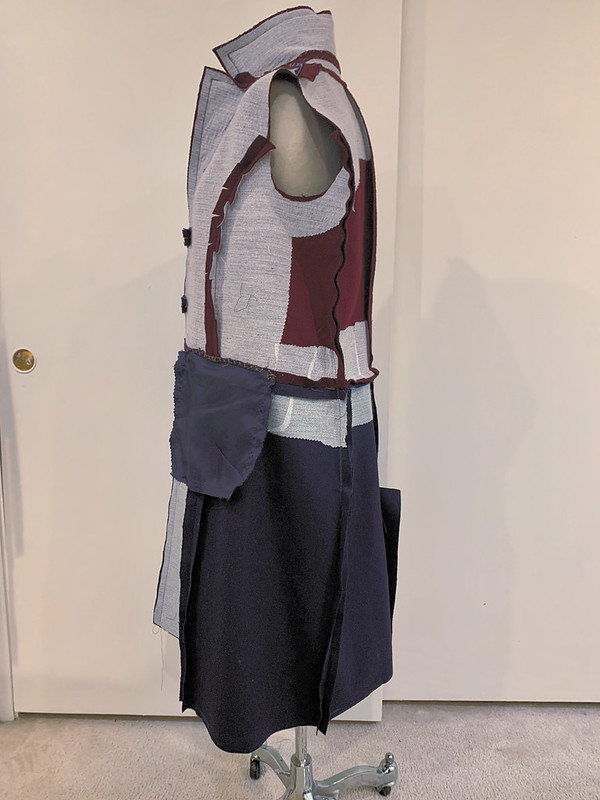
Interfacing inside coat
Inside before trimming and pressing. I think when you have some seams intersecting in two different wools like this then adding interfacing gives them a bit of structure and helps them to match together well and press similarly. Originally I didn't have any interfacing on either the blue or the burgundy around the horizontal seam but it just looked limp, particularly as compared to the front portion which had interfacing on the entire pieces. I had only machine basted it together just to double check fit so it was easy to detach some seams and add interfacing. Below shows the front with the silk thread tracing in preparation for the bound buttonholes, see how nicely that seam presses where the two colors meet. That was the result I wanted all around the coat so it was worth the extra time to go back and add the interfacing. I use Pro-Weft Supreme Light from Fashion Sewing Supply for almost all coat or jacket projects. 

thread mark for buttonholes

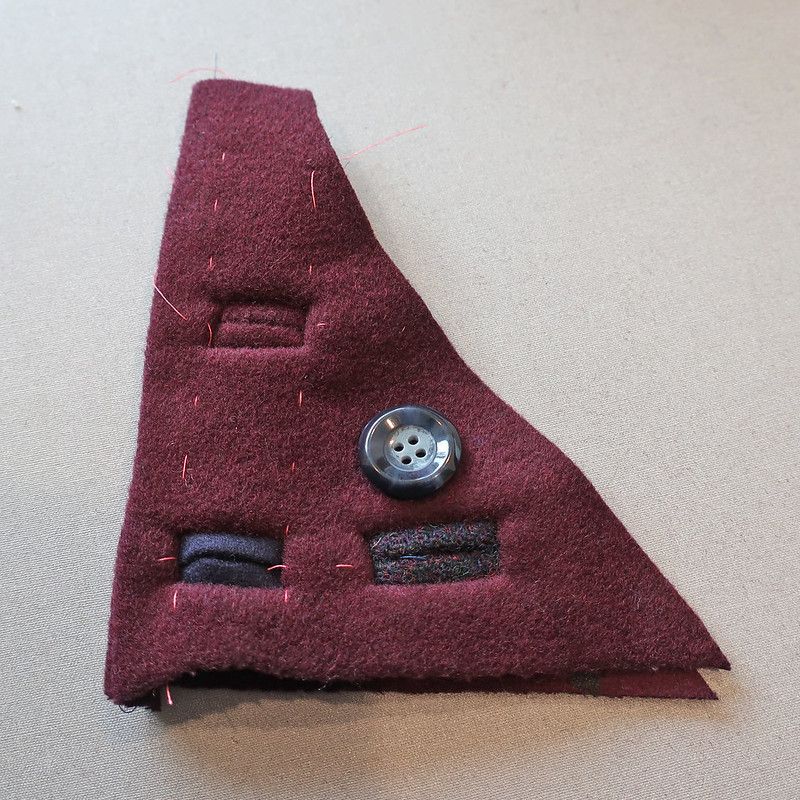
Coat starting to come together at this point and decided to use these buttons which I bought in NY in October at Pacific Trimming. I always make some test buttonholes and play around with size, plus see how the fabric behaves. Note that I sew two layers of interfaced fabrics so that simulates the actual coat front including the seam edge so I can really see how the real buttonholes will turn out. 

IMG_5308


Remnant coat on a sunny day

So that's some detail on the fitting and construction for this coat. And a look at the meyer lemon tree outside my sewing room window. Next up I will post the finished coat. Then it's on to a new project - whatever that might be!  I just was given some really cute vintage patterns from the 60's so I might get started on a summer dress. 

I'm teaching a combo "Learn to use patterns / simple pattern fitting" class this upcoming weekend via HelloStitchStudio but I think it is sold out.  April 27-28 I'm teaching a shirt class using the Kalle Shirt pattern from Closet Core which we just listed so there are spots open. (Location is Bay Quilts in Richmond CA, they have a really nice classroom space).

Of course there is plenty to do outside now with all kinds of weeks popping up and plants needing attention. Plus I just ordered some new plants this morning  - they're like fabric, hard to resist!

Happy almost Spring Sewing,
Beth

Today's garden photo, taken yesterday between the downpours. A cheerful daffodil is so welcome this time of year. 


Daffodils 2024 Feb

Saturday, July 22, 2023

Cashmerette Auburn Blazer: 2 versions

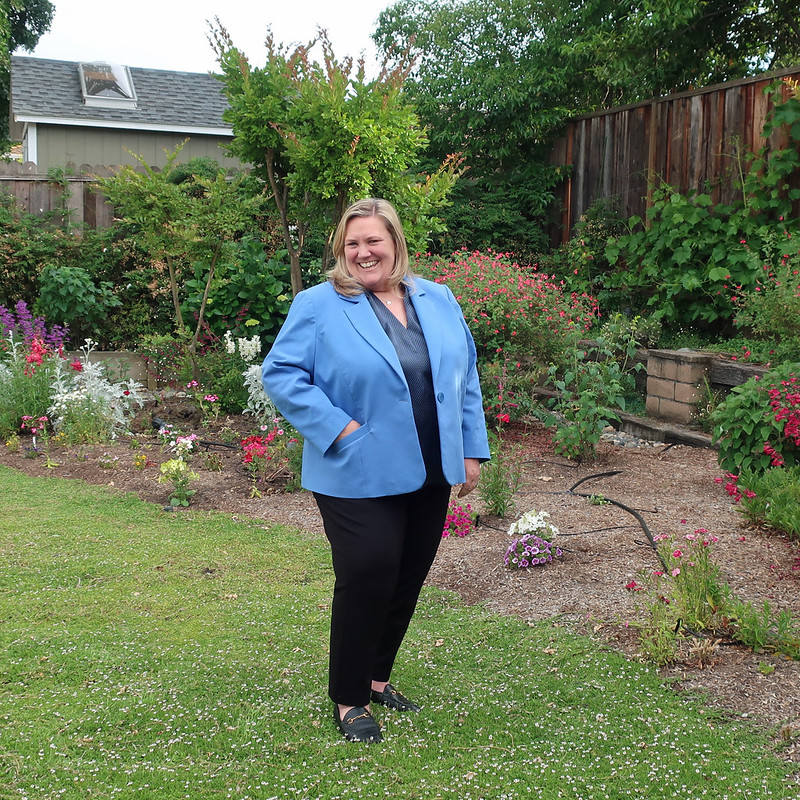
Did I intend to have 2 months go by since I posted on the blog? No, I think I've just fallen out of the habit but I really wanted to share this pattern and the jackets I made for my friend Heather. Here is the most recent version, in a summer color and fabric. 

Light blue blazer 2 on H

This is the Auburn Blazer from Cashmerette Patterns. It's the first pattern I've sewn from this pattern company although I have been looking at them with great interest ever since they started. Below I will discuss some of my thoughts on this pattern. 
It has princess seams front and back, plus side seams, 2-piece sleeves and a slanted single welt pocket. 
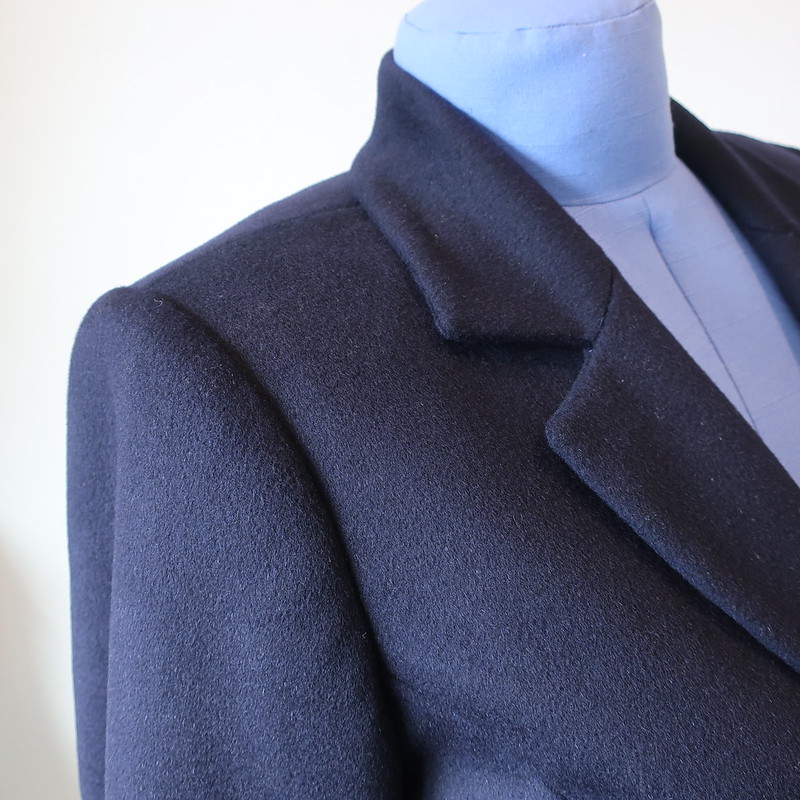
Here's a look at the winter version I made back in the autumn. This is the most gorgeous wool from Britex Fabrics, so soft it feels like cashmere. 
Blue blazer1

Here's a look at the pattern photos and their technical drawing. 

Auburn blazer pattern image

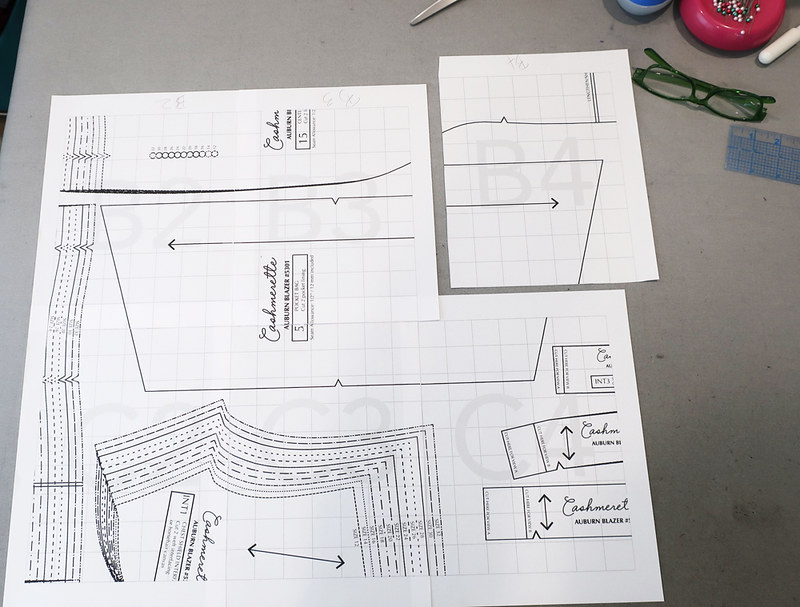
I took a picture of the  PDF of this pattern as I was really impressed. I think this is one of the best PDF patterns I have worked with.
  • every page is numbered and lettered so it is easy to put together
  • the printing is bold and clear
  • the pattern pieces are labeled distinctly
  • the size labeling is easy to find
Blazer PDF example

I did a real combo of sizes and while it is great that the jacket comes in various cup sizes I had to do some reshaping of the bust area. While Cashmerette is marketed to full busted sizes I often notice a few fit issues on both their samples and on garments that people make and show on IG or blog. My impression is that on some their patterns, particularly ones with a distinctive waist, the waist seam is too high, and there is not enough length in the front bodice, even though it fits around the bust area.  I just made the Upton dress and came up with the same issue and I think it is due to the center front piece being the same for all cup sizes. So only the side panel changes. That doesn't seem quite right to me and I did change the shape of the princess curve a good bit. But in general I liked the fit of the jacket pattern and chose a starting size based on body measurements with good result. On a tailored jacket I will always make a muslin and fine tune a lot of things before cutting out the wool.  I did shorten the longer version with the pockets. 

IMG_9825

I don't want to go overboard with too many construction photos, I did do an Instagram story "Auburn blazer" which I saved as a Highlight so if you go there you can see some construction details including a lot about making the pocket which because it's slanted is a bit tricky.

IMG_4929


IMG_4928
This image doesn't have the best lighting but you can see the sleeve has a nice curve. I used the regular fit sleeve which is generous and I didn't need to do any full bicep adjustment. The pattern comes with pattern pieces for a full bicep sleeve which is really nice to include. 

IMG_4947


IMG_4945

You can see this wool has an almost fluffy texture. And it was very tricky to press! this is the type of wool that will get marks easily from the iron and flatten the nap so I was SO careful. It also seems to pick up every little piece of lint. 
IMG_4949

The navy blue wool jacket fabric and the lining were from Britex in San Francisco. 
For this casual version the fabric was from Mood in NY. It's a cotton pique with spandex, so to me it looks sometimes a bit rumpled but also doesn't really need pressing, it behaves like a lightweight stretch denim. 

Light Blue Blazer on form

I'm really happy I gave this pattern a try, proportion-wise it's almost perfect for Heather and I think next winter we will do a suit version with trousers. Spoiler alert - I tried the Meriam trousers for her recently and they were great (with some specific adjustments  - what pants patterns doesn't need a few adjustments, right?)

Light blue blazer front on H

So I am on the Cashmerette team for my friend Heather. It's a little ironic or perhaps fated because when I first started making things for Heather I remember showing her a picture of Jenny (owner of Cashmerette) in a black dress that looked fantastic, and I told Heather I could sew something like that for you. And now I have made so many. A truly gratifying partnership. 

Up next, I have traced a few items from recent Burda magazines but my sewing motivation is on the wane. A combination of 100ºF plus temps here, and the fact that I sewed so many items during those first 2 years of the pandemic that I am now getting to wear more. Also I'm in the midst of a bathroom remodel which is almost done but kind of hectic when the builders are here. Plus it's swimming season so that's a lot more fun than being in hot sewing studio!

You can see a peek of a silk blouse in the photo above, I copied a top (from Universal Standard) that Heather owned. It was a bit of a pattern puzzle but very rewarding so I want to post about that soon.

Happy Summer Sewing and stay cool 😎
Beth

This time of year merits more than one garden photo. White shooting stary hydrangeas, pink hydrangeas of a similar type, and a pink dahlia that I forgot about but is blooming like wild this year. 

white and pink hydrangea

pink dahlia 2023