Showing posts with label interfacing. Show all posts

Monday, October 11, 2021

A silk shirt post with lots of construction details

It finally feels like fall here in N. California. Not exactly coat and scarf weather but a slight nip in the air, and some falling leaves. Actually today is a swirl of fallen leaves and a red alert for wind and fire danger but we will cross our fingers and hope for the best. This is the scariest time of year and I don't mean Halloween!

Last week my sewing thoughts turned to long sleeved shirts and I decided to use this beautiful silk crepe de chine fabric. My favorite local sewing store Stone Mountain Fabric  has just reopened to the public after being online only during these many months and this silk fabric is the last thing I bought in person there. In fact purchases the very day before we started the first day of lockdown here in California back in March 2020. 

Blue shirt1

I've been doing a lot of preparation lately for my jacket class that starts next week, so I have construction details on the brain and thought I would share some of my silk shirt construction methods with this post. I used to do more detailed posts and would like to do some more this fall and winter. The problem is remembering to take pictures as I sew!

For this shirt I've used the same exact pattern that I use for almost every button front shirt I make. I like the size and shape of the collar and the way it fits across the shoulders, so why try something different when a shirt pattern is just the starting point. I have changed this same pattern up to do a popover placket, gathers instead of darts, hidden buttonhole placket, cut-on faux button band, faced front and tunic top versions so if you check the search bar on the side of the blog you can see many other versions. It's Simplicity 2339 which is an Amazing Fit pattern from around 7 years ago? 

To start with I evaluate the fabric and decide which method I will use for the closure at the center front and then which interfacings would give me the shaping I want. For this shirt the fabric was just about the same as this one, which I wear A LOT and whatever I did was successful so I decided to use those methods. (actually if you look at that post there are some god construction details) However I couldn't remember what I used in the collar/collar stand so I unpicked it a little bit at the center back neckline so I could see into the seams. As it turned out I used a combo of lightweight fusible and silk organza. Also I used facings at the front, so there is no sewn-on button band. Sometimes on a silk shirt I think it looks smoother with facings. 

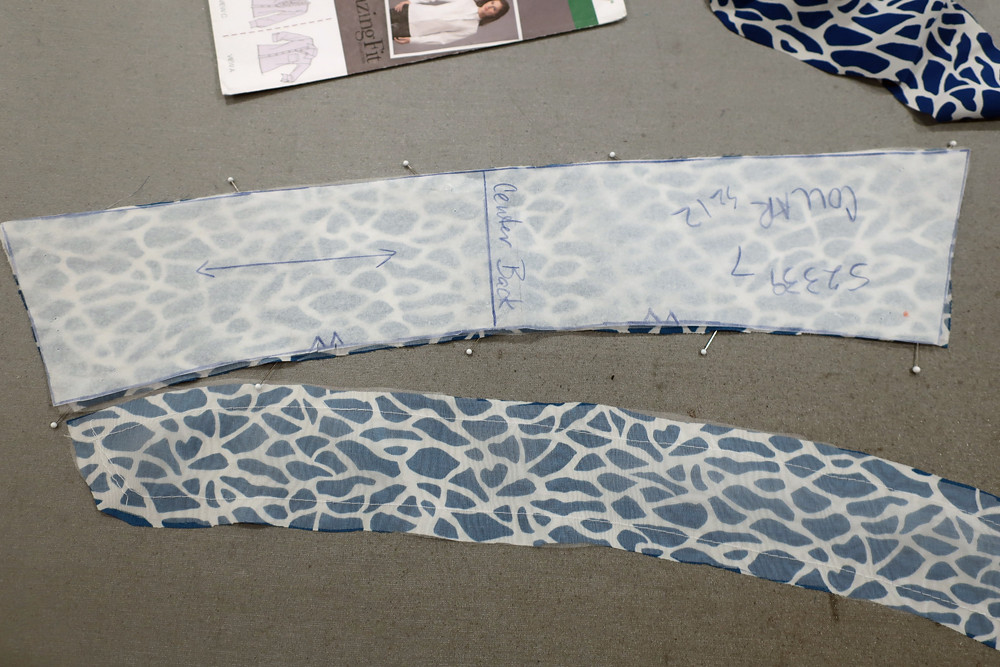
In the photo below I'm getting ready to apply the fusible to the collar, and so I place the fusible on the silk pattern piece, pin it lightly down and then use the paper pattern piece to make sure the shape is retained. Some fabrics just seem to wiggle or change shape and then once you apply the fusible you are stuck with an incorrect shape. I do this a lot with a variety of pattern pieces, particularly V-necklines to make sure they are still the same shape as the paper pattern piece. 

Silk shirt collar fusible

I do the same for the collar stand, check the shape before fusing. For the collar stand side with the silk organza, that fabric is quite stable, it stays the same shape as the paper pattern piece so you can use that as the guide when joining that to the fabric. 

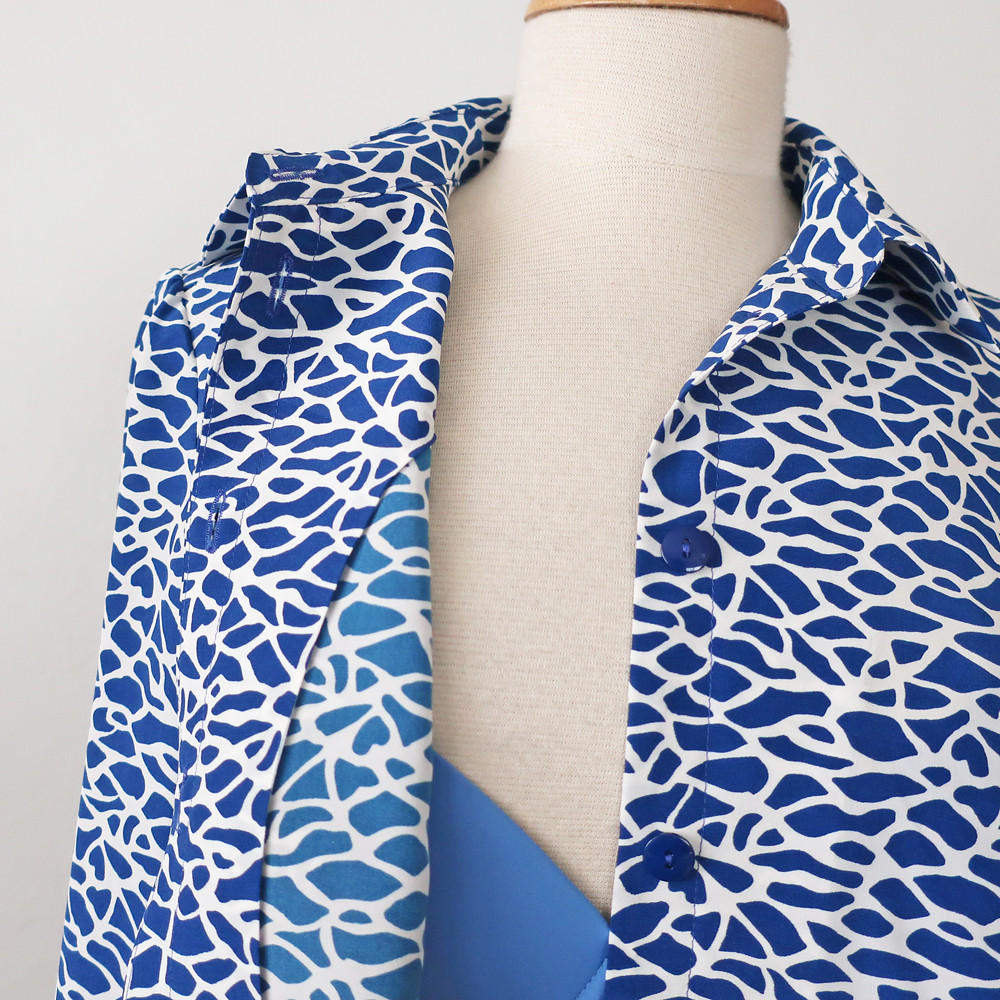
Next up is taking care of the facings. I like to use the fusible which is in fact a woven fabric to finish the edge of the facing by stitching them right sides together and then flipping over the fusible, clipping the seam and then fusing the rest in place. It is a bit of a fiddly process as you don't want to fuse it crooked, or with a wrinkle so I just move the iron about 1/4" at a time from the seam edge towards the other edge. 

Facing edge with fusible

The result is a very clean finished edge inside the shirt, and then you have the facing showing where the neck falls open at the top, so you see the right side of the fabric. This fabric has a distinctive different shade of blue on the wrong side and for a while I was trying to figure out how to use that as an accent but it's not really distinctive enough so I let go of that idea.


Blue silk shirt facing


Silk shirt front

I wish I had measured the piece before I started cutting it out, it was probably 1.5 yards of 55" wide fabric. So that's enough for me to make most shirts or tops with some inventive cutting out - however I did have to omit the inner yoke piece in silk. In fact I often use some solid lightweight fabric there anyway so it worked out. 

Blue silk shirt inside

As I was sewing I realized I wanted the seams at the side and in the sleeves to have some nicer seam finishes so I did what I think is a faux french seam, in that I press it open and then press to create two folds which are stitched closed. Perhaps more work than the traditional method of a french seam but I never remember to do it and then have to use this. So often I am just sewing on auto-pilot with something playing in the background. I'm currently watching a variety of British, French and Italian mysteries on Britbox and Mhz channels. And I definitely need the subtitles on the French so that means I pay more attention to the screen than to my sewing :). 

Silk shirt french seam

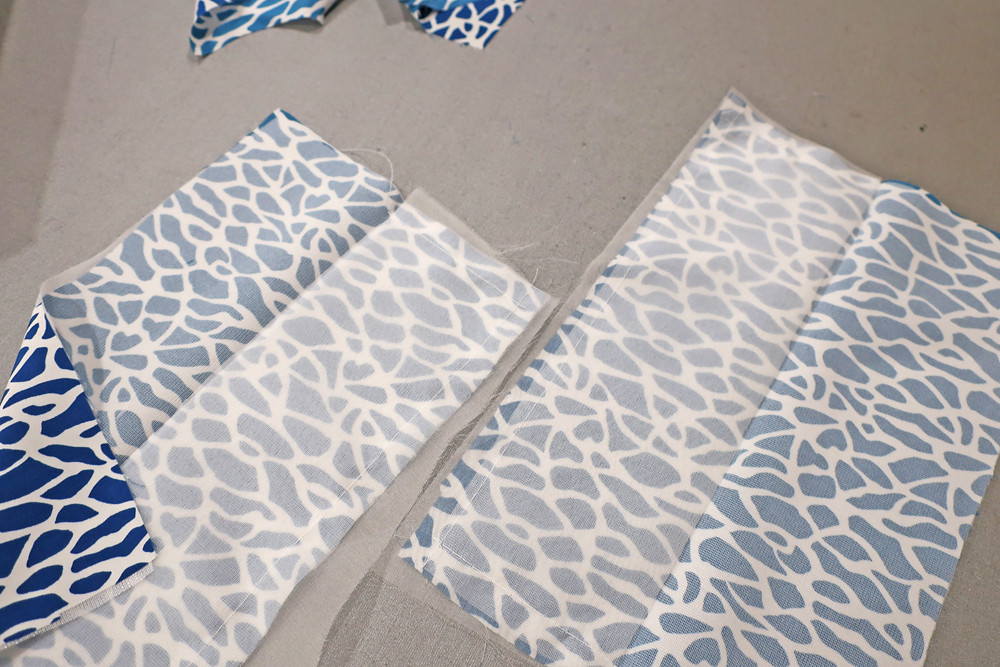
For the cuffs I put both a lightweight fusible and then on one side I put silk organza, that combo gives the cuffs just the right amount of stiffness. I just cut out some "close enough" pieces, baste them on and then trim to match the cuff edge. 

Silk cuffs interfacing


Silk shirt back

Blue shirt back

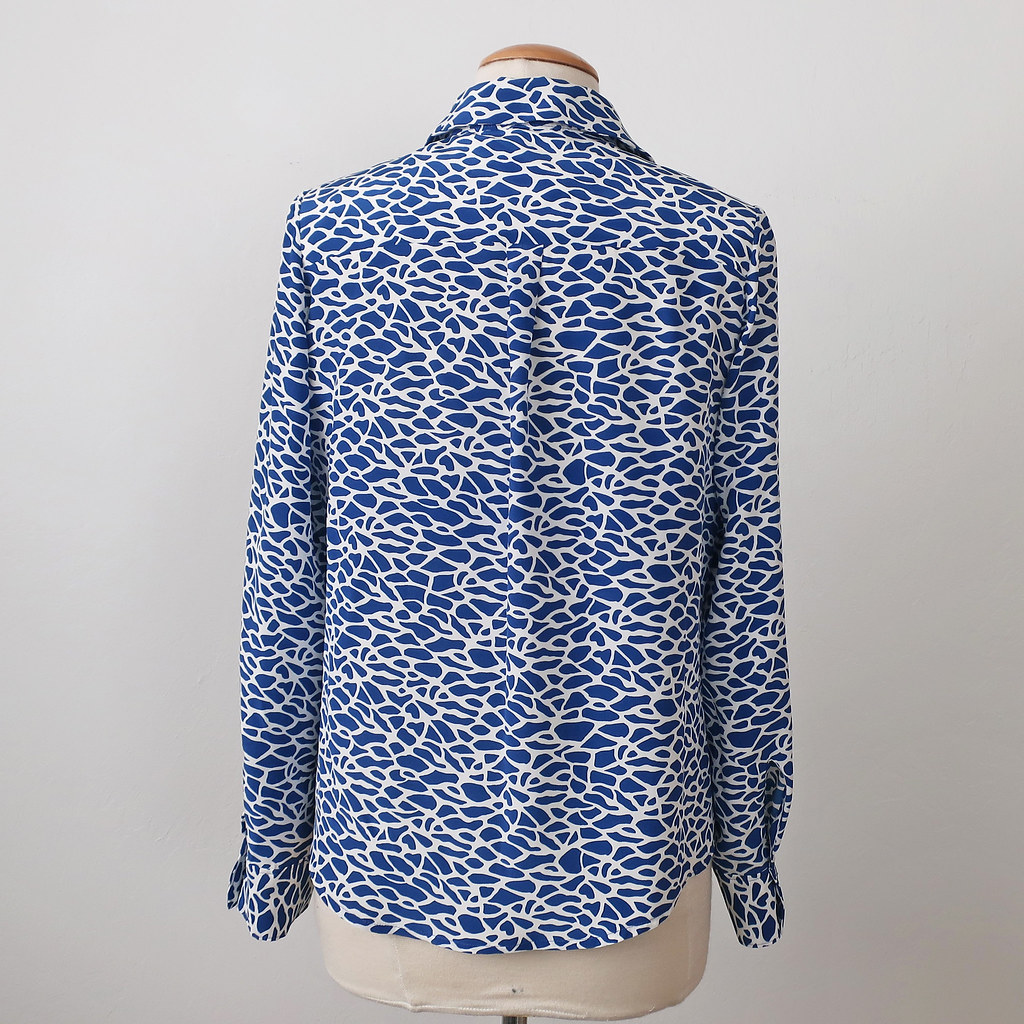
I wanted the back to be loose and flowy so I put a small pleat in the center back. 
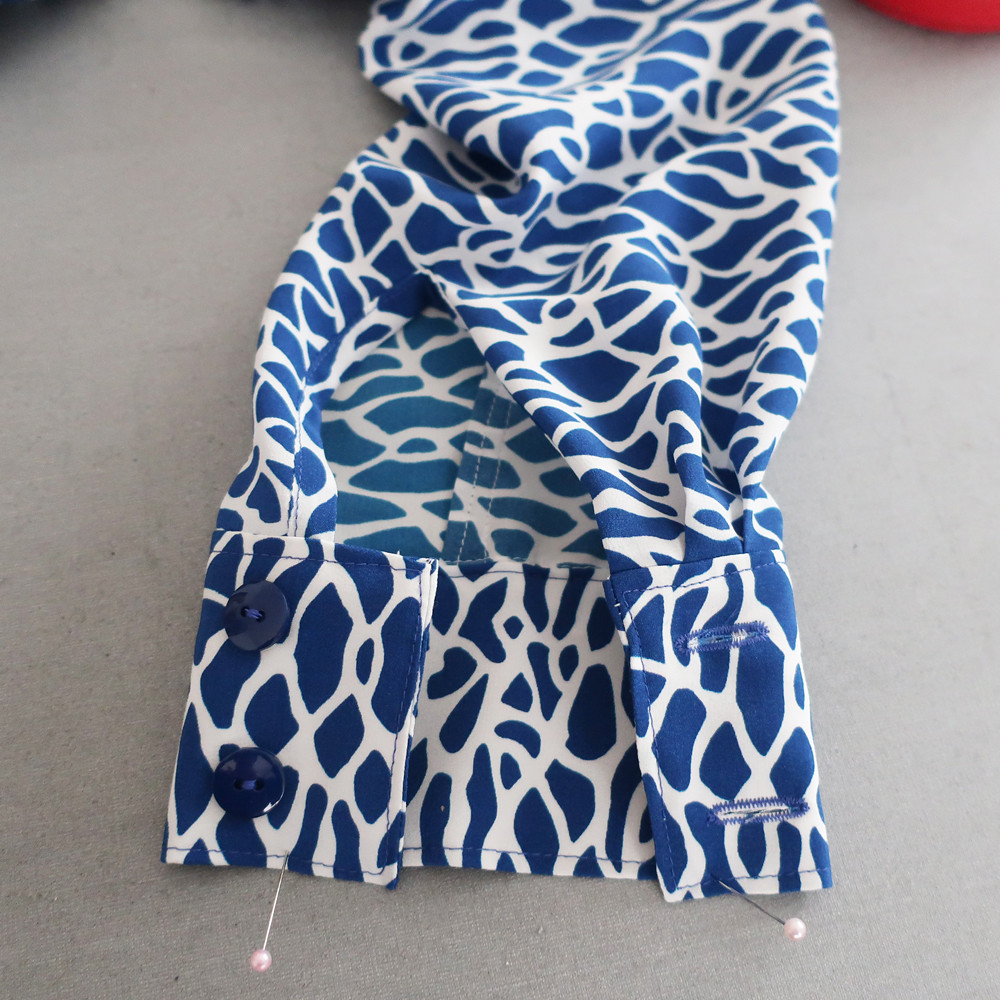
For the cuffs on these silk shirts I don't do a tower placket, I prefer the continuous binding which is a bit softer. 

Blue silk shirt cuff

So that's the latest on my start of fall sewing. I am vowing NOT to make any coats this year, I've made 3 in the past 18 months and the red coat only had one wear. I plan to wear that all through the holiday season!! 

It will be blazer sewing from now to Thanksgiving. We start the Live/Online Jacket Tailoring class next week on Tuesday night. There's still time to register, here on the Hello Stitch website.  It's  Tues/Thurs 6-7:30pm so hopefully that works no matter your time zone. And you don't need to have all your supplies for the first class as I will be covering a lot of that information then and you can get your project together after that.

I've now taught a couple of in-person classes at the studio and it was really fun to be there, I think a lot of people either started sewing during the pandemic or decided it was time to learn because we are almost fully booked. In January I think we will have lots more garment sewing classes so I will update when we get the schedule finalized. 

I'm looking forward to wearing my new silk shirt, and this is actually how I will probably wear it most of the time, underneath a cashmere sweater. 

Blue shirt with sweater2


Happy Sewing,
Beth

For today's garden photo, a closer look at those hydrangeas which were a bright lilac blue earlier in the summer. I tend to leave them on the plants and just see what colors they turn. The other day I saw a floral designer refer to this hydrangea bloom as "antiqued" which is I suppose a fancy name for fading flowers. 

4B5B87FA-4197-47CE-A880-21991A53ED4B_1_201_a

Sunday, February 9, 2020

Sew the Precious - Silk Crepe shirt

Is it spring yet? My February has started off at rock bottom as I caught the flu and have been mostly horizontal for the last week. After hearing about it on the news for months I thought it unlikely I would get sick, as I practically shriek and jump away when next to someone who coughs. But alas the germs got me, shall I blame the gym in January? why not. Anyway - an imposed rest for the last week and I'm finally feeling human again.

This post is heavy on sewing details and techniques and lacking any photos of me wearing this shirt - that will have to wait until I'm feeling better, plus I have a skirt in the works that goes with this so it will wait for the the full outfit.

Purple dot silk fabric

The last thing I had finished was a silk crepe de chine shirt in a purple leopard-y print. I would call this fabric "my precious" as I bought it over a year ago at Stone Mountain with not a real idea of what I would make but I just loved the color and feel of the fabric. I think at the time I had the idea of making a Bondi dress for my summer vacation but made this version instead, and set the silk aside, knowing I would wear it more often if it was a shirt or top.

Purple dot shirt front

The purple/magenta color is something I really like and the spots in white and navy blue make it so interesting. They still have this fabric at Stone Mountain - as you will see further down in this post.

So once I decided to make a shirt, after a few experiments with other patterns I returned to my favorite Simplicity 2339, which may be going on upwards of 20 uses of this pattern. I think a shirt is a shirt, and if this is the silhouette and detail I want then it's best to use a pattern that I know fits me perfectly.  Also when people say that standard tissue paper patterns are not very strong I just shake my head - I think they last forever - or at least a good long time. Although with this pattern I have modified it for various changes (covered button placket, popover version, darts rotated to gathers, etc) so I do have some pieces copied over onto other papers.)

Let's talk about yardage. Once I unfolded this fabric I saw that previous me only purchased 1.5 yards of this fabric which is 54" wide. Even for my bargainous nature that is a bit skimpy to make anything other than a sleeveless top or a very simple dress (which was my original plan).

Purple dot grainline change

Consequently I had to do a bit of creative cutting to get a long sleeve blouse out of 1.5 yards. Note the collar stand laid out at that jaunty angle. Not exactly on grain - but I figured with interfacing it would be stable enough to work, and it was.

Speaking of interfacing, this is the new-to-me method I read about in Threads magazine, and it works so well. Particularly for small pieces. You can cut out an interfacing piece in the general shape, and on the right grain, then place over the fabric piece on top of a silicone baking mat. Press/steam away and then trim the excess. The part of the interfacing that is overlapping to the mat does not stick at all. In fact it doesn't even seem to melt. So a win in terms of less precise cutting and placement of interfacing, and no sticky bits that just peek over the edge of your fabric and adhere to your pressing surface.

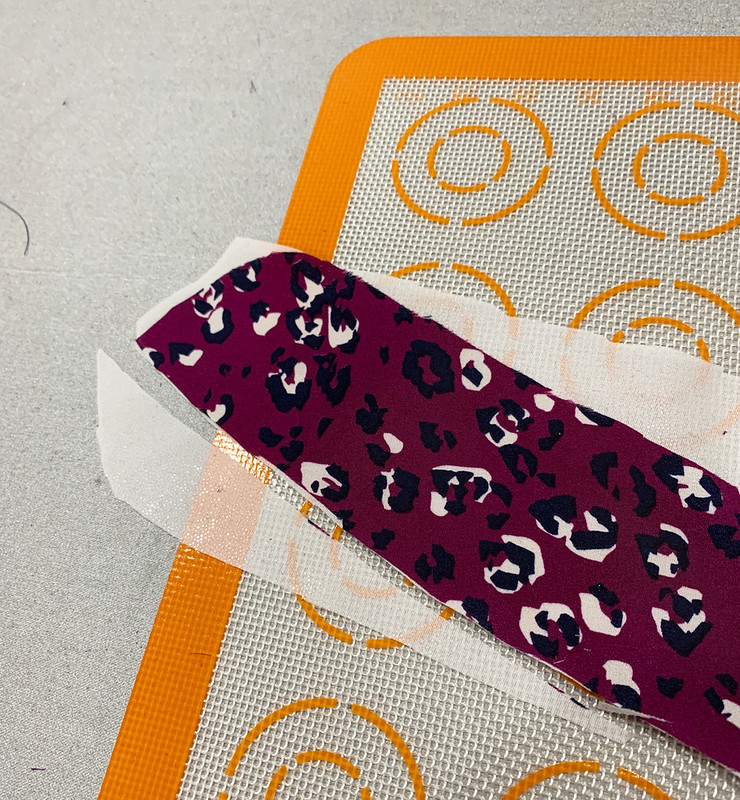
Purple dot band on mat before trim

Purple dot band pressing on mat

I trim it with scissors but I suppose if you are a wizard with a rotary cutter it would be a quick task. I think of all the things that make scissors dull the worst culprit is interfacing, so I do all cutting of interfacing with a specific scissors so as not to dull my nice ones. Paper I think has no effect on scissors but interfacing is a menace!

Lastly, I always use the paper pattern piece to verify the shape of my pattern pieces (usually I do this as I lay down the item prior to placing the interfacing on top. But I didn't take a photo of it that way - hopefully you get the idea. You would be surprised how much pieces distort with handling and it's just a bit of insurance to maintain the right shapes.
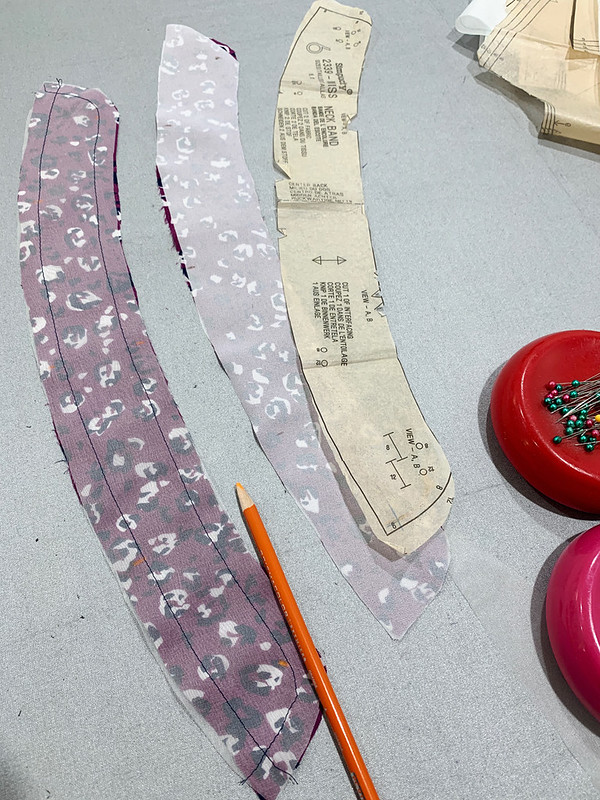

Purple dot collar bands

For silk shirts like this I have concluded that 2 types of interfacing work well, one one side I put a lightweight fusible (usually the Couture weight Sheer Elegance from Fashion Sewing Supply) and on the other side I use silk organza. Same for these three parts, collar, collar stand, and cuffs. On the button band just the fusible, no organza as I think it would be a bit too stiff, whereas I want some stiffness in those other three spots.

Another interfacing technique I use is to enclose the edge of a facing by sewing the interfacing and flipping it over, then fusing it. It's a bit of a tricky maneuver but I did take some photos and write about it in this old post. 

If you look closely at the edge of the shirt front facing you can see that the interfacing and the fusible are stitched together to make a completely clean finish. I love to use this on silk shirts and tops. But you have to clip the seam, and then carefully press that first 1/4" down to get it smooth and flat, then pressing the rest is not too bad.
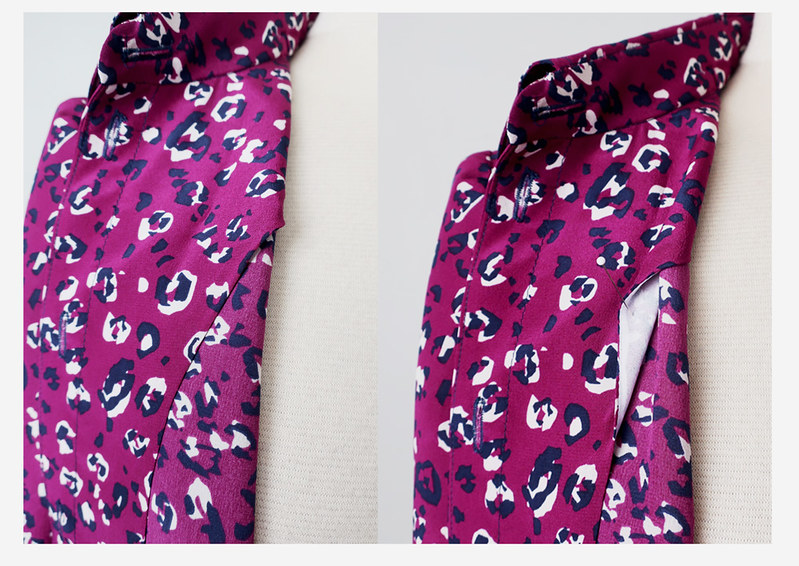
Purple dot facing 3

Purple dot collar construction

There are a couple of ways to sew the collar stand to the shirt, and I prefer to do it this way which is a bit fiddly but I think the end comes out nicer. I wrote an article for the Craftsy website which is still alive on the Bluprint website with color-coded details on how to do the collar/stand with both methods and I still think it's one of the best I wrote! (along with my favorite one, the hidden buttonhole closure :)
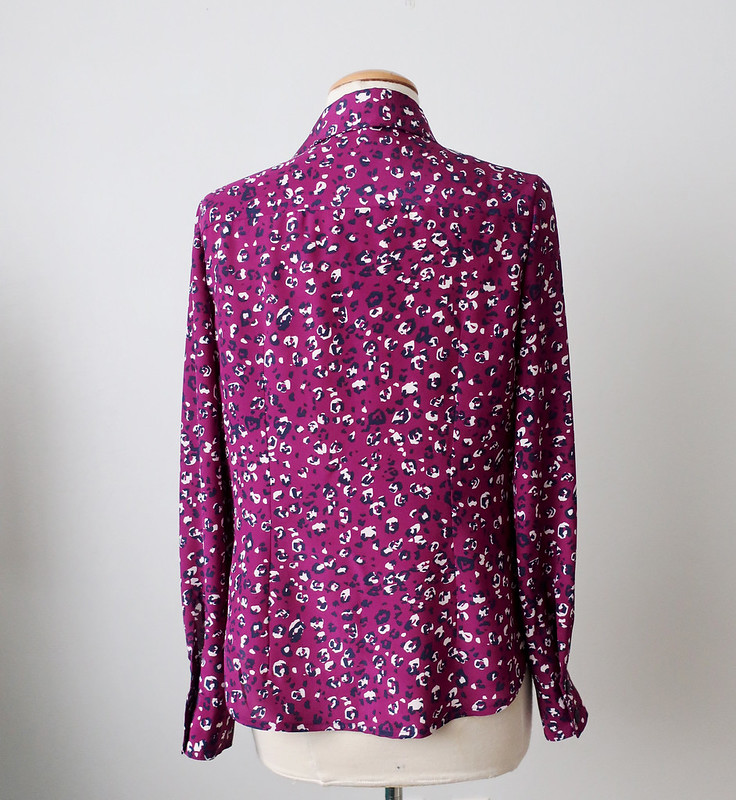
Purple dot shirt back on form

Onward to cuffs and buttons. I bought these buttons at Stone Mountain, they had the right about of blue to go with the shirt. I had a number of dark blue buttons in my stash, but they were all too shiny or too bright so for once I was patient and waited to finish until I could buy some nice buttons that complemented the fabric.


Purple dot close up cuff buttons

When I do cuffs on a silk blouse I most always sew a continuous lap which you can just see peeking out there. I think it looks more elegant on silk fabric.

I never use a cuff pattern, I just decide how wide I want it to be, and how long depending on the thickness of the fabric. Then I cut rectangles, interface, and add silk organza to make it a bit more structured.

Purple dot cuffs 1


Purple dot cuffs 2

The fusible keeps the seam allowances from showing through and the silk adds a bit of rigidity, you can see that cuff can stand up a bit on it's own there.

Lastly, how do I know they still have this fabric at Stone Mountain?

Purple dot sq with bow

Because when I went in to buy the buttons I succumbed to my urge to have a nice fat bow to wear with this blouse, so I bought another 1/4 yard which was used in it's entirety to make this fluffy bow.

Another silk blouse in my wardrobe - I think this will get worn a lot with all my purple and blue items. A little more costly than my usual sewing lately - not a remnant in sight. About $ 50 if you total fabric, buttons and interfacings. Considering I'm still wearing the first silk charmeuse shirt that I sewed from this pattern in 2011, I think it will get plenty of wear and use in my wardrobe.

So that's the latest - this weekend I've felt a lot better and started on a very cheery and suitably February red coat which I hope to complete to wear to Frocktails later this month. Plus I might start on some corduroy jeans as a warm up for my jeans class in a couple of weeks. And try to get outside to check what's survived the winter in the garden and even do a bit of prep for spring!

Happy Sewing
Beth

Today's garden photo is a pink camellia. These are so common around here in older houses, I think garden design has moved on to more interesting things but there are a few remaining at my place. This is pretty but it's so messy and I think this might be the year that it gets the chop to make space for something different.

pink camelia 2020


Friday, June 20, 2014

Summer Blazer Jacket - Vogue 2853 - Part 2

Ready for more details on sewing a summer blazer? It is just about finished so I will not have more than a week between posts. Although as I mentioned in my previous post - I tend to get sewing fast and sometimes forget to take any process pictures, however I can illustrate the same steps which I have used on other jackets. I have made a lot of jackets!

Onward with this one. After cutting out, the next two important steps are marking the various pieces and applying the interfacing. At this point I do tailor's tacks for all the dots or other indicating marks.

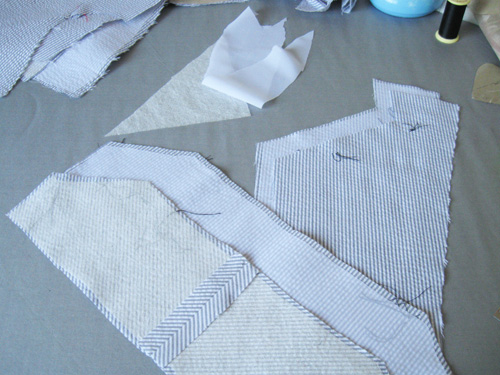
This photo shows the various interfacings I use on a jacket. While the fabric for this one is a lightweight cotton seersucker, the interfacing is just about the same as I use on a winter wool.

collar and lapel interfaced

I read somewhere recently (can't recall where) that the difference between home sewing and ready-to-wear clothes is the amount of interfacing. If you open up a better RTW garment you will see interfacing everywhere,  hems, pockets, almost every seam junction. I agree with this and use a lot of interfacing, about 90% of which is fusible. I love fusible intefacing, it is like magic! Ok slight exaggeration but it is so useful and like seasonings in cooking - I add different ones based on the fabric, and what part of the garment it is. 
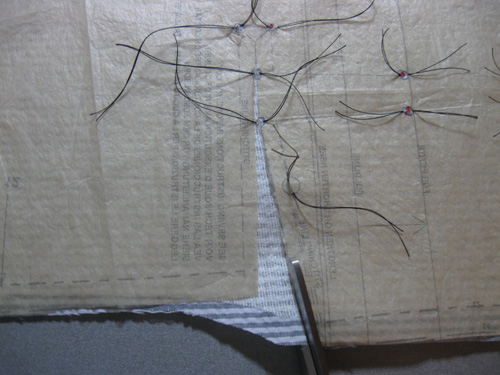
For this jacket I interfaced the jacket body front in lightweight weft interfacing. Same on the under collar which you can see in the photo above (top piece with the seam). Weft interfacing is great for tailoring to give body and support. Then I used Sheer Elegance Medium fusible on the upper collar and the upper lapels, and the side front pieces. You can see that I do the tailor's tacks first, while the paper pattern pieces are still attached to the cut fabric. So the thread tailor's tacks do get stuck under the fusible. If I am concentrating I will remember to pull the thread tails away to the edge so I can yank them out easier when finished but I usually don't have trouble removing them. Once in a great while I sew a tricky corner or junction and upon completion there is one stinking thread from a tailor's tack that will not budge so very precise extraction is required. Usually in a very visible spot and in a color that is very distracting. But patience and a tiny tweezers usually do the job.

Now to the pockets. This jacket pattern has a rather tricky welt pocket which incorporates a front vertical dart. I do look at the instructions each time I have used this pattern, just to make sure I don't slice anything before its time. 
Here you can see that I put the interfacing on the jacket front, then replaced the paper piece, did the thread tailor's tacks and finally cut out the wedge in order to sew the dart and then make the pocket. If you slice this open before interfacing then you have a flippy-floppy piece that might threaten to unravel or get stretched out of shape. By interfacing first then you can make a nice clean slice with the interfacing covering every fiber. 

extra cutting on pocket

Next step is to sew the vertical dart and attach the side front piece (which is also a bit tricky as the center front pieces have a horizontal slice going in them).  To see this pattern piece and the tricky dart/slice feature take a look at this previous post, there is a picture of the front pattern piece.


inside thread trace pocket

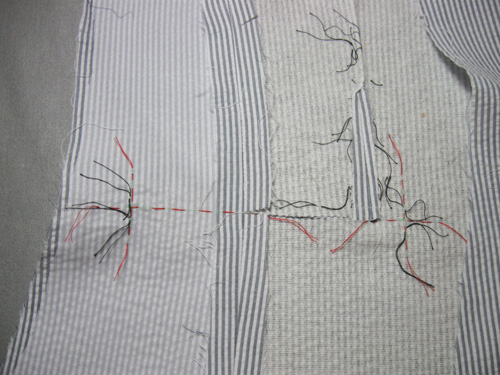
Then I thread trace the welt pocket, both the horizontal line and the vertical lines at the edge, about 2-3 inches for those vertical pieces so when I put the pocket welts on them I can see the end point for stitching. I mark and thread trace on the interfacing side of the jacket but the business side is actually the right side of the fabric, where you will be sewing the pocket welts.

thread trace for pocket

Searching though all my previous posts I don't see one where I took pictures of the welt pocket process, step-by-step but I know there are zillions of tutorials available.

Up next, making the pocket flaps. Yes - a whole post just on pocket flaps. Suprised myself with that one - more involved than I previously realized :)

By the way - some interesting comments on my previous post about pinning vs. pattern weights. Whatever works for you is great. I know a lot of people use a rotary cutter instead of scissors but I will never try the rotary cutter for cutting out a garment. I just can't get the hang of that thing, too clumsy and know I would slice something important like my finger or the center of a pattern piece! So better to stay safe with my nice sharp shears. 

Interfacing info:  I use various fusible interfacings from Fashion Sewing Supply. The top 3 that I most frequently use are the Pro-Weft Supreme, the Pro-Sheer Elegance, and Pro-Tricot Deluxe. 

There is a stack of new patterns waiting to be tried and a few fabrics I want to start on so they can be made into wearable summer garments - however in the summertime is it better to be sewing or out doing things?  Outside in this glorious weather almost always wins! 

Here's hoping you have a glorious Summer Solstice weekend (or autumn in other parts of the globe)!
Beth

Today's SunnyGal garden photo - gladioli that rebloomed from last year's bulbs. My favorite kind - the repeat performers. 

pink glads