Monday, December 31, 2018

Burda 6630 knit t-shirt with bonus sparkles

Happy New Year! This morning I read a number of year end wrap up posts. I really enjoy reading those as they remind me of all the great sewing I've seen and of course all the patterns I want to try. As usual lately with both my sewing and blogging I have a wrap up post planned, so perhaps I'll get to that next weekend.
For my last item of 2018, a bit of sparkle and a very quick and easy knit top using fabric that I believe has been aging in my fabric stash for quite a while. Well about 5 years - so for me that is quite a while.

Teal top 2

The front of this knit top is 2 layers, as I wanted the sheer bit over the shoulders but wanted it to be opaque in the body part. The plain fabric is a nice thick jersey fabric. Despite knowing that both fabrics have been paired up in my stash for a while, I'm not at all sure where I bought them. The sparkly fabric is 60" wide and I seem to have bought a lot but it had a big flaw across part of it so perhaps I bought 1 yard with no particular idea in mine and they gave me extra. Somehow I think I got the plain knit from the remnant shelf at Stone Mountain. I always find nice knit fabrics in their remnant bin and now that I have several knit top patterns that can use multiple fabrics I find that a something like a 3/4 yard piece potentially useful.


Teal knit top front

I wasn't sure where I would hem this top and cut the sparkly overlay front piece about 1/2" longer than the plain piece underneath. Once I sewed it up it seemed to be fine as a raw edge so no hem anywhere. Score for quick sewing!

Teal knit top side view


Teal knit top 1


teal knit top close up fabric

The mesh has a nice amount of sheerness but not too much. I just sewed the whole thing with a regular size 80 needle, and paid no attention to the sparkles with are presumably tiny plastic dots that made no difference to the stitching. I was careful with pressing, using a press cloth as I don't want melted plastic sparkles on my iron.


Teal knit top back view

More ironing needed, apparently :)  of that crease on the back and the sleeve.


Burda 6630 envelope

Here's the pattern envelope - I really like the short sleeve version and I think this pattern will be used again when summer arrives. I sewed a 38 which is my usual size in Burda, grading out at the hips.
I do think it is a bit short over the shoulder, like the raglan shoulder piece could be longer, look at the sleeves in that photo above where I'm standing in front of the tree, when I wear it there are some slight drag lines on the sleeves making it look like there needs to be a bit more length where the shoulder piece meets the sleeve piece. But I have a different Burda raglan knit top pattern that fits well so I'm not entirely sure. In the white version on the right on the envelope the same lines are on her sleeve.

So that's it for my 2018 sewing blog posts - but not the last item I have sewed this year. I just finished a quilted vest and am about to start another pair of Ash jeans. Our jeans class is on the calendar at Hello Stitch for Jan 26-2. The weekend seminar classes are really fun. It's a great way to spend time doing what you enjoy and being with other sewing obsessed people, lunches are included and the studio  has their nice sergers etc. set up so you can really zip along on your jeans construction.

Time to dash - it's New Year's Eve. I hope everyone has a happy and healthy 2019!


Teal knit top 3


Happy Sewing and Happy New Year,
Beth

instead of a garden photo I will include this one of me and my friend Halyna (who has just begun learning to sew this year and is already creating a fantastic handmade wardrobe, she is @zigzagstitching on Instagram). We were taking pictures and a nice man insisted on taking our picture together. And admittedly it sounds a but nutty when you try to explain to people we all about photographing the clothes :) However I'm glad he did.


Teal top and H

Saturday, December 29, 2018

Simplicity 1779 bow blouse in red checkerboard silk

There is something about this time of year that makes me want to sew all my red fabrics. The weather can be a bit gloomy, and red is such a lively color. Perhaps seeing the Christmas decorations everywhere makes me want to decorate myself in a bit of holiday color. Although the shade of red in this one is not quite as perfect holiday red as my plaid dress, but I have a feeling I will wear this one more often.

red bow blouse close up2


I bought this fabric at the American Sewing Guild stash sale back in October. Maybe $ 5.00 for a bit more than 2 yards. It wasn't identified as to fiber content, so I did a little burn test with this and also a piece of silk and the results seemed the same so I will call it silk. It feels and presses like silk and not a polyester.


Red silk bow blouse on form front


And yes, another fabric the required a bit of pattern matching. I'm not sure it actually matters with a large pattern like this, the important thing though is to cut it on 100% on the straight grain so the lines are not leaning one way or the other.

It was a gloomy rainy day when I took these pictures but the blouse certainly stands out.

red tie blouse


Simplicity 1779 pattern envelope

Here's the pattern photo and drawing. I made Version C. This pattern is quite easy and method for making the bow part and the button placket turn out really well. I used this pattern a few months ago when I sewed a blouse and skirt for someone else. That version is in a very luxurious silk and worth taking a look.


back view bow blouse


red bow blouse untied


Red bow blouse cuff buttons

You can see above that I put some plain red buttons on the placket, as they don't really show. One day when I was standing in line at the cutting counter at Joann's there was a bin of clearance buttons, so I found 4 of these red buttons with the little rhinestone in the middle. Just enough for the cuffs. Maybe kind of silly looking but I though the centers echoed the white dots in the fabric.


red silk tie blouse with skirt

So that's my 2nd very economical item sewn with fabric purchased at a stash sale. I love the challenge of finding bargain pieces of fabric and turning them into garments that I wear. In fact I have a dress in mind using some fabric I got for free at Hello Stitch a few months ago. It's not a very practical design but free, right? It's worth it to stretch my style when the cost is nothing.

And up next, I'm sewing some more jeans in anticipation of teaching a Jeans Sewing Class at Hello Stitch, that's scheduled for the weekend of Jan. 26-27. On the listing it mentions the Ash Jean pattern from Megan Nielsen, which I have used to great success (will blog soon) but if you already own a jeans pattern such as the Ginger jeans or the Ames jeans then feel free to use that one.

Also upcoming is a quilted jacket class in late February (over 2 weeks to give you plenty of time for the quilting) and then Fitting classes, more Lander pants, Garment Copying, Wrap dress class, and a 2 versions of a multi-week class for either new stitchers or more intermediate level. All the classes are listed on the Garment Sewing Class page at the Hello Stitch website.

I have at least one more blog post planned for this year, as I just sewed something both casual and sparkly that got rave reviews when I posted a peek in Instagram. Plus I want to do a year in review.
Up next, I have SO many things on my to-do list, including an unnecessary coat that will use up some wool scraps, another silk blouse, and then I saw Meg's Sew Twists and Ties sewing challenge  which I will be unable to resist as I love a good twisty design. And I have a few Vogue Donna Karan patterns that I've never had a reason to make but this will be it.

Happy year end sewing, Beth

today's garden photo, from way back in August. My very best rose bush which must be 30 plus years old, far predates me at this house.  It gives out the most beautiful velvety red roses. Once the heat sets in here around July - August they fade a bit but do stay on the stems for a good few weeks.


IMG_0367

Monday, December 17, 2018

Vogue 8784 wrap dress in silk crepe

Very happy to have this one "wrapped" up. Yes, all the cliches for discussing wrap dresses, I should just get them over with now. How about "it's a wrap" and I did feel that sense of relief when it was completed. A wrap dress with these details involves some fitting adjustments for any figure and I did make more than one test version along the way. However now that it's finished I am really happy with it and hope to make a short sleeved version when spring arrives. The pattern is Vogue 8784.  Pattern envelope photo below and also a link to a previous blog post with all the details on the fitting adjustments for this pattern.

silk dress on H front view 1

Sophisticated is the word that I think of for this dress, the color and print are not something I would have selected but now that I see it sewn up I think it's very sharp - and gives off a the look of "business executive with a feminine twist" which suits Heather perfectly.

Silk dress side view on form


Here's the pattern envelope. I made the View B although I did make a few changes. Firstly to make it a regular long sleeve.

IMG_4389

I did 2 muslins on this dress, as it was a bit tricky to fit because it doesn't have regular bust darts but the bust fullness is incorporated into the release pleats at the waist. As with a lot of other wrap dresses, I added a horizontal bust dart to allow for more fullness and length over the bust of the wrap part. You can't see it in the silk version but here in the muslin it's visible.

This image is from my previous blog post - here's the link -  which has lots of information on fitting this pattern, and photos of the various muslin variations and changes along the way.


wrap muslin 2nd version 1

My biggest lightbulb moment when working on the muslin version was to realize that the skirt part that wraps under doesn't need to be pleated - in fact it's better if it is flat. Less bulk and a smoother layer under the wrap part.


Silk dress front view2 on form

Another change is that the ties don't really wrap, there is no opening in the side for the tie to go through. The pattern had it but I removed it as Heather prefers a tie that is secured on one side seam and doesn't move around. Wrap dresses where the tie threads through the opening in the side seam and then the ties wrap around and tie can be difficult to wear in that the closure is dependent on the waist tie. In this version, the tie belt is stitched to the side seam on the right side so it never moves.

In place of the tie that threads through the opening, I added a short connector, which is sewn to the side seam and then attaches to the right dress front via a skirt hook. I covered some 3/4" elastic with the silk, and the elastic allows it to be snug but also comfortable.

silk dress hook closure


silk dress inside hook closure

The other side has a skirt hook as well, so this dress is wrapped and in place and the sash tie is mostly for looks.

The pattern calls for a full lining and I like the order of construction which gives a very neat waist seam plus the lining is very secure, as it is stitched to the waist. This keeps the skirt lining from ever peeking out under the hem.

Silk dress pleats thread trace

Close up of this lovely silk fabric. We bought this at Piedmont Fabrics in Oakland maybe 2 years ago? Just waiting for the right pattern and I think this one was the perfect match for it. I lined it with navy blue bemberg rayon lining. I tried the lighter colors like ivory and beige but to me the navy blue looked best. Especially in the skirt of a wrap dress, which can tend to flip open. A peek of beige lining looked too neutral and underwear-ish to me (realize that's not a word but you get the idea.)
Whereas the navy blue lining looks intentional and complimentary.


silk dress on H back view    Silk wrap dress back view on form


Silk dress on H front view

I'll say it again, that's a wrap for this pattern - until springtime. Now that I have the fit worked out on the bodice I want to try the full skirt version. Also so many people have written to say that they appreciate seeing what I sew for Heather - I'm glad you like it and I will continue. She picks fantastic fabrics and I enjoy the pattern puzzle of fitting new patterns for her.

In other sewing news, I'm done for the year on classes at Hello Stitch - what a great year it has been and we have all kinds of new classes on the schedule starting in January, like jeans,  a quilted jacket, and repeating our very popular Lander pants and Wiksten kimono jacket classes. Plus some sewing series classes which will include pattern fitting and dressmaking. Hope to see you there!

Up next, I'm just finishing a red silk blouse for myself that may go into rotation for festive holiday wear. Along with my red plaid dress shown in my previous post - Thanks so much for all the nice words here and on Instagram. I do like the color red.

Happy it's almost Christmas sewing, 
Beth


Today's garden photo, a  rose from back in early October. It's almost time to give all my roses their big pruning, maybe in about 3 weeks. This variety is St. Patrick.

IMG_0539

Wednesday, December 5, 2018

Let's be jolly - Burda 6385 in holiday red plaid

What happens when you make a long sleeved, high neckline, fully lined dress in a woven fabric? You realize how comfortable all your other clothes are. Which led me down the path of thinking about how style affects posture, and wondering if dressing for success does impact how you perform.

Which sound like some serious musings for a red plaid dress I wore to a festive holiday luncheon.

red dress on me 4

I found this fabric at the American Sewing Guild stash sale in October and figured it would work for this Burda pattern which I bought at Joann's when the Burda envelope patterns were on sale for $ 2.49. Adding a couple of yards of lining - of course also discounted - plus a zipper from Wawa and some old braid piping I found in my box of trims means this dress cost about $ 12. No idea what the fabric is, seems like a cotton blend pretending to be a wool. In any case it sewed and pressed well although it frayed like crazy. All edges are serged out of our necessity.


IMG_4446

A few things I like about the pattern and then a couple of things I don't. I cut a size 38 which is my standard size in Burda - generally always fits me through the neck and shoulders, which is the important starting point. I added a good extra inch all down the side seams for fitting purposes. I could have graded up at the hip and waist but it's just easier to add the inch and then fit the side seam as needed. Usually I have to take in things at the upper part of the center back but this dress was tight in the shoulders and back. Even the sleeves were a bit constricting in the bicep and that never happens to me. I let out the side at the armhole a good 3/8 on each seam to gain 3/4" on either side, also let out the sleeve that amount which meant going down to a skinny seam on the sleeve but it was worth it for the comfort.

red dress on form close up pocket flap

I also added 3/4" of length to the bodice front and back just above the bust dart. I compared the pattern pieces to a Vogue pattern dress that fits me perfectly and the Burda waist seem appeared too high. It was a good call as it turned out perfectly. Usually I have to shorten the back pattern pieces so another odd thing fit-wise.
On the positive side - the pattern sewed up perfectly and I used the front notch to match the plaid, pretty darn happy with this plaid matching which I feel is almost wasted on a dress I will probably not wear very often. I think Burda sleeves are really nice, fit very well in the armhole across the size range of their patterns, at least that is my experience. This is a fitted sleeve with an elbow dart.

Comparing to the pattern envelope you can see some differences. I was thinking there was an opening in the bodice in the front and real buttonholes but to my surprise there isn't. Instead you are supposed to place the trim to give the look of a jacket and also the buttons. I played around with the trim and the buttons and decided it looked way better without that trim dividing the bodice in an off-center, fake jacket-y way.


For the little pocket flaps I waited until I had cut out and sewn the darts of the front bodice and then tested how they looked cut on grain and on the bias. Bias for the win - of course. Adds a bit of visual interest, and no pattern matching required for 4 flaps!

red plaid dress pocket flaps

Some trim was definitely needed to create the look as on the pattern envelope which was what first attracted me to this pattern. Rummaging in my box of trims I found this black braid piping. Score! No idea where it's from and I had just enough. In fact I would have put it on the sleeve hem but didn't have enough. The plaid fabric is interfaced with lightweight interfacing to stay in shape and then have a lining. I used the zipper foot to sew on the piping first, and then flipped it over and sewed the lining in using the stitch line of the piping. Note that to sew that tight curve I pick up the presser foot and change the angle of the stitching several times just to get around the corner. Make sense?

And done. Also a look at my tailor's tacks which I leave there until I've completed. Once there sewn I don't mind if they fall out, less threads to extract. The reason the pattern envelope keeps appearing in these photos is that I posted a few of these on Instagram previously and wanted to show what the pattern was in progress.

red dress pocket flaps with piping


I brightened this photo up a bit as it was a very gloomy day yesterday, plus drizzling so I'm standing under the patio cover. You can see how fitted the upper bodice is. I'm not saying it's too small, it's actually the style but it caused me to notice that most things I wear these days have a lot more ease or comfort built in. This dress makes me to stand up straight - which is a good thing! In all these photos I'm wearing a gold pin that was my grandmother's. At the holiday luncheon I had been to earlier in the day we were all asked to wear a pin or brooch that had some significance to us. It was so nice to hear the stories and it seemed like everyone was wearing something they had received from a mother or grandmother. Pins are nice and yet I rarely wear them. Mostly because they don't really go with the clothes I wear now. Also this one is gold and diamonds so I'm afraid of pinning it on a coat and then losing it  - that would make me so sad for many reasons. But this day was a great reason to wear it.

red dress on me 2

Red dress on form 1


red dress back view on form

I'm not 100% satisfied with the plaid matching at the center back, it's good at the top, and at the waist and down to the hem but there is a small area in the center back where it shifted just a bit. It also needs a hook and eye at the top of the zipper which I was rushing and haven't yet added. However I can live with it for my $12 dress which I will wear this holiday season, most likely under my black wool coat.  (which I sewed in 2010 and still get a lot of wear for dressy occasions in the winter).


red plaid back view on me


red dress on me 1

Don't look at the garden in the background - a dismal time of year with nothing blooming. Although tulip bulbs are planted so spring is in mind if not in view.


red dress on me 3

So that's the latest on my red plaid dress. Up next on my sewing table is a red print silk blouse (must be the holiday theme with all the red) and maybe something with a piece of velveteen that's been in my stash waiting for the right pattern. Up next on the blog is the silk wrap dress for Heather. And thank you to everyone who commented on my last post about her wool dress.  I agree - she looks fantastic.

Lots of classes on the schedule for January and February at Hello Stitch, here's the link. Another session of the Lander pants, a quilted jacket class, the Ash jeans class and pattern fitting plus garment copying. All the hits plus a few new things :)

Happy Holiday Sewing,
Beth

today's garden photo, perhaps the last bloom of the year on this red rose. The variety is Veteran's Honor, planted about 2 years ago and it's quite a good bloomer.


IMG_0541

Thursday, November 29, 2018

Simplicity 1586 plus wool from Britex = perfect sheath dress

How many blue items can one person have in their wardrobe? I laugh with Heather as no matter what we are looking for, she finds blue fabrics. Although I can't really fault her, because they work perfectly for her.
For this dress I have lots of photos and inside sewing looks, so if you like posts with a lot of sewing details then read on. Or at least scroll through and see the photos.

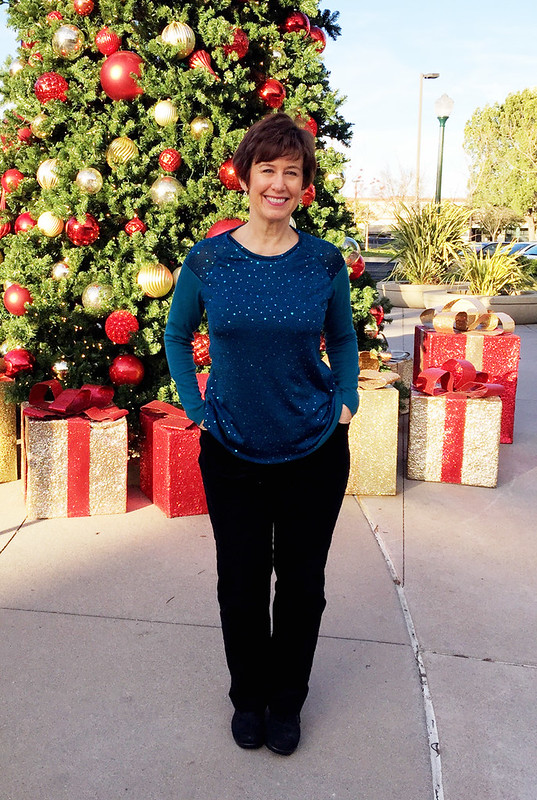
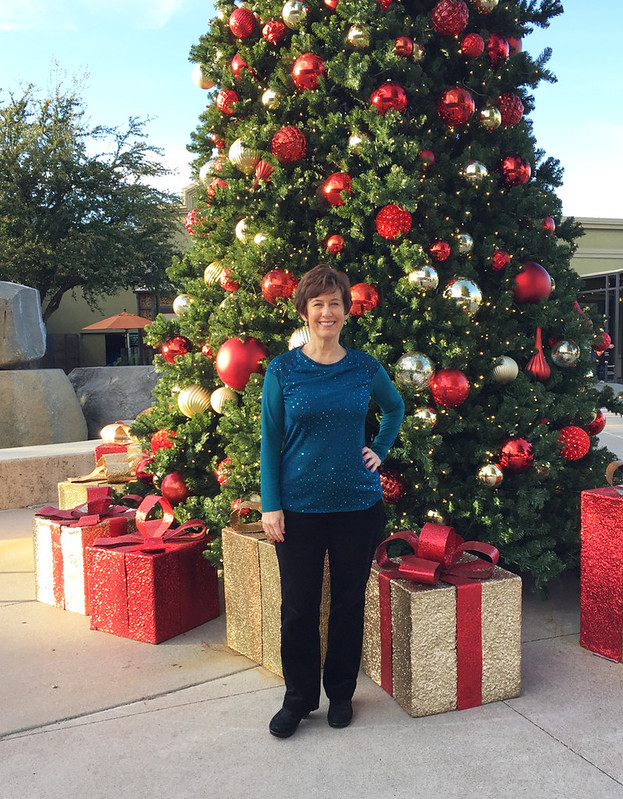
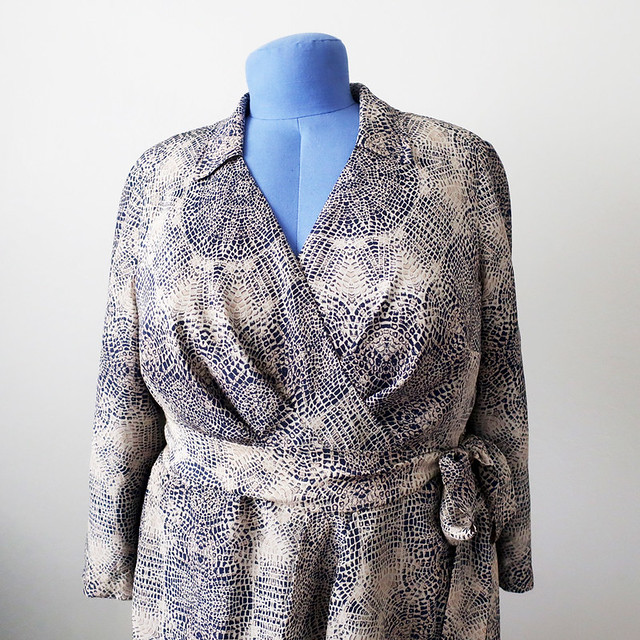
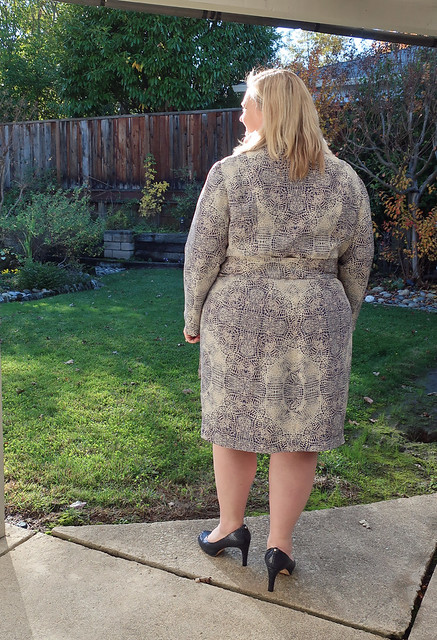
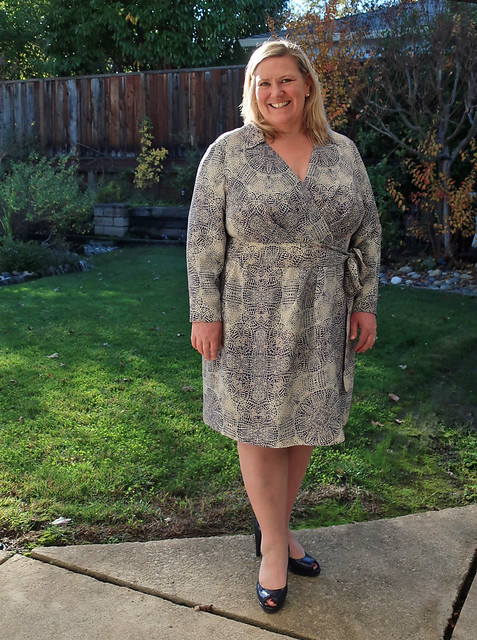
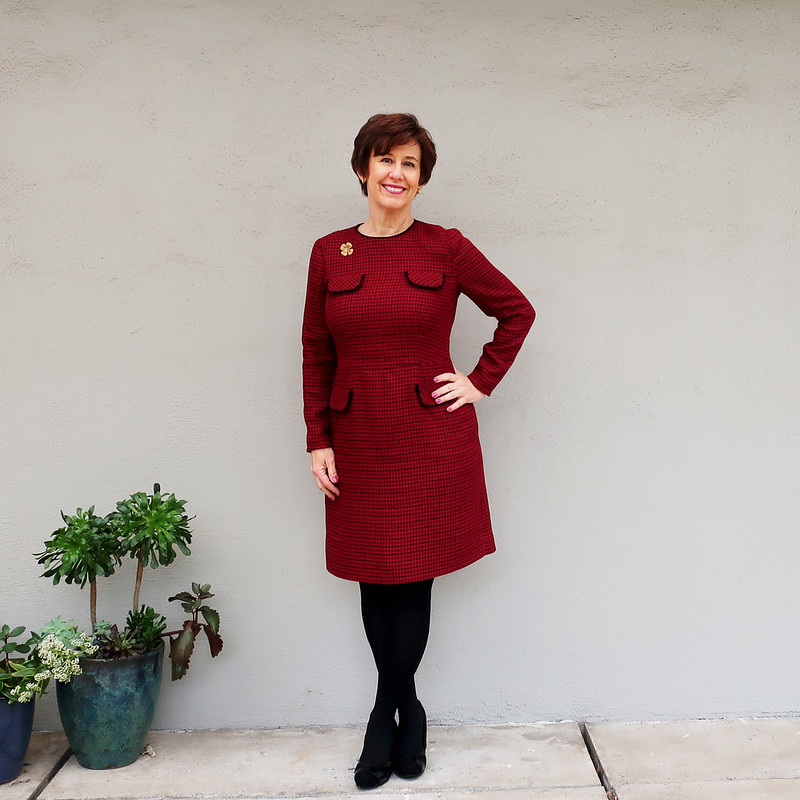
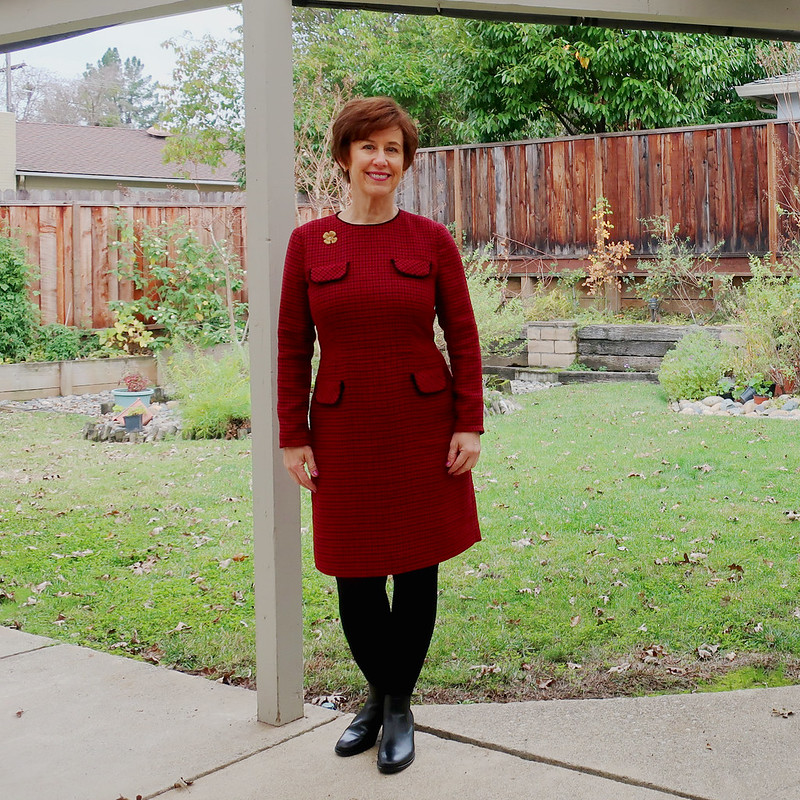
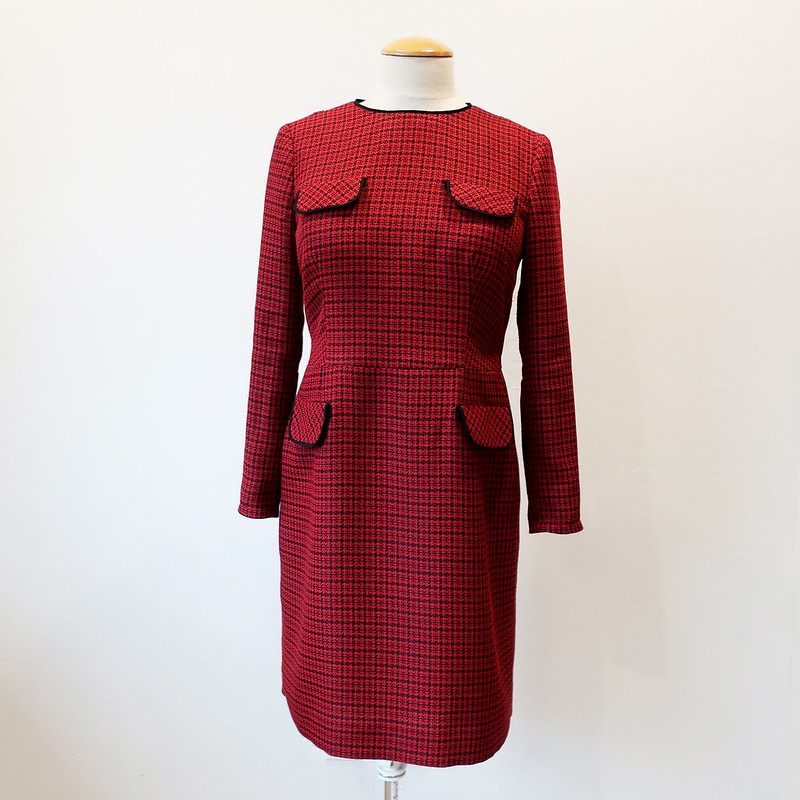
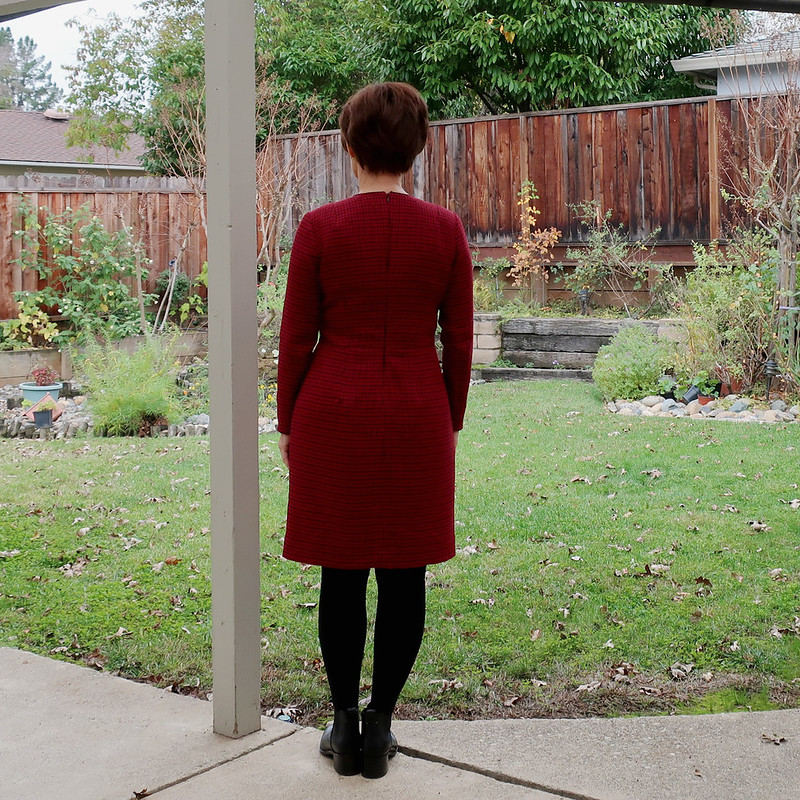
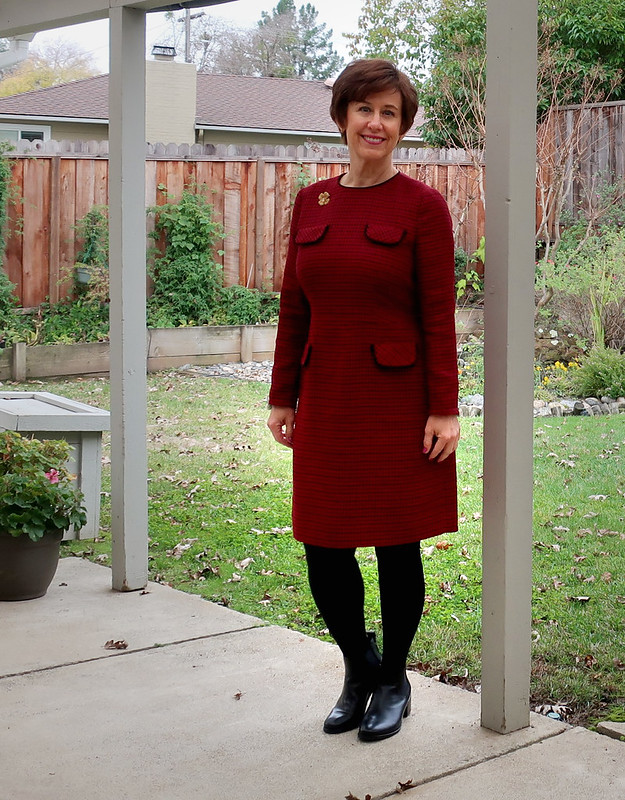
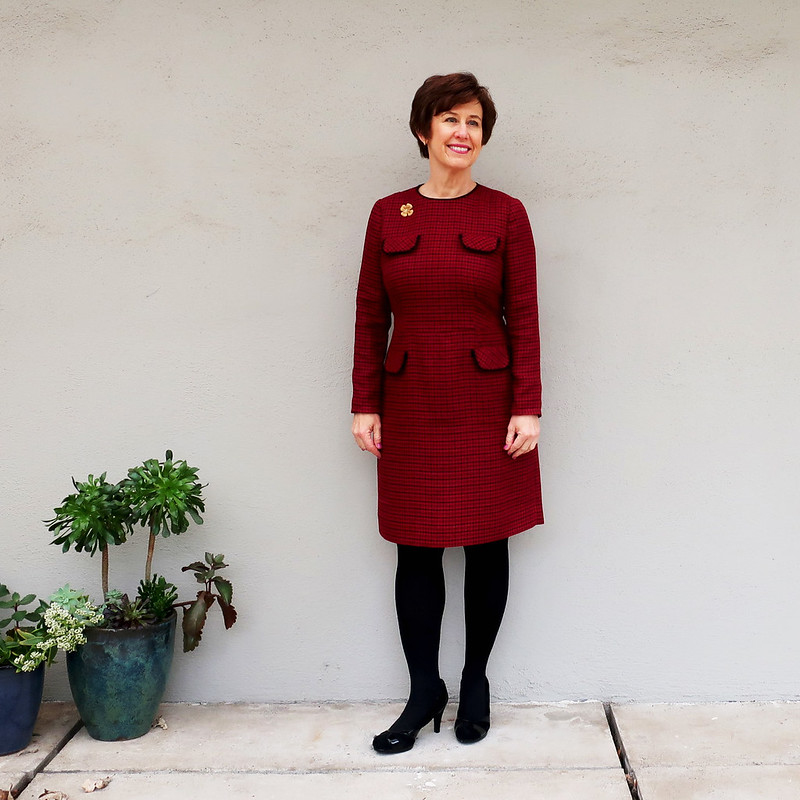
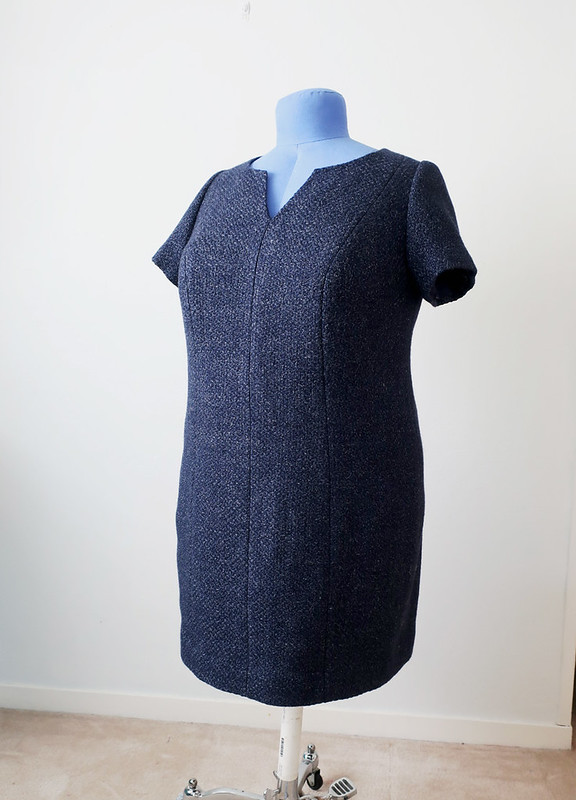
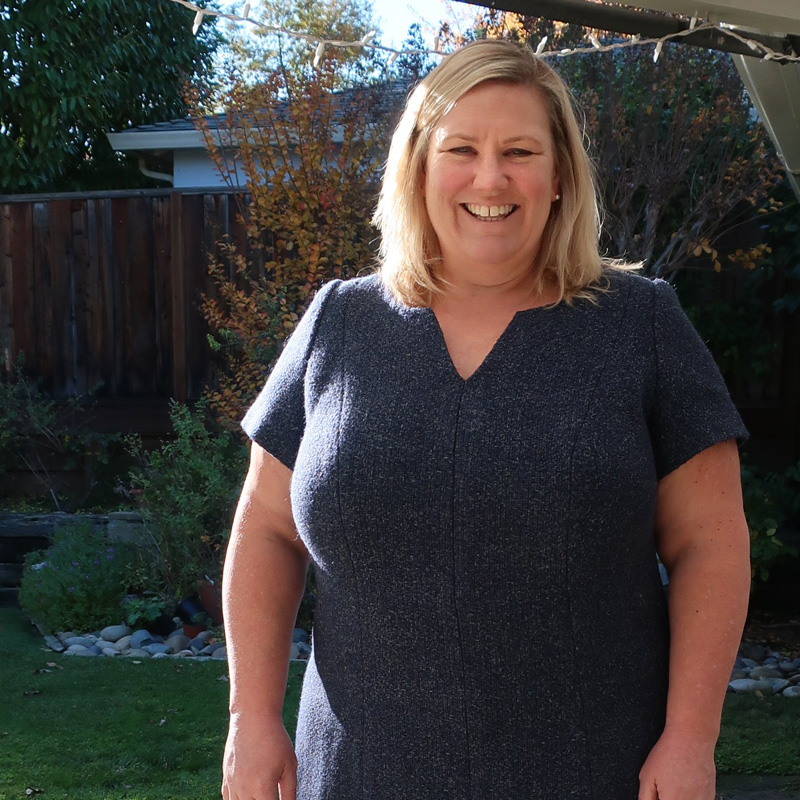
Starting with the finished look. I am so happy with this dress and the fabric is gorgeous. It is a fairly bulky wool but sewn up it makes a very sleek work dress in a color that suits her perfectly.

H wool dress front view

The fabric is from Britex, we bought it last spring and then I set it aside during our hot summer as nobody wants a wool dress around here in July. But once I finished the previous version of this pattern for her I thought it would be a good choice for this fabric as well. Here's the link to that post, same pattern but made of a cotton sateen for a summer dress. If you are interested in pattern manipulation and redesign take a look, as I changed the armhole princess seams to shoulder princess seams. I think on her they give a nice vertical line, plus allow some smoother bust adjustment on that seam.


wool dress neckline close up on form

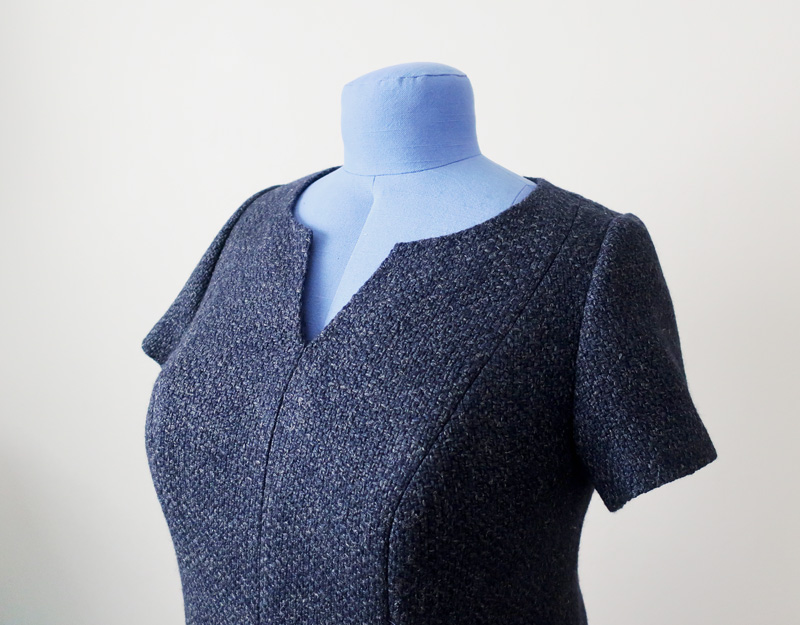
Sometimes a slightly thicker fabric is your friend - in that it sews quite easily, of course wool can be steam shaped and practically molded but it hides a lot of wrinkles or little shadows that might appear on other fabrics. Gosh I love this fabric and wanted to make a jacket - but she was set on a dress. In the end a good choice!

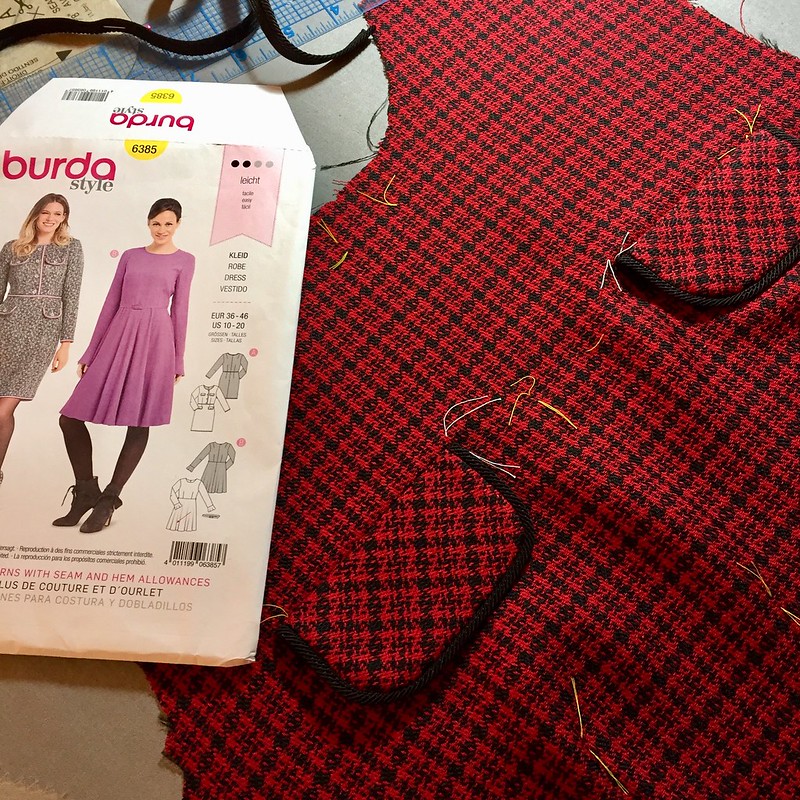
Sewing details. Starting with the basics - what color of thread to use?

wool dress thread choices

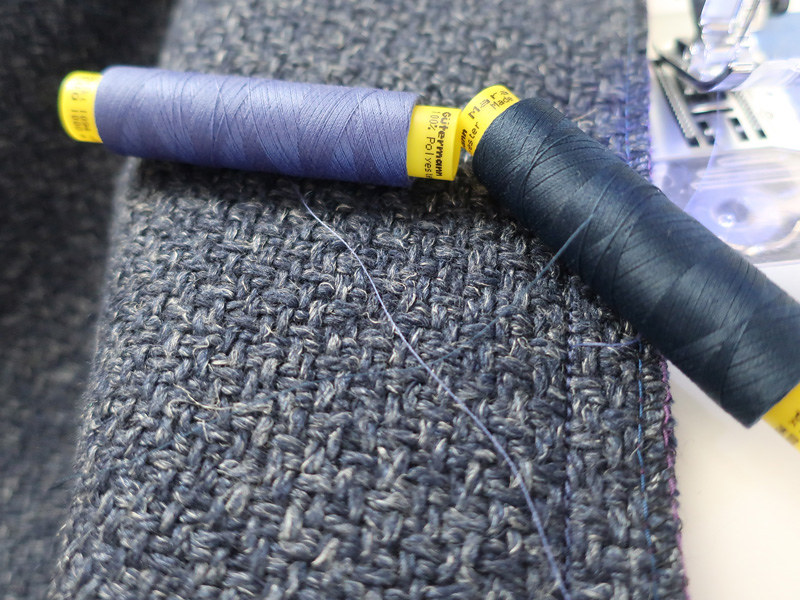
I used the lilac thread on the left instead of the navy blue thread which might seem like the first choice. When sewing on dark colors I tend to use something a few shades away from the fabric color. Not wanting it to disappear - I want to see the stitches when I'm sewing and if you need to remove anything, that navy blue thread is not your friend. In most fabrics the thread in the seams will never show and why not make your life a little easier?

Next decision, interfacings.

Wool dress interfacing test

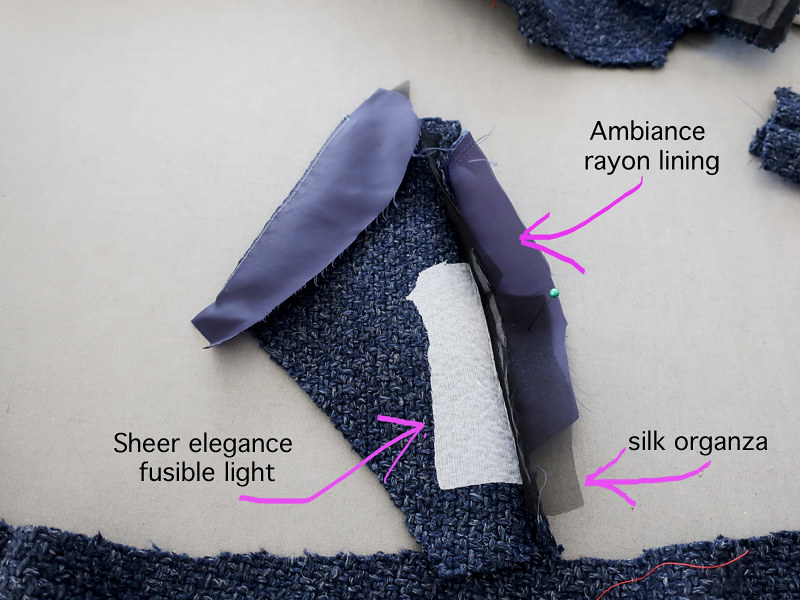
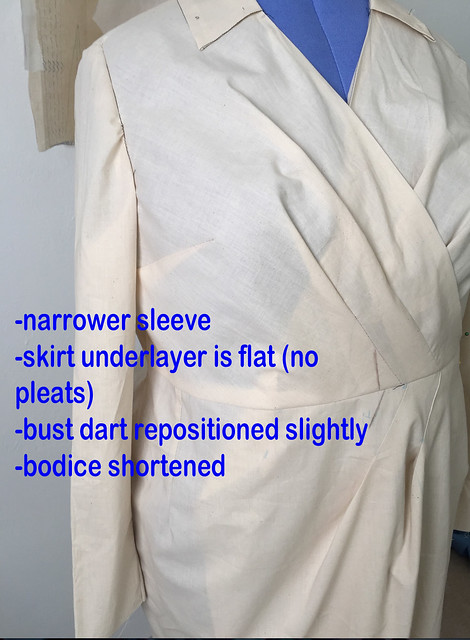
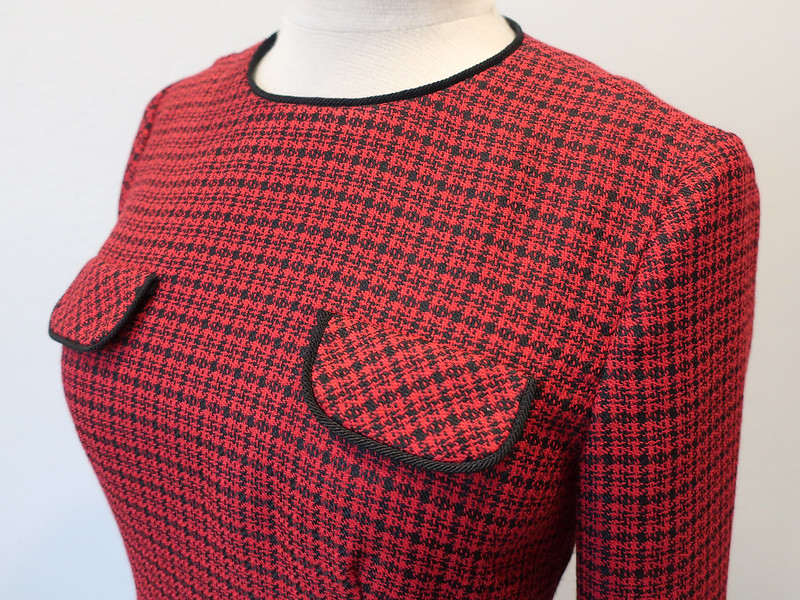
Here's my little test sample. I put all the interfacing choices on a scrap of fabric. Then I sew some seams, add lining or other edge finishes just to see how everything goes together and which interfacing works best for the fabric. And even the location on the dress. Most garments are a mix of interfacings, I rarely use the same one on every part of an item. Here I determined that the fusible held the wool in shape, kept it from stretching at the neckline but it didn't give the crisp edge that was needed on that neckline and the center V. So I added silk organza and that combo worked beautifully.

wool dress interfaced neckline inside view

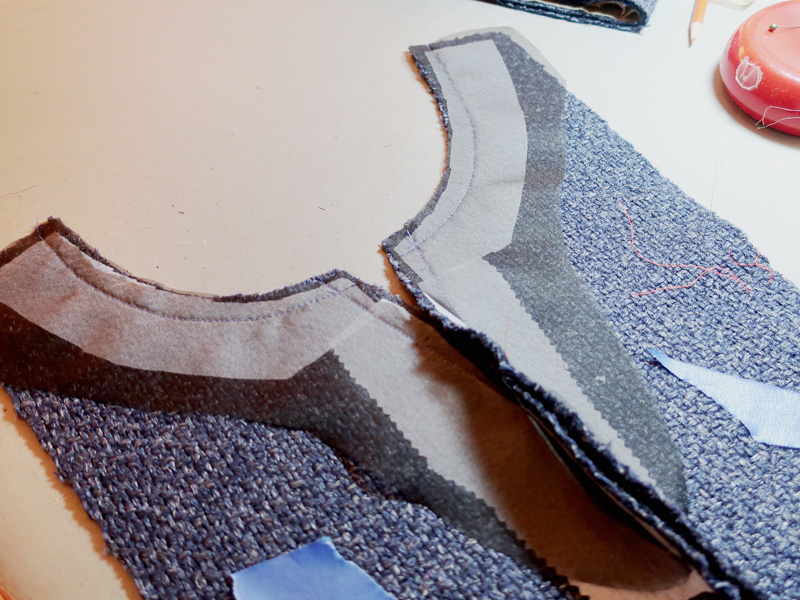
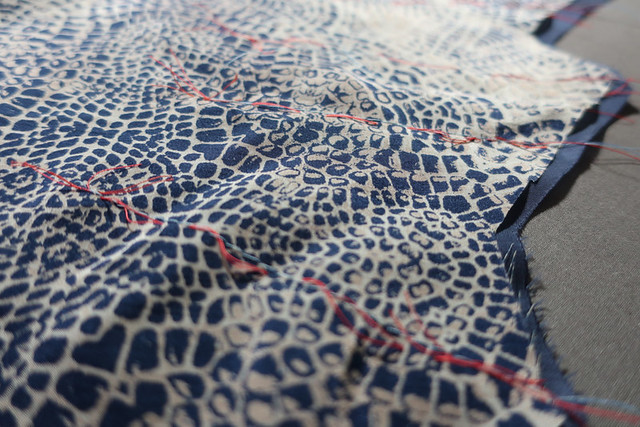
This is the center front of the dress. I did all the work on that center front, both to stabilize and sew the front seam before attaching it to the side panels. That way it's locked down and not going to change shape as I work on the rest of the dress.  Blue painters tape on every piece of this, on the wrong side, which just makes it quick to know right/wrong side and not mix anything up. I put the tape pieces on as I cut out and while I'm doing my tailor's tacks.

I love it when I learn a new technique!
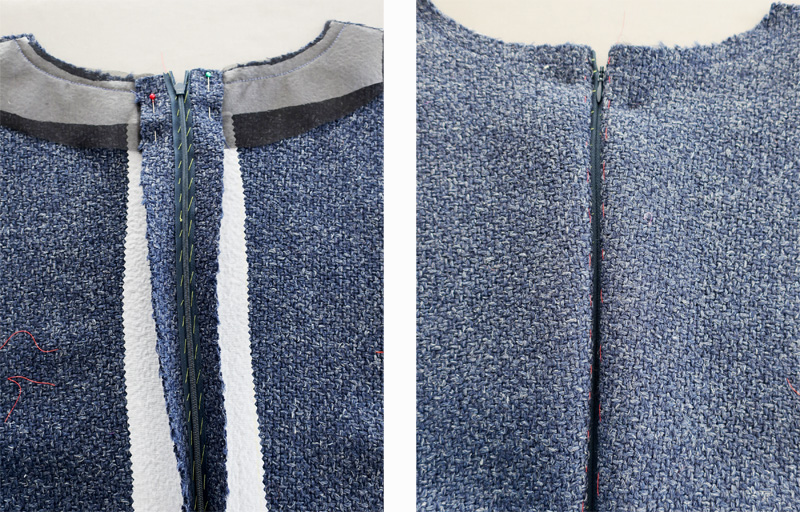
wool dress zipper construction

I saw 
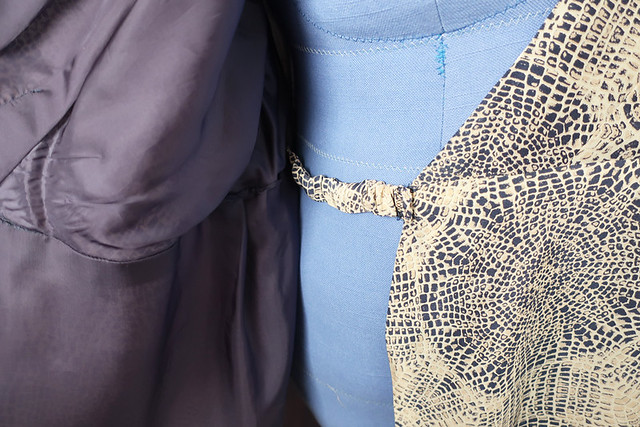
this method on the Threads Magazine website (I think).  A slightly different way of putting in an invisible zipper - you baste the center back seam closed, baste the zipper to the seam allowances, then stitch it in. This method allows you to have the bottom of the seam already stitched up as opposed to going in after the zipper is sewn in and doing that part of the seam. On the right I haven't pressed the seam so it still shows a bit.

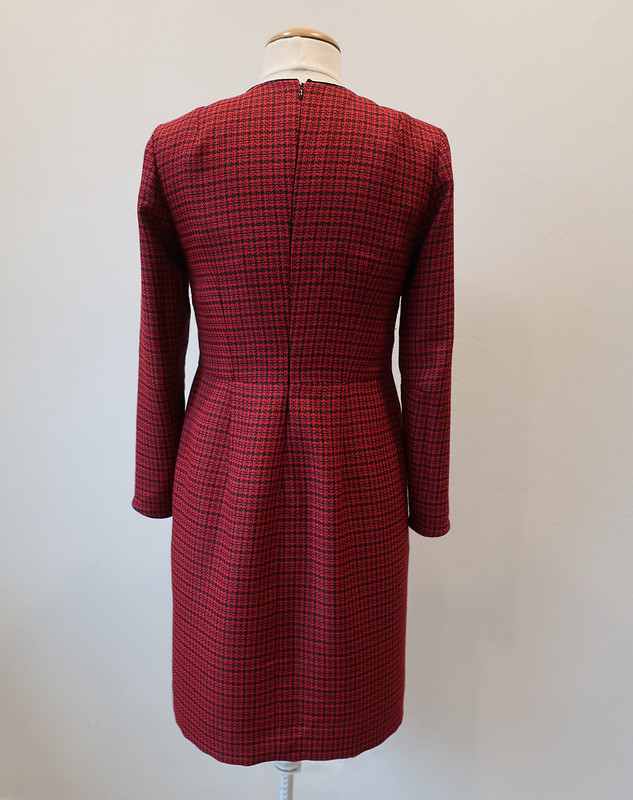
Here's the finished zipper. I'm finding this dress form that I made a while ago in Heather's size somewhat useful - it's a tiny bit off in some areas - I think I overstuffed it. But the bigger issue is that it's tilted and I can't really fix that without taking it all apart.

wool dress on form back zipper


Wool dress on form  side front


H wool dress back view

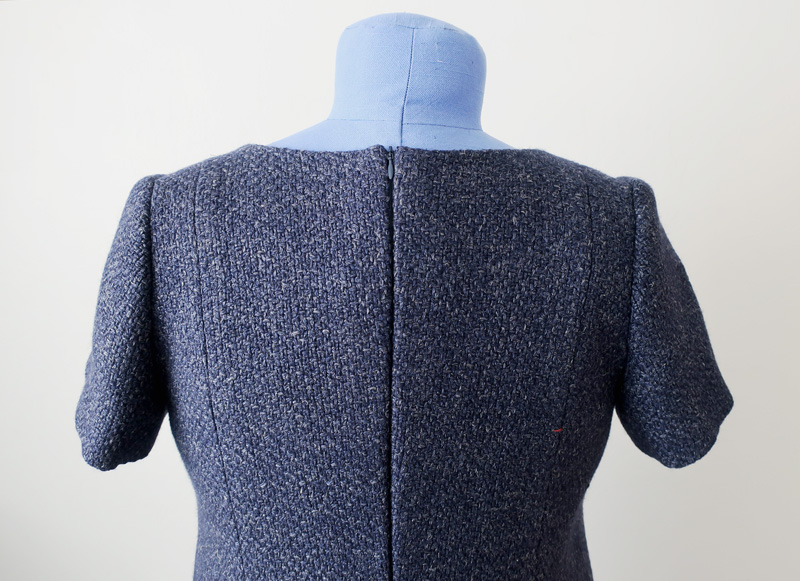
I did make a walking vent in the bottom of the dress, which isn't necessary for striding actually, but I always think it looks nice and helps when you sit down so that there isn't pulling around the hem. We took these pictures around 3 in the afternoon on Sunday and the sky was so clean and blue after a few days of rain. Such a change from the previous week.

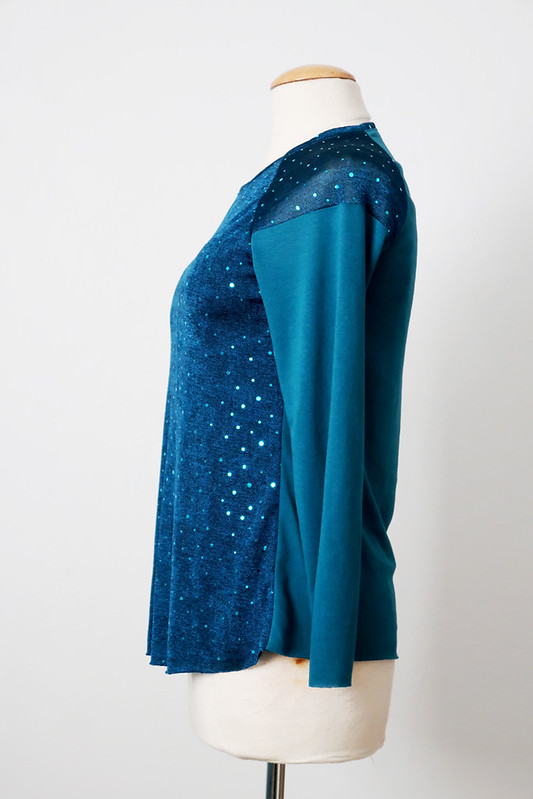
The last version of this pattern was sleeveless so for this one I needed to figure out a sleeve pattern piece and ended up making my own. I follow a few Russian dressmakers on IG (whew their talents are amazing!) and saw a quick video on how to draft a sleeve that made so much sense. So I tried it and perfection. I will never stress about a sleeve again. Maybe 😌. In any case I will try to post how I did it on my next Random Threads post.

Here's my test sleeve using a scrap of wool. This is hand basted in but I thought it was great so onward with cutting it out in the actual fabric.

Wool dress test sleeve 2

Wool dress sleeve closeup

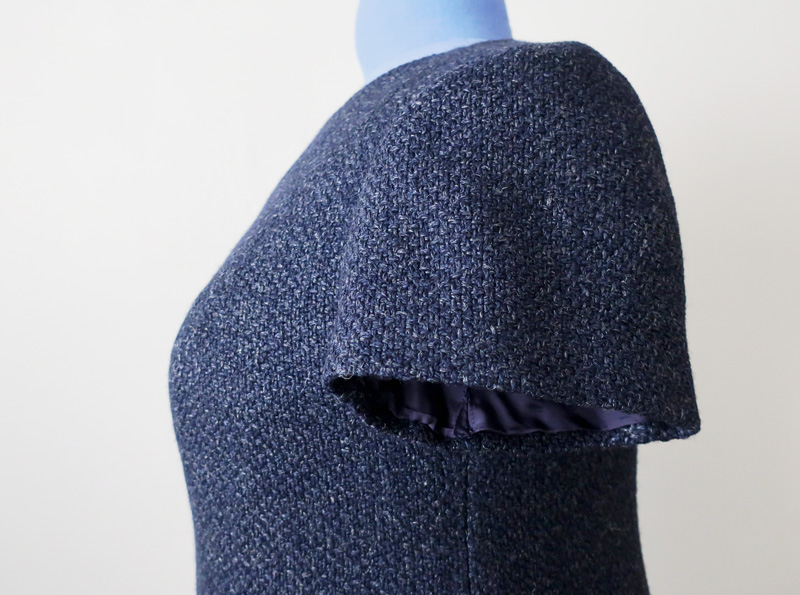
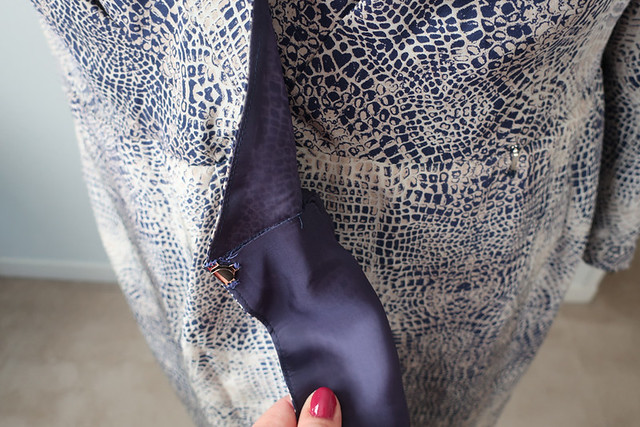
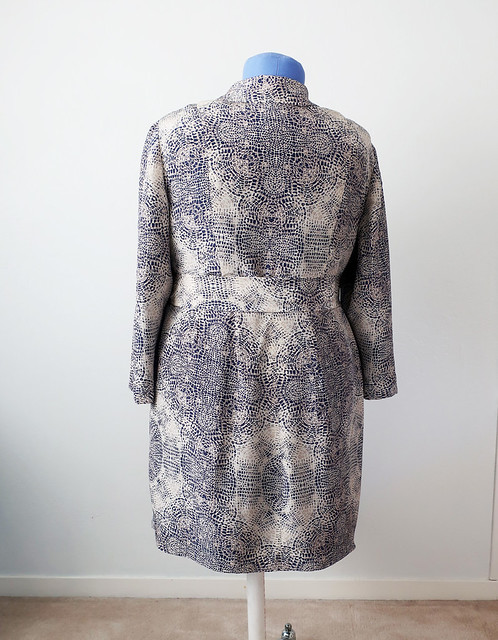
There's a peek at the lining, the dress is fully lined to the edges including the sleeves, which have a slight pleat at the hem edge in the lining for movement. Hand sewn there at the sleeve hem.

I had to guess on the sleeve length but looking at the proportions on the dress form I just picked a length and it worked out. The goal was a short sleeve but not a cap sleeve, and a slim fitting sleeve. It needed less width than I thought to fit into the armhole nicely. There is very little sleeve cap ease which works well in this wool bit still allows for fit around the arm and also comfort.

H wool dress neckline


H wool dress side view

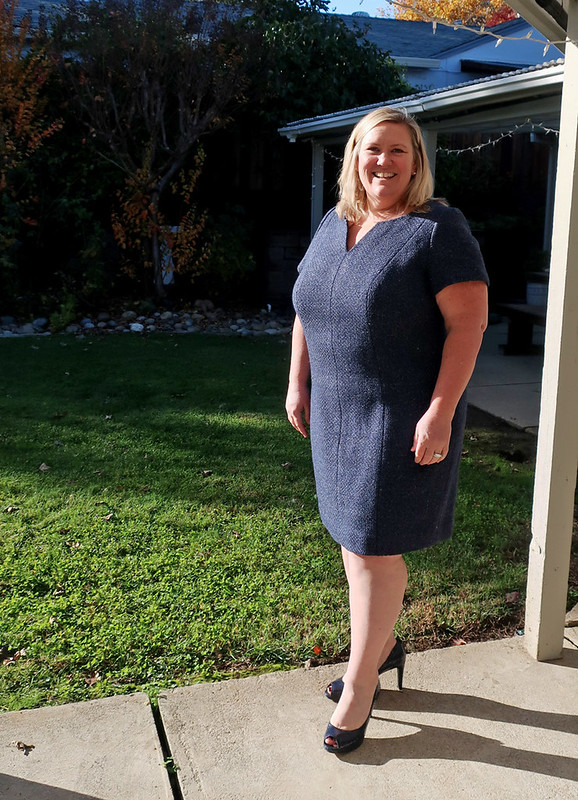
Wool dress completed and ready for winter. I guess some people don't like to wear wool, too itchy, allergic or even too warm for them? But I love it and it sews so beautifully.

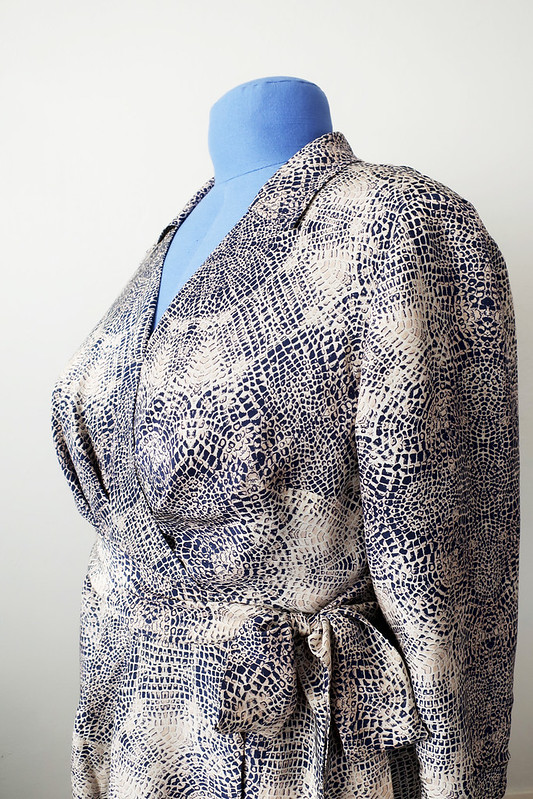
Next up I have completed 2 other items for Heather including the silk wrap dress and a blazer jacket. I hope you like seeing things I sew for her  - I've received some lovely emails to the effect that it's interesting to see garments sewn for a variety of shapes and I agree. I'm always looking online to see new techniques or how things fit on various people.

As for selfish sewing, I made some jeans using the Ash jeans pattern from Megan Nielsen. I chose a size based on my hip/waist measurement, decided to sew them up exactly as instructed and they fit perfectly. Kind of amazing! I can't guarantee that would happen for anyone else but I struck lucky on this one. I like that this pattern has 4 variations, skinny, slim, straight and flare. Everything you could need! I'm teaching a weekend jeans workshop at Hello Stitch on Jan 26-27 . By then I might have a few more pairs in my wardrobe. By the way you can use this Ash jeans pattern or any jeans pattern you have, like the Closet Case Ginger jeans, or Cashmerette, Deer and Doe, etc. It's flexible so if you already own a jeans pattern that's fine to use.  I will post my Ash jeans in the next week or so.

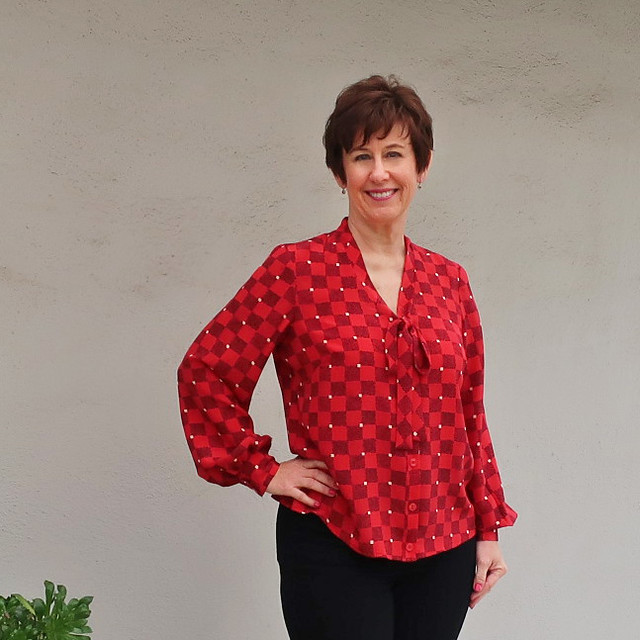
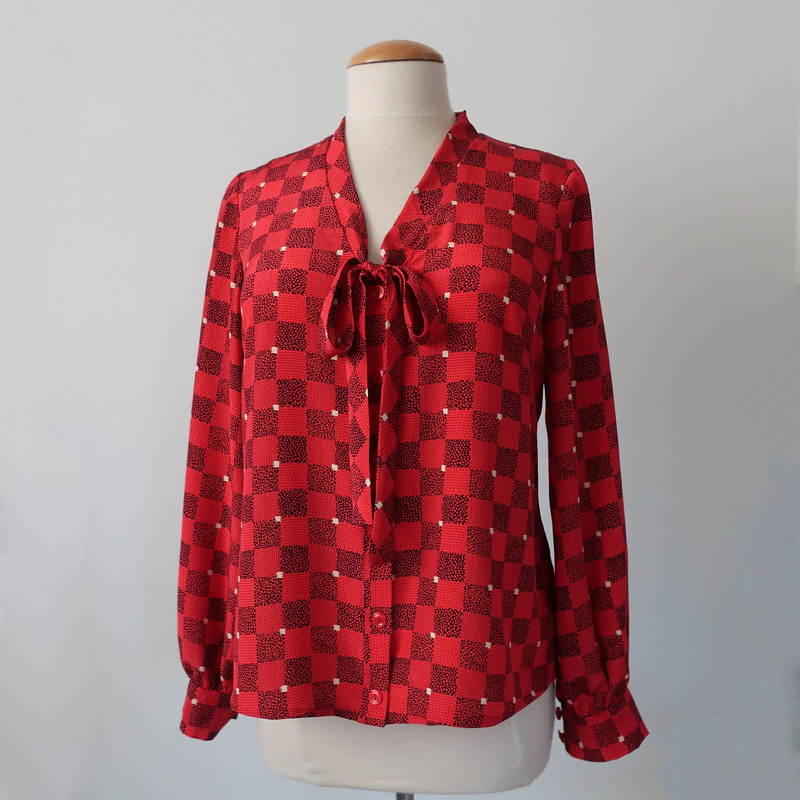
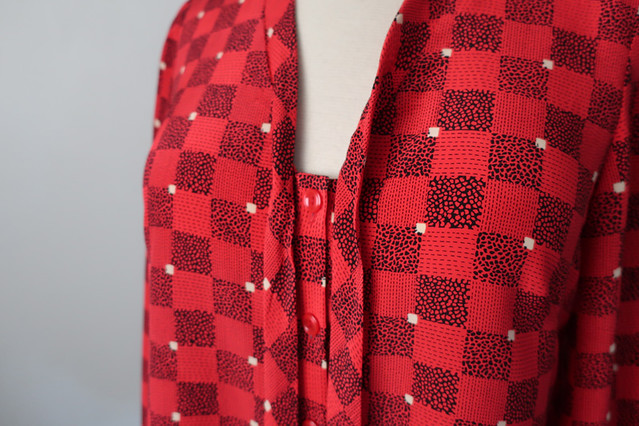
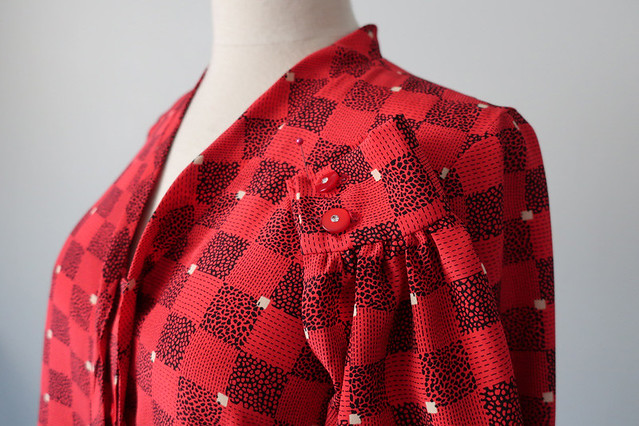
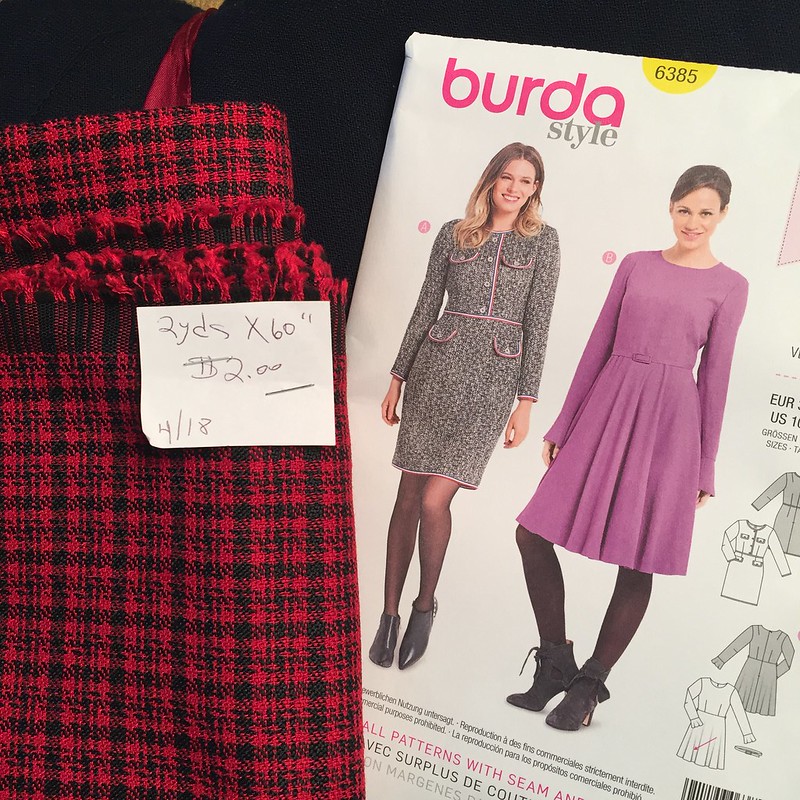
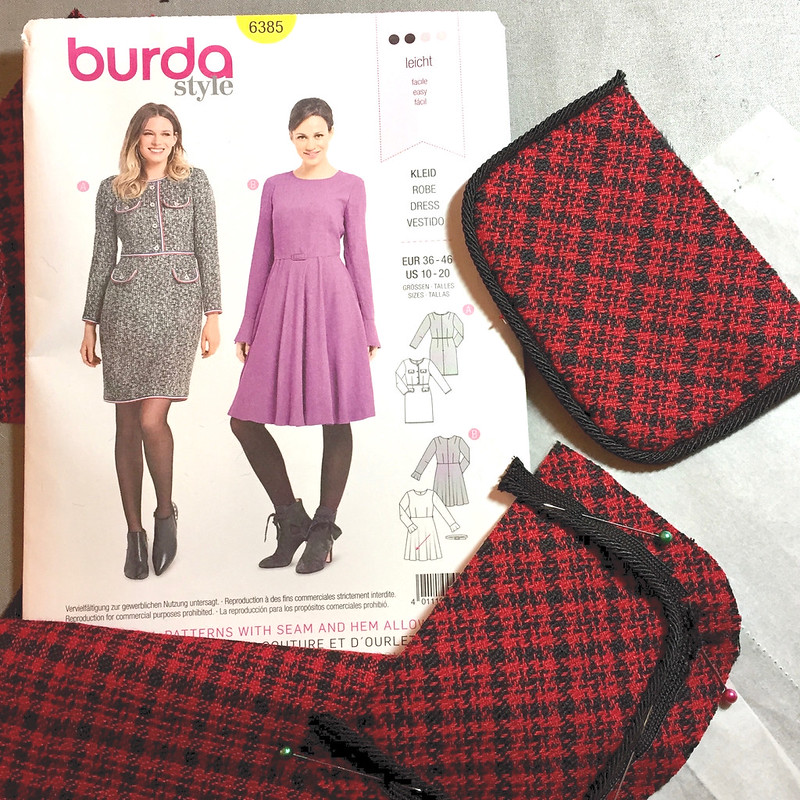
Other projects in mind - I have some red print silk that is calling out to be a nice bow blouse for the festive season, I just finished a red plaid dress which also seems right for winter and I want to make a ponte knit turtleneck color-block dress with McCalls 7430. Enough on my to-sew list, right?

Happy Sewing,  Beth


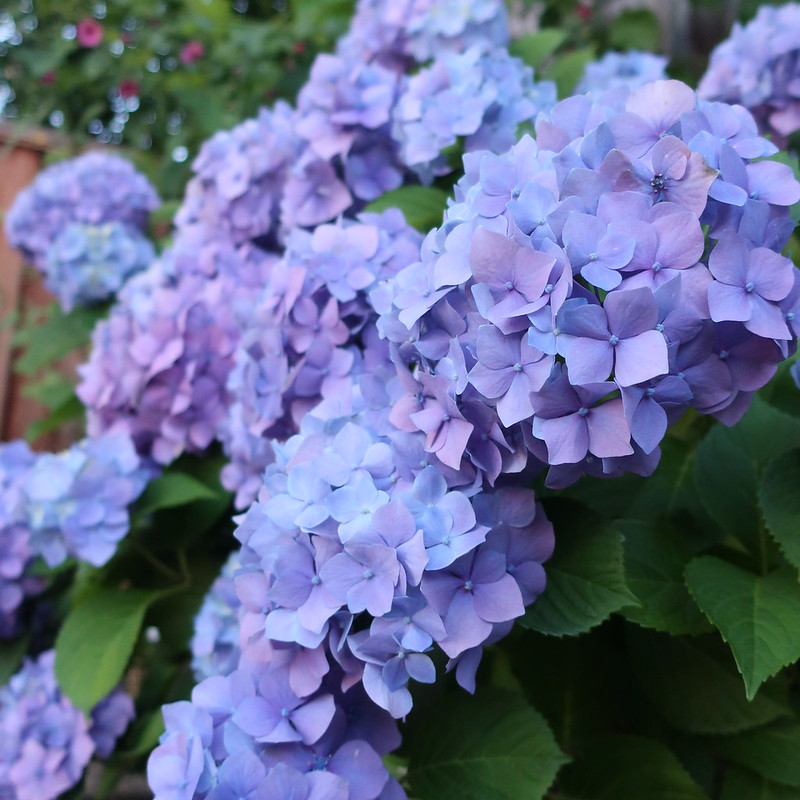
Today's garden photo - a throwback to this past June when the hydrangeas were in full bloom.

IMG_0124