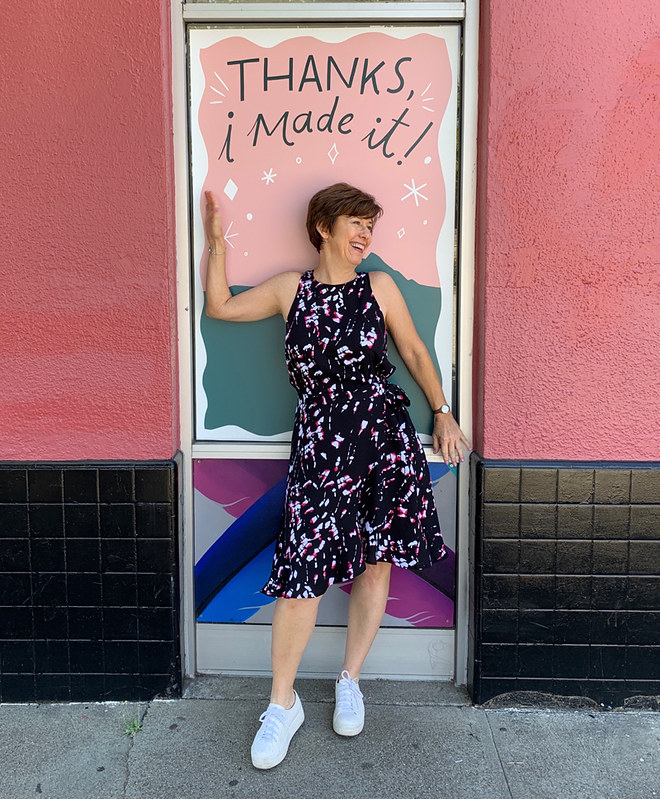
The following photo illustrates my glee at the fact that I have squeezed this skirt from what was left of the rayon print fabric shown a couple of weeks ago. Recall that fabric? which I used to make my faux jumpsuit, seen here in this post. By the way, speaking of previous posts, thank you for all the sweet comments on my last dress, the purple one, which was quite popular here and on IG. Now I think I might need a purple coat! But it was over 100 F today here so not even thinking about coats!
And yes, I did take this picture in front of Stone Mountain Fabrics in Berkeley where they have helpfully painted this doorway to the delight of all shoppers.
Let's get to the details of that skirt. I love it!! and you can expect to see this pattern make a repeat performance.
I know I started off making the short version, but for some reason I think I cut off 1 inch from the hem ruffle, as it seemed just a bit too long. Well I will check and see when I make another version.
This rayon fabric is the ideal choice for this skirt, although I think it would work in a lot of other fabrics - now for my constant suggestion - a lightweight denim :)
I made version D, which is the short version with the flounce. It is cleverly designed, quite similar to the purple dress in my previous post, in that the part that is underneath has less ruffle since it doesn't show. Which means that you cut the two front ruffle pieces on the single layer. Now I will tell you a tip for cutting out - ignore the grain lines on the ruffle pieces! There is a grain line but when you make this type of ruffle (which I actually call a flounce or a circular ruffle) the grain is only straight on one section of the piece and the rest is different bias angles, so it makes no difference where you cut it out. And that helped me squeeze this onto the fabric I had remaining.
By the way - all the articles I wrote on the old Craftsy blog are on the new Bluprint website, here is the link to the one I wrote on designing this type of circular ruffle.
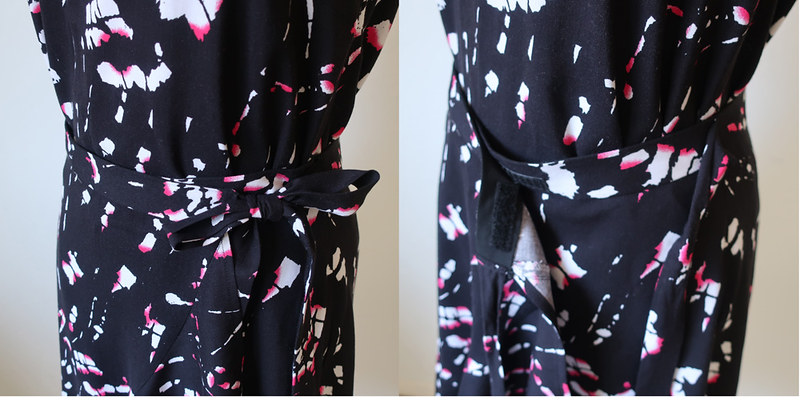
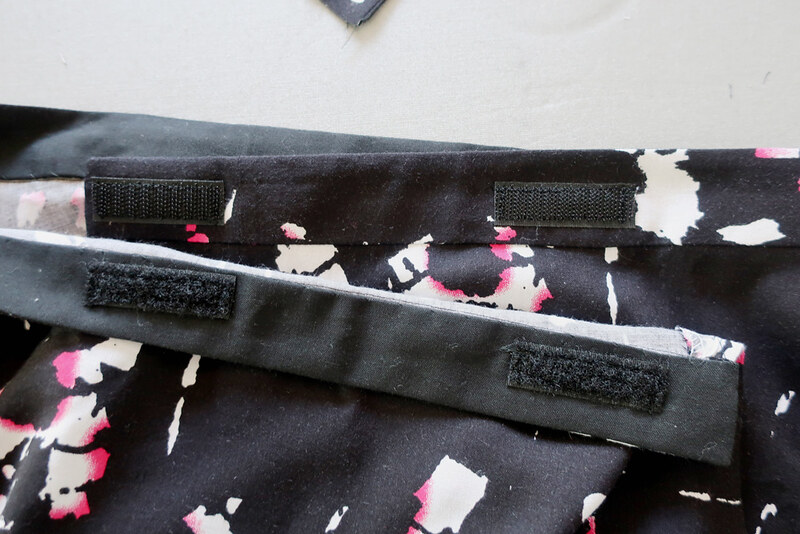
This is supposed to be a true wrap skirt, where the long tie goes through the waistband and encircles the waist. But I had no fabric for that, so I cut one layer of waistband, made a facing of solid black cotton, and please don't tell anyone but I put velcro for closures which leaves plenty of adjustment room for ice cream after dinner, smart huh?
And with the remaining scraps I made a couple of shorter ties to make a bow.
I even had to piece the skirt body at one of the side seams. I always find piecing fabric weirdly satisfying, and have done it 3 times lately. Which may indicate I'm habitually skating on the edge of not having enough fabric but that's what makes it fun.
This past Saturday was our Bay Area Sewists Meetup and I saw Meg of Made by Meg wearing her fantastic Sirocco jumpsuit. She needs to make another one, it looks great on her.
My top is the Bondi top that I made to go with the Emerson Pants which made up my faux jumpsuit.
Once I finished the skirt I felt like it needed a different top so I rummaged through my fabric and came up with a pink eyelet for a sleeveless top.
This is New Look 6107, a pattern from a few years ago that I also got at a Bay Area Sewists pattern swap. I can't say that it is much like the pattern as designed, I used the basic shape but then I changed the button front area, the pattern has a placket behind the center front and loops for the buttons. That would be too bulky in eyelet so I extended the center fronts so it buttoned like a regular shirt. Then I made some self bias and just kind of winged it around the neckline. I think it shows but it was hot and I just wanted to finish it so it's not my best design but it works. I do love the color.
I am a fan of blouses with shoulder gathers so I might make this one again with sleeves in the fall in a silk or something else.
I really like the skirt with a pink top - black is not my favorite so I prefer some other color on my top half. Do you crack up when you look at your outfit photos? I seem to often be looking at something in the distance or perhaps it's the beginning of that phrase "hurry up and take the picture people are looking at me."
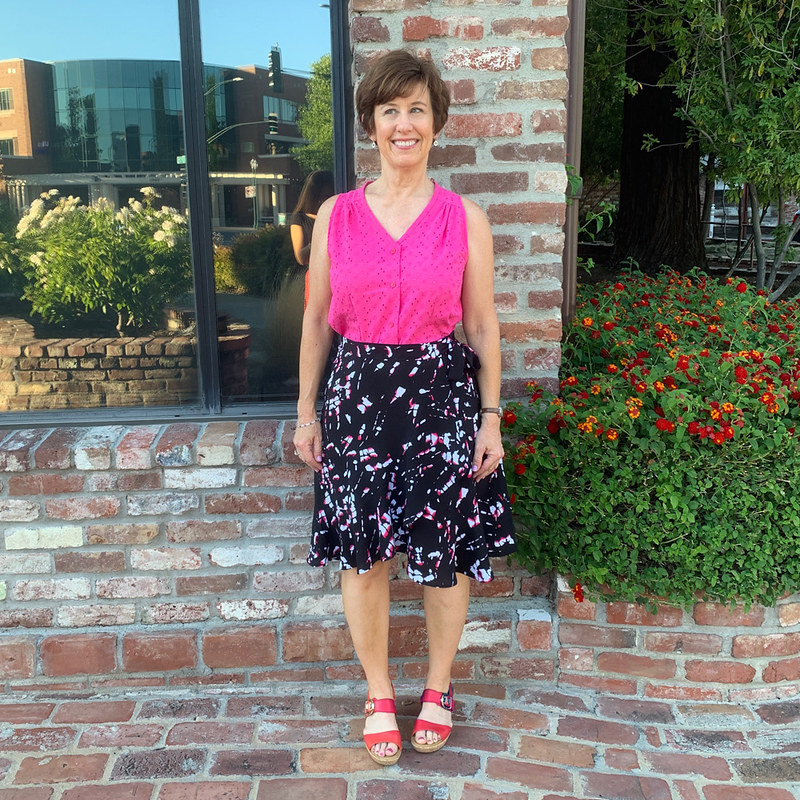
And if one version of this skirt pattern is good that two is even better!
My friend Halyna (Instagram: zigzagstitching) saw my version on the dress form and immediately got the pattern.
So that's the latest on my new wrap skirt. Also I can report that this skirt seems to cleverly stay overlapped when walking, sitting etc. So it is a winner of a pattern!
Up next in my sewing, I'm making another New Look pattern, in gingham as I have to join in on this summer's trend. And then it's head down with a lot of serious sewing, prep for my upcoming classes.
Speaking of classes - just today we added a new class in October - the Jean Jacket. Here's the link. I think that will be a fun item to sew and it's an ideal garment for our weather. Well it's an ideal garment for every wardrobe. You can use any jean jacket pattern you would like.
There are a couple of spots still open for the September sessions of the Garment Copy class and the Zadie jumpsuit class. We'll be adding some classes for November soon as well.
Also there is one spot that opened up in my Jacket Tailoring class in September so if you wanted to do that here's the link.
Happy Summer sewing and stay cool! It's supposed to be in the 100's F this weekend here but we are used to it, plus it means grilling outside, plenty of ice cream and lots of dips in the pool. I hope the weather improves for everyone else.
Beth
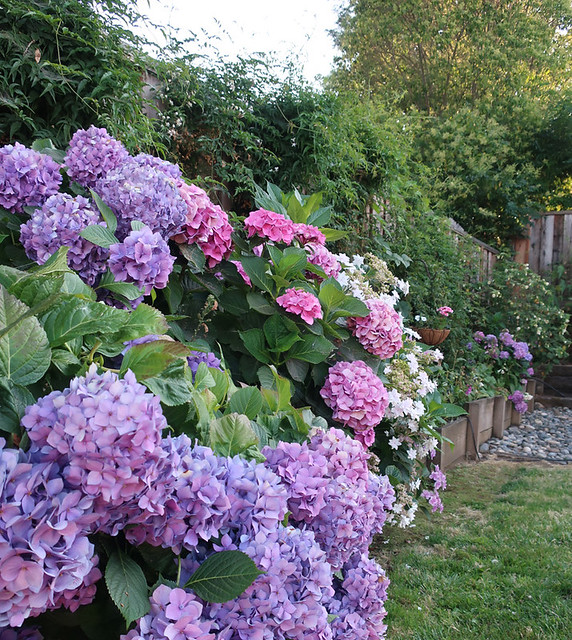
today's garden photo - more hydrangeas, which you can just see in the photo above, on the left side.
This is two bushes next to each other, one is a white and the other the purple version of these shooting star hydrangeas. I didn't even remember getting the purple one so it was a pleasant surprise this year with so many blooms. When the breeze passes by they are just magical.
Thursday, July 25, 2019
Tuesday, July 16, 2019
Flared Dress BurdaStyle #117 April 2019
As soon as I saw the preview of the April issue of the BurdaStyle magazine I knew I wanted to make this dress. The version shown in the magazine is a nice polka dot and I looked around for some fabric like that. As it happened I received a big bag of free fabric that yielded just the right one. Hello Stitch had a fabric swap day a while back and after it was over they gave me what remained to use for making samples for classes. So far it has supplied the fabric for my sample Myosotis dress and my first Zadie jumpsuit - so not a bad haul.
But the one that catches my eye will always be the jewel tone, in this case a purple mystery fabric, probably a poly crepe. I am really happy with the result, although there are a few small things I can gripe about. But on the whole I like it - and have worn it already.
Mostly it's the length! I am on the smaller side, 5'3" maybe a half inch more if I stand up straight :) and I think the skirt length looks better on me if it's just at mid-knee. So about 2 inches shorter on this one would have been nice. Although I realize it's supposed to be this length and I decided to just go with it instead of fiddling with shortening which would have been a pain with the asymmetrical skirt pieces.
And dress lengths seem to be getting longer again. Fashion - always doing this to us, right?
A change I did make is to lower the neckline a bit in the center front, it was a higher cut, more of a boat neck (where did that name come from?). Anyway - those necklines always feel a bit uncomfortable on me so I rounded it a bit at the center from lowering about 1/2".
That twisty waist sash was a total puzzler and thank goodness for this very thin fabric. It is probably impossible to see but the larger side twists and is caught in the skirt under where the ruffle starts, and then the smaller side loops around that and is caught in the seam between bodice and skirt. At least that is what I gleaned from the Burda instructions and looking closely at the example for many minutes.
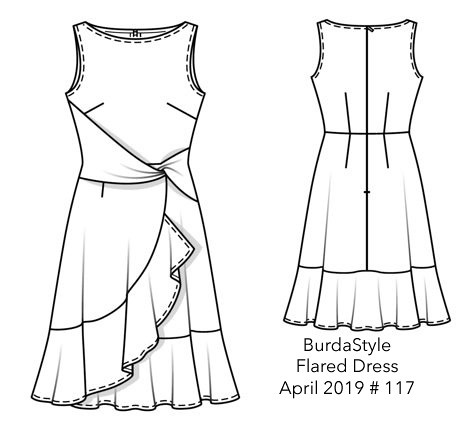
I think the best thing about this pattern is the skirt and it would be easy to use the skirt portion with a different Burda dress bodice, or just as a skirt alone.
I treated this dress as a combo of fancy sewing and speed sewing. In that I took my time with the fit and yet I used some super quick sewing techniques in certain areas. Like the hem for the ruffle. This fabric was super unravel-ly which is not fun, so I just serged the edge of all the ruffle and turned, pressed and machine stitched for the hem. Which is pretty much what the instructions said. But for the neckline and armholes it said to finish with bias tape. Nope - I have an aversion to bias tape. At least the packaged stuff. Far too stiff for most garment sewing.
I could have made a facing for the neck and armhole and almost did that when I was thinking of lining the whole dress, but then I decided to go speed sewing on that and skipped the lining. Although I'm wearing a knit slip I sewed a while ago (for wearing under knit dresses) - which is the perfect layer for this one as well.
Actually I'm really liking the fit in the back. Maybe I should make this one again? I cut out a size 38 at the neck and shoulders, and then graded out about 1-2 inches larger at waist and hip. The waist twisty sash thing is cut on the bias, and I cut it the same as the pattern and based it on, then later I had to open up parts of the side seam at the top and bottom of the sash as it was too loose there. So basically tightening up the sash so that it would lay flat against the body.
There's the tech drawing and the magazine photo. I really like the proportions of the ruffle. The skirt is not an overlap but is two pieces with a curved seam joining them and the ruffle sandwiched in between. Also maybe I need a hat??? (nope)
Attempting a better pose for photos here - trying to emulate my friend Laura Mae who I think has master the art of blog photo poses (which I have not :)
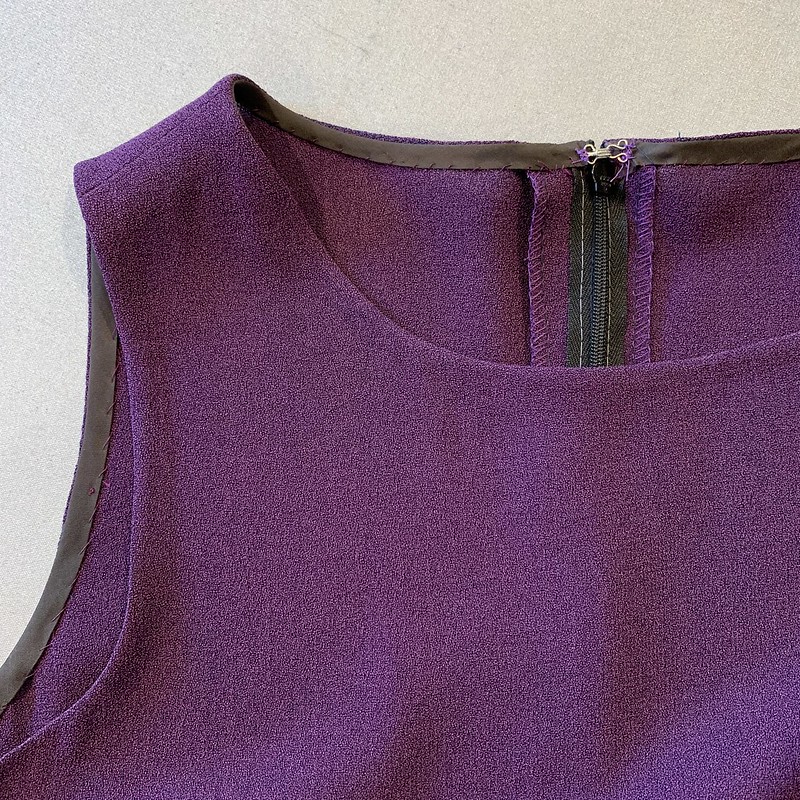
What about the inside? Well since I decided not to line it then the neck and armholes needed finishing. I cut bias strips from a scrap of bemberg rayon lining, about 1.24 inches wide, and pressed one edge under by 1/4". Then I stitched it on at the 5/8" seam line, trimmed and clipped that, pressed inside and then hand stitched the bias to enclose the edges. I'm a pretty quick hand sewer so it was probably faster than making a facing pattern piece and dealing with that. You can see the grey basting thread on my zipper - I machine baste invisible zippers in, and typically use a contrast thread color so I can see the basting. And no need to take it out - it's on the inside of the garment so I don't care.
The one drawback to the combo of this lightweight fabric and no interfacing around the neckline is that it is a bit limp and you can see some ripples when I wear it, but I can live with that.
So that's my latest Burda magazine sewing, with a few new things traced out and ready to go when I find a minute.
But this is not the last of a skirt flounce this summer - my other finished project also has this feature. It's the summer of ruffles - they are everywhere.
Happy Summer Sewing,
Beth
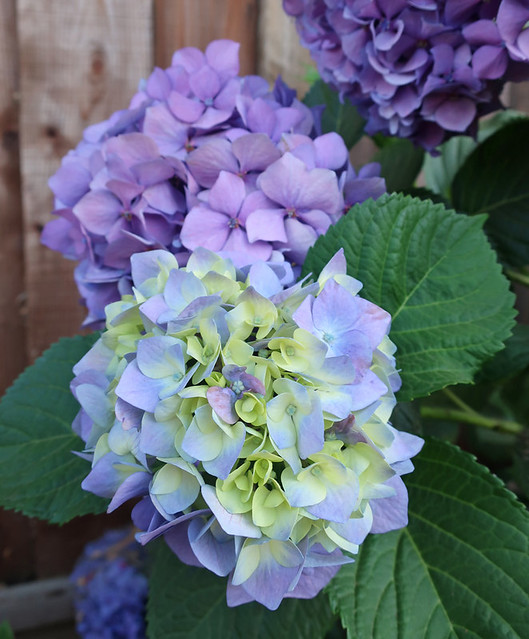
and today's garden photos, it has to be these purple beauties. Right now I have a wall of hydrangeas across the back of the yard and I couldn't be happier every time I look out.
Subscribe to:
Posts (Atom)