The title of this blog post sums up this project, it feels like it was epic and has taken me forever due to a variety of reasons. I had decided to use traditional tailoring techniques as specified in the Vogue pattern instructions, which call for use of hair canvas and pad stitching for the jacket shaping. I haven't used this technique in a long while, preferring to use fusible interfacings mixed with some hand sewing to achieve shaping in a quicker way. So that was time consuming - but what else do I have these days of covid semi-confinement. Also I have no need for a new outfit, as I haven't even worn some of the standouts I made in the previous 8 months. So a slow sewing project seemed just the thing. However it did take me even longer than anticipated as I am teaching monthly classes for Hello Stitch Studio via Zoom and have found that teaching in the virtual world is far more time consuming than in person. I'm not complaining - it's just a fact that preparing for the online classes is so different than in person teaching. Although now that we are a few months into regularly doing the online classes I have figured out a lot, and have the camera mount gadgets to prove it :)
In the next few months we are offering even more classes including Pattern Hacking (you know I love to get more mileage out of a single pattern!) At the bottom of this post I will add more info and links to sign up if you are interested.
Back to the vintage Vogue suit which my photostream tells me I stared in early November. I am 99% sure I picked up this pattern at a Bay Area Sewists pattern swap sometime in 2019 - back when we could meet in person. It was irresistible since it was mostly uncut and in my size (12 in Vogue), although a little battered around the edges.
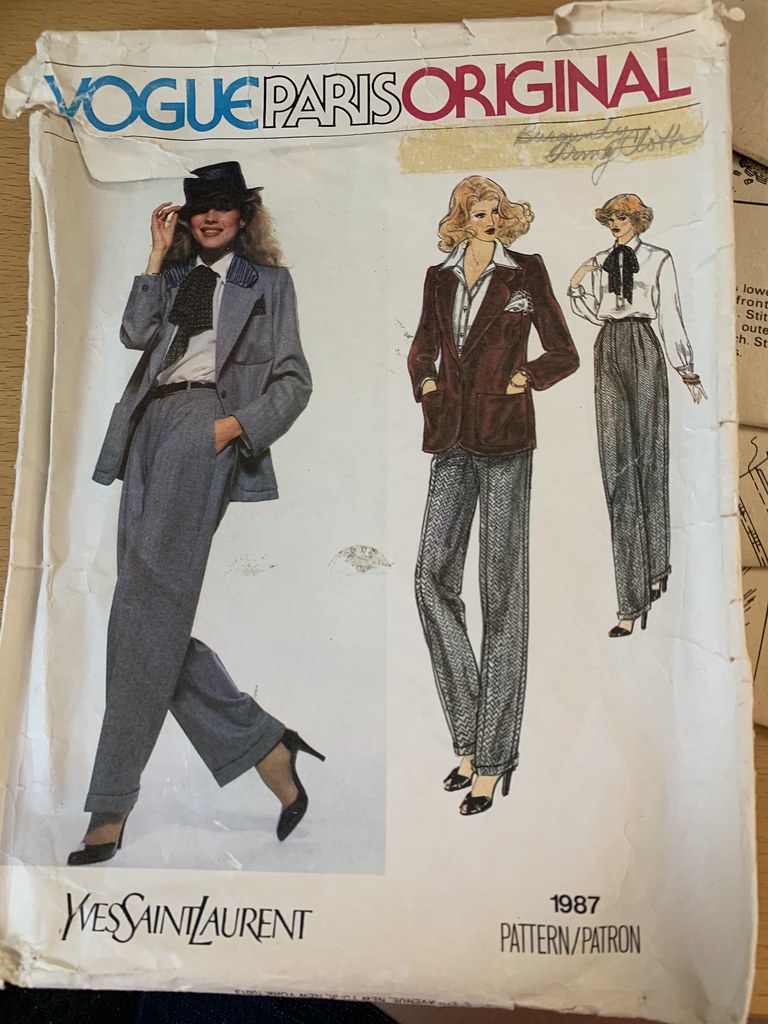
I had forgotten about it but during a clean up session this summer came across it and decided to make it a winter project. First step was to make a muslin as I had some doubts about the round lapels but it looked great when I tried it on. You can see that this is a piece of recycled muslin - note the dart markings at the front hem.

Even though the sleeves were a bit long I decided not to alter them, I have arms that are on the short side and thus one day when I donate this jacket to someone else they will fit and not be too short.
The only fit adjustment that was necessary was to add more room in the hip. The style is slightly loose and straight in the body so it fit find from the waist up, but as usual I needed a bit of space there. This might not be the most correct way to adjust - actually what other way is there? I measured the amount added at the hem, divided that by half and added that amount to each piece (side panel and center back).
Note that I add this amount when cutting out and then fine tune the fit in the real jacket. I really prefer to add extra to the seam allowances and then fit as I sew. It fits me fine despite looking a bit wonky on the dress form. All my dress forms seem to have quirks, leaning to one side or the other.

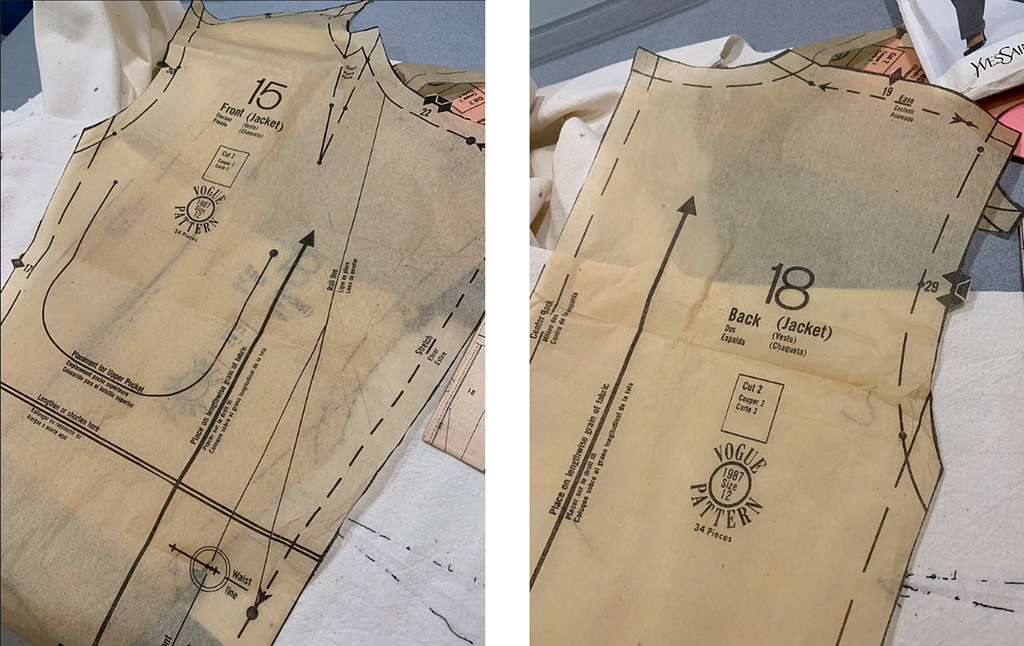
Here's a look at some of the main pattern pieces, that lovely jacket front with the roll line clearly marked for the lapel. Multi-size patterns certainly have their benefits but it is very satisfying to work with a single size pattern - the lines are so clear and bold plus there is no confusion with the excellent and plentiful pattern markings. The basis of my sewing knowledge was started back in my teen-age days when I used mostly Vogue patterns and the single size was still the norm - maybe a few years later they had started to put three sizes in a envelope which is also useful. I think the current parallel might be the capacity to print a PDF pattern in layers and then just choose a couple of sizes that you can grade in between. While I'm not the biggest fan of PDF's the layers feature makes them a lot more user friendly.
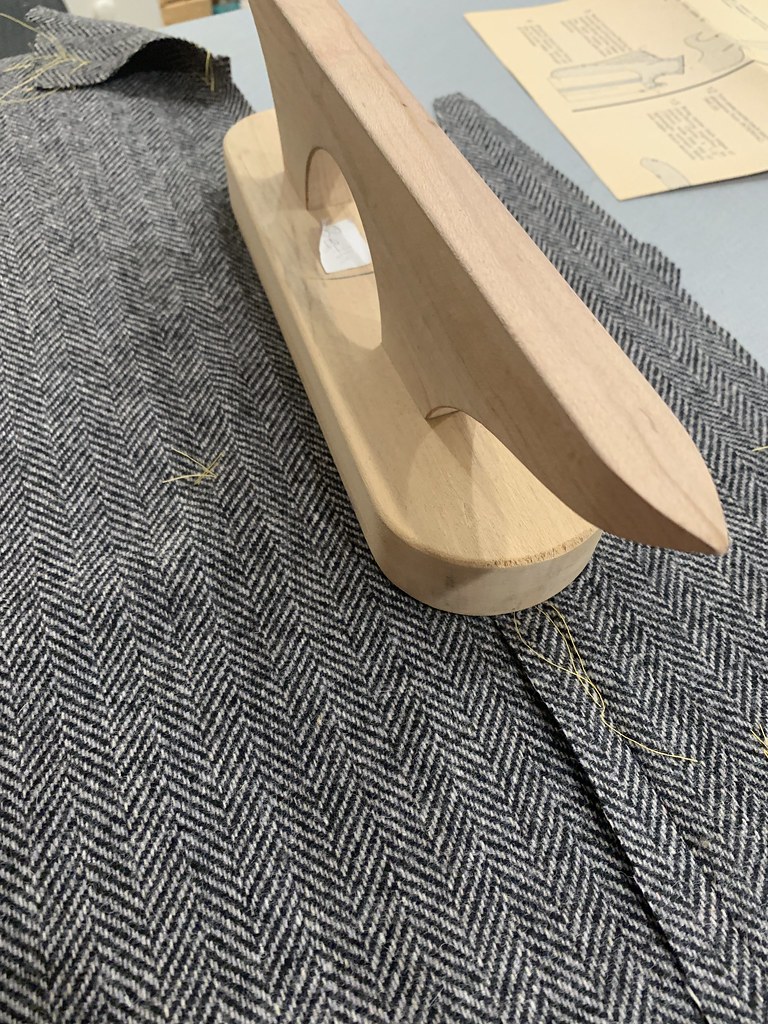
Once I decided on this project it was time to rummage through my stash and see if I had any fabrics that would work. I was thinking about doing it in plaid and I had a subtle grey/blue plaid found at a recent sale of a costumer clearing out their studio. It turned out to be too small a piece so maybe it will be pair of Tajana trousers. It took me a while but I knew that lurking on some shelf was a wool herringbone and I finally found it, 2.5 yards so plenty for this jacket. While I don't really like grey it makes a great neutral jacket that can be worn with so many different shirts and blouses.

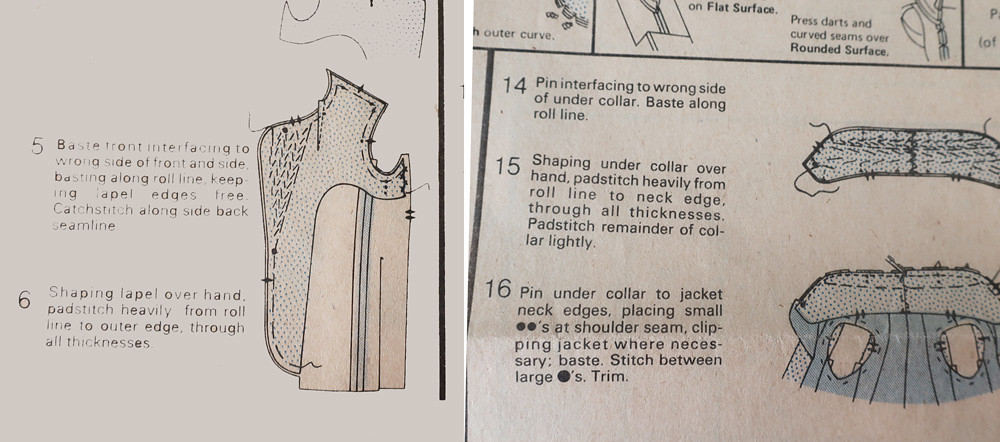
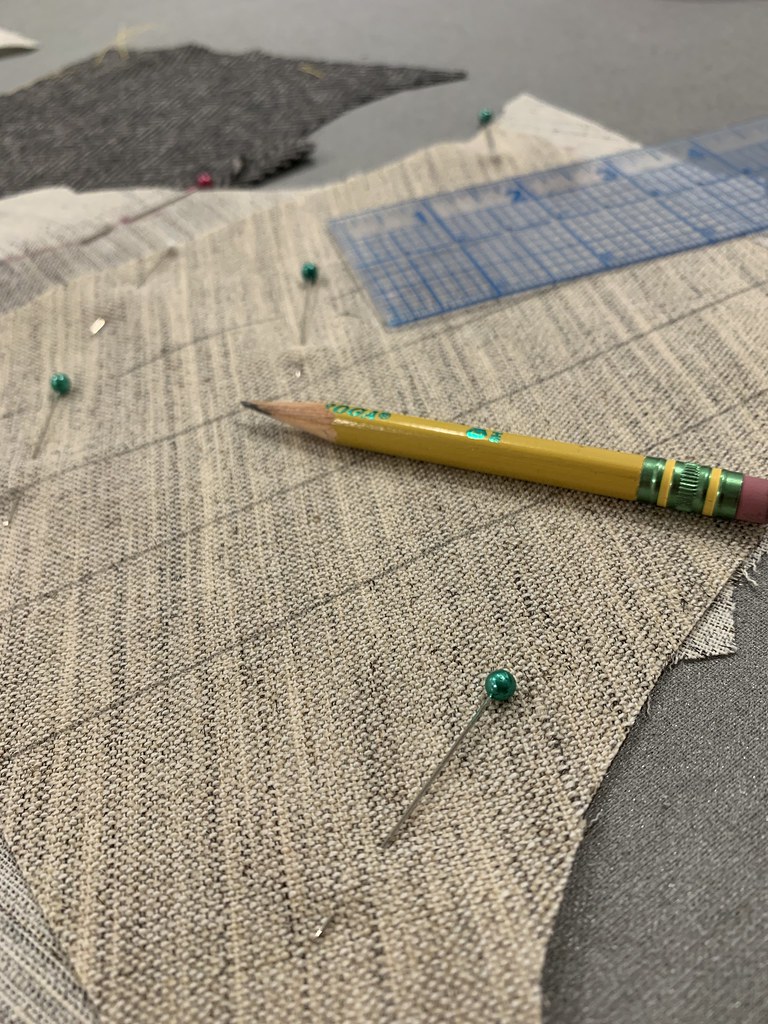
And start as I always do, with pattern marking after cutting out the jacket. This bright yellow thread is perfect for tailor's tacks on so many different fabrics. One reason I was interested in this pattern was the use of hair canvas for jacket shaping, which I haven't done in a while. I had a nice big piece in my stash - another swap sale find. Here's a look at the instructions detailing the pad stitching. Which I followed somewhat but also used the info from several books to fine tune it a bit. My go-to books for sewing questions are the Singer Tailoring book and now I have recently acquired a copy of Classical Tailoring Techniques by Cabrera/Meyers which is also a great reference.
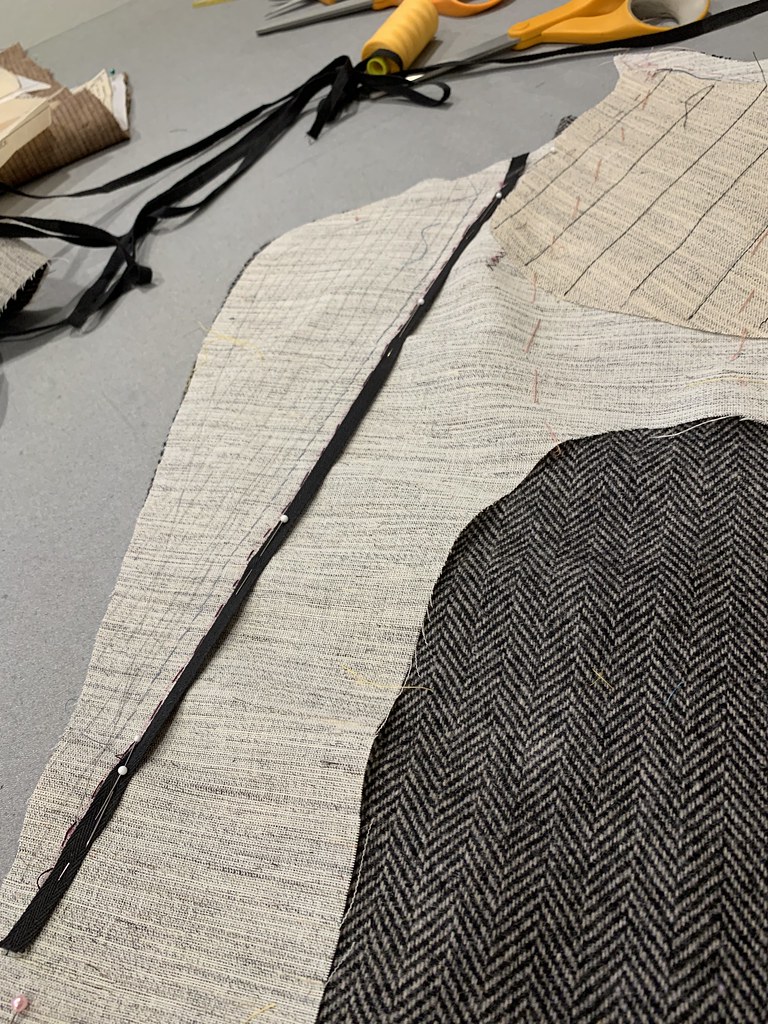
For once I followed the order of construction instead of jumping around, so first is sewing the jacket front to the side front, then applying the hair canvas.
Here are the pattern pieces for this jacket, including the hair canvas interfacing pieces for the jacket body and sleeve hem.

One item not included was an additional piece of interfacing for the chest, which serves to fill in a bit of the hollow at the collarbone/front shoulder and make the jacket lay smoothly there. So I added one and machine stitched it as per the books.
The hair canvas continues around the armhole across the side panel. At this point both the books and the pattern instructions said to hand baste the canvas to the wool fabric with long running stitches.

The roll line is marked on the pattern and I also marked it on the wool and the canvas. The pattern didn't call for taping the roll line but I decided to do it as I like a lapel to have a crisp or at least structured turn back. It will also keep the jacket shape in the front from stretching out. Fortunately I found some cotton twill tape in my stash - this pandemic sewing has been all about sewing from what I have and fortunately I must have stocked up on a few items for a rainy day. At this point I also marked the pad stitching lines with pencil. It's not necessary and I didn't follow them precisely but it helps me keep straight rows as I stitch. I used silk thread in a turquoise blue color so I could see it well on the canvas side and it's just about undetectable on the right side.
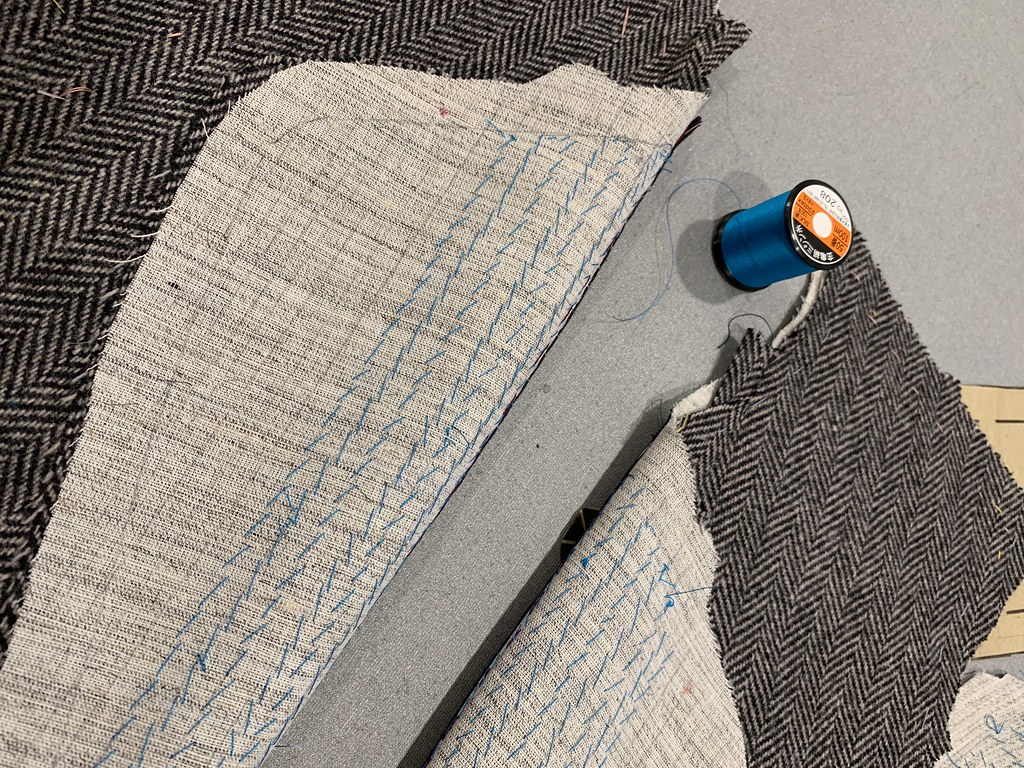
And away we go with many, many minutes of hand stitching. Which was a good wintertime evening activity but I don't plan on rushing into another one of these projects soon. Perhaps that's why I can't get going with knitting - I'm just not good at sitting still for long stretches of time.
That's where I will leave this project for now - I have many more steps to go so this will get a couple more posts, plus I've finished both the trousers and the silk shirt. Next time the weather is nice I will venture out for some finished garment photos. Today we finally have some rain here in N. California and it's a big relief although probably not enough to assuage our drought worries.
Changing topics, here's the info on the upcoming online classes I am teaching via
Hello Stitch. We are trying a few different time slots in the next months. Our monthly garment sewing series has been really fun with people signing up for multiple classes, which means we have developed some sewing camaraderie and the chance for weekly sewing chat with like-minded sewists during our Thursday evening happy hour sessions. We call them happy hour but it is a combo of that and just drop in time to ask any questions, get feedback from the group, trade ideas and talk about stuff that's not work, school or the other things that seem to be on repeat these days.
February Garment Sewing Club Tues/Thurs 7pm-8:30pm
Pattern Hacking Change necklines, move darts, modify closures and get more mileage out of your existing patterns. Starts Feb 9
February 21 10am-12:30 S
ewing Pattern Basics for Sewing Success this is the online version of a class I teach in the studio. If you have any friends who are just getting into sewing this is a good introduction which includes how to read a pattern, pick a size and a fabric, how to measure yourself and other things to get someone started with using sewing patterns.
That all should get my sewing mojo back in motion, it has been sorely lacking lately. I think that previously I would sew something and start wearing it right away which is rewarding but now I have a lot of things I have made these last 10 months which are just hanging in the closet. But summer is coming (hurry up!) and I know many people who have had their first vaccine shot. Progress.
Stay well and keep sewing - that is one of my mantras these days. Perhaps I will even see you online in a sewing class - that would be fun.
Take care,
Beth
This was my last rose of the year and perhaps fittingly it was from my favorite rose bush in the garden which I have never been able to identify (it was here long before I bought the house). I think it's Mr. Lincoln or Chrysler Imperial but there's probably no way to tell. I do know it's time to do some rose maintenance so that is on my garden to-do list.


Hi Beth! Thanks for posting this. It's very interesting to see authentic tailoring techniques. I love making coats, but I am still in the baby stages. In any case, I got my first vaccination! I am a teacher (as you know), so we were given the option in our county to receive an early does when they had extra during the 1a round. (We are 1b.) It does make me feel safer since I am teaching in person. In any case, I have noticed my sewjo got better after the inauguration. I know some people were very productive last year, but I didn't really fall into that category. I want to be gentle with myself this year. I am TRYING not to plan too far ahead and just enjoy the process. Sewing is such a joy for me, even when things turn out a little wonky. I appreciate you sharing your process. I learn so much from people sharing on the internet. Happy sewing!
ReplyDeleteI toolove a single size pattern. Currently I have only one, a Vogue from the 80s. It was a joy to work with.
ReplyDeleteAbout increasing the width near the bottom of the jacket, the only potential issue I can think of with your method is if the jacket design has it pegged at the hem, maybe just increasing the hem width might change that design element. What do you think?
Those tailor tacks never work for me - they always fall out. Guess I need to handle my pieces more gently.
Looking forward to seeing more of this project.
Bonito patrón y muy buena técnica de costura. BESICOS.
ReplyDeleteI know I don't have the hand strength to do pad stitching but I really don't even have the desire! shhhhh! LOL! :)
ReplyDeleteI am loving this pattern so far - very cool.
Good luck with your classes!
This is very interesting, I love seeing these techniques - and it's a beautiful fabric. But I can't find you on Instagram?
ReplyDeleteBeautiful work as always, Beth. I've been daydreaming about starting just such a similar process - the old Vogue's of tailored jackets have such great and detailed instructions! I was thinking to make a second version of Vogue 8333, which is a more recent one but has similar detailed instructions. Perhaps once I've finished the coat I'm working on!
ReplyDeleteTake care and stay safe
Beautiful work. I really miss doing this type of tailoring. I must say the trousers in that pattern are fabulous and very on trend. Any plans for those?
ReplyDeleteI did make some black pleated trousers however I used a new pattern but the look is the same. I will post them soon - however I don't really like wide leg pants on me at all so I will probably modify them.
DeleteIt's really inspiring to read your blog, Beth. This jacket is gorgeous! Perhaps you are going to go back to shorten the sleeves. It is beautiful on you and I hope that you do decide to keep it for yourself.
ReplyDelete