
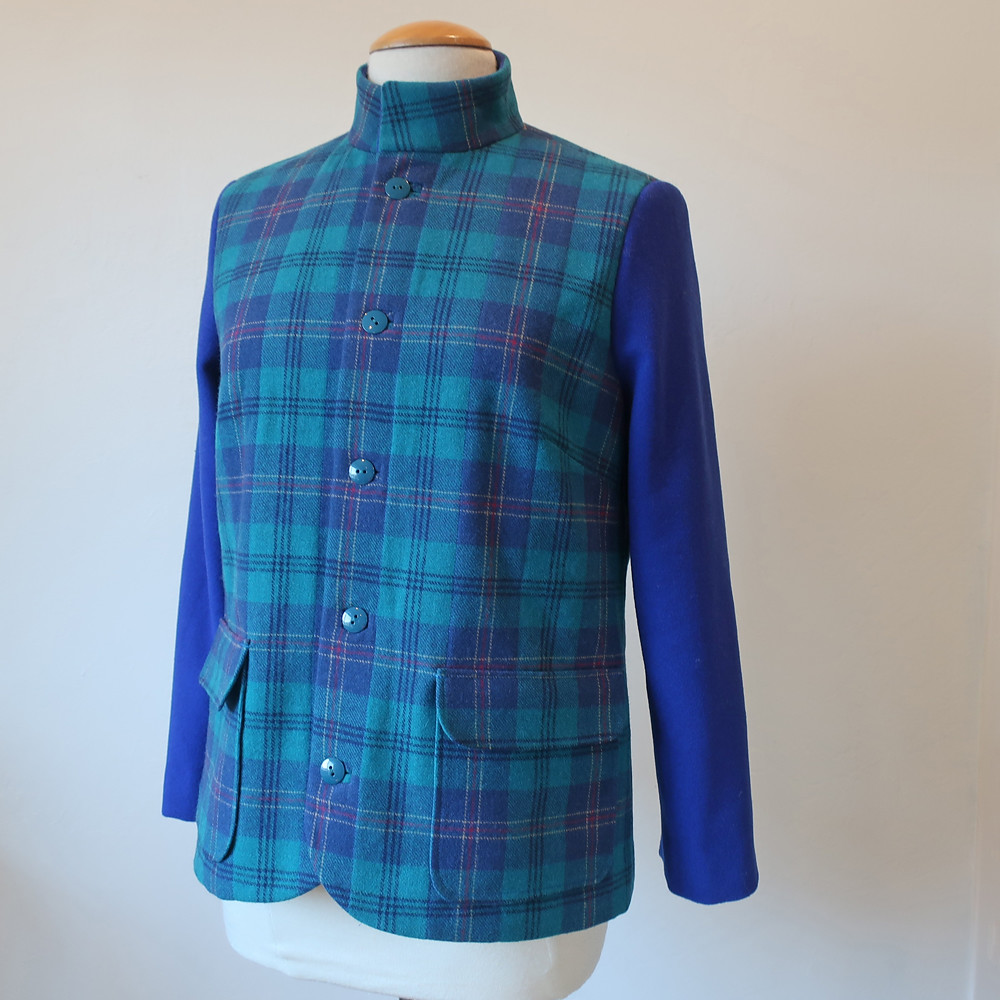
This time of year I try to organize any fabrics that I have and in particular see what large remnants I can make use of. In my stash I had 1 yard piece of a blue plaid wool, not quite enough to make a jacket but I looked around for a coordinating fabric. I had a solid blue piece remaining from my tri-color coat so decided to use those and get two pieces out of a fabric bin. Here's a look at the finished jacket, which doesn't appear quilted at all.
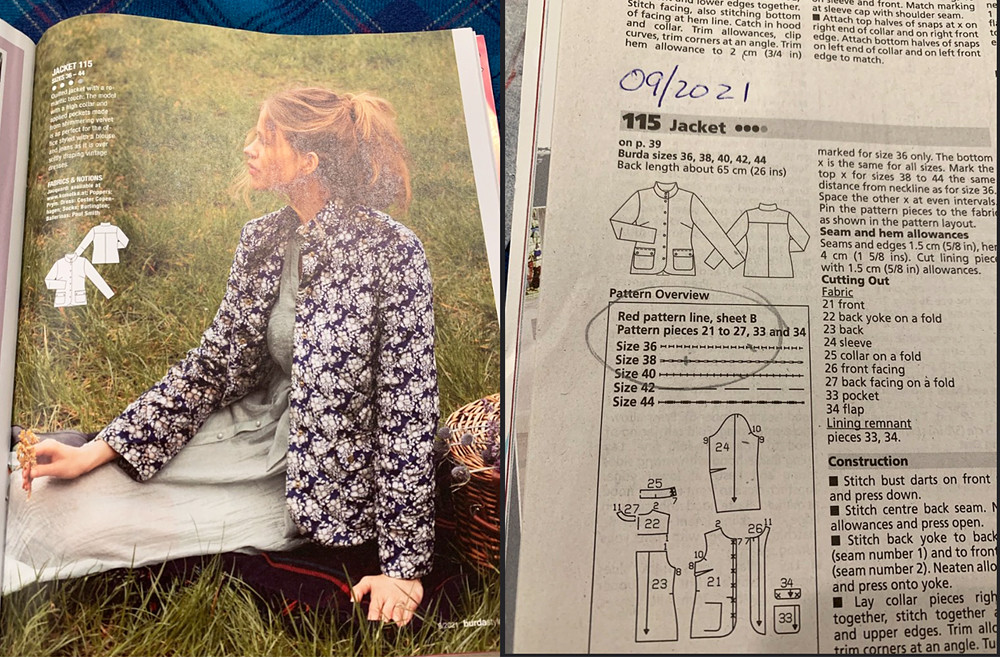
What made me think about doing a quilted jacket? At Hello Stitch one day I noticed a big pile of quilt batting remnants and asked about them. Turns out when they stitch a quilt on the longarm machine, and use yardage from their roll of batting, depending on the size and width of the quilt there can be quite large remnants of very nice batting in silk, wool or poly that are left over. So I took a good stack of these remnants just because they seemed useful but I didn't have an idea. Then while perusing my Burda magazines (for the millionth time - something I do when waiting for things like for the oven to heat up). I noticed this pattern for a quilted jacket and thought it would be easy to make and it doesn't take a large amount of fabric.
So first I cut out the pattern pieces in the plaid wool fabric, then using the convenience of plaid I stitching them to the batting.

The quilting doesn't really show at all and I played around with adding more quilt lines but it just made it look busy but not in a good way. So I have ended up with a nice and warm quilted jacket that doesn't really look quilted.
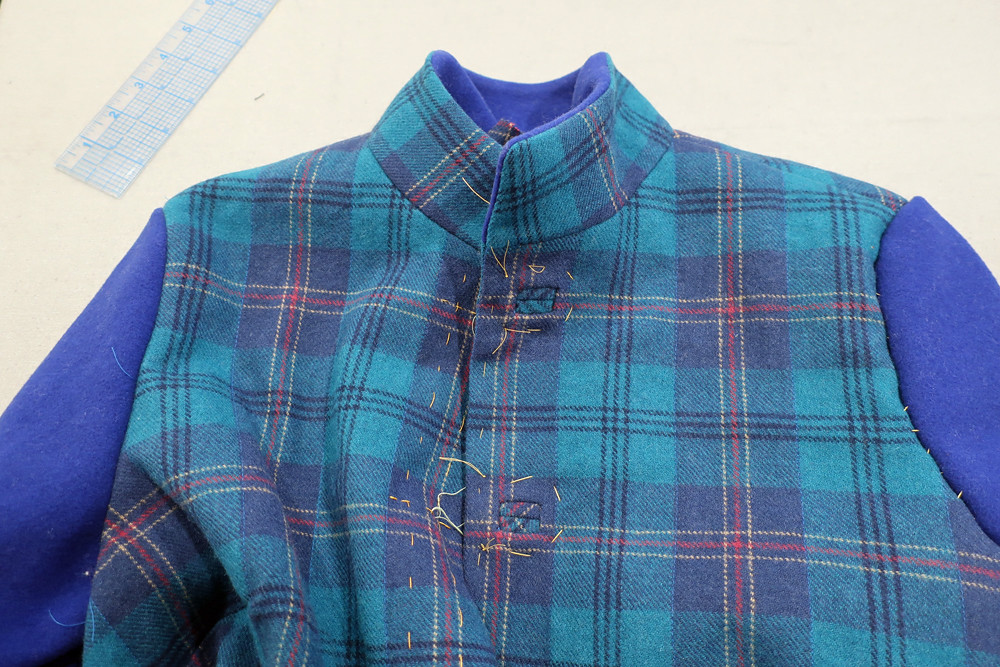
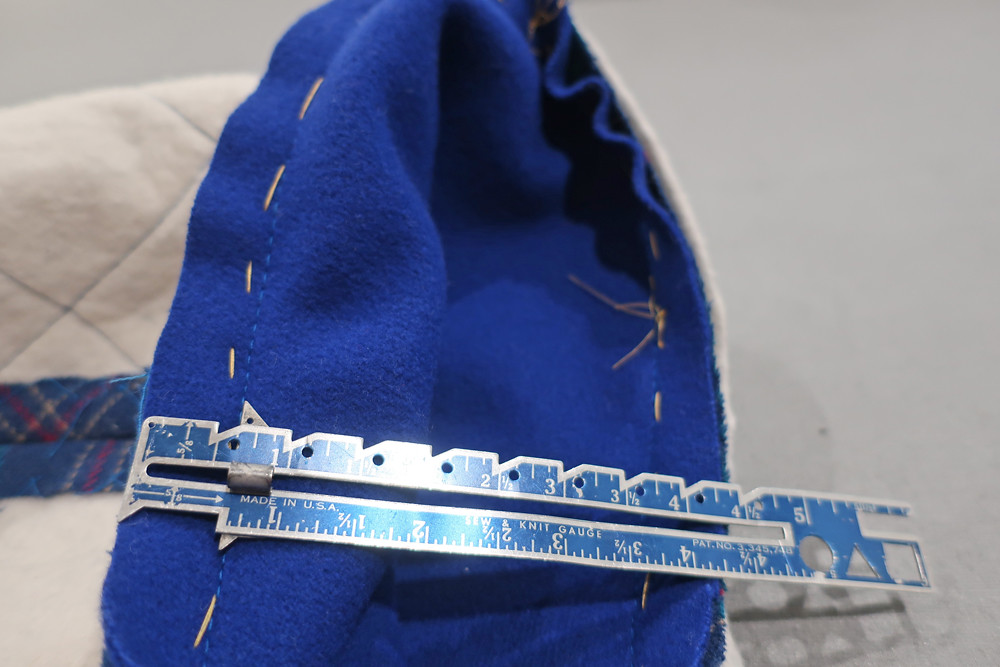
Once I had all the jacket body pieces quilted then I had to decide on the closure. I think on the pattern they call for snaps but that didn't seem like it would go for this fabric. I rummaged around in my button box for some coordinating buttons and decided to make bound buttonholes. With the wool plus thickness of batting I didn't think any of my buttonhole makers would succeed, at least in uniform stitching on that many buttonholes. For bound buttonholes I always start with a thread ladder, which sets out the location of the buttonholes in both vertical and horizontal placement. If you look at this picture below you can see some markings for my tests of other quilt lines, including some hand stitching which just looked too handcrafty to me.

Then I made the welts. I have never had any success with the one piece method, perhaps I will give it a try again but I just make the buttonholes like miniature pocket openings. One of the few times I use a rotary cutter!
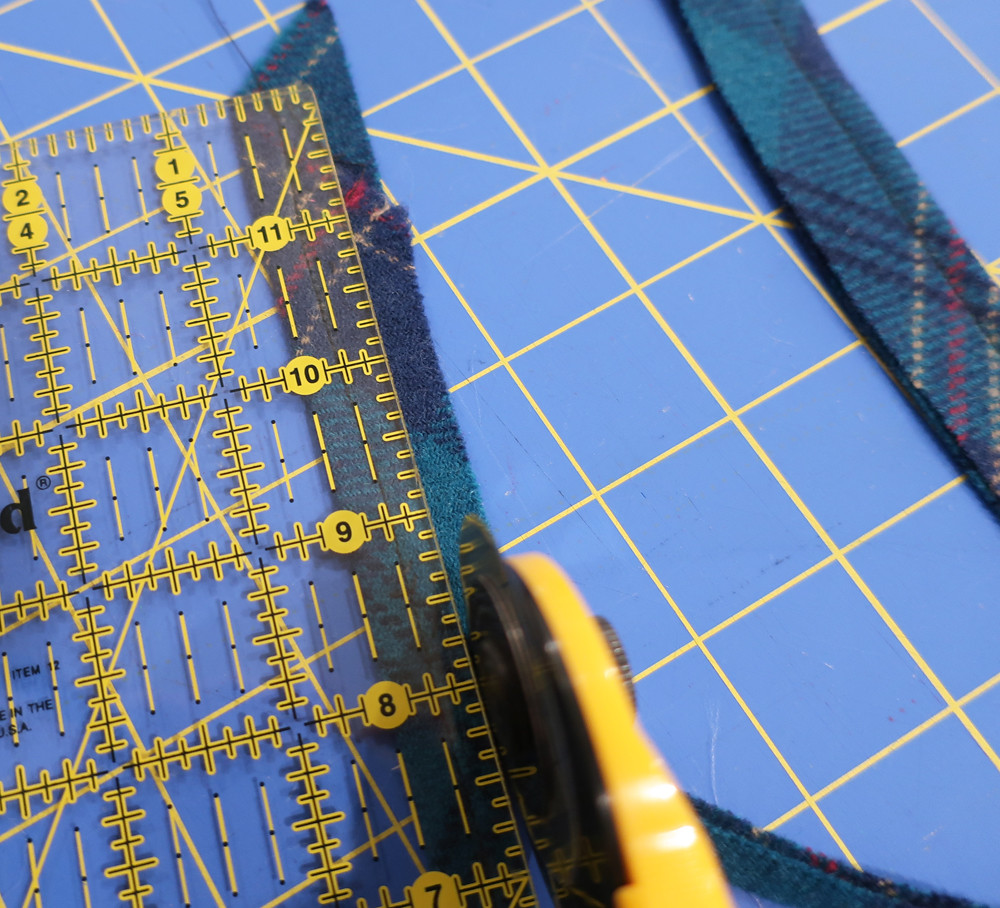

Maybe not even noticeable but I like to cut the buttonhole welts on the bias in plaids, it adds some visual contrast.

I mark the ends of the stitching with chalk so that the top and bottom welts of the buttonholes are exactly even.

Once all the buttonholes are stitched, I cut them open and turn them, tucking in the edges to create the actual buttonhole. The folded edge starts out on the outer edge, but after stitching and then cutting open it flips to the center to create the edges where the button slips through. Once they are all pressed then I trim the edges on the inside, usually rounding the corners and trying to remove any bulk that will later be sandwiched between the jacket front and the front facing.
Next up was to make the pockets, which I really like on the jacket and I think make the look. It's kind of a barn jacket style. I might have to make this one again sometime...Anyway, I had not cut out the pockets initially, just reserved some fabric in order to do that. I had marked with tailor's tacks the pocket placement on the jacket front pieces.
So the way I cut out plaid patch pockets is to lay the pocket pattern piece on the jacket front and trace some of the plaid lines onto the paper. That way I can put it on the fabric and cut out exact plaid matches, in both vertical and horizontal color lines. Hopefully you can see my pencil lines on the pattern pieces here that note the plaid lines. I typically pick the most prominent lines, in this case it was the yellow stripes and matched those. I am super happy with the way these turned out! In the past I haven't really been a fan of patch pockets but this is the second wool jacket I've made with them (first one here) and I just cut out another one.


I put weft interfacing on both the patch pocket and the pocket flap, it seemed to need some support and also to make it match the thickness of the jacket body. I had this lovely coordinating bemberg lining in my big box of lining fabrics. Sometimes I think that container is like Mary Poppins bag, every time I dip into it out comes just what I need - maybe that luck will continue if I believe in the magic :)
Time to discuss sleeves. With jackets/coats from Burda or Vogue patterns I don't think I ever add the gathering stitches on the sleeve cap. Is this shocking? I find them not needed and most times the sleeve fits in beautifully.

Often I pin in the sleeves and then hand baste both in just to see if I like the placement, once in a while I will tilt the shoulder of the sleeve forward slightly, or move it in to make the shoulder less wide.
Then I will machine baste it in and check how they look. In this picture below the sleeve on the left is machine sewn in but the one on the right is still hand basted only, and you can see how well it fits in the armhole. Burda sleeves/armholes are really nice.
I then do one row of machine basting, and after that check that the seam allowance is consistent all around the armhole. Sometimes it's easy to stitch wide or narrow, particularly at the underarm or at the upper back and if you stitch wider you are taking out width across the back and across the sleeve cap. So check those seam allowances. Then I do any adjustments needed and then give it a final stitch with regular stitch length, twice around at 5?8" and 1/2".
For the collar I used the solid blue on the inside, it's super soft and non-itchy which is what I like in collars. The pattern had a square corner on the collar and I rounded it off a bit, now I wish I had rounded it even more as it looks a bit pointy to me. Note for next time.

So that's some of the sewing details on this project, next post I will have the finished garment photos.
Meanwhile I'm in the midst of a jumpsuit class (online) and a few more in-person classes at Hello Stitch. Also I'm doing a lot of individual lessons either via Zoom or in person so if you want more info on that get in touch.
The other project on my to-do list is a complete revamp of the irrigation of my front and back garden areas. Drought plus aging pipes and sprinklers means it's time for a refresh, changing out some areas for low-water usage and getting rid of some lawn. We had ZERO rain for these last 4 weeks after a good soaking so we quickly went from drought is ending to drought is never-ending. Scary!
Meanwhile among my other projects I cut out a new project, using a vintage Vogue jacket pattern. So I will sew that up in a few minutes here or there and maybe finish that by the end of the month. Love using those vintage single size patterns - they are so easy to work with.
Happy Sewing,
Beth
today's garden photo - what else but this year's first daffodil. So cheerful


Hi Beth, I so enjoy reading your blog. I learn something from each one. Today you made the bound buttonholes look downright easy! I might be inspired to give them a try. I gave a couple of Burda magazine patterns a try, but was put off by the myriad of lines. Good info about the craftsmanship shown by both Vogue and Burda developing their sleeve patterns.Thank you.
ReplyDeleteyour buttonholes look super, as do the pockets. Good tips for us in this post. Love the daffodil too. I am surrounded by two feet of snow up here in Canada.
ReplyDeleteThank you for the details. Your precision is admirable! I am a big fan of combining perfectly good fabric pieces into one of a kind garments too - these remnants play really well together.
ReplyDeleteGreat details! I need to learn to make bound buttonholes (I've done them maybe three times in all my years sewing). I'm always regretting machine button holes for thicker fabrics and larger buttons.
ReplyDelete