Monday, August 30, 2021

Sew sustainable dress and top

During this past 18 months I have purchased very little fabric and yet sewn quite a few items. It seems this was the year when everyone was stuck at home during various lockdowns, and deciding to do a bit of destashing. So quite a few people said "do you want this?" and most of the time I said yes. Needing to sew samples for my Hello Stitch classes for the past few years has used up some fabric in my own stash and I just can't resist if someone has a lovely jewel colored piece of fabric. Sometimes I hit the jackpot - this jacket was a fabric that someone gave to me and I wear it a lot. I belong to a local sewing group and they have occasional stash sales, so recently I added quite a few nice things to my fabric inventory. 

When a fabric costs me just a few dollars and is something I picked up on a whim it seems ideal for using to sew up patterns that are a bit of an experiment for me. This past year I've tried a number of shapes and silhouettes that haven't made it to the blog. So one upside of this weird year has been the time to experiment and not really care how things turn out. Just sewing and having something to pass the time has been great.

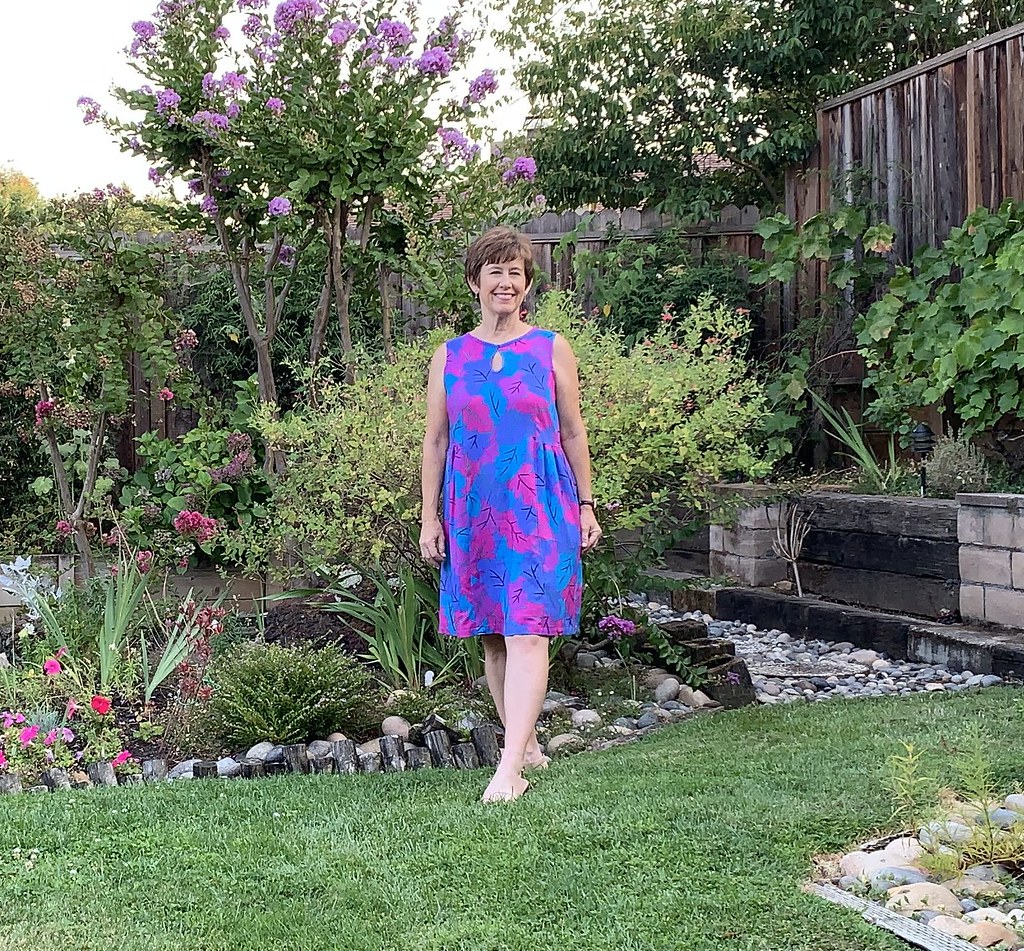
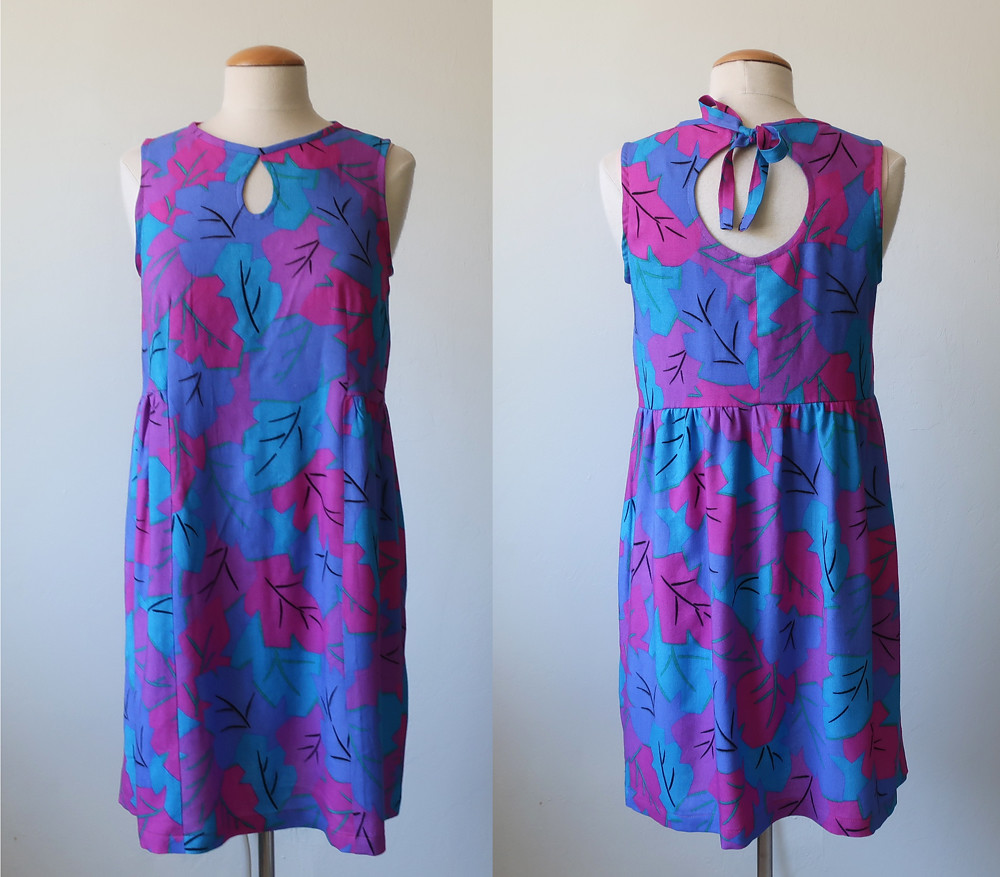
So that is a long way of saying that I've made a dress that I don't really like and will probably not wear, or maybe it will be a beach cover up when the opportunity to travel returns. The colors are great but the fabric is not really my preference and I have no idea what it is, other than probably more than a few years old. Sometimes you can tell by the smell of a fabric, and also I think it was a strange width. Anyway I made a dress from a recent Burda magazine - although I changed it up considerably. But the basic style of it could fall into the nap dress, or buffet dress category. ( If you've watched the recent British Sewing Bee that's the term they used and I like it!) 

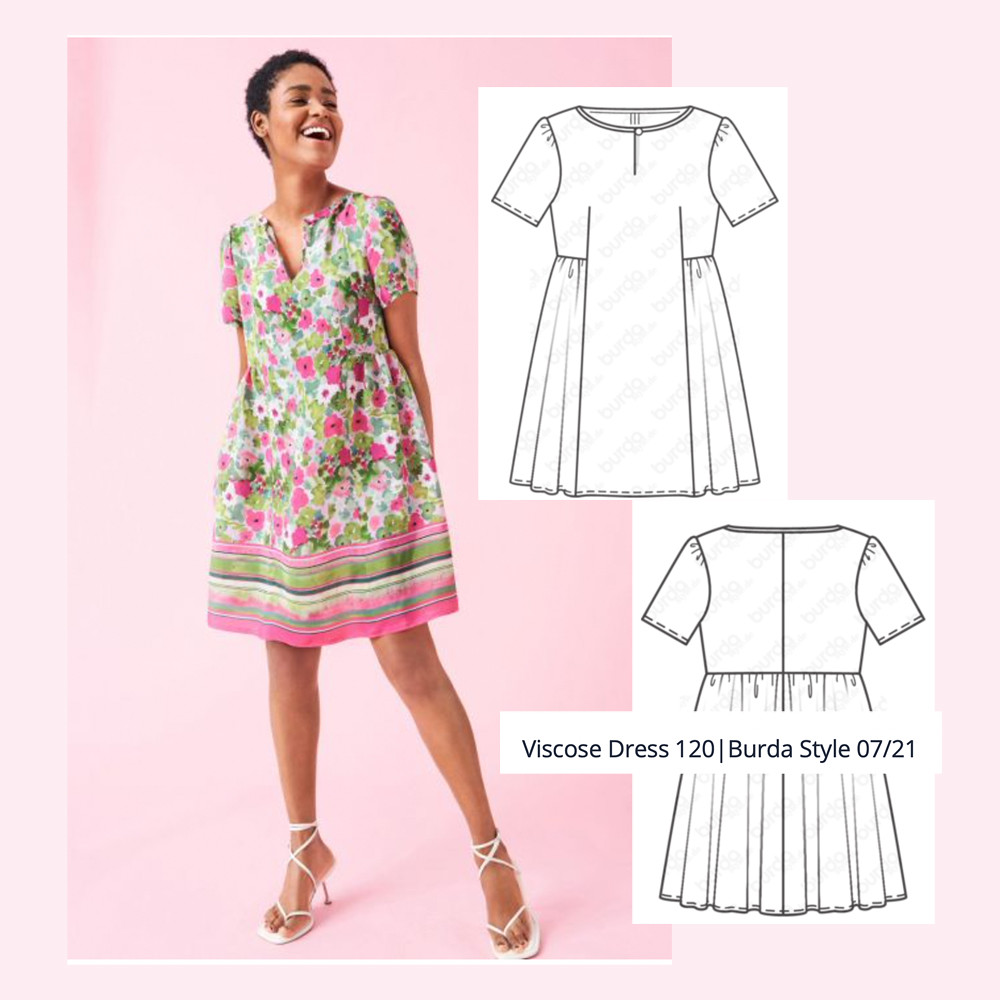
Burda dress 4

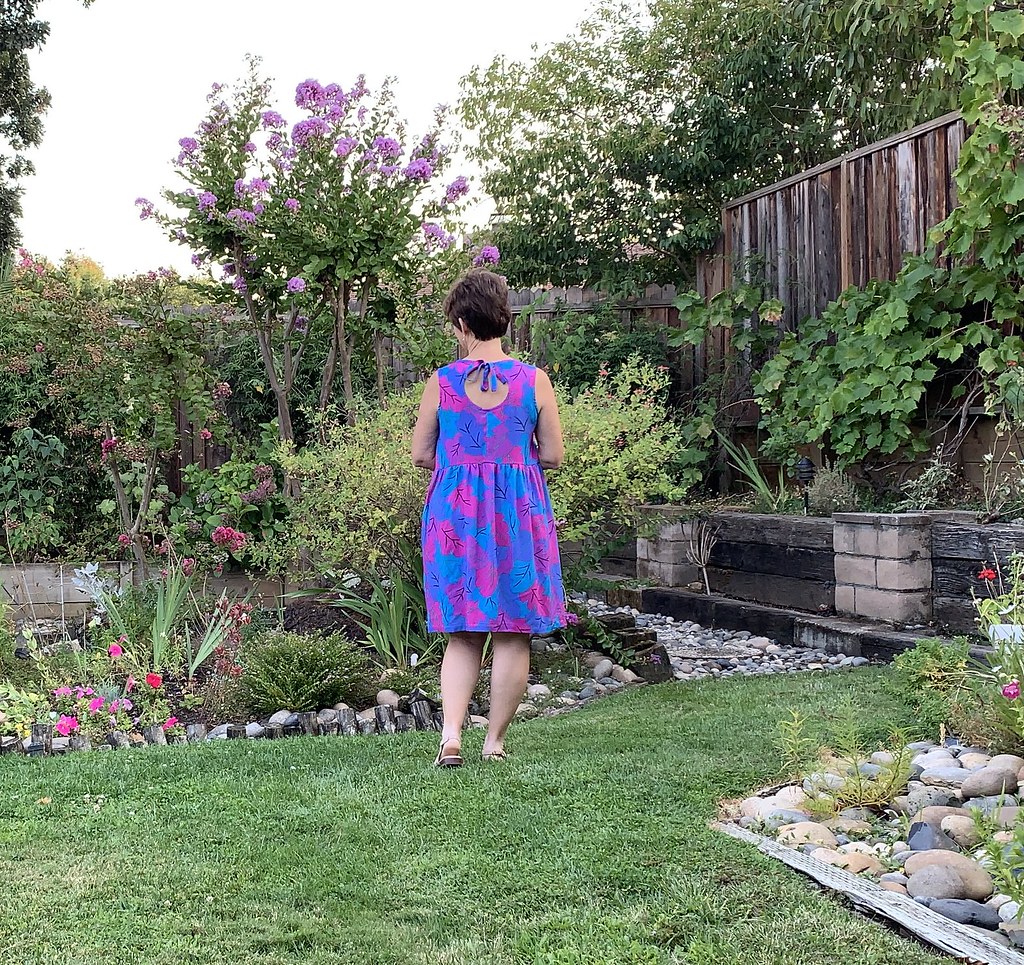
This pattern (Burda 07/2021 # 120) has a darted bodice with a center front that extends straight down to the hem, and then the skirt is a gathered rectangle seamed at the center back. It's meant to fit loosely as you can see in the drawing. I left off the sleeves because summer dresses and sleeves don't mix for my weather. Then I decided the neckline was a bit boring so I gave it the same treatment as a dress I made in the summer of 2019. A dress that I adore and love to wear, and one that I redesigned on the fly to have the cutouts front and back. 

2021 image copy


Burda dress1

In fact now that I am looking at these pictures maybe I will cut it off and make it a top, perhaps with some cropped pants I might wear it. Because those are definitely my colors!

pink blue nap dress 1

But there's more - This was quite a long piece of fabric that I purchased for a few bucks, enough to try out a top as well.
And to continue my trouser experiments with the Tatjana Trousers pattern from Just-Patterns. 


Pants 2

A couple of posts ago I showed how I removed the pleats from the front of the trousers and made some shorts.   The fuller legs are ideal for a walking short style but now I wanted to make a slim leg pant so I continued with my modified (pleat-less) pattern pieces and used another Threads magazine article to narrow the legs. Here's the link to that article on the Threads website which is available (not behind their Insider paywall). I found it really helpful, there are probably a few methods to achieve this but I liked how it worked. I printed it out and stuck it in my special binder of things to keep  - which also includes my first welt pocket lesson and my first zip fly notes :)   Here's a look at the diagram in this article. They do a really good job with their diagrams I think. 


Diagram pants narrowing

Diagram narrow pants2

And a look at my my scribbly calculations for my adjustments. Sometimes I long for the metric system in sewing but I will never get there, my brain thinks in 1/8 of an inch!

Here's the back which I have lightened up considerably as black pants are never easy to photograph. While the fit might not be perfect I'm fairly satisfied. Time to mention that I have a considerable asymmetry due to spine issues which I hide for the most part in my sewing but is a nightmare for pants fitting. So in the words of the song, I choose to "let it go" and fit them well enough without going crazy. 

Back pants lightened


So these pants were kind of a test, I have plenty of black pants so I really didn't need another pair but they are wearable and now I'm ready to make some others this winter. 

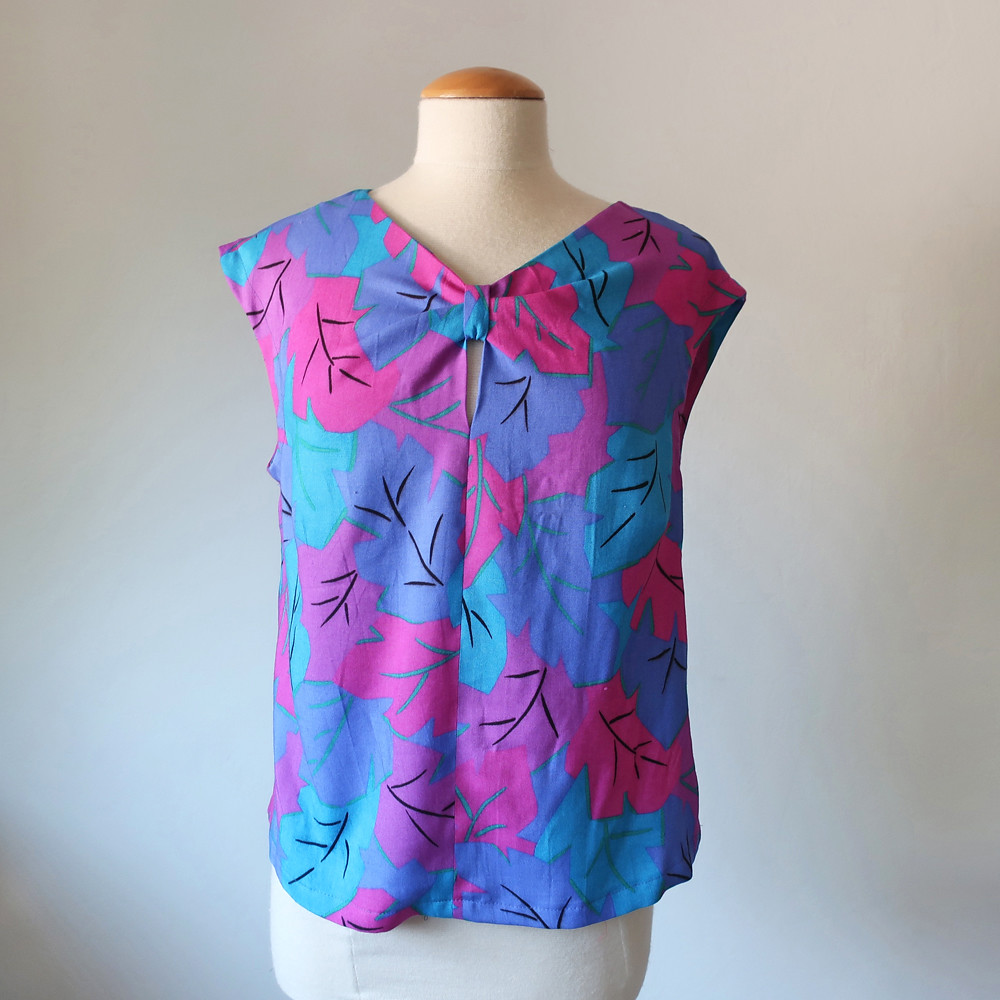
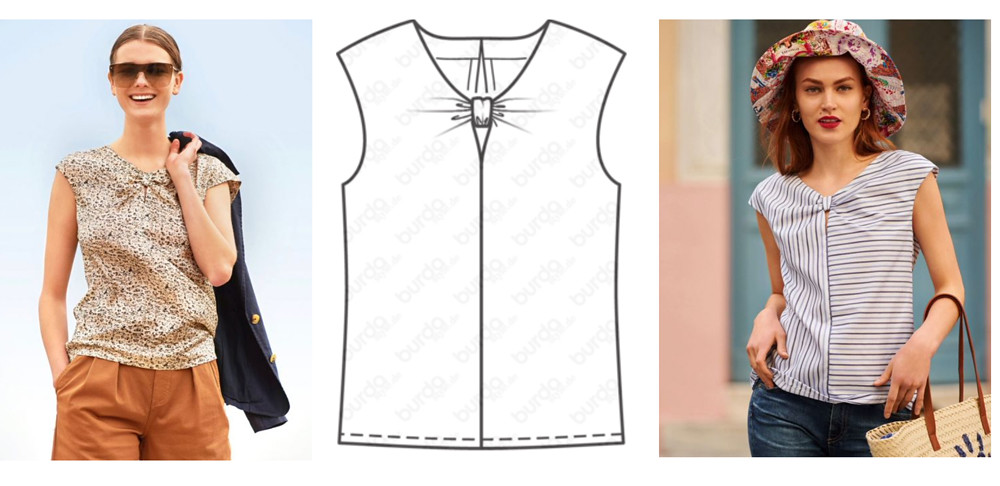
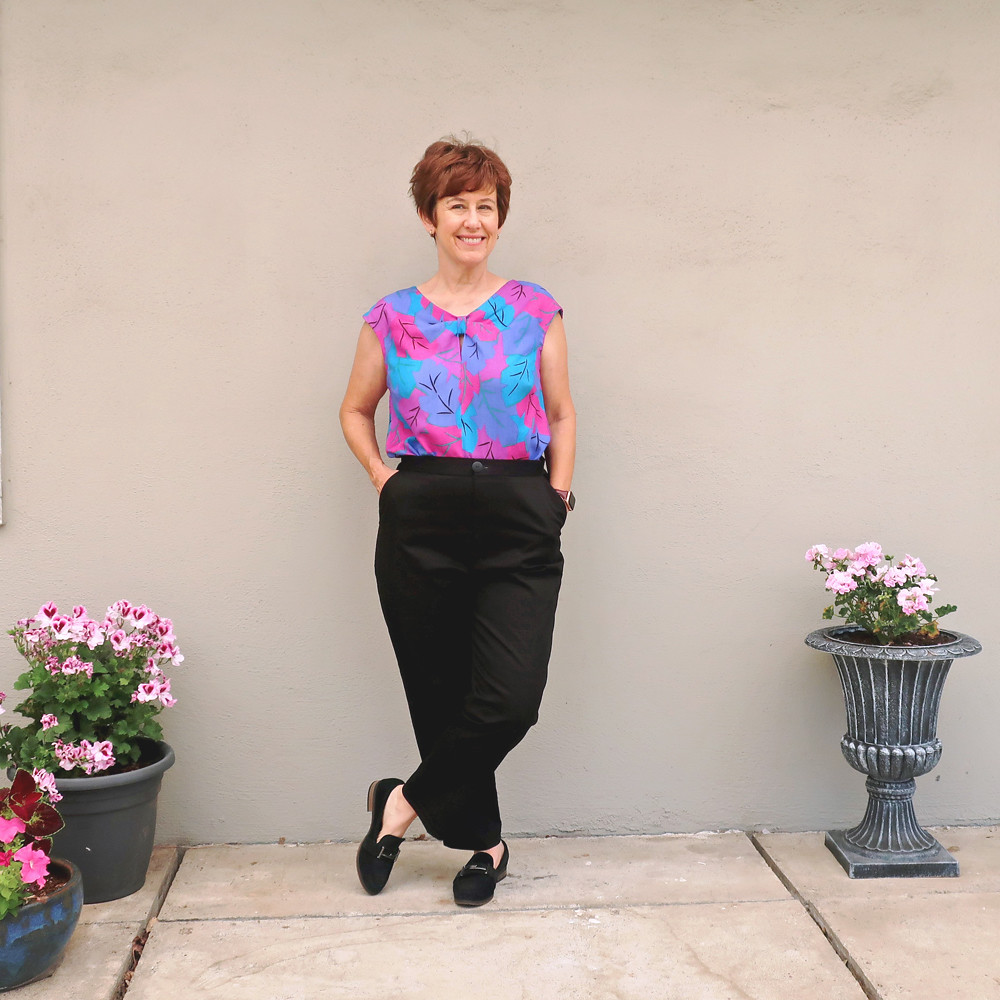
The top is also from Burda, it's 08/2021 #109.  Another thing I'm ambivalent about. I did add bust darts which were fine but the armholes are too low for me and the whole thing is kind of droopy. If I sew it again, which I might, I will take it up by 1/4" at the shoulder seam and that will do it. 

Burda knot top1


Knot front top Burda image

The stripe version is cute and it doesn't take much fabric so I will keep the pattern pieces for future scrap busting opportunities. 

B;lack pants3

So that's the latest on my summer sewing. Which has been all over the place but after so much stay at home time I feel disinclined to sew up new clothes for myself when some of the recent ones have not even been worn.  

Up next, I'm making a summer birthday sundress, which I will wear! she says determinedly.  And starting in on some sample sewing for upcoming classes at Hello Stitch Studio. We're planning a 6-week online jacket making class starting in October. We scheduled some in-person classes for introductory sewing and they are all sold out - which is very gratifying. I think once we get back in the swing of things we will have more in person classes as well as continue with the online classes which were really well received. 

Now time to either nap or go to a buffet. Just kidding, I'm off for a swim as it's again around 100ºF here today. And pray for some rain which is very unlikely - better to hope for no wind and some luck for our brave firefighting crews here in the golden state. 

Burda dress2


Happy Summer Sewing,
Beth

The garden is limping along with the drought and I'm glad I have planted so many California natives which tolerate this water shortage. Here's a great example, this penstemon which has gorgeous pink blooms. And I've succeeding grown another one from a cutting! Free plants - so happy about that. 


Penstemon

Sunday, July 25, 2021

Helena Wrap Dress from Just Patterns

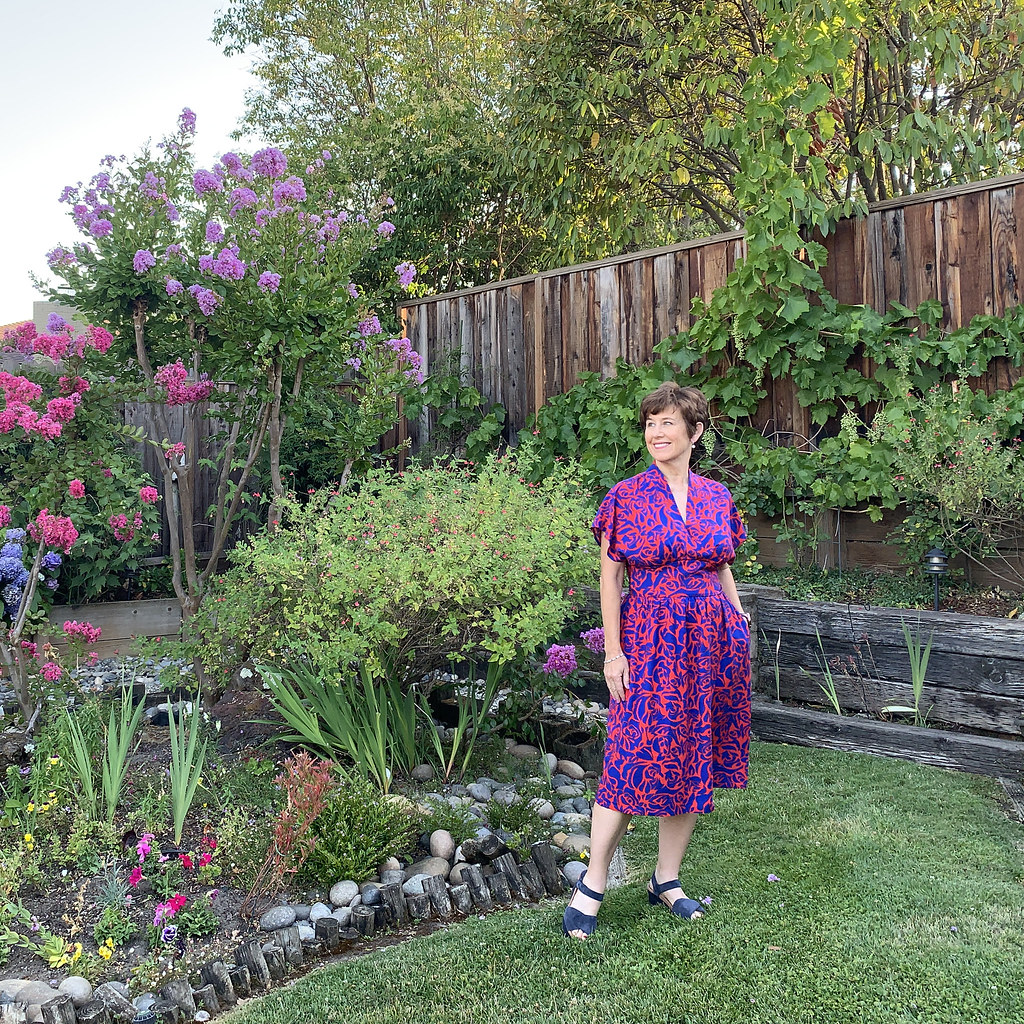
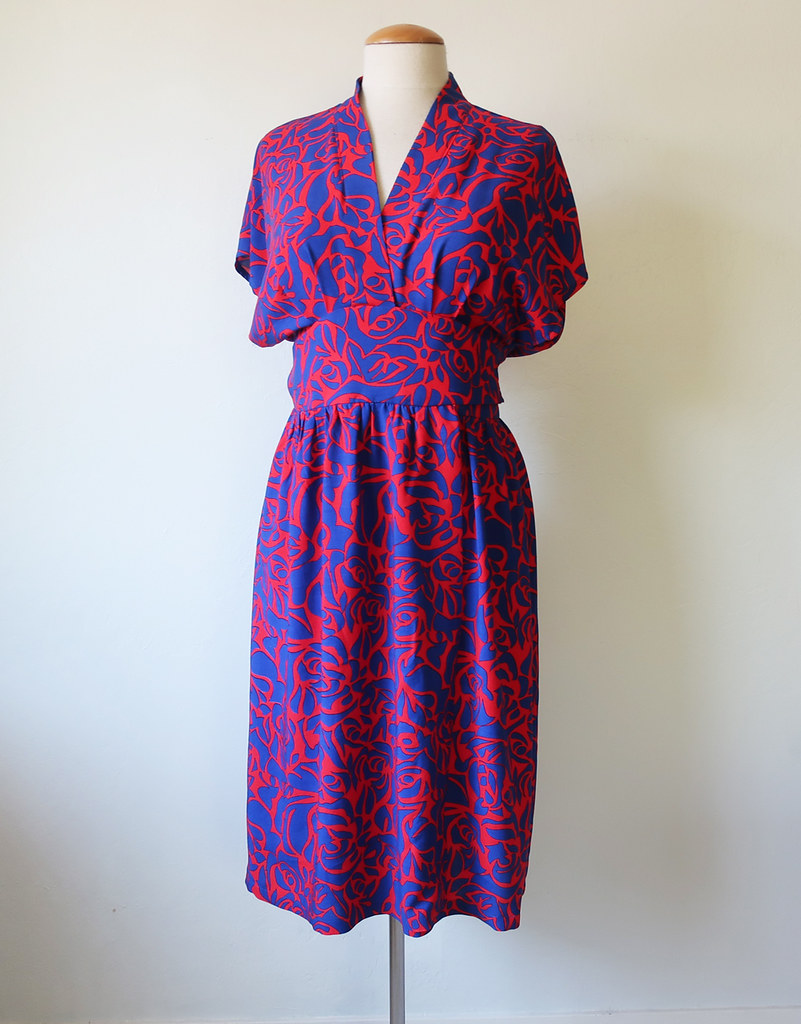
When my friend Delphine of Just-Patterns asked me if I would like to sew her latest patterns I said yes right away. It's a bit outside of my usual style but this past year that has been my sewing theme, to try new silhouettes and see if I like them. This dress came together so easily and I highly recommend. It's the Helena Wrap Dress from Just Patterns

Helena dress3

I also think this is a case where the fabric choice was just right. Which was a bit of luck, as I had to look around in my stash to find a piece with enough yardage. This is rayon challis I ordered a few months ago from Fashion Fabrics Club and when it arrived I thought it was way too bright even for me. But I decided to give it a try for this and it worked out well. 

Here's the pattern drawing from the Just-Patterns website. 
Helena Tech drawing
Note that the recommended fabrics are mid-weight fabrics with some body such as linen, cotton poplin etc. I'm trying not to buy any fabric these days and have acquired so much yardage in the past year that I determined to use something from my stash. Looking at the design I think it would work for a lot of woven fabrics not mentions, such as silk crepe de chine, or even wool crepe. 


Helena front

I sewed size 40 as it for bust 36" and waist 28.5"  which is right around my measurements however I did add a bit at the waist which I will show below. The fabric requirement for that size is 3 yards of 60" fabric. That is a quantity that I almost never buy! Since I am shorter than most patterns specification (5'3") I can always shorten skirts and then play around with the cutting layout to squeeze the pattern pieces on. 

My fabric was about 2 1/3 yards. I removed 6" from the skirt length before I started cutting out and that helped a lot. I cut the pockets in half and only used the printed fabric for the back half of the pocket, and used a lining fabric for the front half, then seamed it where the fold would be. This is a common change I make on pockets anyway.  The reason I put the fashion fabric on the back is that this is the side that can possibly peek out when the garment is sewn. 

Helena inside fr and back

I also used a red cotton for the inside waistbands, so that also saved some fabric. Since this rayon is a bit limp as compared to some of the recommended fabrics, I put a fairly stiff interfacing on both the outer and inner waistband pieces which worked well. 

Helena dress4

For other fit adjustments, I added some width at the waistband, as the finished garment measurement was just around my waist number and I wanted a bit of extra ease at that area. 

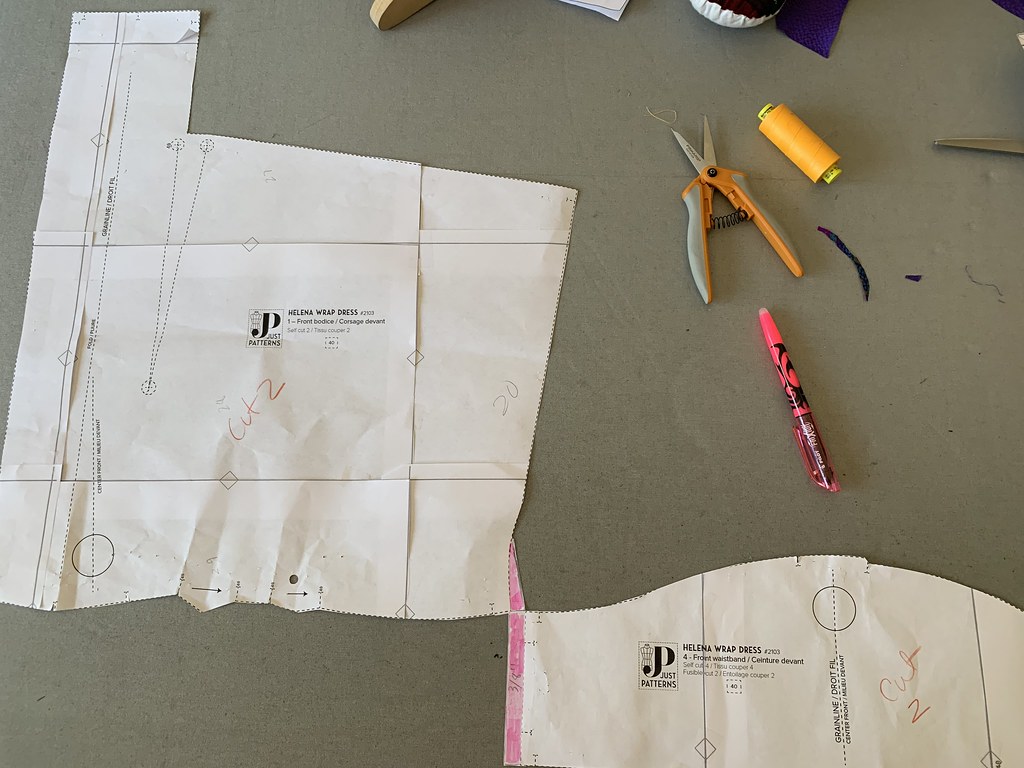
Helena wrap dress front pieces

The amount I added is shown in pink. For the bodice I just tapered it away as it neared the sleeve. Now that the dress is finished I could probably omitted that although the extra in the waist circumference means I can wrap the dress overlapping nicely in the front, probably a bit more than the pattern is designed for. I did omit the sleeve bands, I basted them on but they made the proportions look odd to me, I like more arm showing so you can easily skip then and just put a narrow hem on the sleeves, or a facing if you want them to have more structure. Now that I see the photos and also on the advice of some sewing friends I'm going to take it in under the arm, to make the dress a bit less full at that point and also make the armhole opening smaller, perhaps just by an inch. All these things are not exactly fit adjustments, but more changes due to proportion and making a garment just right for my height and frame shape. 

The instructions on this pattern are very clear and the pattern pieces are well marked. I did read the instructions just to make sure I was sewing it correctly and then I did my own thing - as I usually do :)
The only quibble I have with this pattern is that it has 3/8" seam allowances which I suppose are more professional (?) but I can never get used to them and also they don't allow for any small fit adjustments as you go. In fact now that I like the Tatjana trouser pattern so much I'm going to go back and adjust my tracing to have 5/8" seam allowances. That way I can sew it on auto-pilot, I'm just a robot when it comes to sewing and have to constantly remind myself about 3/8". 


Helena front close up


Helena dress 5 backJPG

I've seen a few versions of this Helena dress made as a top and that is a clever idea, also as a 2-piece outfit which makes it very versatile. 

Up next, I'm sewing a pattern repeat however I think my fabric choice won't turn out as well as my first version (it happens :)  and then it will be time to make a birthday dress. Which I'm not sure about as I haven't worn the one I made last year.  Although it's supposed to be a hot spell this upcoming week and I have a few things on my calendar so perhaps I will reach for that one. 


702FFB1B-9FA1-4797-97B1-0F3E4D027039_1_201_a


Big news - in person classes are back on the calendar at Hello Stitch Studio in Berkeley. So happy! Right now I have a beginner class starting in mid-September but we are working on adding a few more so stay tuned. And due to requests from students, I will continue doing live/online classes in the fall as well. So it should be a busy time and I'm really looking forward to sewing with people again. 

Happy Summer Sewing, 
Beth

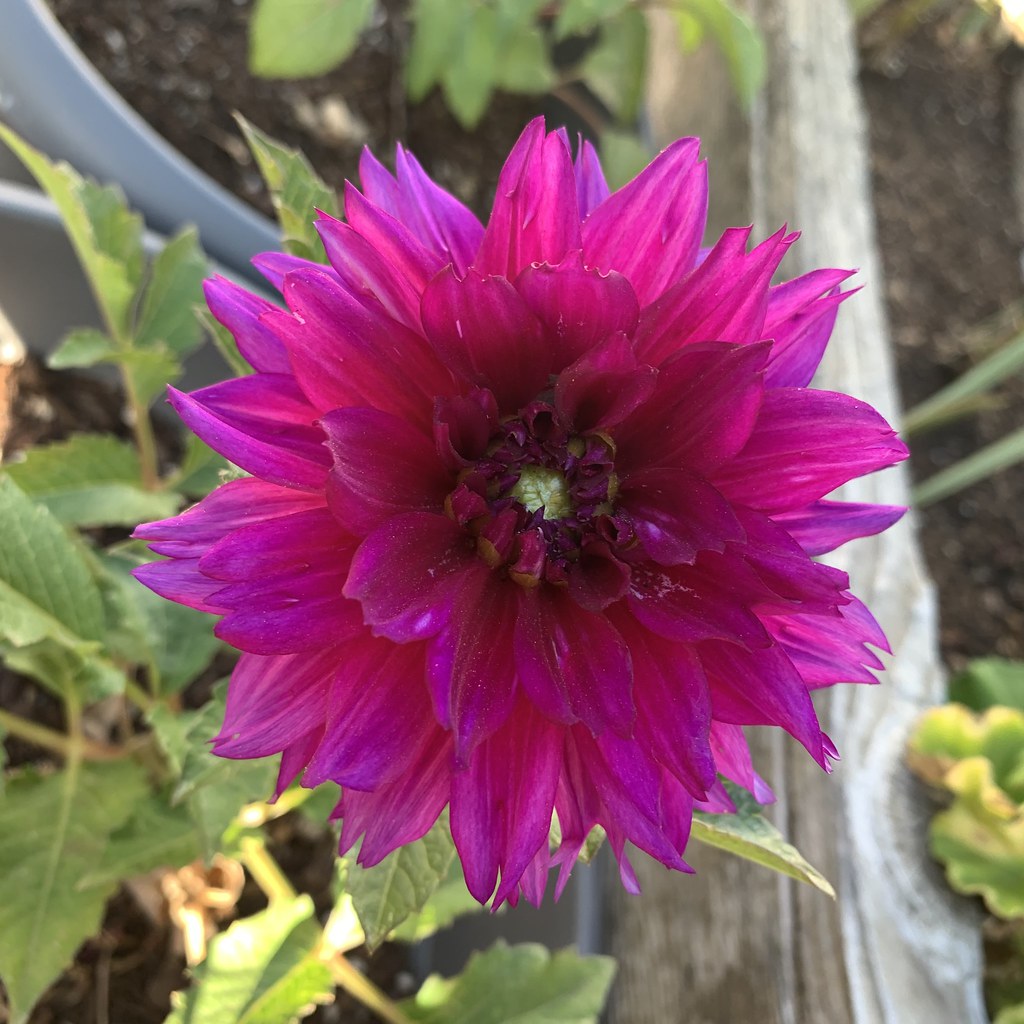
Today's garden photo needs to be something as vibrant as that dress, so it's this dahlia. My dahlias have not been doing very well this year, and you can see from the photos above that the drought has really taken a toll with everything very dry. I have drip irrigation in the areas where there are roses, hydrangeas, gardenias etc. and then sprinklers for the lawn which is mostly a lost cause. I think in the fall a conversion of the lawns to drought tolerant plantings is the only way to go. But that's a project to contemplate on a rainy day (which I hope we have come October!!) as the ground is like cement now and impossible to do any yard work other than water, mulch and hope for rain. 


Dahlia 2021


Monday, July 12, 2021

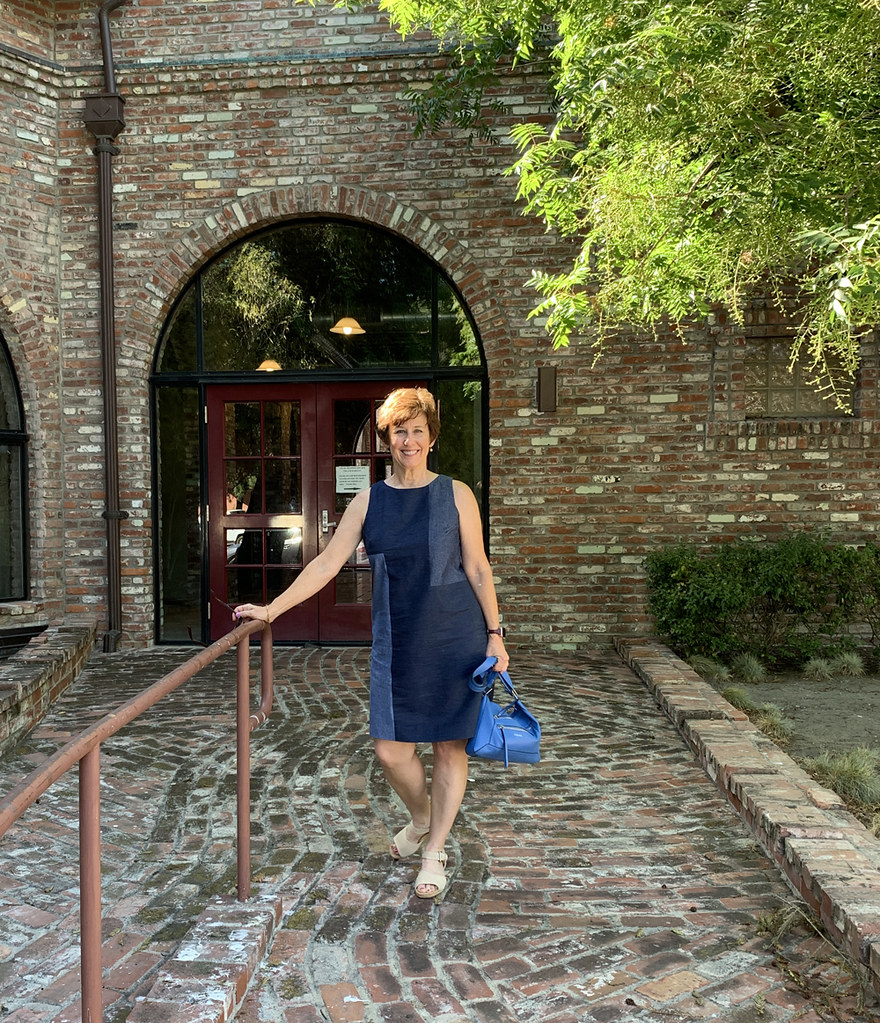
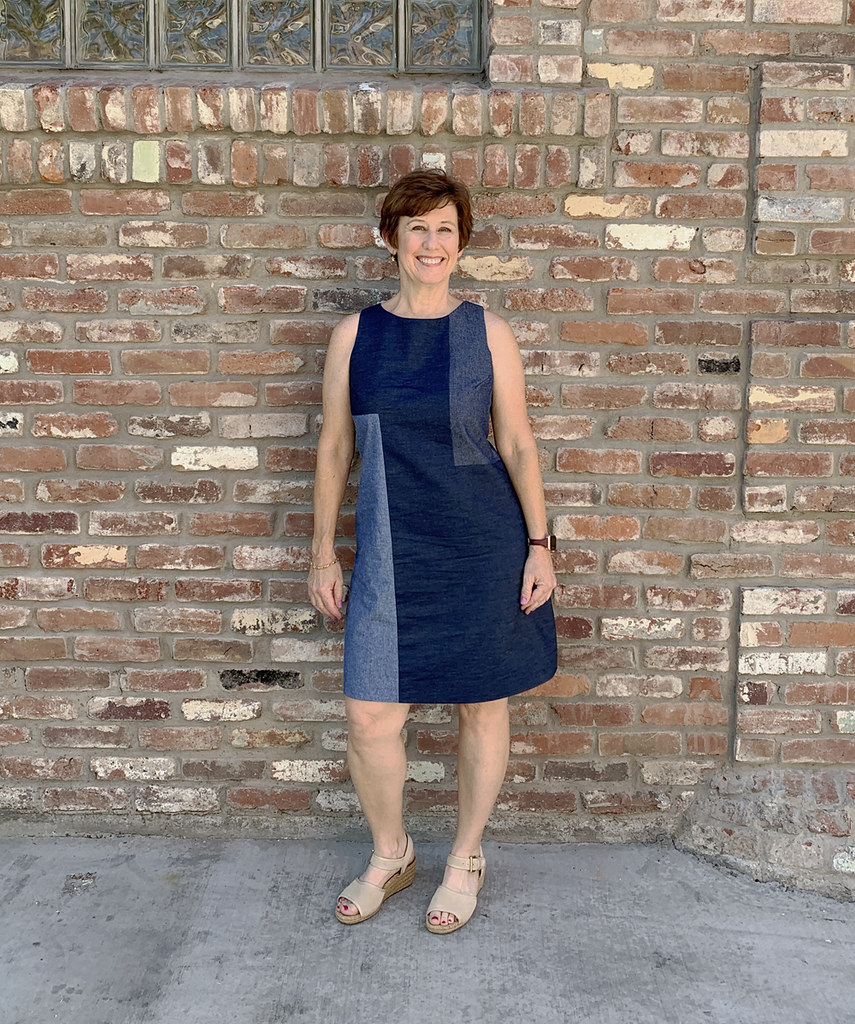
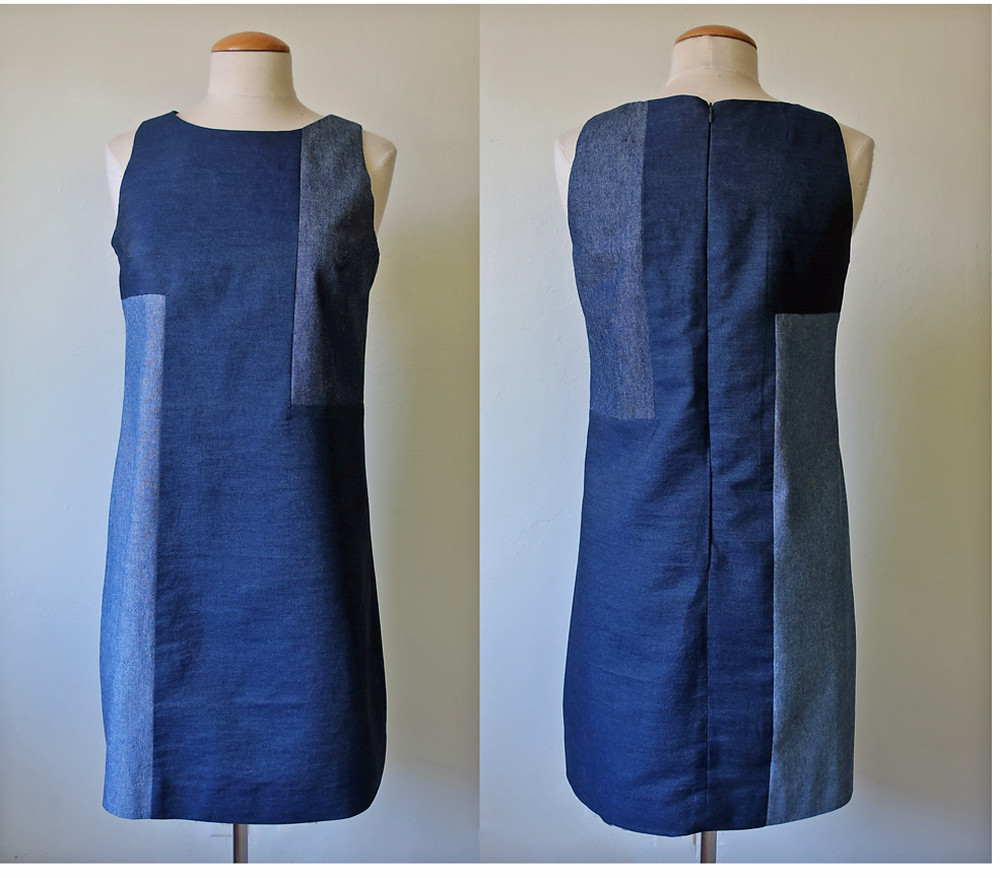
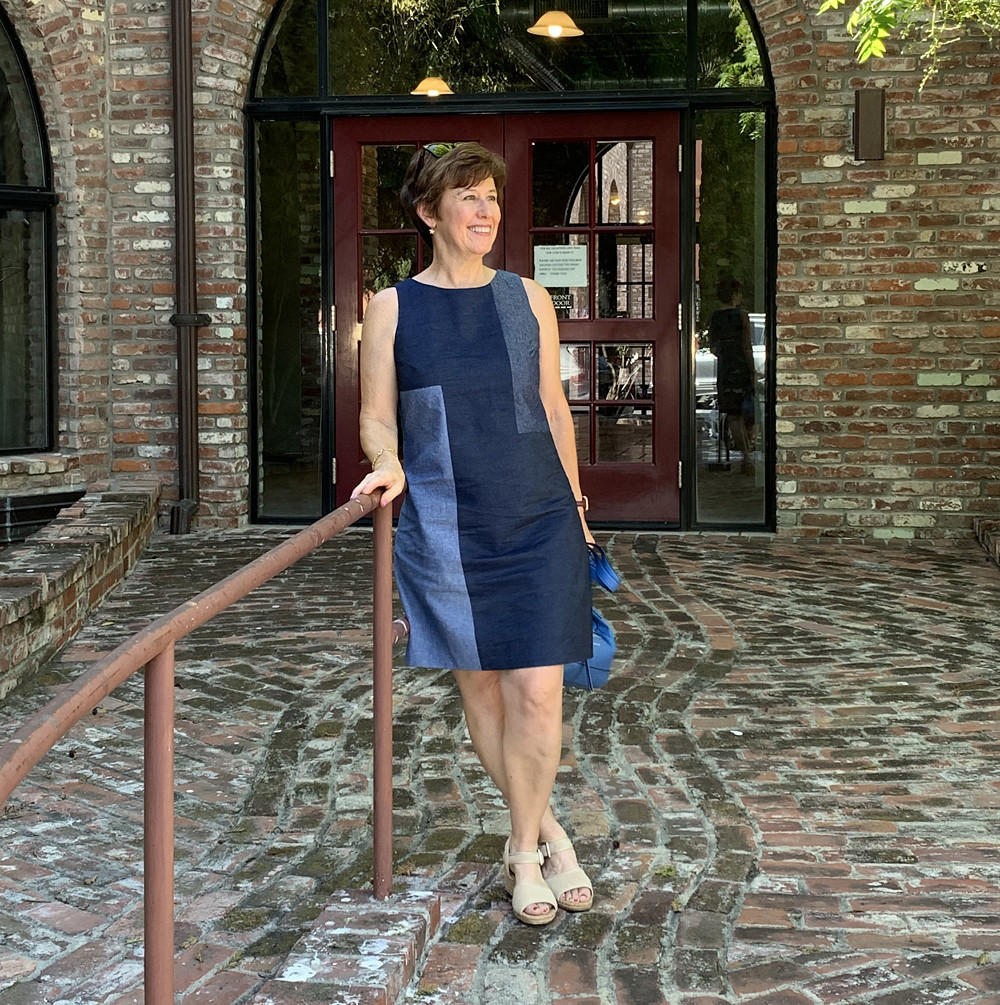
Chambray Color Block Dress from Burda vintage magazine

The current trend is a a lot of ruffles, gathers and generally items that take a lot of fabric. Perhaps that's why when I look at patterns or magazines I'm drawn to simpler styles, and if something is color-blocked it will always catch my eye. And I don't think the year of a pattern makes any difference, some things are classic and always look good. 

Chambray dress2

This is Burda issue July 1998, it's one I was given recently. So I think that qualifies as vintage, being over 20 years old. Here's the magazine photo, which is such a good pattern for using up some not very big pieces of fabric. My one regret is that I wish I had used the other side of the fabric in the upper block, it is lighter and would make more of a contrast. I think the high contrast of their color selection makes it more interesting.

Colorblock burda magazine pic


Chambray dress 3

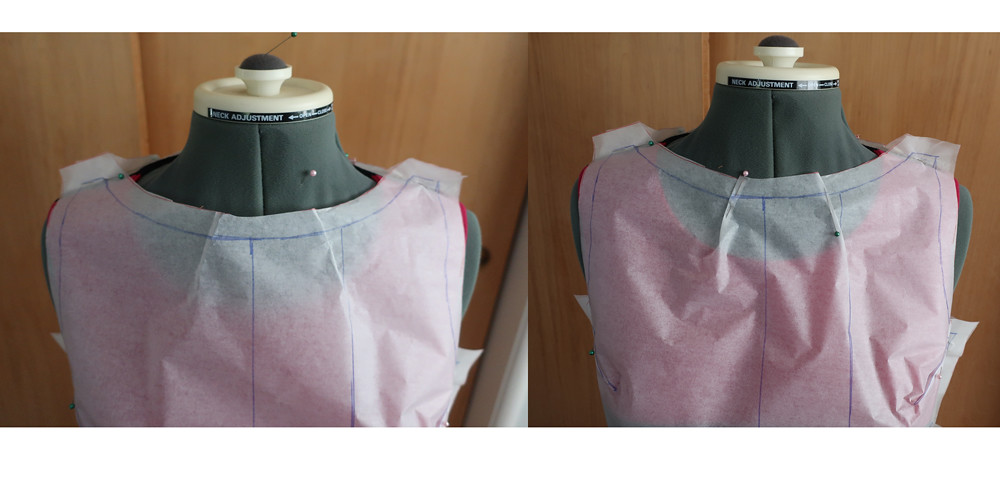
This shift dress doesn't really have a lot shaping, it has bust darts that start from the armhole. I decided to make a muslin which I don't do all that often for simple dresses but I could tell by looking at the pattern pieces that I wouldn't like the neckline at all. That high boatneck is just not comfortable to me and I always change them. 

Color block neck darts on muslin
Here's the front neckline on my dress form. This is an old dress form that is adjusted and padded to be pretty similar to my shape, and I keep that pink wool dress on it as I really like the fit of that bodice.  I can then compare all pattern shapes to that one and know that I'm in the ballpark for shoulder width, neckline depth, etc. Here you can see I removed some width across the front neckline by pinning out some small tucks. For a dress like this where I'm sewing a bit fast and loose I fold out the tuck to flatten the pattern in that area and call it a day. In the photo below you can see that I have added to the neckline on the inner edge of the shoulder seam, on front and back to make that boatneck less wide. I also lowered the front neckline about 5/8". I shortened the back waist length a good inch (which is a standard adjustment for me, also shown below. And then I took in the center back seam about 5/8' when I put in the zipper. also a common adjustment for me. I suppose all that narrowing of the shoulders I could do by narrowing the upper bodice but for simple shift dresses I find it easier to do it this way as I can see how much I want to change in small areas. 


Fitting adjustment center back

This pattern piece also shows the color block lines. When I made the muslin test version I just made it like a simple shift dress all one piece, and then once I had the pattern adjustments I traced the extra block sections and then added seam allowances. 

Chambray dress4

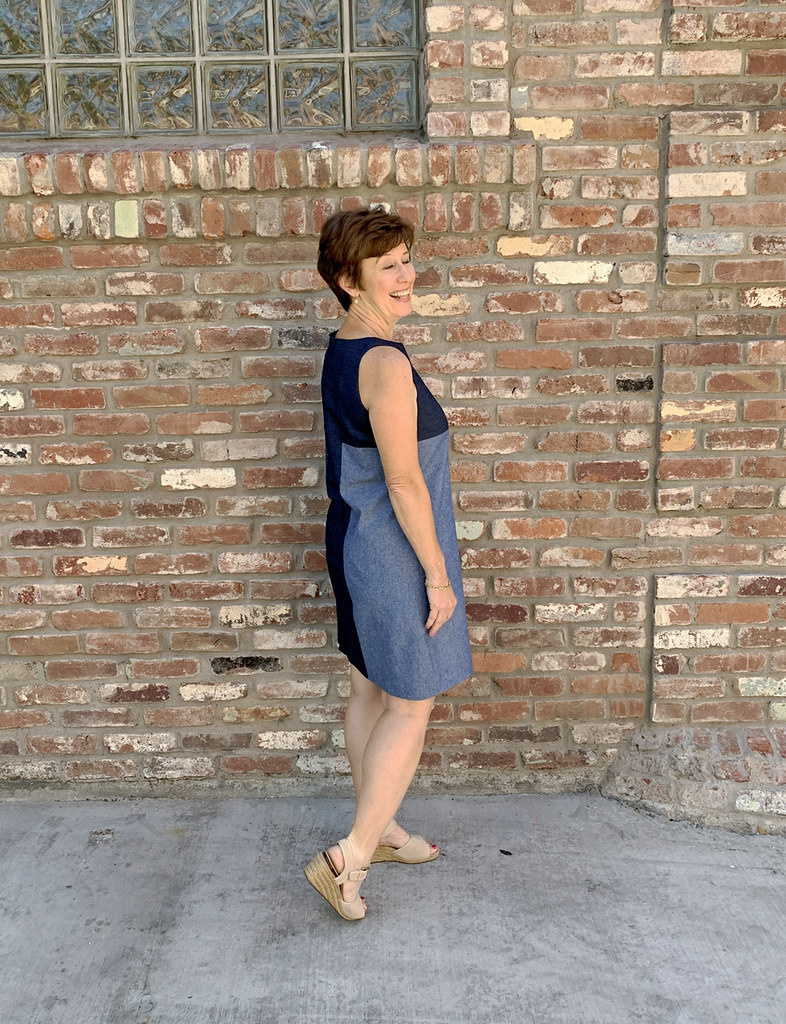
I neglected to take any pictures of the back of the dress on my and this one is not ideal as the dress is sticking a bit as I turn but you get the idea. No shaping to speak of and putting in any curves or darts would mess up the block areas. Oh and it was around 102ºF the afternoon when these pictures were taken so it was quickly done in the shade and then onto the cafe for a drink!

colorblock dr front and back


Burda color block tech drawing

I always like to see the technical drawing of any pattern, don't you? I did add about 6 inches to the pattern but making it longer kind of spoiled the look, so I hemmed it above knee, although not quite as short as their example. 

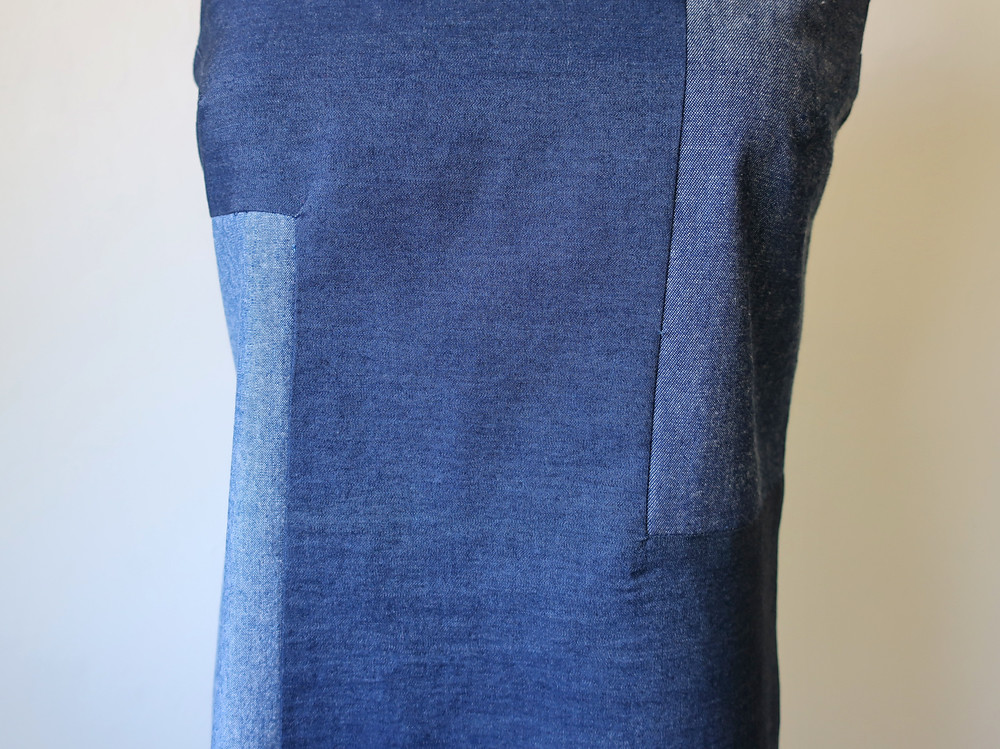
colorblock dr front close up Corner of color block pieces

There's a look at the corners, outside and then on the inside. I put a small piece of fusible interfacing on the corner that needed to be clipped, then I stay stitched it to reinforce, then clipped and sewed to the corresponding section. I think of these as one and done corners, it doesn't pay to have to unpick, redo and start to chew up the seam allowance so it's best to get it right the first time :) 

So that's the latest on my random summer sewing. It was a scorcher this past weekend, around 110ºF for the high so not much of anything was accomplished other than trying not to melt. Up next I have used my Tatjana trousers minus the pleats pattern, (seen in my previous post as shorts) and further remodeled it to narrow the legs. A bit of an experiment and I'm not sure how it went, but I will show all in a post soon. They aren't hemmed yet and I think I will better be able to evaluate when they are hemmed and pressed. 

Sewing classes are on a summer break for new but Hello Stitch Studio is opening back up this month and we are planning in-person classes in September and October. As well as continuing to offer some online classes. At the end of my most recent class I was surprised that people said "you will continue with the online even when the studio opens, right?"  and the reasons were interesting. (time available to participate, distance etc) So I will do both and keep you updated. 

That's the latest. Stay cool and enjoy the summer. Life is looking more like normal here - we are fortunate to have a very low case rate and high vaccination rate so things are good! (if only we could get out of our drought situation - it's always something).

Chambray dress3

Happy Hot Summer Sewing,
Beth

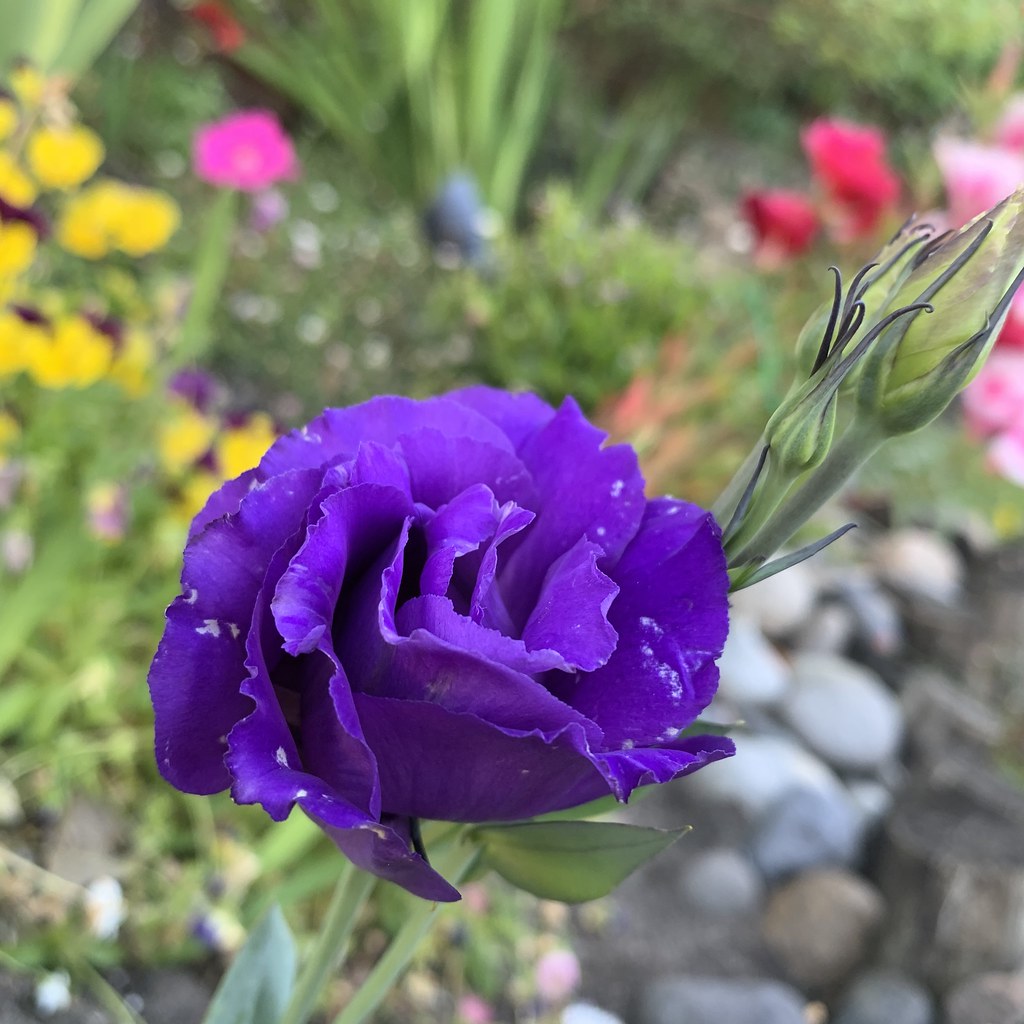
Today's garden photo, a new to me plant. This year and last I have tried a lot of new plants and some of them have been great discoveries. This is another one I will plant again next spring, the color is amazing. It's Lisanthus. 


Lisanthus

Wednesday, June 30, 2021

Just Patterns Tatjana Trousers as shorts with some design changes

After the last year when I have sewn several dresses (like this and this) that have not really been worn during this weird year, I figured it was time to start off my summer sewing with some more practical separates. (And I will wear those dresses soon:).  Once I made the first version of the Tatjana Trousers from Just Patterns I was really impressed with them and resolved to try them as shorts. You can see my second version here paired with my vintage Vogue tweed blazer.

When I sewed that black pair, I had just read an article in Threads magazine showing how to make fit adjustments to the back of pants which I tried. Fitting magic! or at least a fitting adjustment that was ideal for my needs. 

Here are my finished shorts. Which have no pleats. More on that pattern modification below. 

Tatjana shorts1

Here's the front of the shorts, with the photo lightened a bit so you can hopefully see details. Actually the absence of details, as I removed the the front pleats. This pants pattern has what I consider a high waist, or at least hits at the natural waist which is above where most pants patterns are designed. This is ideal for me as I have a very long rise for a short person.  For comparison the finished zipper length here is 7" whereas on my Ash jeans the zipper is 5.25" long. 
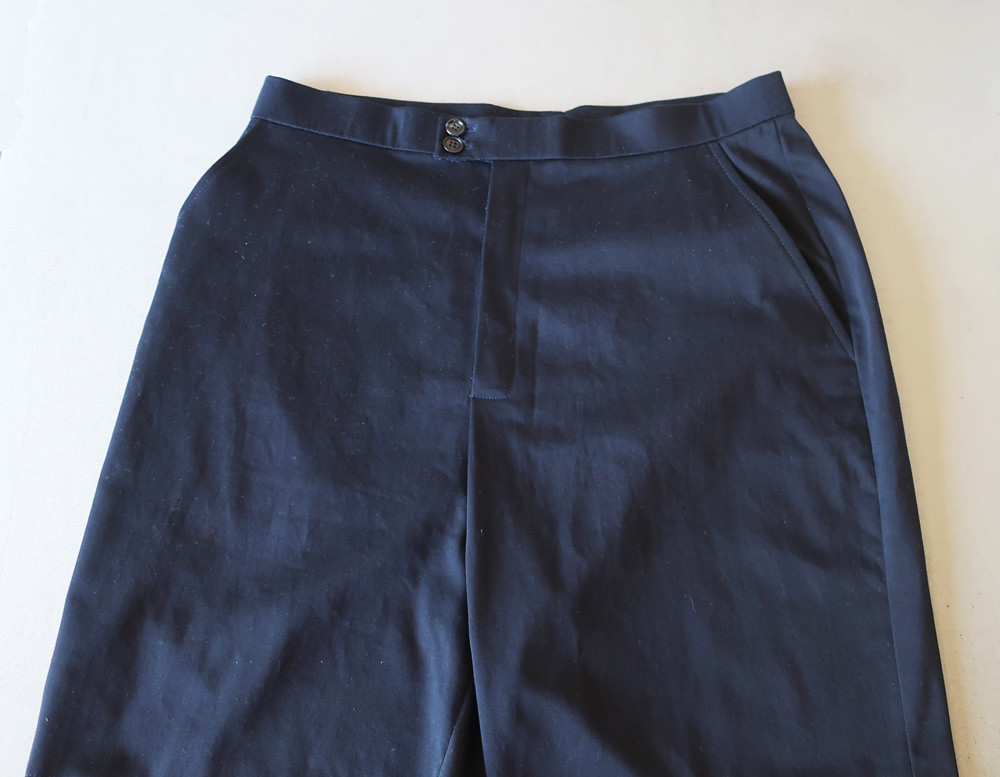

Blue shorts front

I had been thinking about how to remove the pleats for a while and then I saw an Instagram post from @elmeretakespictures who showed how she was removing the pleats of the Flint trousers using a tutorial from the Megan Nielsen blog.  Exactly what I was looking for!  What do we call that when someone posts on the sewing intterwebs the exact thing you are thinking about?  Sewindipity?  I'm going to start using that.  

So here is my explainer of how I did it.  Not exactly a tutorial but hopefully you get the idea. Here's the front pattern piece of the Tatjana trousers with the existing pleat fold lines shown. One small pleat next to the pocket edge and then a larger pleat in the middle. 

tatjana pattern front

To remove the pleats, I followed the method from the Megan Nielsen blog and overlapped the larger pleat, taking up the excess length horizontally by also slashing the pattern there and overlapping. For the smaller pleat I just used my standard method of folding it out in the pattern paper and smooshing it where it got to the end. Then I needed to fill it the top edge to make it smooth for attaching the waistband. I did forget to check the pocket pieces so they didn't catch complete in the waistband seam bt I will go back and add a bit of height to that piece to match the pants front piece. 

Tatjana removing pleats

So that's the front, it doesn't change the waist circumference of the pants nor the rise.  The back I had already adjusted based on an article in a recent Threads magazine. I continue to subscribe to Threads although now they are reducing it to 4 issues per year, they say more content per issue. But I can say that in each issue I learn something, be it a great big fitting revelation or a small tip that makes sewing easier. Plus their website has a wealth of information - I always suggest to people in my classes to check there first if they are looking for how to do something, very reliable information presented well. I took a picture of the cover of the issue I am referring to for the pants adjustment so you can see which one, Jan 2021 and get an idea of the articles. Better Fitting Pants and Muslin to Pattern How-to, both useful. Although some of their features have the same flaw as the pattern companies - fabric choice! see below. 


Threads mag cover

Here's a look at the article, I was very peeved that they decided to photograph this using that print fabric on the pants. Way to obscure the details!  But I wanted to show you how they do the diagrams, they are 
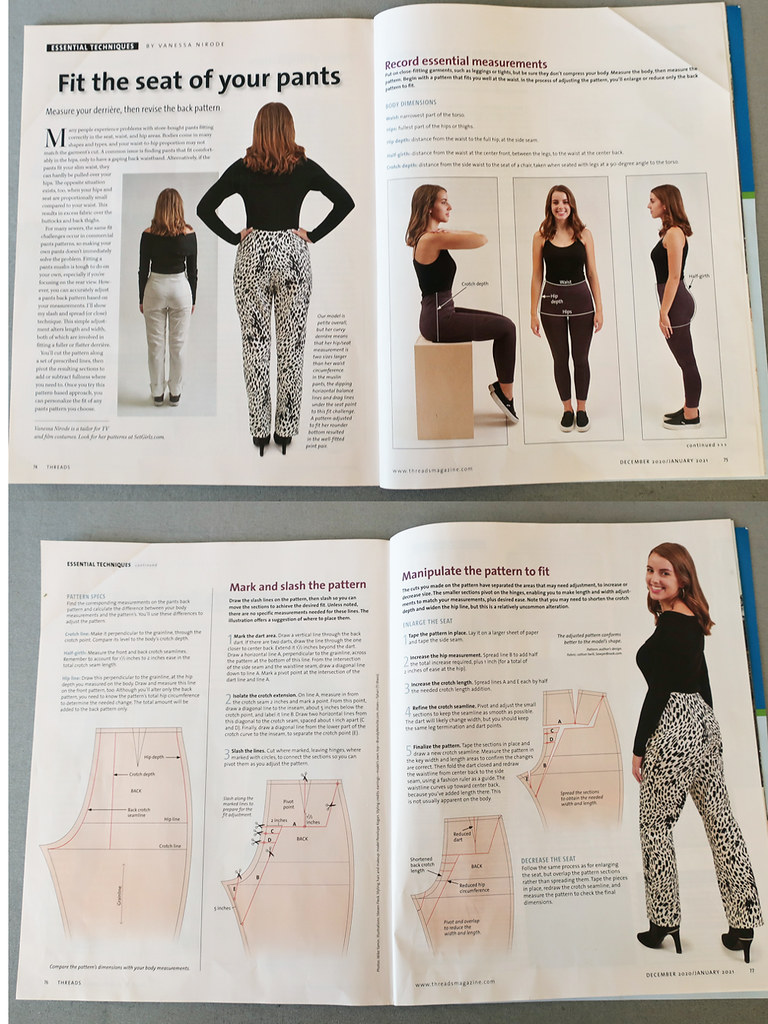
Pants fitting diagrams

Here is my adjusted pattern piece.  I added 1/2" in width at the hip, and about 1/2" in length. This adjustment also makes the dart larger. This pattern has 2 back darts and I could have shifted some of the increase to the other dart but for now I left it as is. I have highlighted in pin the addition. I then needed to redraw the pocket to make it straight but otherwise this is a great way of adjusting just the pants back, adding space where needed and keeping the side seams unchanged. 
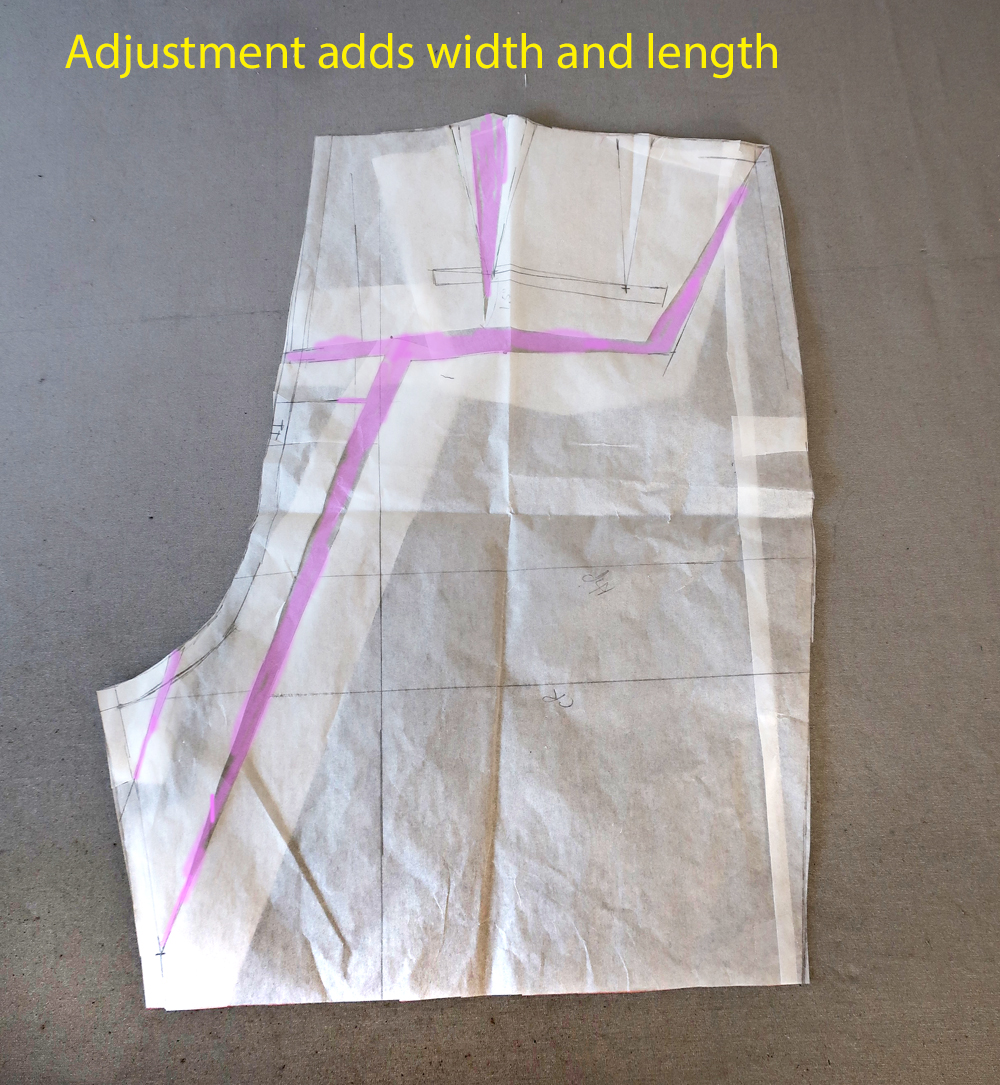
tatjana back adjustments

OK I guess you want to see the pants back on me, so here is one picture. It's not likely I will wear tops tucked in with shorts but I think with wool trousers I would. Perhaps if I make this winter I might put pocket flaps just to break up that expanse on the backside and add some interest there. In any case I'm pretty satisfied with these adjustments and now I plan to use this same pattern to make a more narrow leg pant (using this article that I also came across on the Threads website)
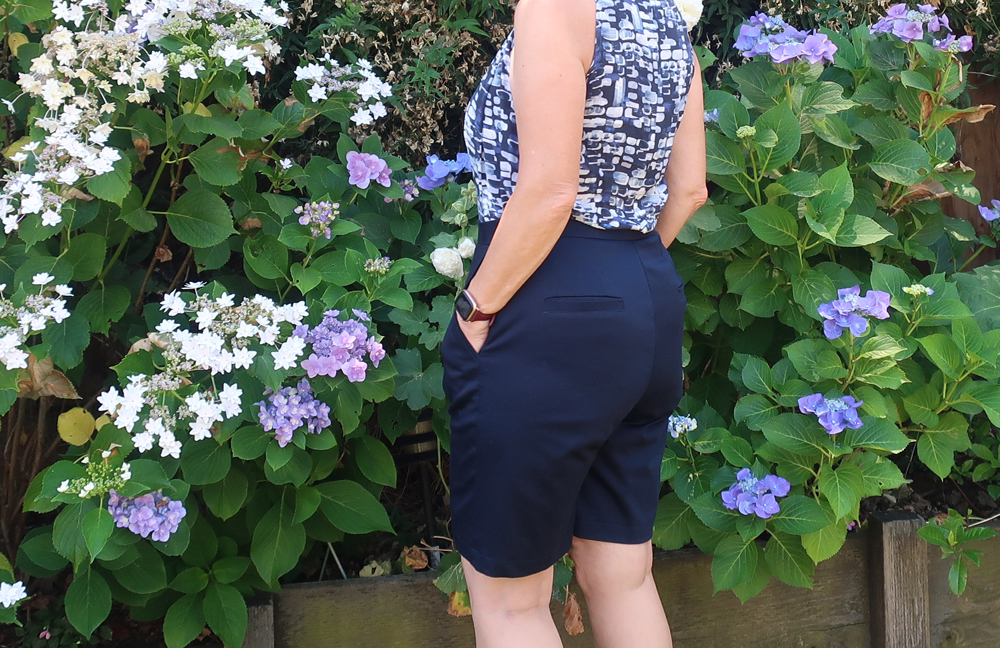
Tatjana trousers back view3


blue shorts back

I meant to topstitch around the entire welt pocket which is a detail you see on khaki pants or shorts. Next time. 
One other change I made was to narrow the width of the waistband. As designed it's a bit too wide for me and so I just added interfacing then trimmed away the extra. These shorts gave me an opportunity to use some of the many packages of waistband interfacing I have accumulated after going to many many rummage sales. The type of waistband interfacing only works well on straight waistbands but if your pattern does have one then it is really quick and easy to use and makes a stiff waistband that doesn't crumple. 

Shorts waistband interfacing

Another look at my shorts, plus a top I started a while ago and recently finished. I'm not crazy about it but it's nice to wear on a warm day since it is the most floaty rayon lawn. 

Tatjana shorts2 with Burda top


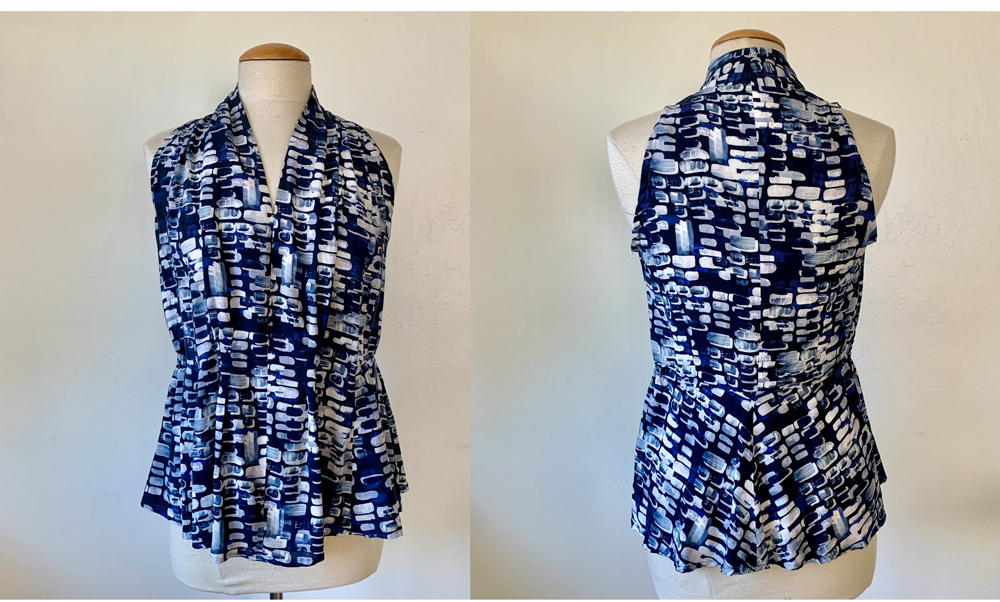
Top Burda 07-2018


mosaic top front adn back

I quite like the neckline and the upper part but the body had too much fabric so I took out some of the pleats and also some width at the side seam. Perhaps it needs that tie as shown in the pattern. I think it just has too much fabric in the front, not my style. 

So that's the latest on my new shorts. If you make this pattern I defy you to refrain from putting your hands in the pockets at all times. Irresistible!  Worn here with one of my favorite t-shirts, I think it's a McCalls pattern mash-up. Made with this Art Gallery knit from a few years back. Such good quality and I love the fabric. I keep looking at their fabrics but nothing has grabbed me again. Kind of pricey but I only need 1 yard to make a top and considering how often I wear this it's a very good value. 
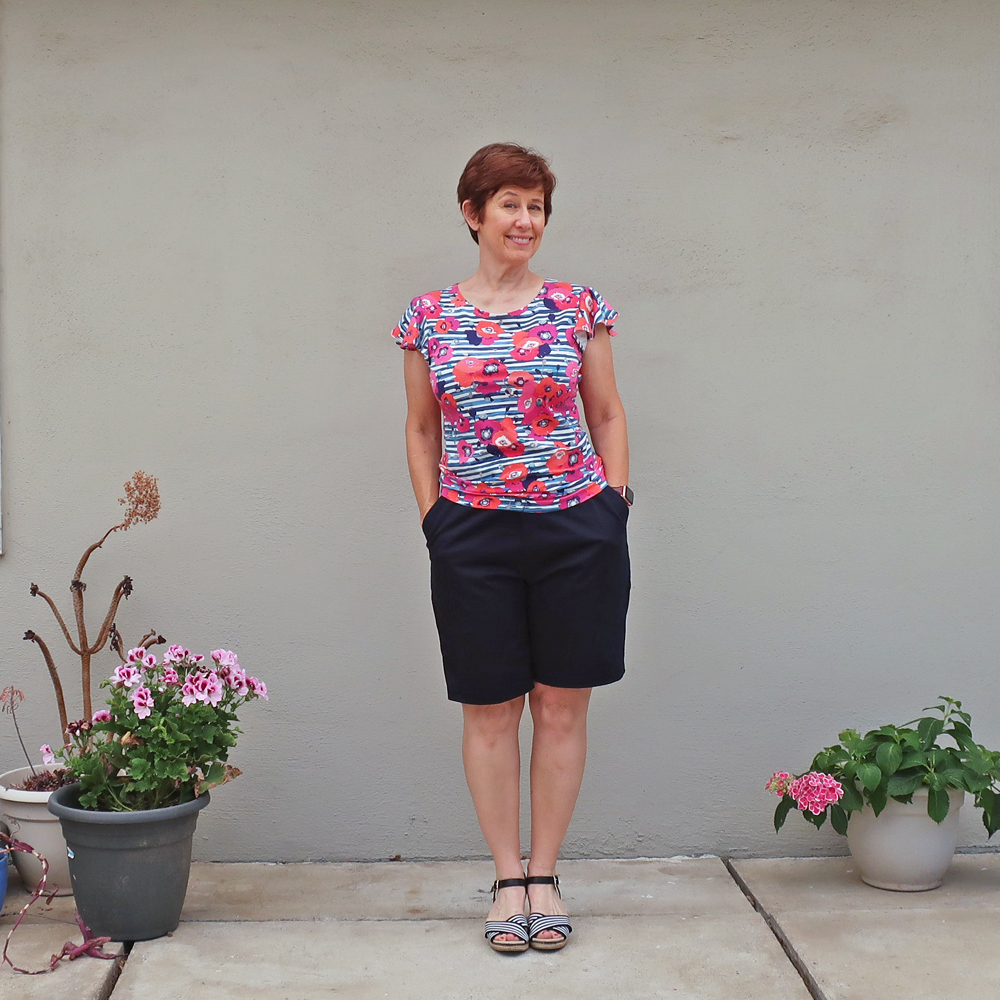

Tatjanashorts 2

I just started a chambray shift dress with a pattern I found in a 1998 Burda magazine. (Is 1998 vintage? or just old?)  I have one online class for July which is Sew Lab. Just a 3 session class where you can ask any questions and get help with unfinished projects, advice on new ones and just sew together a bit. Then in August I'm taking a break and then we start some in-person classes in September, Yay!!
I will have details soon. 

Happy Summer Sewing,
Beth

Today's garden photo, a look at my hollyhocks next to the hydrangeas, which you saw in the photo above. This is the 3rd year for the hollyhocks and they are bursting with blooms. Despite living in dry N. California I do like the cottage garden look, so I'm really pleased with these and will get some other colors next year. 

0D56C3AA-A793-47CB-93DD-281BDCE02FA5_1_201_a