Time to pick up where I left off on this vintage Vogue pattern. It's all finished and on a rainy day (one of our few) I took a couple of outdoor shots. That may be all there is. I'm actually not crazy about this jacket, while I'm glad to have it finished it might just be another one of those 2020 items I give to a friend. However it did pass the time during the winter and reminded me why I like to use the quicker tailoring techniques to make things. Further down in this post I will pick up where I left off with sewing details in my previous post.
It has been finished for a couple of weeks, but it just feels so strange to add substantial items to my wardrobe with basically nowhere to wear things. In fact I was at Trader Joe's this week, wearing my bright blue wool blazer (here's the link) and one of the guys stocking the freezer cabinet turned around and said "great jacket - love the color!" So perhaps I need to wear some of these items for my mundane outings. Fingers crossed that summer is a lot different around here - I don't even want to talk about it (going on 12 months of social distance here in N. Calif 😩.
As to what I've been sewing - not all that much as I just finished a month of teaching several online classes via Zoom for Hello Stitch Studio. I can say they are a lot more to prepare than teaching in person but I'm happy to do them. We structure the classes as part instruction/learning time and part social time. I think we all miss our sewing social events so much and while I talk often and even see some friends periodically most of my friends don't sew. (and think that making clothes is a mysterious and unfathomable activity).
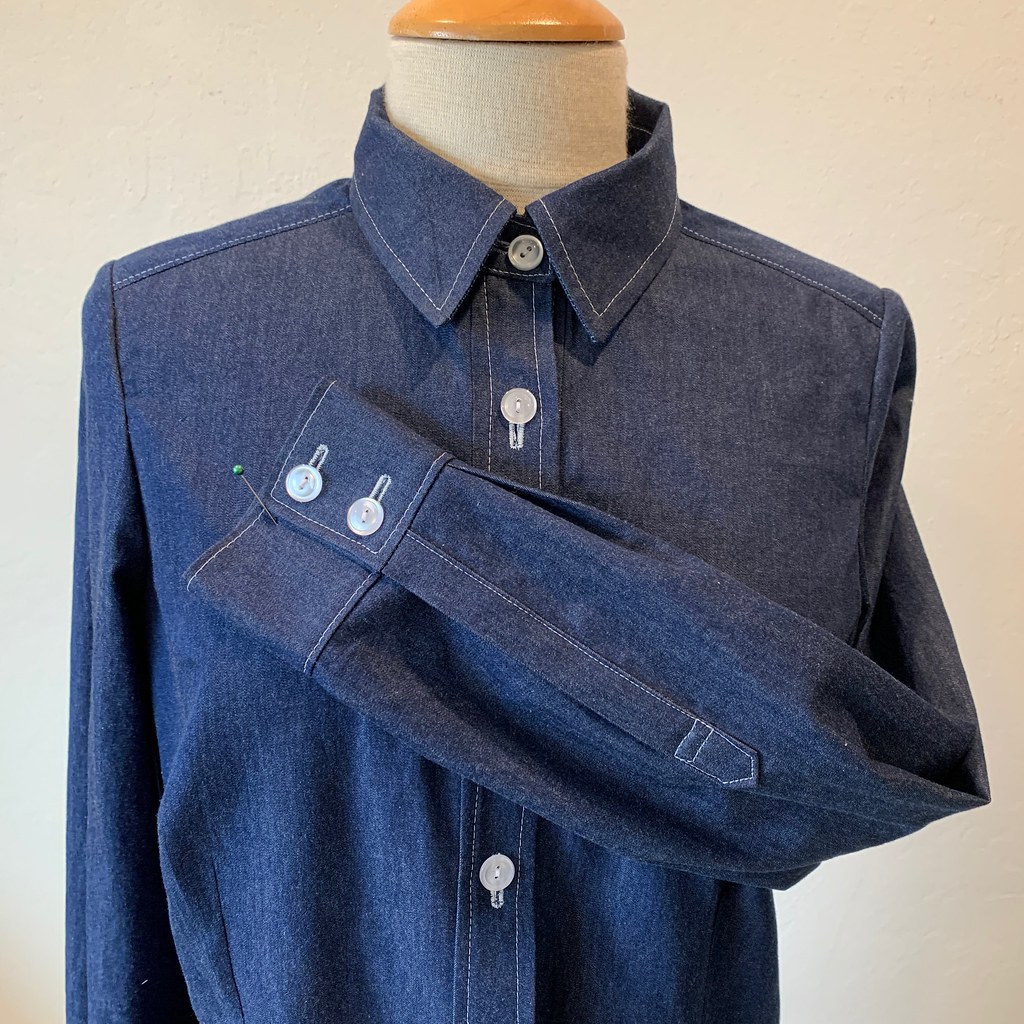
We have two classes in our monthly sewing club starting this week, the Button Front Shirt class which is an early session (4-5:30 pm pst ) and you can use any shirt pattern. Also we have the Myosotis Dress class 7-8:30pm. If you want to join in this class it would be fine to use shirt dress pattern that you already have. One upside of this whole situation is that people from outside the bay area can join in so it's been great to meet (virtually) some new people. Here's the link to Hello Stitch Studio for all their other offerings. I made this chambray shirt in the class a few months ago, so I will be looking around in my stash tomorrow for fabric to use in new shirt project in the class.
OK, back to jacket construction. In my previous post I ended with the start of pad stitching on the lapels. The next pattern piece to be pad stitched was the collar. I really feel I am out of practice with this stitching technique but wool tweed is a very helpful fabric and my stitching seemed to work. I like to use a contrast silk thread color as it make me happy to see the stitches marching along in turquoise rows, plus it doesn't show on the other side since the needle takes an invisible bite into the wool on the right side.

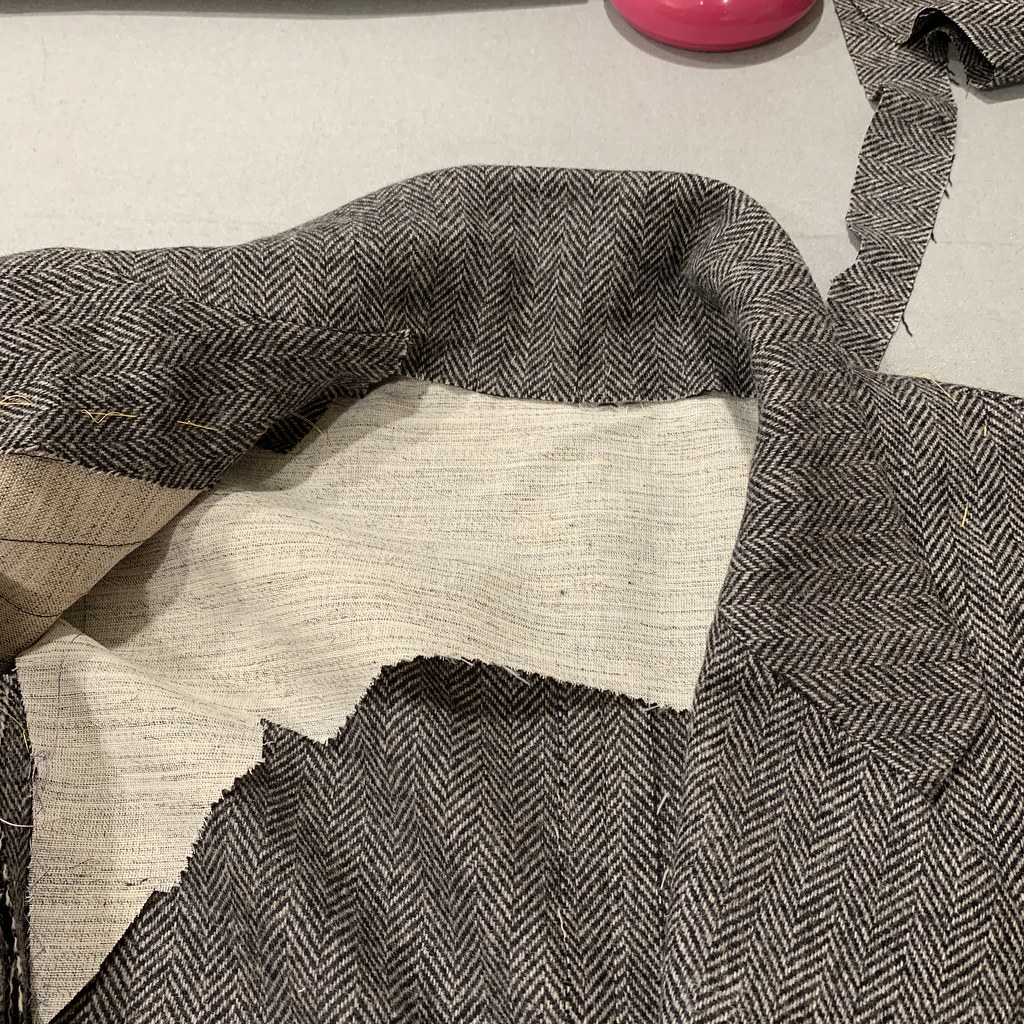
Next step is attaching the under collar to the jacket front. At this point it is sewn on but not trimmed nor the seam pressed.

My next step is to press that seam which joins the collar to the lapel, trim and catch-stitch it down with silk thread. I do this same process also when I have made a jacket using fusible interfacings, it keeps the seam allowances smooth inside the jacket and then the upper collar and lapel can overlay with out any seam allowance getting in the way.

Onward to the upper collar and lapel. Here is where in deviated from the pattern instructions, they didn't have any interfacing on the upper collar but I don't like the way that looks, although in this fabric it might not have been as noticeable as it might be on a solid or light color fabric. In any case I put some lightweight fusible on the upper collar and the jacket lapel facings. The seam there was also trimmed and then catch-stitched down.

Time to sew the upper collar/lapel facing to the jacket body. I have no reservations about marking my stitching line on curves, angles etc. It just makes the machine sewing more accurate and avoids having to redo things. Soft lead pencil, chalk or Frixon pens all work fine for this purpose.
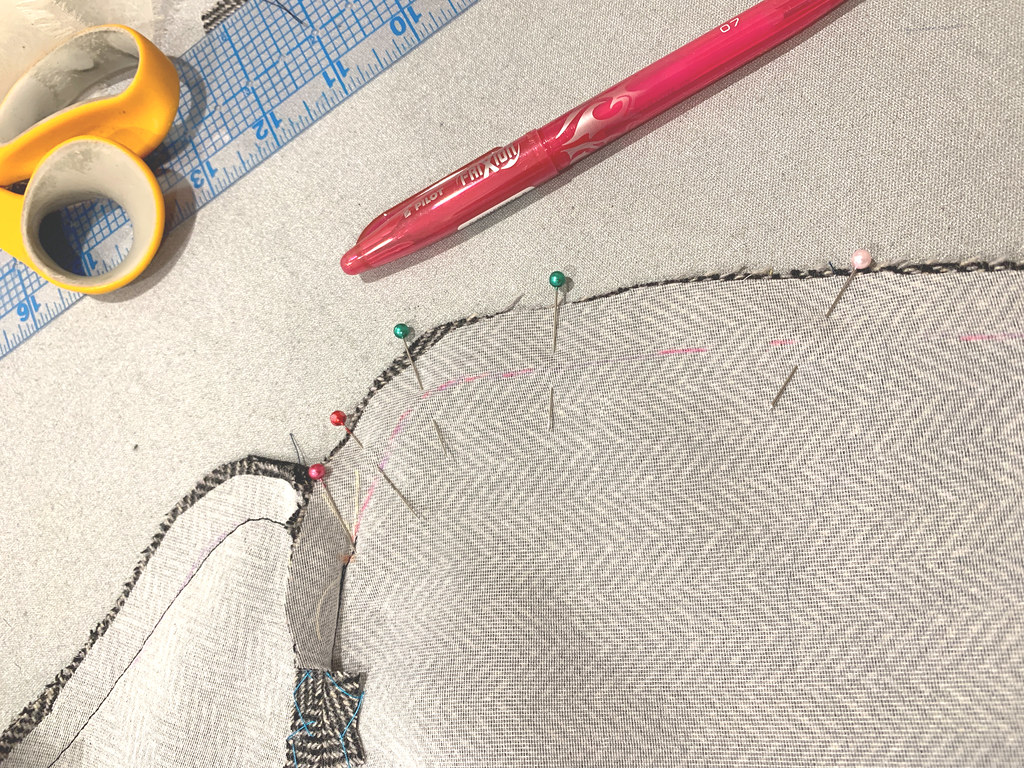
More trimming. Grading the seam of the collar.


Pressing open the seam on the edge of the collar and lapel, and notching the curves which need space when the seam allowance is on the inside.
Collar and lapels done. Onward to a couple of steps that I have never done before. Hand sewn patch pockets! I had doubts but I do like them. So sleeves, pockets and a few finishing details will be in the next post which I intend to do later this week. I like to blog projects as I go and this has been lingering a while.

That is a very satisfying lapel :) The herringbone stripes show off the collar angle nicely. So that's the mid-point on this jacket construction. I did make the shirt that is shown on the pattern but it is just way to 70's for me (the collar puts it out of the range of wearable for me) but I will post it you can see how it looks. The start of this jacket as well as a look at the Vogue pattern and the muslin are in my
previous post here.
Stay well and Happy Sewing,
Beth
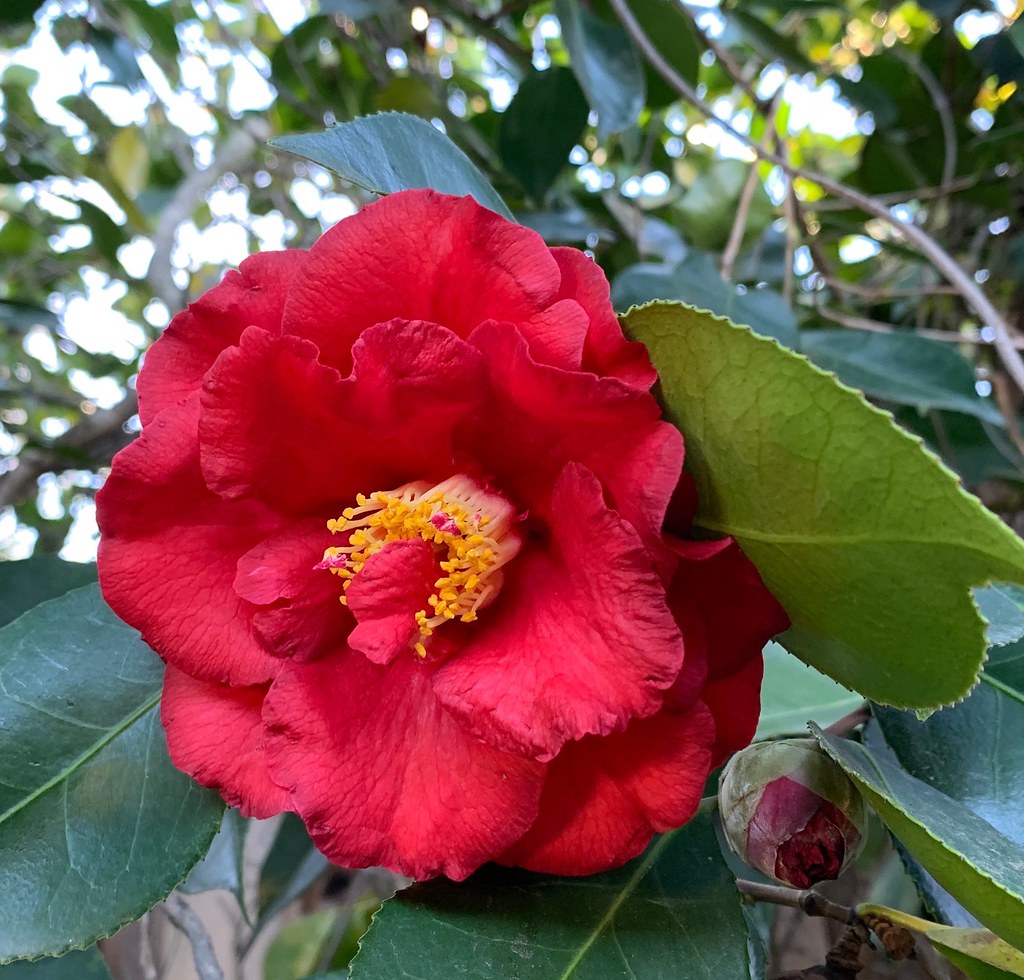
Today's garden photo, not a lot blooming right now although the roses are all trimmed and sprouting their new leaves and stems. There were tomato plants for sale at the nursery this week. I have a new neighbor who has moved here from Michigan and she was saying that this California garden thing is quite confusing - I can imagine. Apparently they have plenty of snow on the ground in her former neighborhood while we are out walking in shorts and dealing with our drip irrigation in anticipation of the dry year to come. Here's a camellia that always puts out so many of these huge red blooms, filled with nectar for the bees and hummingbirds.


Is that a cosy cover I see on your clapper, do tell. As usual this post is full of interesting tips and ideas, I keep them all, thank you.
ReplyDeleteYes, that June Taylor pressing board came with the cover when I bought it. so you can use it with padded surface and edges or without. very handy.
DeleteThank you for the wonderful photos. With your descriptions they explain and teach so well.
ReplyDeletePerfecto paso a paso. BESICOS.
ReplyDeleteThank you for the detailed information and great pictures of your jacket construction. I appreciate you taking the time to do this.
ReplyDeleteI loved seeing your process for this lovely wool jacket over the last post and this one.
ReplyDeleteYour comment about the long time spent hand stitching and referencing knitting too is just how I feel. I loved doing my latest tailored coat, but there's something to be said for the nice pace of construction with speed tailoring methods :)
Looking forward to seeing your finished blazer
swoon.
ReplyDeleteSuch beautiful sewing. I can't wait to see it finished. I'll have to admire the tailoring from afar because no way my hand would allow me to do all that :(
Wow, this looks like a very professional haute coture work! I am very impressed!
ReplyDeleteKind Regards
Alicja