Friday, April 15, 2016

Burda 6632 tunic top in cotton lawn

Do you ever feel like you ought to sew something different?  Like a different silhouette? Or maybe a color that currently doesn't have a place in your repertoire? I do. I've been thinking about this question lately and come to the conclusion that I want to try some different tops. Reflecting on what I make for myself, I think I have a good variety of shapes in coats, jackets and dresses but I don't really branch out when it comes to tops. And I see so many cute and interesting tops that other people are sewing.

Consequently I bought Burda 6632 and sewed it up using a cotton which I bought last December at Stone Mountain. I originally bought it to sew a Christmas gift and there was about a yard remaining after making that project which was just enough for this sleeveless tunic.

And that is another question, what defines a tunic top? To me it is a bit loose, most often collarless, and maybe longer than a button front shirt.
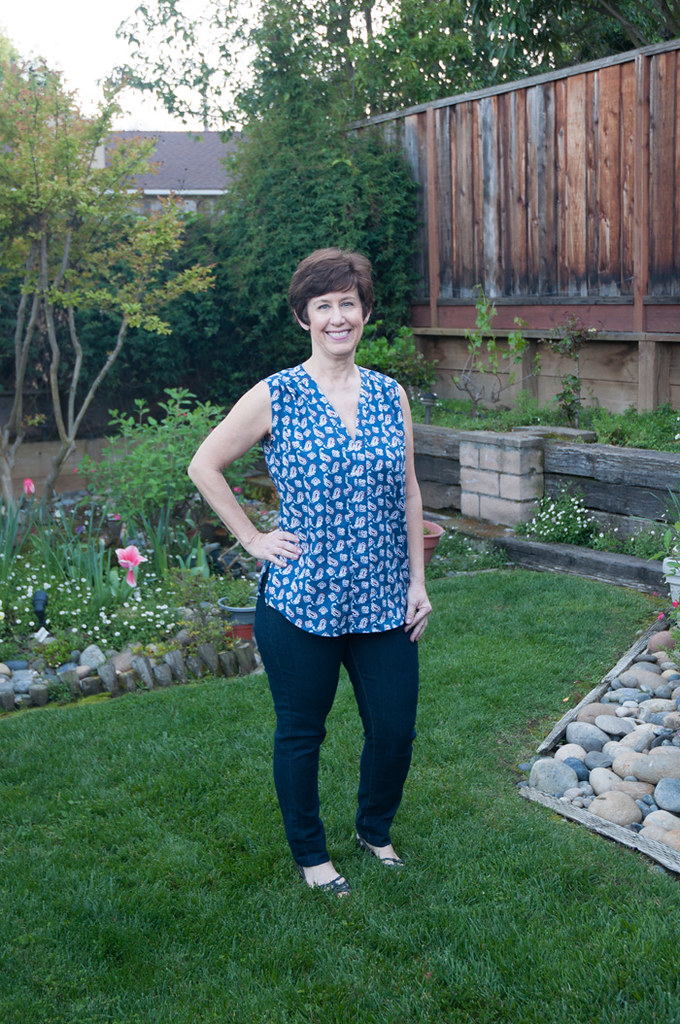
Burda top on me front

I'm not sure I landed on tunic top with this one but I did end up with a nice floaty top which will be very wearable in July or August.

It has forward shoulder seams and some pleating there, and then the neckline band meets in the center and continues down to the front hem. The inside of the band is pieced as I was down to little scraps of fabric when I cut it out. Sewing this type of fabric is so nice - cotton lawn and voile just sew up like a dream and press so easily.
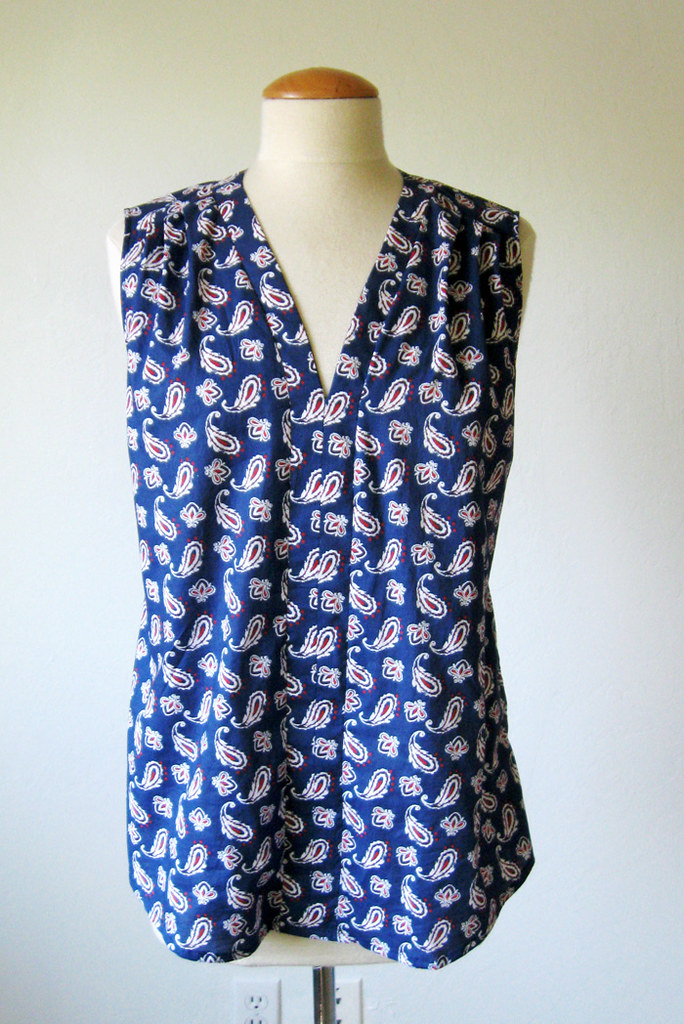
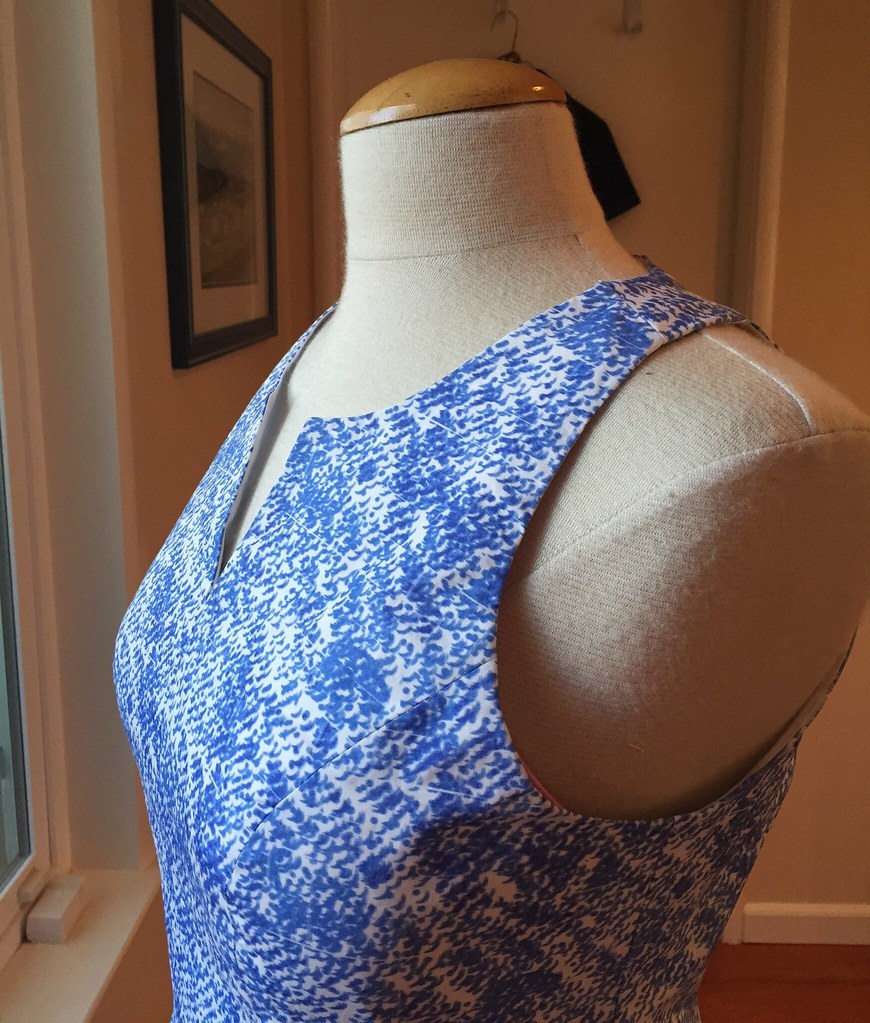
blue burda top on form front

Here is the back view. It has a yoke and then the back is very full and gathered into the center of the yoke. It looked very balloon-y on me (at least I thought so). So I added the little bit of elastic in a channel at the center back waist. Not on the pattern but my little fix to take in some of the ballooning. I think if I were to make it again I might take out most or all of the gathers at the center back and just have it be flat at the yoke. There would still be enough room in the back. In a silk it might be fine, more floaty and drape and look better, sometimes you just have to adapt a pattern for the fabric at hand.
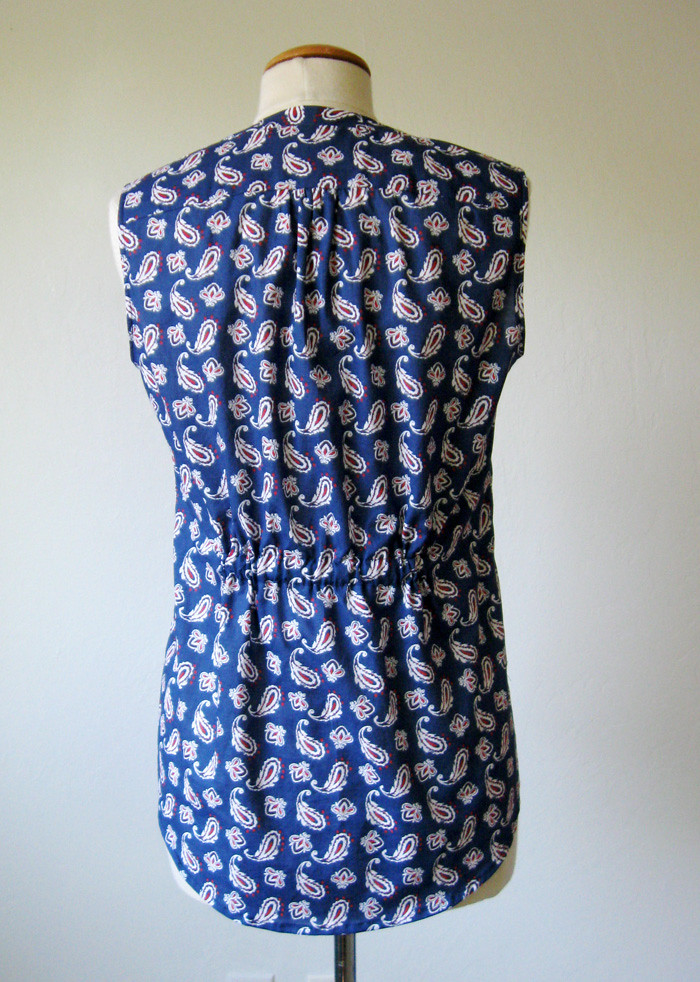
blue burda top back on form

Or maybe not enough room over the backside :)
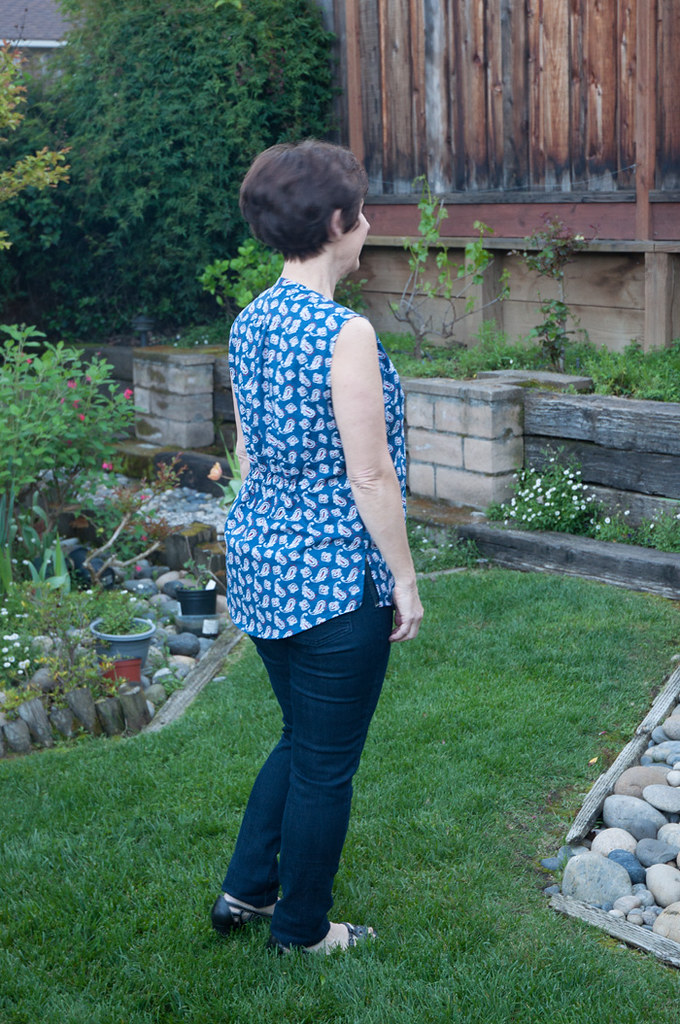
burda top back view

Side view on the dress form. I like the shape of the hem and that it is a little bit longer in the back. I just made self-fabric bias binding for the armholes - which the pattern probably noted but I didn't look at that part. Although I did have to read through the instructions for the center neck band piece.
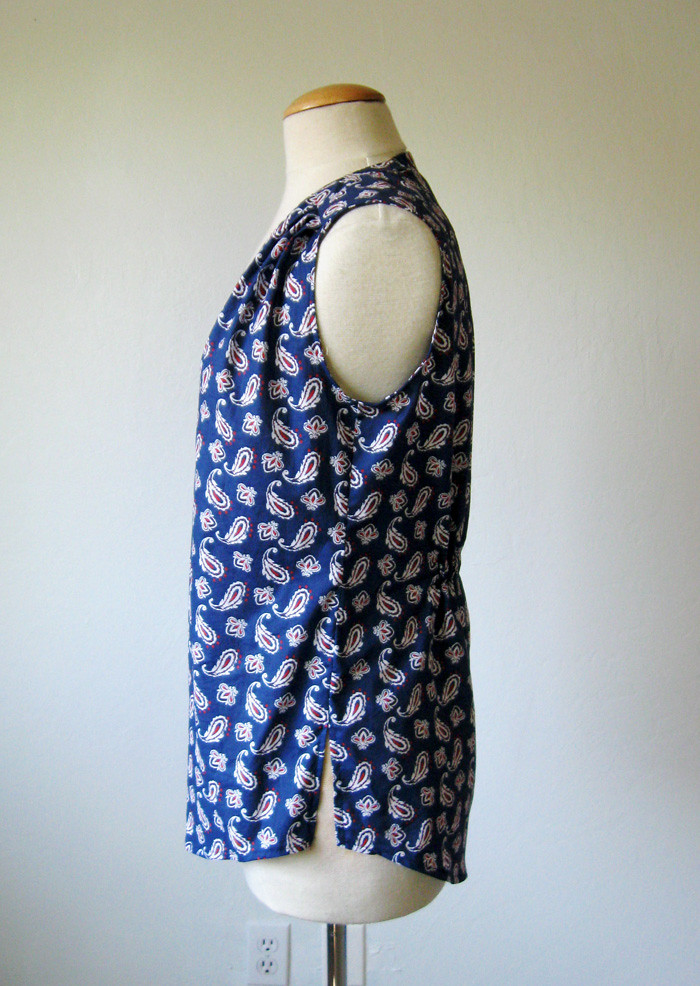
blue burda top on form side

Here's the pattern envelope. And by the way, I lopped off a bit from the outside edge of the shoulder. My standard adjustment - I can't stand sleeveless tops that are too wide in that area. Looking at the photos above I would have liked to take away more but I think the pleats were in the way. I sewed the size 38 but now I'm thinking that in roomy Burda styles I might even try the 36 next time.
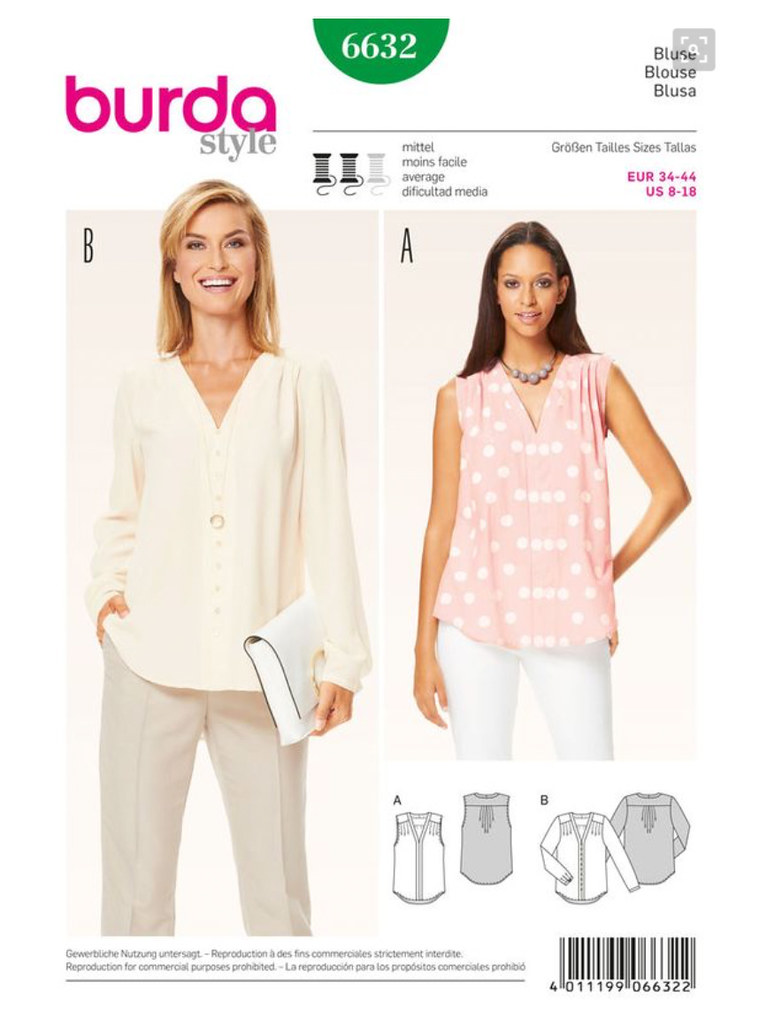

Burda 6632 top

I thought the center neckline might be a bit low and it's not too bad when standing up straight.  A lot of things with V-necklines are that way which is probably due to the fact that I am shorter than the pattern is designed for. I thought about shortening the upper bodice but it seemed like a pain in the you know what to deal with redrawing that neck band piece, plus this was kind of a test version using a scrap fabric. On the positive side a friend of mine gave me some dark red jeans which are a perfect complement to this top. And which I didn't wear when I took these photos as they had not been hemmed yet. Oh you bet, I have to shorten all pants. Good thing I have a sewing machine. ;)
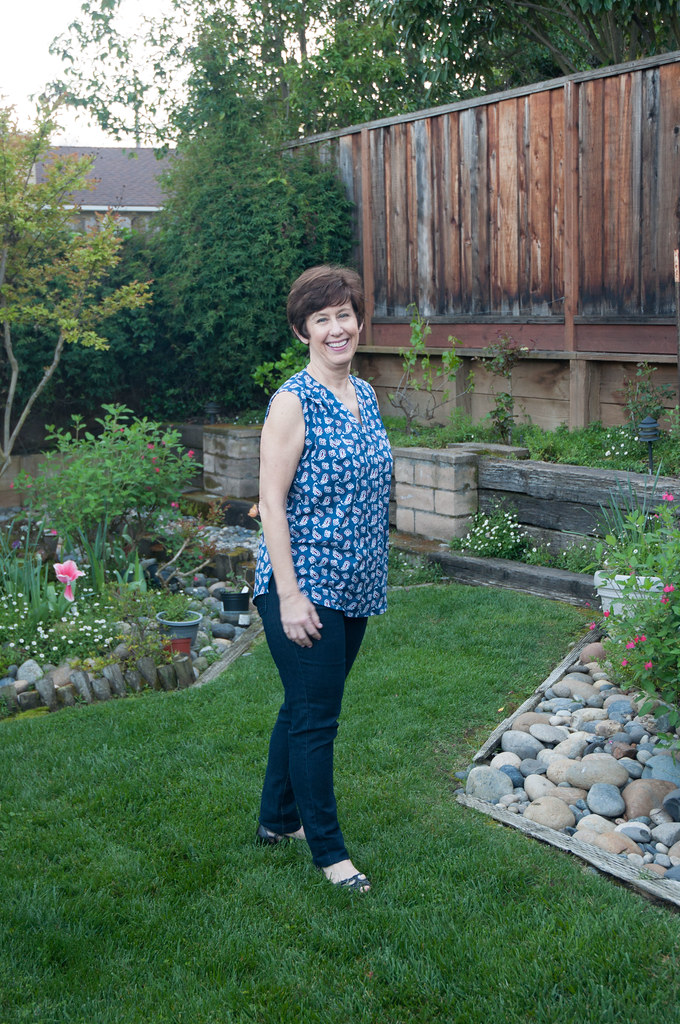

Burda top on me3

So now I have tried another silhouette. And hmmmm. Not so sure I like it. But whatever. Worth a try.

However I just finished a different item, with another new to me silhouette, and I love it! Which goes to show, you never know until you try something out.

We took these photos about 3 weeks ago - it was almost sleeveless weather that evening. And then more rain - yippee - and now I think spring is well and truly arrived. I have tomato plants growing happily on the patio!

I have more fabric from My Fabric Designs that I am about to cut into very soon - after pondering what to make with it the light bulb went on. Are you one of those people who puts their head on the pillow at night and then reviews your day? A quick mental scan of what you are doing tomorrow? and any puzzles that are rattling around in your cranium? Oh, is that just me? Yes, some nights I fall asleep in a snap but most times I have the sense that just before I go to sleep I open one little mental filing drawer, pull out a question and think about it a few minutes. It could be anything from where to put a new plant, a solution to a family dilemma, what to cook for a dinner party, how to advise a friend with a sticky situation, or the most relaxing one of all - what to do with a particular piece of fabric.  OK, fabric usage is  not the most earth-shattering issue but enjoyable to think about nonetheless.

Next up - the result of my recent declaration which was "when in doubt sew denim".

Happy sewing dreams,  Beth

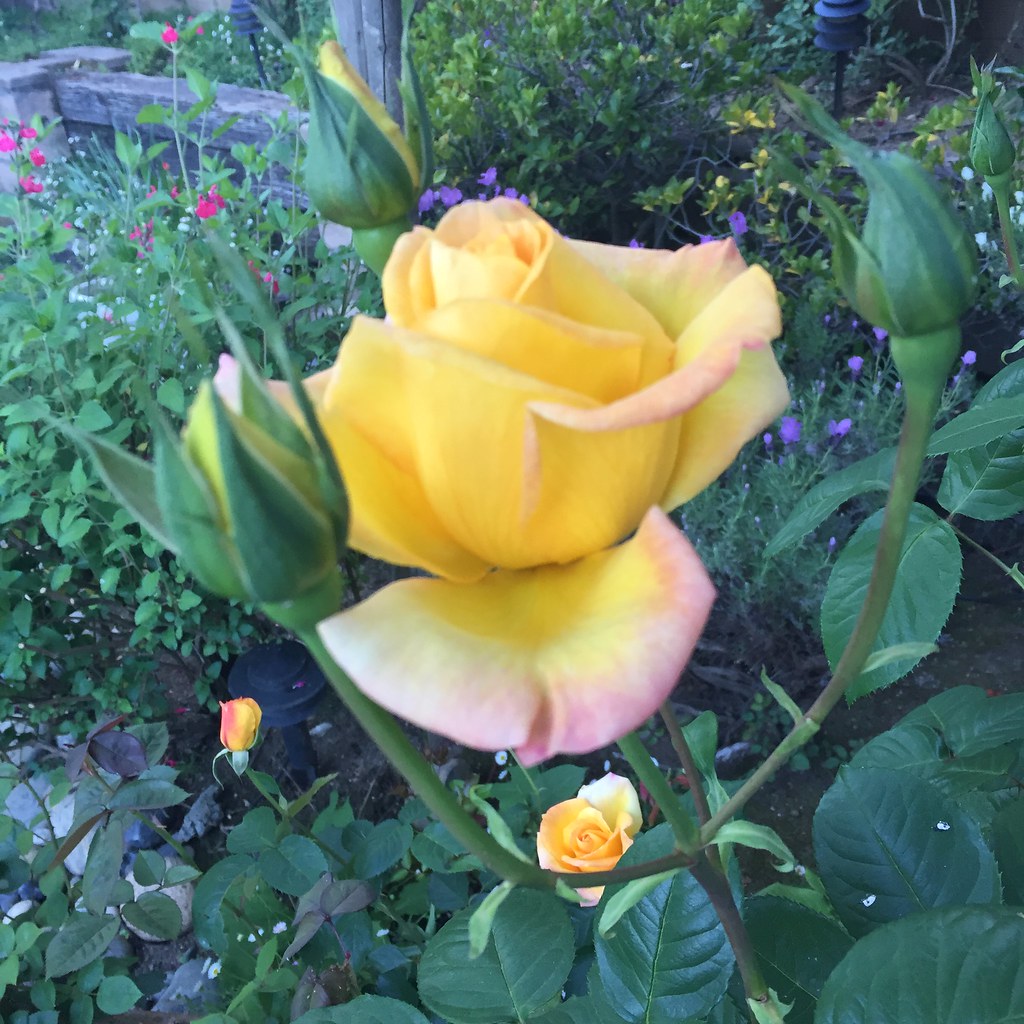
The roses are blooming everywhere, my neighborhood is awash with color on every street. Lovely! This yellow one in the backyard is usually a first to bloom then kind of drags staring in July. But so nice for now.
April garden

Monday, April 11, 2016

Lots of fitting details for Simplicity 1354 dress

This is one of those posts that I feel should have a subtitle, and this one should be:

The pattern that wasn't there...

Which might seem mysterious but will make some more sense once you read a bit further. As mentioned in my previous post, I had the opportunity to use My Fabric Designs to create a custom printed fabric. Once it arrived I decided it should be a summer dress and had just the pattern in mind.
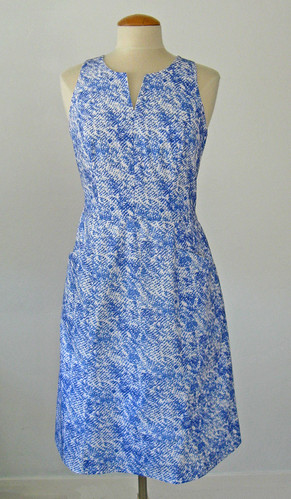
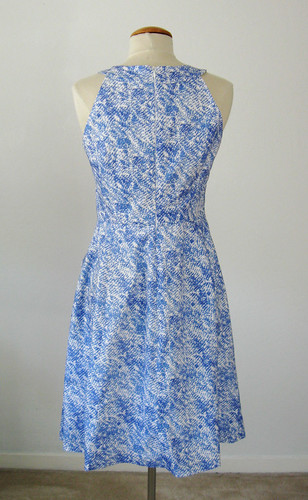
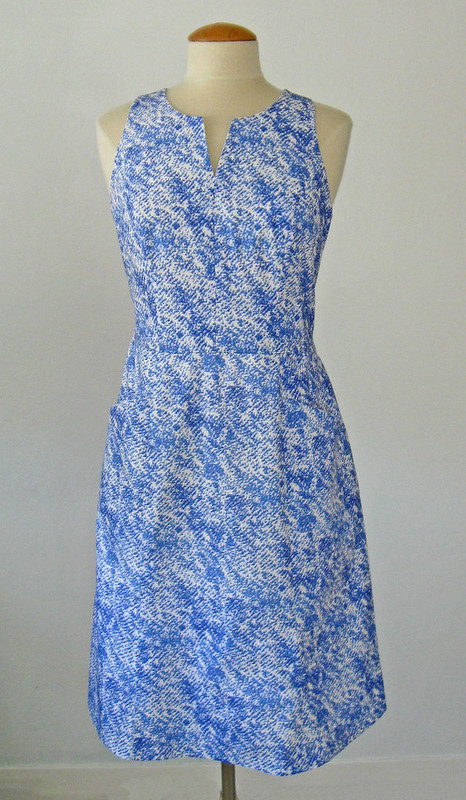
Due to the lighting and my photo skills the details might be hard to see but you get the idea. The skirt has a center panel and then side panels with slant pockets. The bodice has princess seams and slightly cut in armholes with a rounded piece at the back neckline.  Here is the previous post with the first photos on this dress. 

Note: this is turning out to be a long post but it has lots of fitting details so if you like that then stick with it :)
blu wh dress on form2

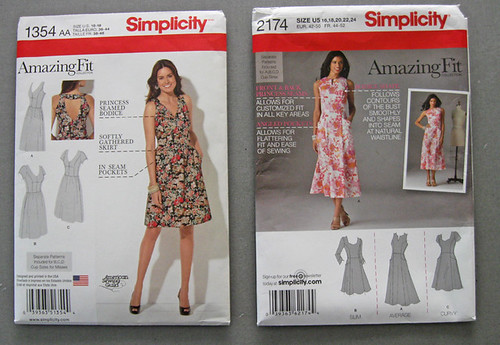
I used both these patterns to create the dress, Simplicity 1354 for the bodice and Simplicity 2174 for the skirt.

pattern envelopes for my fabric design dress

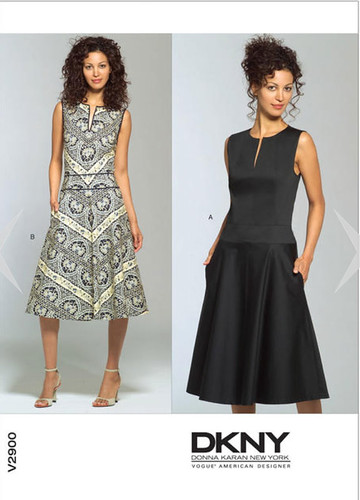
But what I really wanted to use was this Vogue 2900 DKNY pattern that I have been saving for just the right moment. I first saw it sewn up by Yoshimi and then she sewed it again here. But I didn't seem to get around to making it. Then Carolyn got in on the DKNY goodness and also sewed it up.  And I wanted it even more.  So told myself that this was the year I would make it.

V2900 pattern envelope

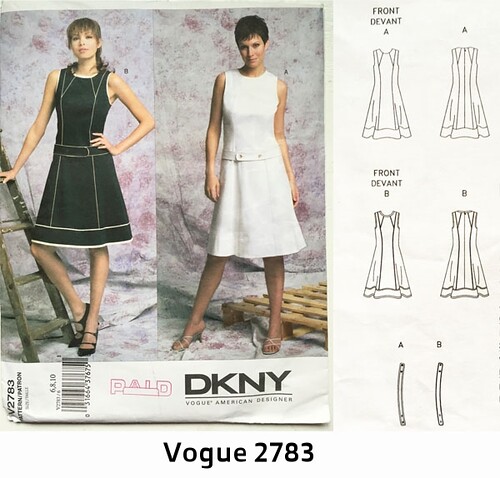
Consequently when I evaluated this self-designed cotton poplin I though "oh, self, make the Yoshimi dress" and went rummaging in my Vogue patterns. Where I didn't find it. And realized that the pattern I had in the drawer was actually this one.

V2783 pattern envelope
A perfectly good pattern, and also a DKNY who is my favorite of all the Vogue designer patterns but not the one I wanted. I briefly thought about buying a copy of the V2900 on eBay but economy won out.
Back to rummaging among the pattern and I found that Simplicity 2174 which is quite similar to the shape/style that I wanted, but my copy is a size 16 - 24 and I usually start with a size 12. So that would be quite a chore. However - another Simplicity Amazing Fit in the box caught my eye, and that is why the result is a frankenpattern re-creation of the Vogue that I wanted.

Now for the fitting details.  This Simplicity 1354 was size 6-14 with cup sizes so I looked at the finished garment measurements and started with the size 10. I have always started with a size 12 but on most all pattern brands I have to take in the front neckline and even the center back neckline, so I wanted to test out starting with a 10 C and see what happens. And this might be my new size, at least for dress bodices.  I made a muslin of just the bodice, as the skirt could be fitted with larger seams as fit insurance. I always stitch in a zipper. This is my trusty blue zipper which I use and remove from so many muslin bodices. With the ribbon tied on the zipper pull like on a scuba wetsuit so I can fit it on myself.

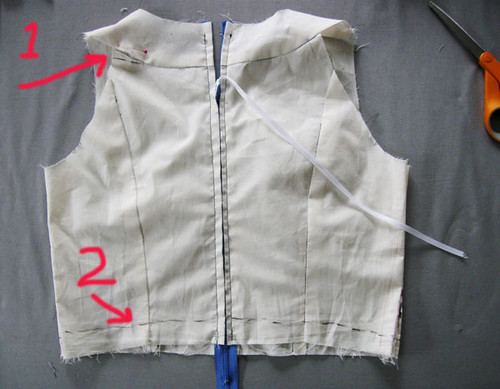
Starting with the back of the bodice.

muslin back

1.  teeny adjustment at the back shoulder, there was a bit of excess fabric where the back met the neckline, so I just pulled it in about a quarter inch at the edge tapering to nothing.
2. Shorten the back of the bodice. Everyone calls this a swayback adjustment but I will stick with shortening of the back bodice. There is too much length there and the back waist seam is too low. I mark where I want the stitching line to be using a sharpie pen (tie a piece of elastic round your waist to decide where). Considering that the muslin includes the waist seam allowance I probably shortened it about 1/2 inch.


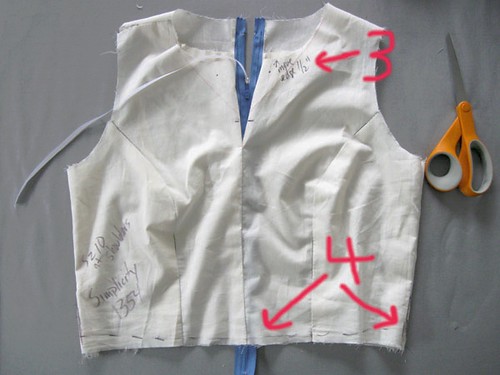
Now the front of the bodice:

muslin front

You can see on the original Simplicity 1354 pattern it has a V-neckline which is pretty but not what I wanted here. So I drew in a rounded neckline but kept the markings for the V-neckline so when I tried it on I could check both. I can see doing the V-neckline version in the future so figured it would be nice to get it fitted now.
3. I liked where the rounded neckline landed on me as it was on the muslin, so if I want that to be the edge then needed to add some seam allowances. My scribble here says to add 1/2" to the center neckline edge and taper to nothing at the shoulder seams. Note I have also marked where the center front vertical opening will end. I also decided that the narrow V opening in the center should be about 1 inch wide.
4. Waist seam - based on my try-on I had determined that the back waist seam needed to move up but the front waist seam needs to move down a bit. Since I had started with a size 10 I expected this plus often more length is needed in the front. So adding about 3/8 inch at the center front. All this is a bit inexact as I just add plenty of extra seam allowance and figure I will get it precisely lined up in the real fabric.

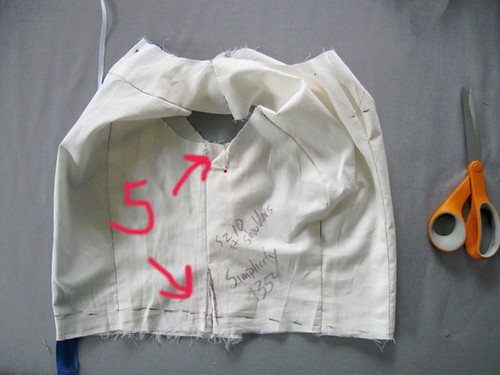
Side view:

muslin side

5. Side seam.  I can't recall exactly but I think I added 3/8 inch on the side seams when cutting out for a total of 1 inch seam allowance. I like to adjust in the real fabric on the body as every fabric and sewing pattern behaves differently. I think a lot of stitchers are searching for that perfectly adjusted pattern which is an elusive goal - what I want is a perfectly fitted garment and the pattern takes me part of the way there.
Anyway - enough opinions? - back to this. I peeled open the top of the seam under the arm so you can see that I used all of the 1 inch seam allowance there, and most of the way down to the waist. Like most women I have that shape were the ribcage or under bust is the smallest circumference on the torso and then it gradually increases down the body. So you can see I gave myself a bit more room at the waist. (because the size 10 waist was never going to be my fit :)

Now I cut out all the pieces for the bodice and then moved my attention to the skirt portion. I used the  size 16 version for the skirt - which would be a bit big but I was the smallest in the envelope and then figured I could adjust it as I sewed. The one thing I gave up on with this pattern is to match the princess seams in the bodice with the ones in the skirt. With this busy print they don't show anyway and frankenpatterning a size 10 from one pattern with a 16 from another was more work than I wanted to put in.

Here is the part where some of you might say aaaargh.....too much work?

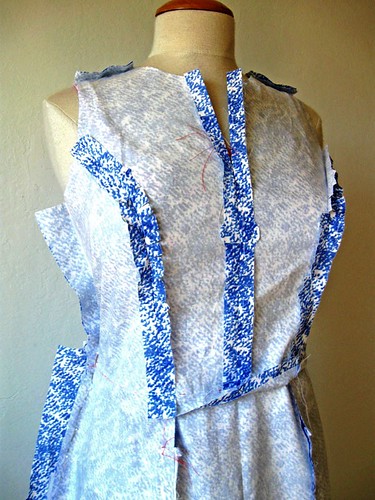
inside seams blue white dress

Basting is my friend!  I machine baste everything together, and try it on. Including basting in the zipper. It really is a simple matter to try on and then just adjust a tiny bit here or there. Those large seam allowances make it really easy. I use smallish silk pins to pin seams in the spots where I want to try them out, and then just rip out small sections of basting, re-pin and try on again. That includes tweaking the waist seam up or down as needed. With a good helping of pencil marks or those heat-removable ink pens. You can see my extra large side seams under the arm and then the side seams on the skirt which behaved a bit strangely, front one smaller than back one but you can get a feel for how the fabric should hang in the skirt portion.

Then once I have it all basted or pinned to fit, I go over any newly adjusted parts with faint pencil or chalk mark and then sew it all up for real. Including the zipper. The back neckline of this dress is just my style, and I think I will try out the pattern envelope version with the cutout out and front V-neckline.

blu white back view on form

fabric design dress1

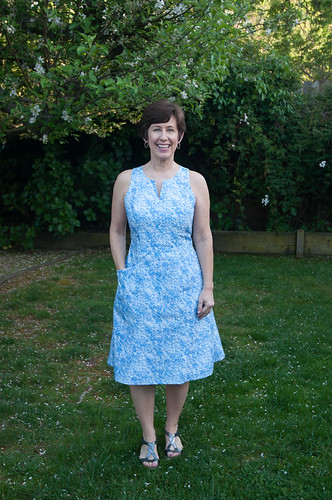
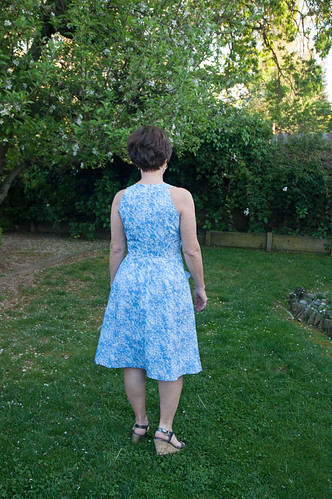
Here is the final fit on me. I think it is just about right for a woven cotton dress (meaning something with no stretch. Keep this in mind for the next picture. Demonstrating my philosophy that there should be some ease in woven garments, I like them to float instead of be absolutely fitted. Less wrinkling and pulling on the body, more comfortable.  There is about 2 inches in circumference more than my waist. Too much?  I think when you are moving, sitting down, in action then it is just right and doesn't look too big at all. Interested to hear thoughts on this one.

Side seam ease when worn

Not the most lovely photo but I don't walk around like that :)

Back view blue white dress

I can't leave off with that photo so here is a repeat from the last blog post.

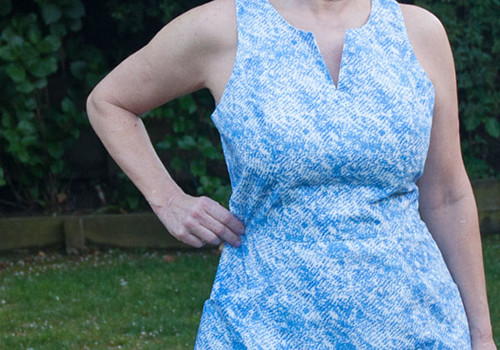
dress close up blue white

I'm happy with the neckline/shoulders fit - will definitely repeat this pattern. And will try to stand up straight - looking at sewing photos is a wake up call about posture, isn't it?

That's all for this one. I have been on a sewing streak lately so lots of things for the blog in the near future. We had a really rainy weekend so no photos completed but this week I will try to get some accomplished. April showers were so welcome - the roses are loving it.

Happy sewing, 
Beth

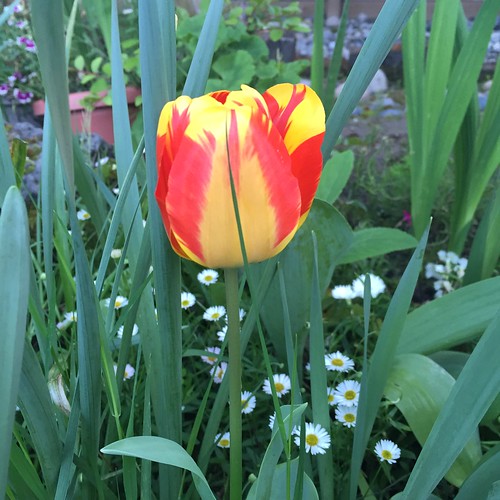
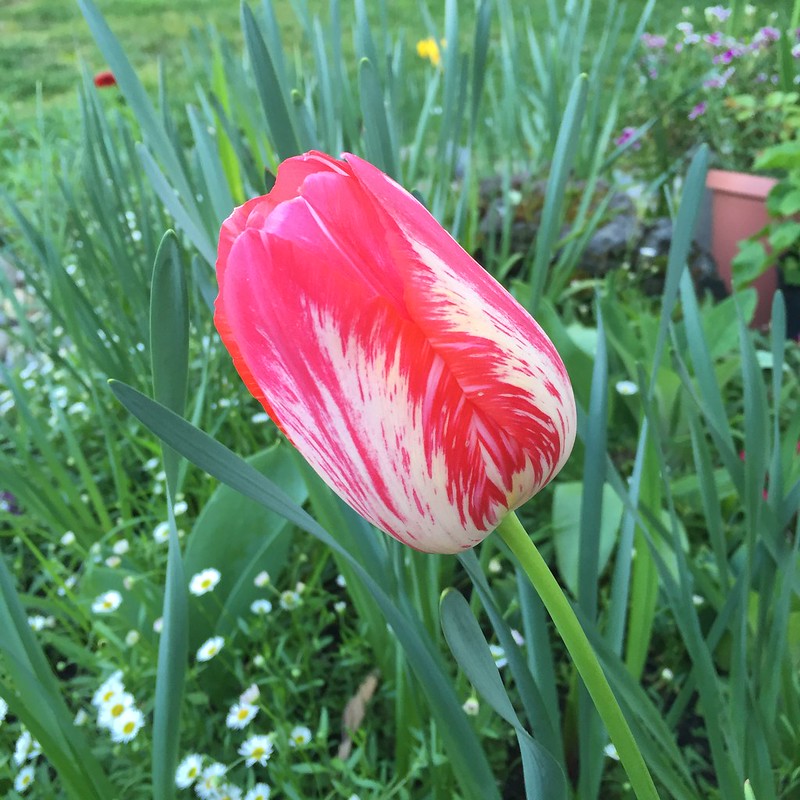
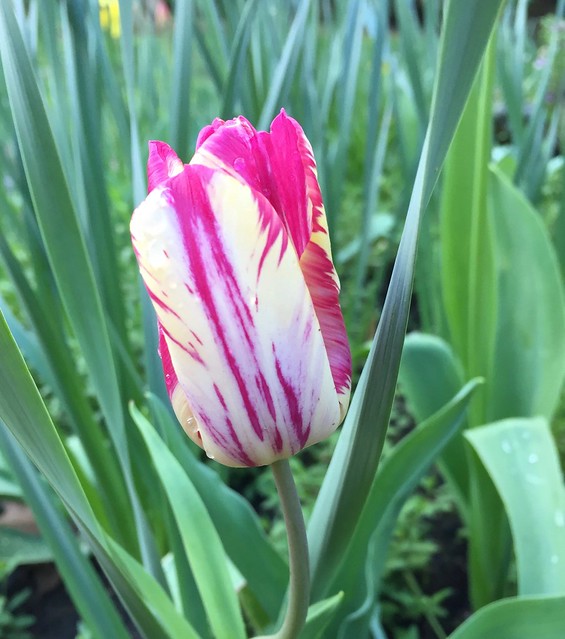
these tulips have been popping up and I completely forgot that I planted them, I thought it was a bag of yellow and red ones but apparently they are the variegated version. So nice!

April garden


Wednesday, April 6, 2016

My Fabric Designs and a new summer dress

Have you wanted to design your own fabric? I have always thought it would be fun and a great way to get all the colors I want (which might just be too many for a lot of people). Recently I was contacted by My Fabric Designs and offered the opportunity to try out their fabric. Why not jump to the end of the story?  I am impressed.

They have a lot of different fabric choices including cotton voile, cotton sateen and poplin, a cotton silk blend (which is luscious and I want to try soon). Also silk crepe de chine, a variety of knits, polyester woven and knit, some fabrics suitable for athletic wear and also for home dec or quilting. So quite a variety. Since I am only interested in making clothes  - for the most part - I decided to try the cotton poplin and start with one color on a white background.

blu wh dress on form2

I am so far from being artistic in terms of painting, drawing or anything like that, consequently I created something in Photoshop and then did some research on repeating patterns. The My Fabric Designs website has a tool to upload or create patterns and then further tools that tile or place the graphic in different ways. For this first one I used some basic edits to have a repeating pattern without obvious seams where the print repeats. I also figured using a small and busy print would disguise that issue. Once I saw the finished fabric it actually showed me more about how it works so I will apply that for another one.

The fabric quality is really nice. The cotton poplin has a printed area of 42 inches wide so I ordered 3 yards. I figured I would make a dress or a shirt but when it arrived I decided on summer dress. In my next post I will give some more details on this dress as it is a mashup of two Simplicity Amazing fit patterns and I think fairly successful. Also I washed it in the machine, on warm temp just like any other fabric and then put it in the dryer as I would cotton (on the high heat temp). It came out perfectly, the color seemed exactly the same as before washing, and then pressed very nicely.

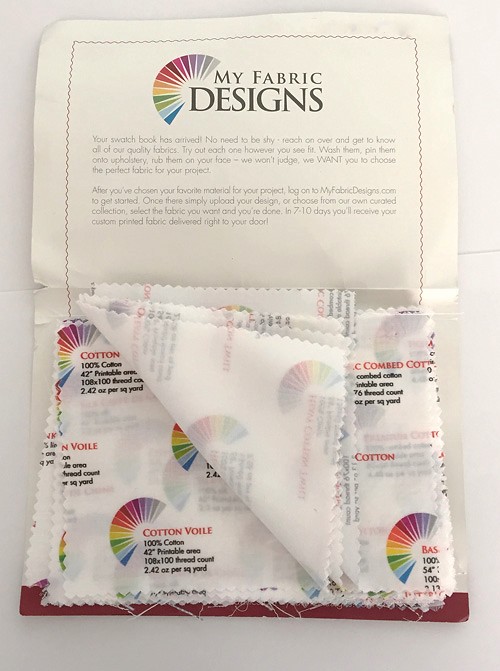
If you are at all interested in trying this out I suggest you order the swatch book which is sold on their website, it is $ 5.00 and well worth it to see the various fabrics and also how the colors print on the different fibers. The printable yardage on the various fabrics ranges from 42 inches wide to 62 inches wide so you really have to look carefully when ordering so that you have enough fabric for your project. The prices range from around $ 17 per yard for the cotton to around $ 38 per yard for the silk so quite a spread.

swatch book

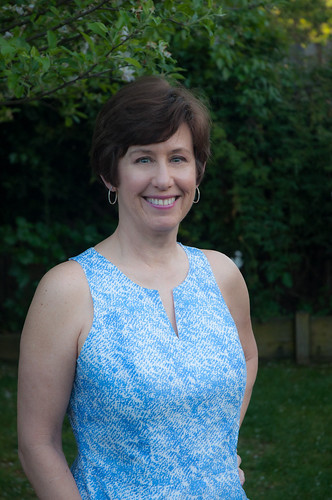
I'm sure this fabric looks different in every photo which depends on the light and time of day and my not so great photography skills. My pal Alice took some pics of me wearing the dress, so here you go. This was in the early evening shade under the apple tree so the blue in the dress looks quite a bit different.
All in all I am really happy with this summery cotton dress and since it is about 90˚F here today it will get worn very soon!

dress close up blue white

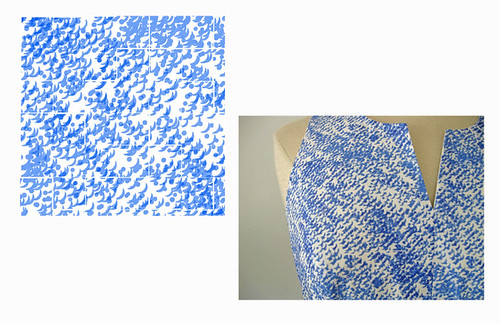
Here is a better look at the fabric, close up on the dress form and juxtaposed with the actual image that I uploaded.

fabric design and real fabric

They have a lot of choices on the website, most of them seemed like quilting cottons at first glance but I suppose a lot of them can work for different garments, children's clothes or especially home dec like pillows or other home items. I think the option to create a fabric to recover dining room chairs or something like that would be fantastic if you had a specific pattern and color family that you wanted.

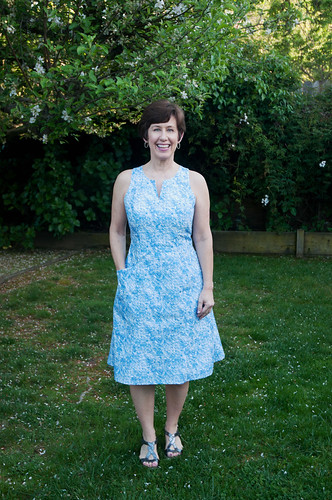
Here's another look at the whole dress. And my weirdly gleeful expression :)  I am probably just thinking summer ! sandals ! sleeveless dresses !   (my sympathies to those of you who are getting a late blast of winter - I hope it goes away soon)
Also that is a shower of pink and white petals on the ground, from the apple tree blossoming away behind me. Too bad they are not very nice apples, but someone told me yesterday that I should offer them to people in the area with horses and there are plenty of those nearby. So I will remember that when September comes.

blue white fabric design dress front view

I have ordered two other fabrics from My Fabric Designs, one is a cotton interlock knit and the other a cotton sateen. The knit is a really nice quality so that will make up a dress and the sateen is a bit more lightweight than I expected, more like a voile. I think it will make a pretty top.
You can also upload your designs and then order a fat quarter or a 5" x 7" swatch which seems like a good investment in order to see if you like the way it prints and the texture/weight of the fabric you choose.

Note: I received this fabric as an allowance from My Fabric Designs and was able to select the fabric and design of my choice, and sew whatever I chose from that fabric.

Next up more details on this particular dress, such as what pattern(s) I used, what Vogue pattern I wanted to use but was too cheap to buy since I have sooooo many patterns already, and how I fit as I sewed to good effect, and now have another bodice pattern which I can adapt to other things.

Happy spring sewing, 
Beth


The roses are blooming all over the garden this week, and this is such an old plant which gets a bit scraggly after first bloom, but I don't have the heart to remove it. Because that color! And a white Spanish lavender behind it that appeared next to the purple lavender. My favorite type of plants, the volunteers.

April garden

Friday, April 1, 2016

Random Threads # 19: Spring Patterns, fabric design and a couple of sneak peeks

Hi all, and thank you for the lovely comments on my teal green silk blouse. And the feedback on my Craftsy post on how to do the hidden buttonhole placket. Readers seem to appreciate the color-coded how-to.  I was a bit worried that it would look odd - however I had a few requests for more of these and now my brain is definitely pondering what else I can detail via the color-coding method. Sometimes sewing can be very confusing - right side, wrong side, flip, turn, insert, trim etc. Certainly sewing calls for some 3-dimensional thinking so anything that clarifies is great in my opinion.

Onward to new patterns -anything with Summer in the Collection title is my favorite and the new Vogues made me smile. Oh, so tempting! Quite a few of the  new summer patterns from Vogue are calling my name. So many I would love to sew. And my resolution to sew fewer dresses is crumbling in front of the siren call of new summer patterns. Here are the ones that I love, not saying I will make any of them but you just never know.....

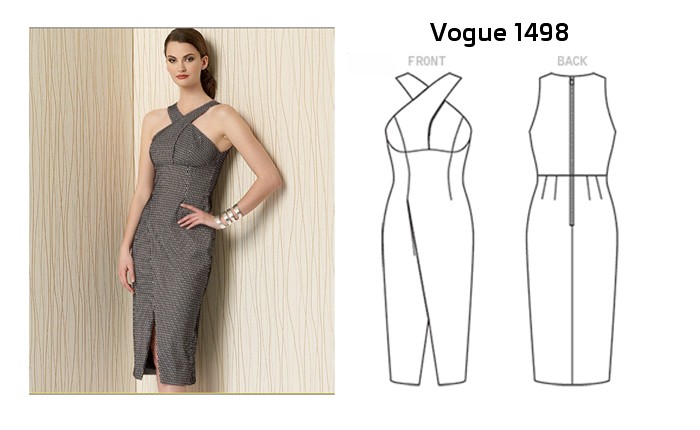
This reminds me of so many dresses I have had over the years, the slim fit sheath dress with some interesting details and neckline. I might buy this pattern just to have. And see if an occasion comes along. (of course I don't care for the color in the example shown :)
Vogue1498
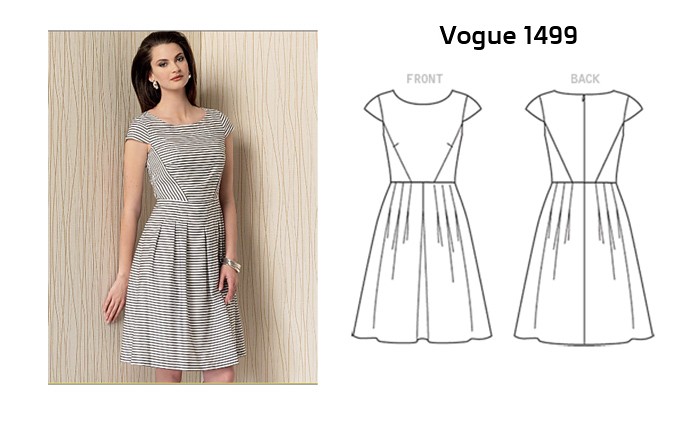
This one is super cute - mostly because of the way the stripes are placed. But I don't need another fit and flare dress pattern. But cute, and I always like a pleated skirt over gathered one.


Vogue 1499
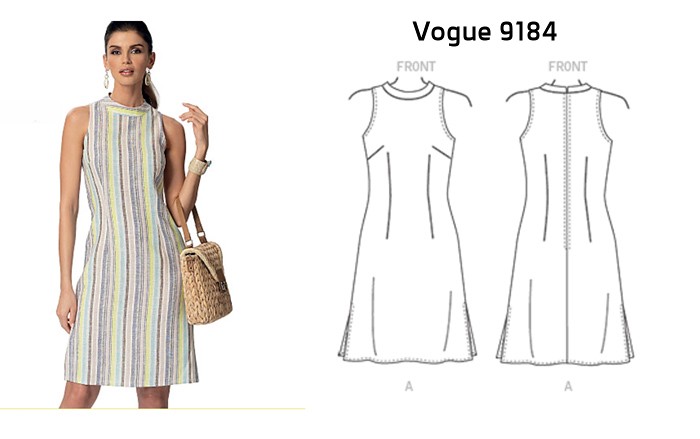
Here's another one that I really like, it is so similar to a pattern that I have had for maybe 15+ years? also a Vogue, that I have used to make a zillion shift dresses. But if you are in the market for a new version. I'm not crazy about the neck band but they have a version without. Those cut-in shoulders get me every time, I like that detail.


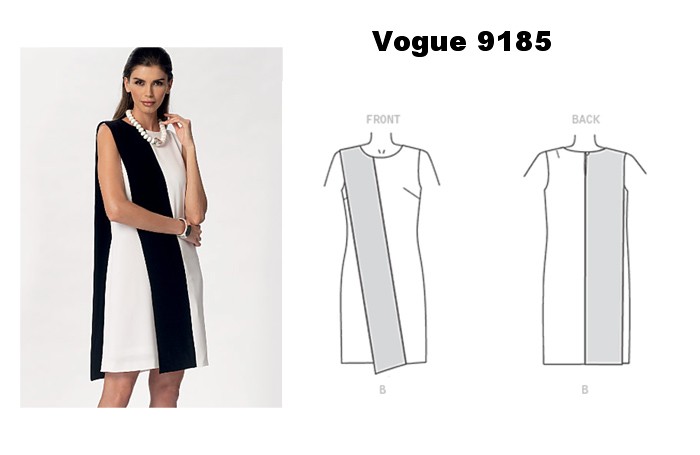
Vogue9184 And now for the comedy portion of this post. This dress is bonkers. or maybe someone will sew it up and prove me wrong. But I doubt it!  Also there is this pattern, and it's matching corral. Who sews these up?  OK don't answer me.
Vogue 9185

As far as the updated BMV website - seems functional and works well - all the search features and groupings make sense and the images are larger. So all in all a good update. Take note Simplicity! That is a mess and I have hardly looked at anything Simplicity since the changes. So difficult to search for a specific category or brand. A mess.
The latest video on the BMV site was kind of silly - too much jumping around making it look like a commercial for Target. I really liked to hear Carlos talk about the designs and hope they go back to those.

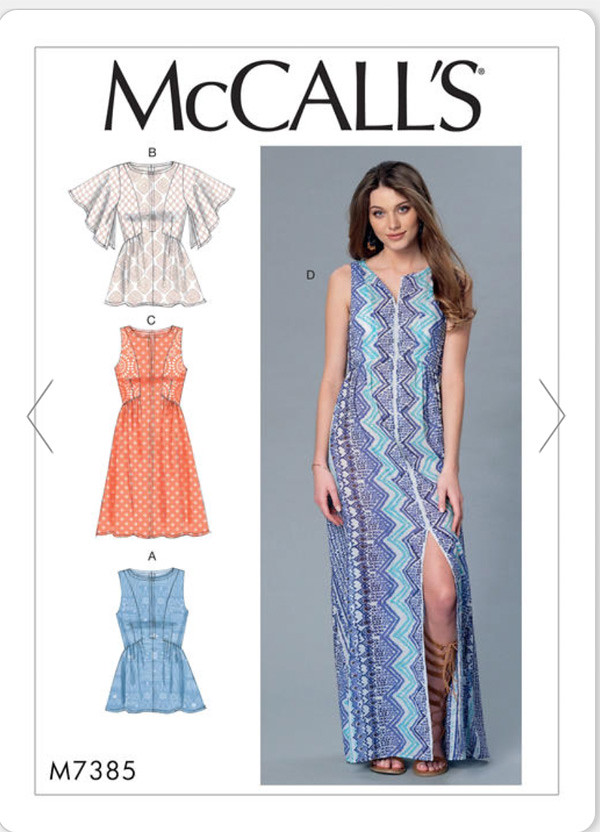
One new McCalls pattern caught my eye right away and I actually bought it today. I like that View C with the two fabrics, it just looks like a perfect dress for a 100˚F day here. I might even try the View B -  I am attempting to try new shapes and silhouettes, get out of my comfort zone - fashion wise. I have some eyelet fabric that might work for that.

MC7385

In other news, I have been trying my hand at fabric design, which is more difficult that I expected. And I am no artist at all! (also terrible at music but good with languages, interesting how the brain works).
Anyway - I saw that my friend Laura Mae is also designing some fabric and I expect her creation will be spectacular. I started with something quite simple and abstract. Here is a sneak peek of what I have sewn, hopefully I will get some pictures this weekend and post soon here. Plus this is a mash up of two Simplicity patterns which worked out really well so details to share on that.  Since this fabric I have received two more so I need to get sewing.

IMG_1170

And then I decided to squeeze in one more wool jacket before the weather hits the 90˚F mark.
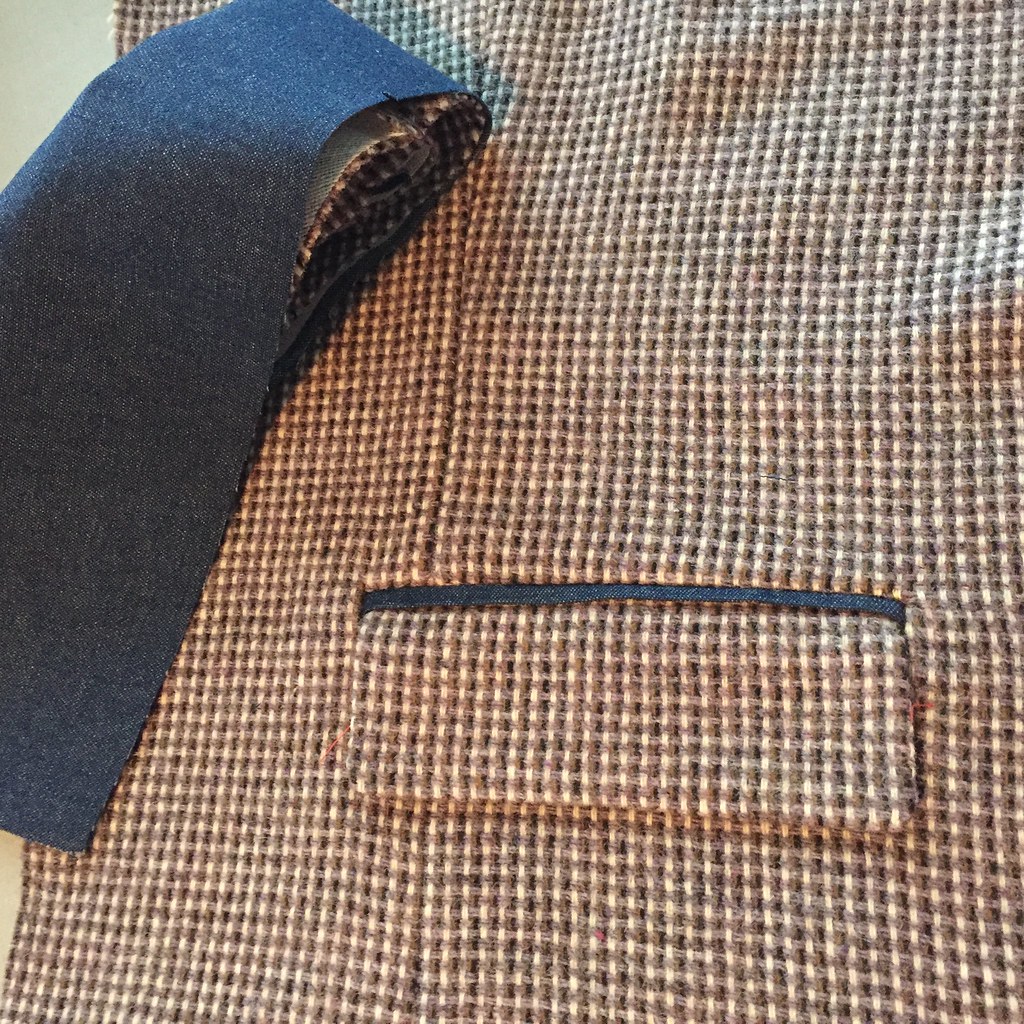
sneak peek here also, pattern testing for my favorite indie pattern designer for a pattern I think will be out in April sometime. Yes that is wool and denim combined, which hopefully will be a success and not weird.

jacket pocket with denim binding

Back to the fabric designing - I have two fabrics which arrived and I need to sew up, which coincides to a new BurdaStyle release of patterns as PDFs. I presume they are in the magazine also but I don't subscribe, instead just have been buying the single patterns as PDFs that strike my interest.

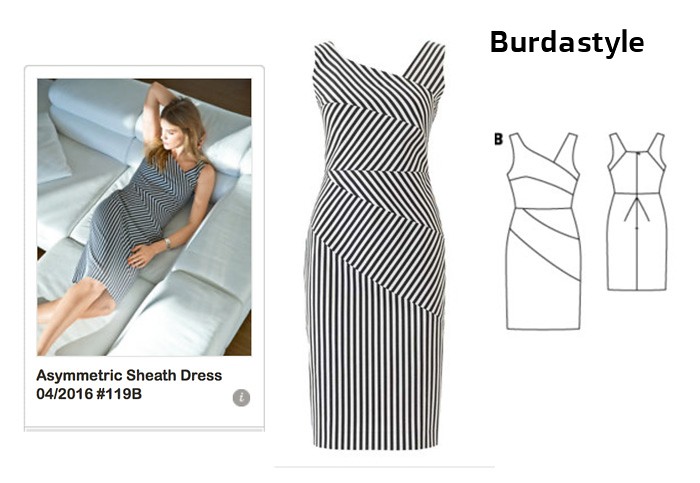
This pattern is my obsession of the week. It is so sharp in the stripe version. Although I have doubts about those diagonal backside darts. which could be changed to something else. 99% sure this one will be in my sewing queue by July.
Burdastyle asymetrical dress

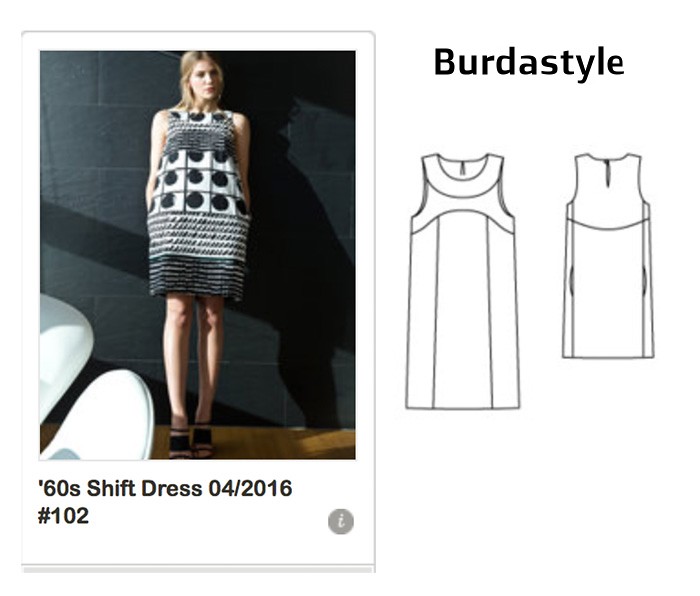
And this one is so cute! their example fabric is perfect. As mentioned above I'm trying to sew some new to me shapes, and this straight cut (no waist definition) style is all over now. I have a RTW dress in this shape and if the length/fit is right then it is OK on me. Too many dresses!!!
Burda mod style dress

That's all for now - kind of light on opinions today (ha, never) OK here's one. If you are selling sewing patterns then the samples / examples should be impeccable, right?  Just a thought.

Next up a Burda top in one of those new silhouettes I mentioned. I wasn't sure about it but friend say it is a winner. Wait and see :)

Happy Spring Sewing,
Beth

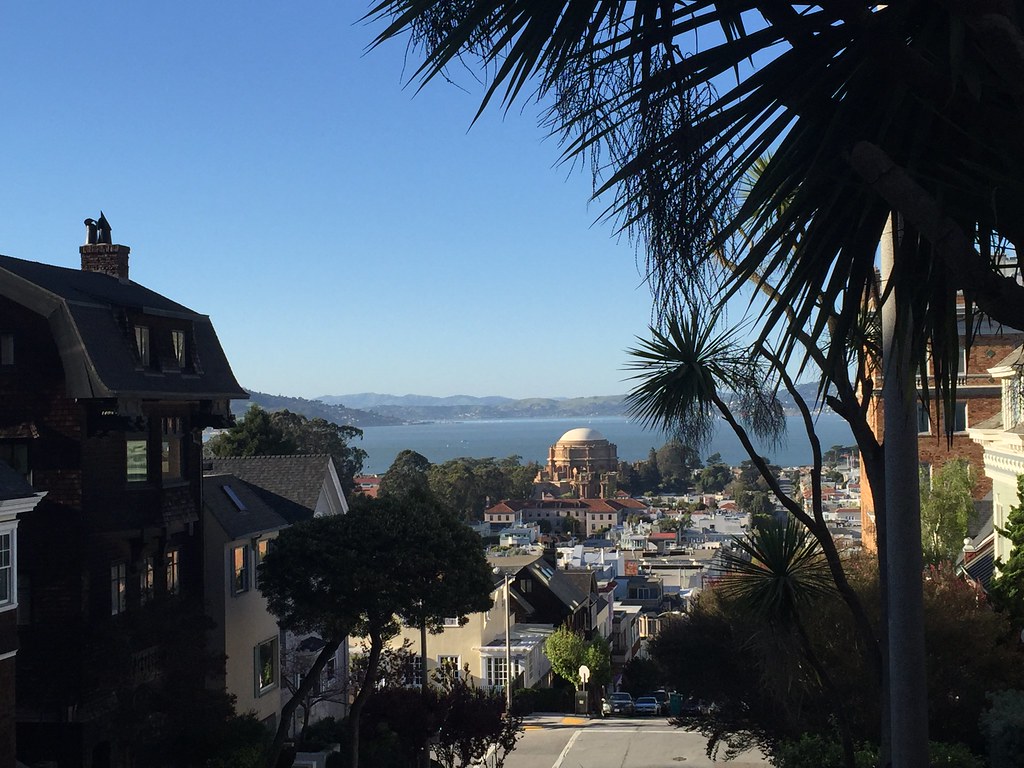
And not a garden photo - instead a pic I took recently in San Francisco, late afternoon and a lovely sunny day. Sometimes in SF you turn a corner and the view is just an amazing surprise. This city is a gem. We won't mention the traffic (which is also epic lately).   That domed building is the Palace of Fine Arts, a remnant of the 1915 Panama-Pacific Exposition.

Palace of the Fine Arts SF

Saturday, March 26, 2016

Silk Blouse with hidden buttonholes in teal green, Simplicity 2339

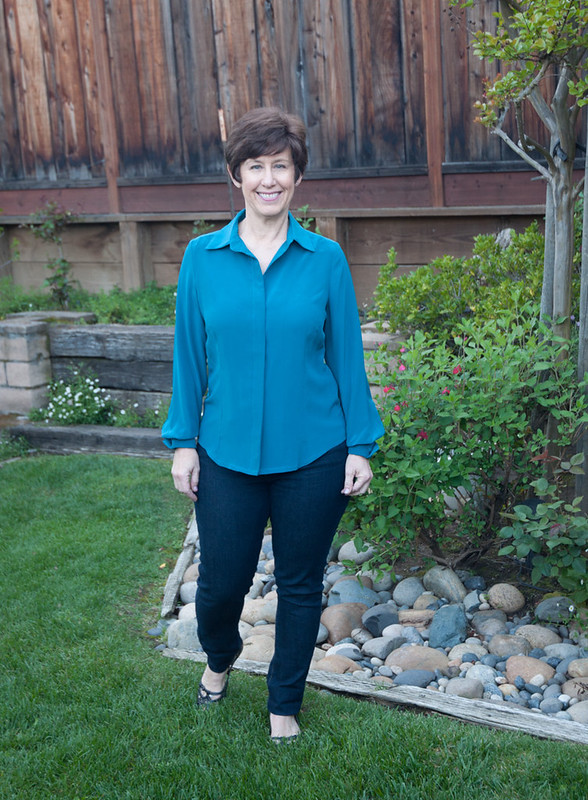
This teal green silk blouse has been a while in the making. Actually I should clarify, it is probably this post that has been a while in the making. I had the idea to make another silk blouse with the hidden buttonhole placket which I first did in 2011 where I used a silk charmeuse that had a bit of stretch. I had never been quite happy with that version - although I wear it all the time and the color is definitely one of my favorites. So earlier this year I decided to try out this project again, starting from scratch and worked out all the details on this blouse in a printed silk. And then I figured it would make a nice how-to post for Craftsy in the solid color. So here it finally is. Plus I have been wearing it a lot! Quite surprised at the frequency but it does hit all my sweet spots - bright jewel tone, luscious silk, goes with a lot of other stuff in my wardrobe, looks dressy but wearable with jeans.

teal silk blouse full length

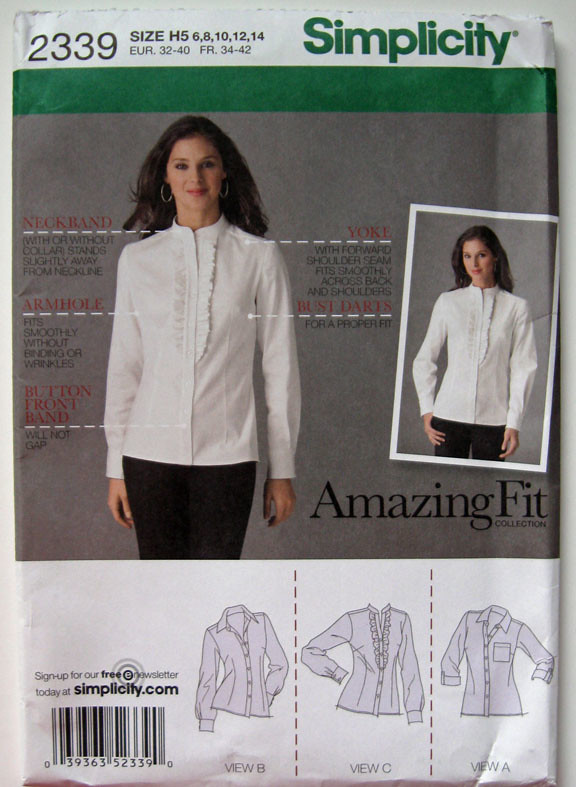
This is my 8th version of this pattern, Simplicity 2339, an Amazing fit pattern. The one with the hideous version on the envelope.

Blue silk blouse pattern S2339

I really like these Amazing fit patterns although the more recent ones have seemed a bit wacky - like they used up all the really nice basic ideas in the beginning and now are just adding peplums or other details to previously existing patterns. (but on the the other hand isn't that the case with all patterns?)
Anyway - if you can figure out what size to make for your shoulders and work your way down with fit (usually taking out some ease) then I think they are really useful as basic patterns.

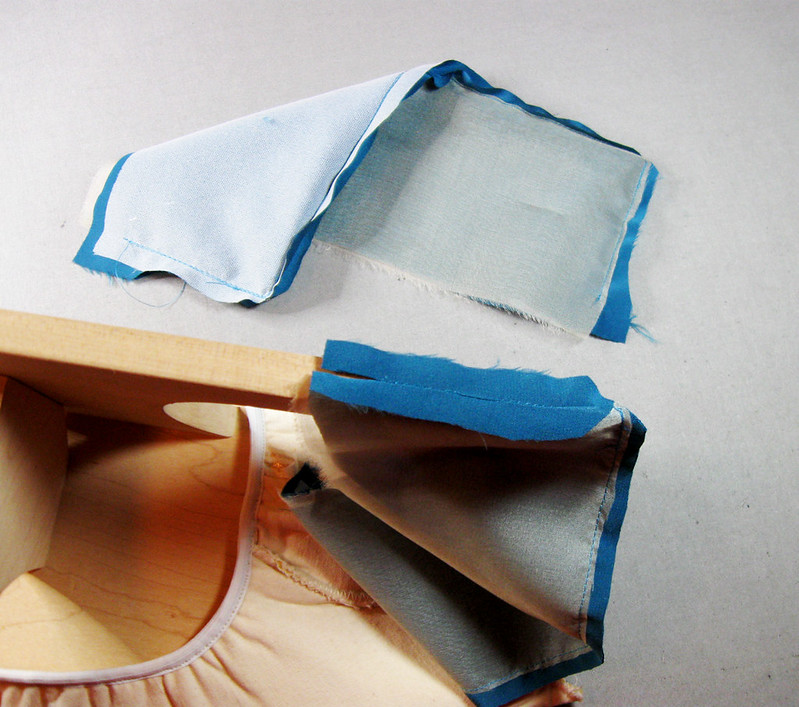
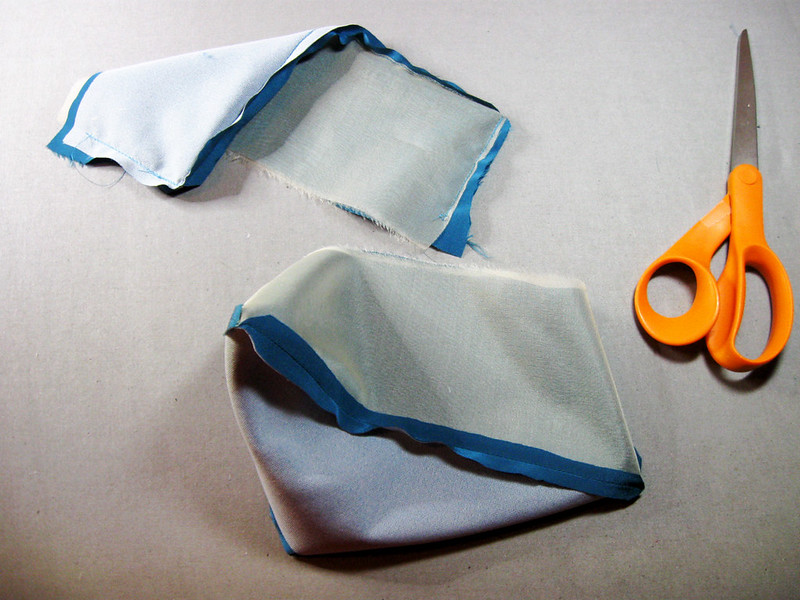
Back to this shirt pattern - I have never made it as designed - with the button band sewn on as a separate piece. Every time I have fiddled with the front to change the placket. This version is the biggest change, with this hidden buttonhole placket. Today on the Craftsy blog there is my step-by-step post on how to create this placket. It takes a lot of photos to explain it so instead of adding them all here I will just link to that post. Plus it is color-coded! (Ok don't laugh if you look at it and please let me know if it makes sense)


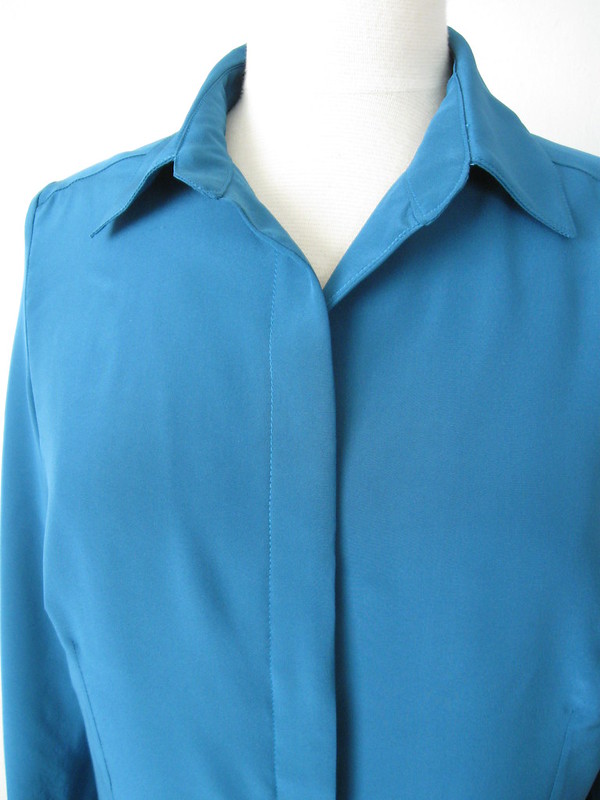
silk blouse hidden buttonholes teal

Every time I look at this I just feel relief that any potential buttonhole mishap in this delicate fabric is hidden from view. Plus the sleek front seems right with silk crepe de chine.

A few other construction details, and how rewarding is it to press silk? Am I weird to enjoy this? It is just so satisfying to get that nice crisp crease on a silk fabric. Of course sometimes the iron is in the wrong place and you create a crease where it is not wanted but in a nice silk fabric it usually presses out again. I bought this fabric at Fabric Outlet on Mission St. in San Francisco during one of their 40% off sales. By the way, Tanya did a great post recently on fabric shopping in the bay area, here is the link.  Check it out if you are traveling this way.


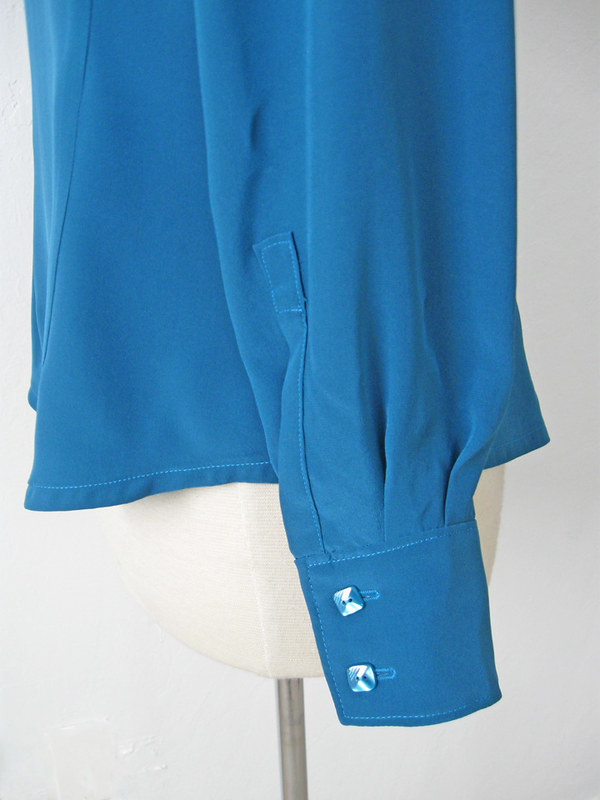
silk blouse cuff

I had these buttons in my button box. Score! I have no idea what I bought them for but I had 12 so perfect quantity for cuffs and center front. Plus they are square which is a detail I like. Also I finally figured out (sort of) my stupid buttonhole foot on my modern Singer machine. Although I still prefer the vintage attachment on my slant needle 1950's Singers but sadly it is not working properly (things don't seem to do as well after you drop them on the floor from height).

There are a few different ways to do cuffs, such as attach from the inside and topstitch down on the outside, plus the reverse of that. I like to attach right sides together and then press in place, lastly stitching all around the cuff to enclose the inside. Though before I get there I press the seams open using my pressing stand.


cuff pressing1


cuff pressing2

This is the same technique I use on lapels, collars etc. Press the seam open and then flip over and press on the edge - it is the way to get the sharpest edge possible.
Looking at this photo I see that I used 2 types of interfacing in these cuffs, a lightweight fusible on one side and then silk organza on the other side as they seemed a bit wimpy with only the fusible.


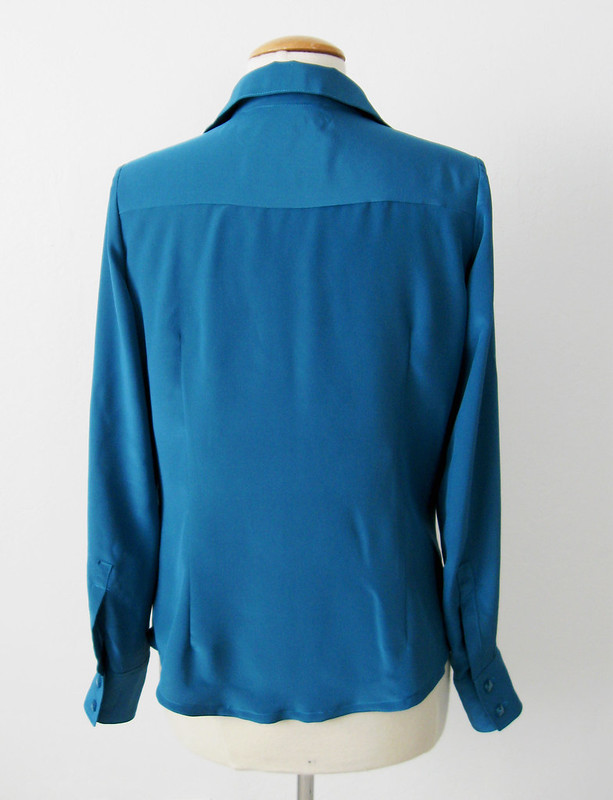
silk blouse back view on form

For the hem I stitched about 1/4" from the edge, which makes it easier to press and then turned and pressed again about 3/8".


hem stitch

Typically I don't get that worked up about inside finishing but with a silk shirt it is nice to do french seams and there are really only the side seams and the sleeve seams to do that way so it did. I have narrowed the sleeves on this pattern a good about - like 1.5' as they seemed way to big around the arm for my liking.  The shirt seemed too long when I tried it on so I cut off a bit of length and now wondering it is a smidge too short. And the other silk one I thought was too long! I am like Goldilocks - when will it be just right?


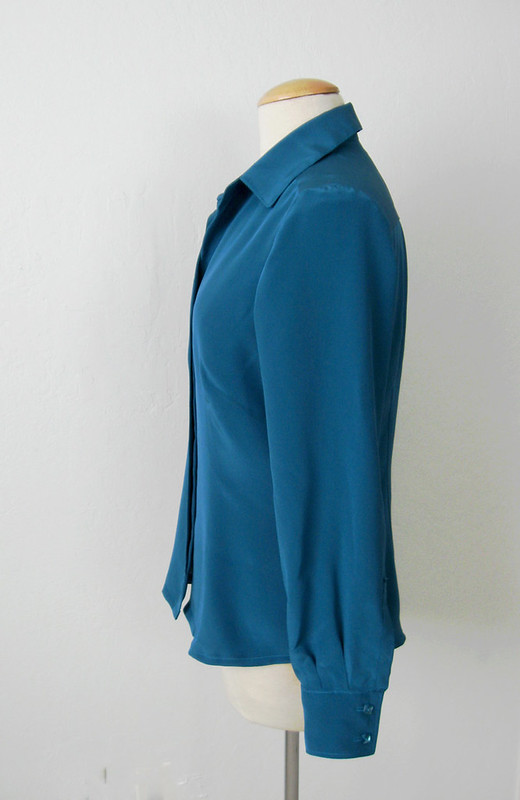
silk blouse side view on form


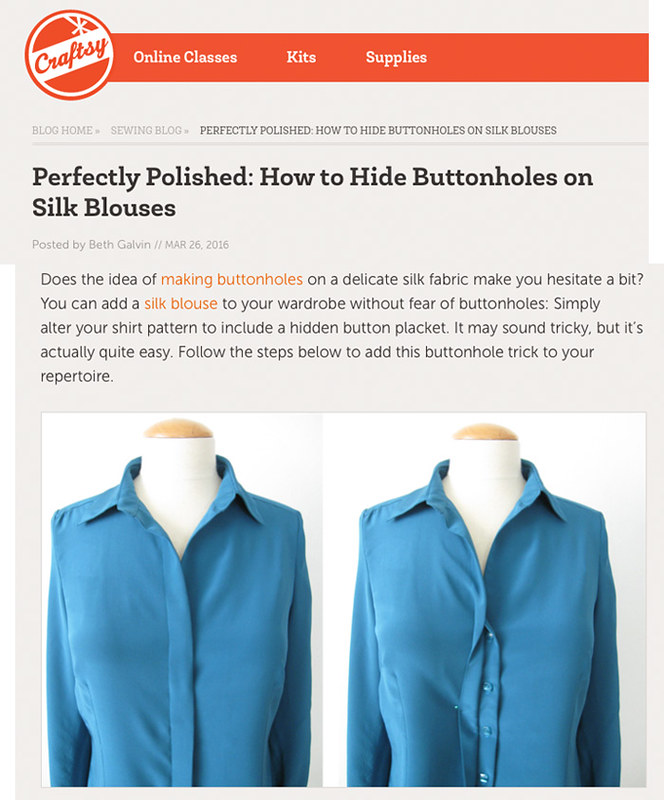
Here is the link to the post on Craftsy.   I just noticed that I didn't show the hidden buttonholes :) but you can see them in the photo below.
Craftsy silk blouse post

So all in all, I think this is my new favorite colors. Plus I have some wool in this shade with a black pencil stripe plaid which will probably make an appearance in the fall for some type of jacket.


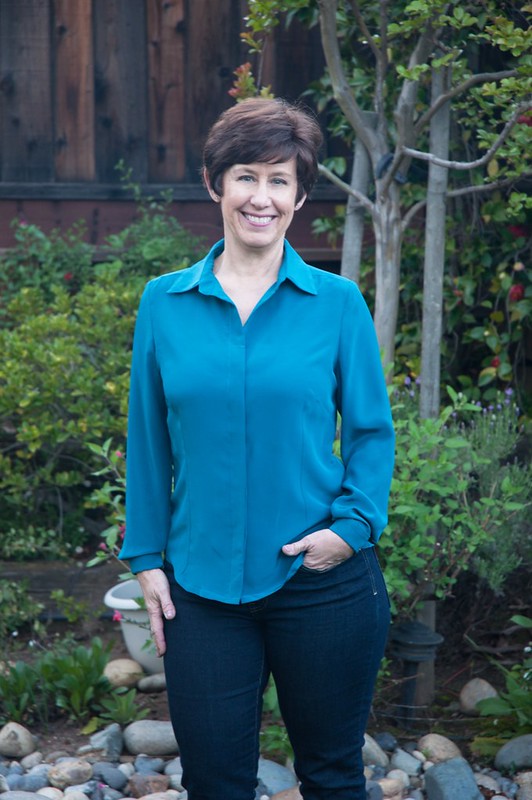
Teal blouse1


Up next - I am sewing up a dress using fabric I designed on myfabricdesigns.com.  I'm far from being an artist but it is interesting and of course you can choose the colors you like - prepare for some eye-searing fabrics in the next months. Although the first one is not crazy at all and came out really nicely, quite lovely and sewing up into a spring dress. Although not in time for Easter - which may be rainy but we are not complaining!  Check out all that greenery behind me - the roses are loving it.

Happy Easter to all,

Beth

another gorgeous tulip appeared this week. I think I planted a few irises as well but they have yet to appear.

Tulip March 2016

Sunday, March 20, 2016

My top reasons for making a muslin

Previously I have stated that I don't make many muslins ( a test garment prior to sewing with the real garment fabric) but in the past couple of years I have sewn them more and more. Trying out new to me pattern companies, sewing for others, doing pattern testing for an indie pattern designer -  these are all reasons I've had to sew up a muslin.

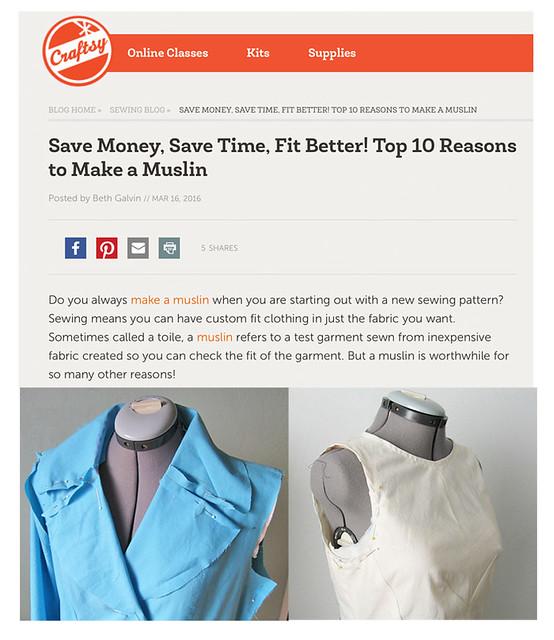
So I wrote a post for Craftsy on my top reasons to sew a muslin. In fact I was surprised by how many reasons I actually came up with. And all quite valid in various circumstances. Here is the link to the post which you can read there.


Craftsy muslin post

Yesterday I had a 60% off coupon for Joann Fabrics so I went over there early and bought a few yards of the 120" wide muslin fabric for about $ 8.  I try not to buy much actual muslin fabric but that is kind of a steal, and using the traditional unbleached muslin is really nice for fitting etc. I can mark all over it with a pen while fitting and see the markings easily so as to be able to transfer back to my paper pattern pieces. Also the unbleached muslin takes the markings from the waxed tracing paper very well. A while ago I bought a package of the red wax tracing paper and so I use that now to mark darts, seamlines etc. The red shows up really well on the muslin fabric. Sometimes I even go over the markings with pen/pencil because I really like to see all the dots and other markings when I am doing a muslin.

As for other options on muslin fabric - the example above left in blue is an old bedsheet. (for my black wool coat, Simplicity 2311, on the right is the muslin for my version of the House of Pinheiro Brasilia dress). While old and worn bedsheets might seem like a good choice for muslining garments I find them a bit troublesome. For one thing no selvage - so you have to figure out the grain on your own. Secondly most sheets are quite tightly woven and very difficult to pin. But in a pinch they will do. So I do prefer actual cotton muslin fabric - and I save all kinds of scraps when cutting out muslins - then on the next project for collars, or other small pieces I use any scraps first and then cut out the larger pieces. My miserly tendencies know no bounds!

Another way to "find" fabric for muslins is to use quilting cottons and use the back side (without the printing) as the outer side of the test garment. If you are using quilting cotton the print can be a distraction when fitting but by flipping it over and sewing with the pattern on the inside you can get a less distracting version for your fit evaluation. I have bought a lot of muslin fabric at garage sales. Don't overlook some of the horrible stuff - particularly poly double knits which nobody has willingly sewn with since ?  but is a really nice stand-in for a modern ponte knit when pattern testing.

Thanks for the comments and emails on my idea about sewing instruction/consultation via Skype. I am working out my ideas and will be back soon with more details.

Happy vernal equinox sewing,

Beth


Tulip and daffodils

Sunday, March 13, 2016

When in doubt sew denim

Don't you think that is the case? Denim is so nice to sew. Today is a perfect day to hunker down and sew with a movie in the background and I was having no inspiration until I found a weirdly shaped denim remnant hanging up on my fabric rack. Score! It is barely enough for the project in mind, some creative cuts will be in order but already I can feel the creative juices flowing. Pattern hint:  Simplicity 8014, the cover version is perfection.
I have been in a weird mood lately - sewing wise. Not really interested in starting any monumental projects and somewhat hampered by the changeable weather which is almost spring but still not sandal weather. In fact pouring today so the March rain prediction has happily come true. Our parched California landscape appreciates that for sure. Changing things up I will put the garden photo near the top today - this bicolor tulip is perfection!

bicolor tulip

Checking on my last post here it was back in mid-February. I told myself I was going to take a bit of a sewing and blog break but actually didn't think it would happen. However that coincided with my "un-motivation" so there you have it. And now I have plenty to write about and some new projects already started. Onward to spring!

By the way - this past year I have been involved with some consulting projects - completely separate from sewing and so was not available for teaching as much as I would like. But that project is done. Which leads me to my next topic.

If you are going to be in the bay area this year and want to have some personal sewing instruction please get in touch!  I have also been thinking about the possibilities of video consultations. It's so easy to do a Skype call and very fun to meet  -  even when it is across the internet. Perhaps you have questions about a specific technique, fitting issue, want to discuss pattern options, help with a tailoring project or just general sewing guidance? This is an idea I have had for a while - I am planning to add more details on my sewing lesson website but please leave a comment here if you think this could work,  if any of you would be interested, or have any feedback or suggestions on this idea.

Some finished projects will soon get their own blog posts.  This is the silk blouse with the hidden buttonhole placket. I just love the idea of the hidden buttonholes in a silk like this - takes all the stress out of making a perfect buttonhole that would be front and center in all its triumph or tragedy depending on how my buttonholer was working on the day. Never fear though - and this technique can be used on most any shirt.  I promise a post on the "how-to" very soon. I have written a post for Craftsy on this topic which I believe they will run near the end of this month - with a color coded example I created. It looks a little goofy but I love a color-coded example and it just helps see where all the pieces go. I will post here as well. And one of these days when the sun is shining I will photograph this shirt on me.


silk blouse hidden buttonholes teal

Thanks for the comments on my last post about keeping or tossing items that no longer get worn. And one of these days I will make a pattern from that black cocktail dress, you will hear about it here if I do :)

New Vogue patterns - I always love the summer release and this time was no exception  - some are just calling my name. But I have yet to get much wear from last summer's dresses so I will refrain for the time being.

Some pattern testing is going on around here - something I rarely do but I bet you can guess which indie pattern designer it is for. New patterns in April I believe. And a real version already planned out in my head.

Lastly - I have done some fabric designs for MyFabricDesigns.com and I am very impressed with the quality of the fabric that has arrived. So those are also in my sewing queue.

Hey - I guess I am out of my sewing slump! Plus the garden is looking better thanks to all that rain. Tomato seedlings growing on the windowsill. One less hour of sleep last night for Daylight Saving's Time is worth it to me to turn the page on winter. Gosh I am such a wimp - what if I lived in a place with actual winter weather? Hibernate and sew I guess :)

Happy Spring Forward Sewing,
Beth