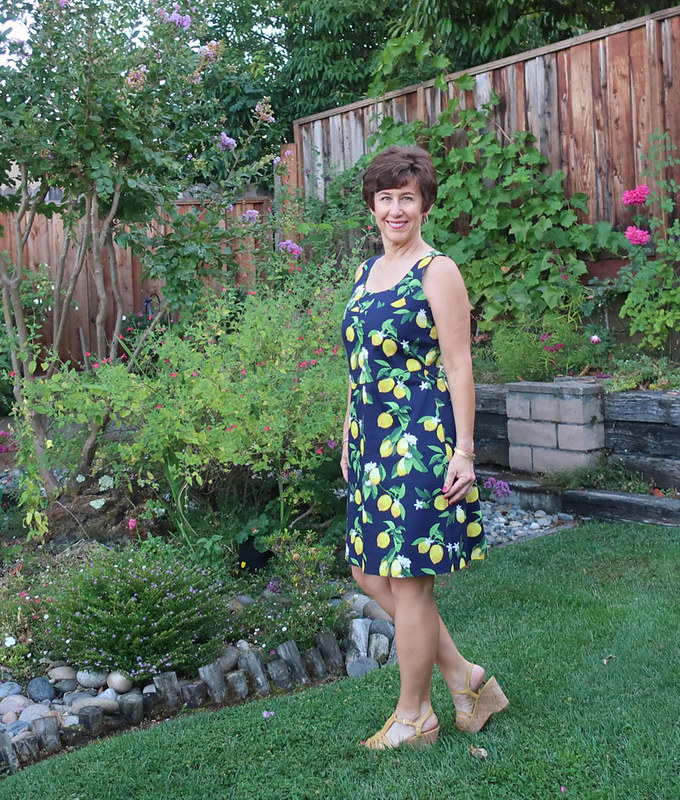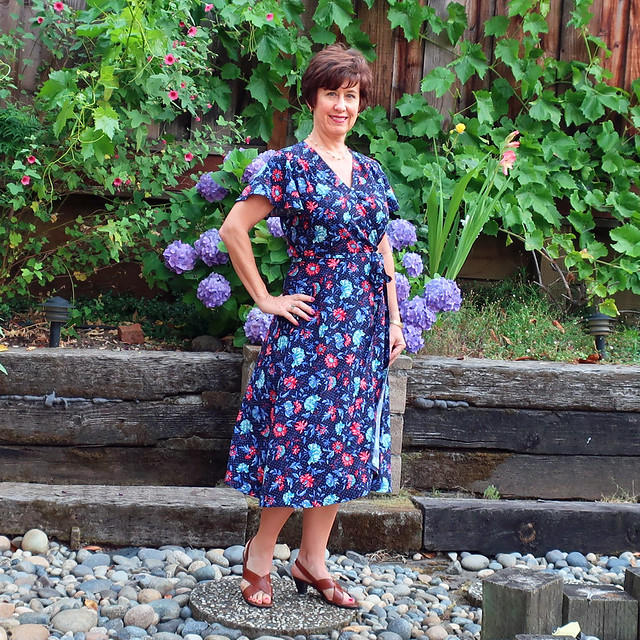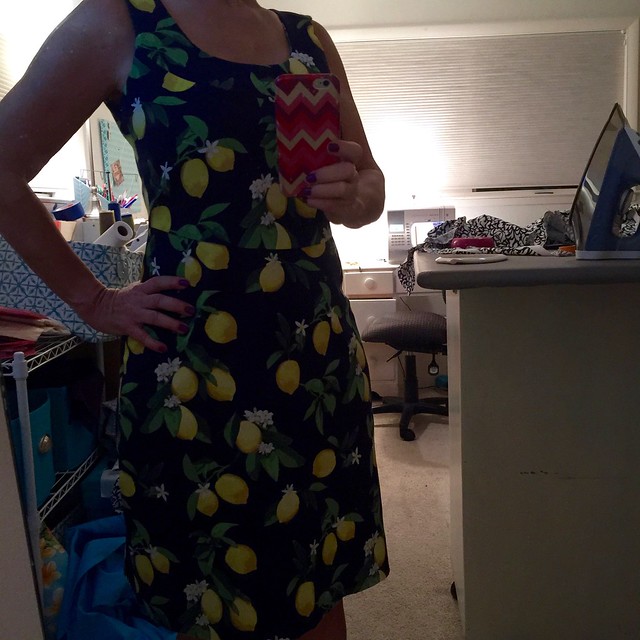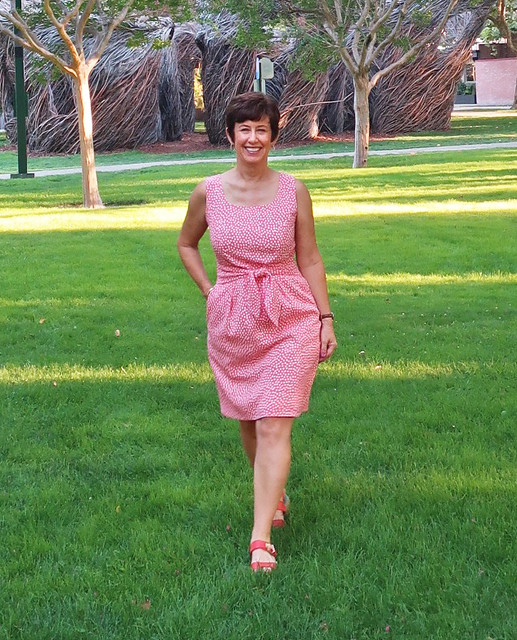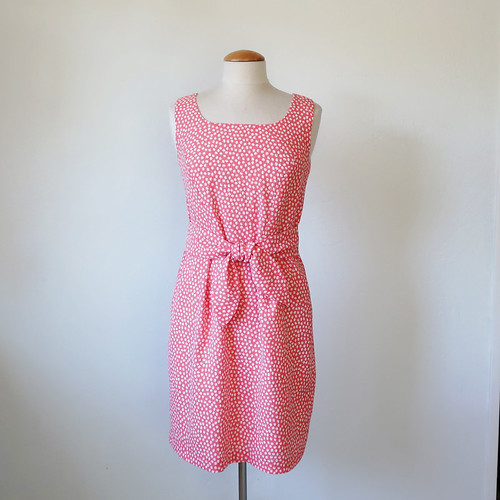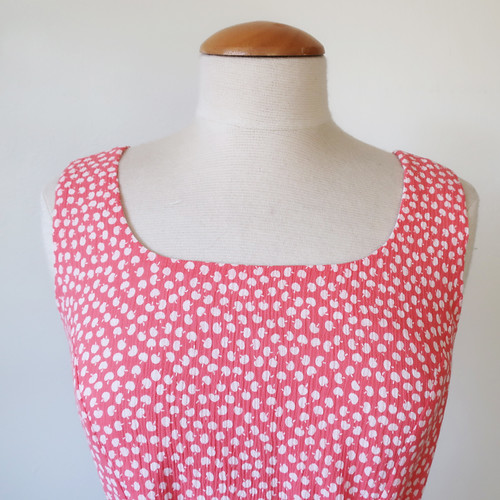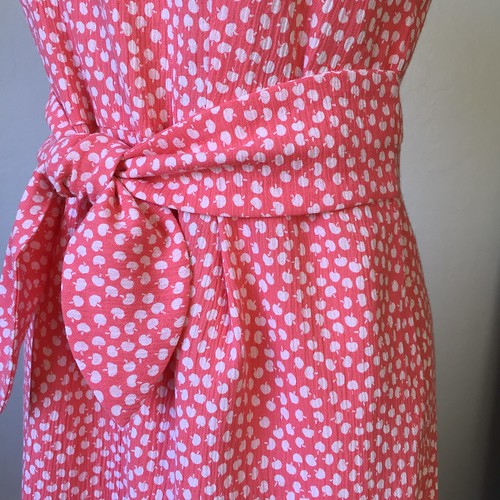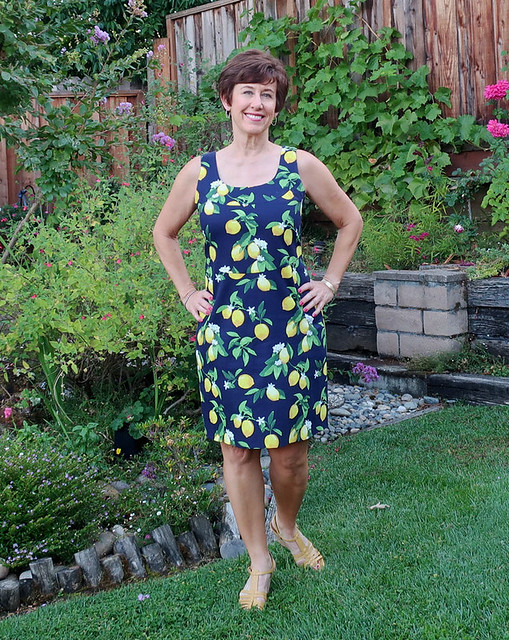
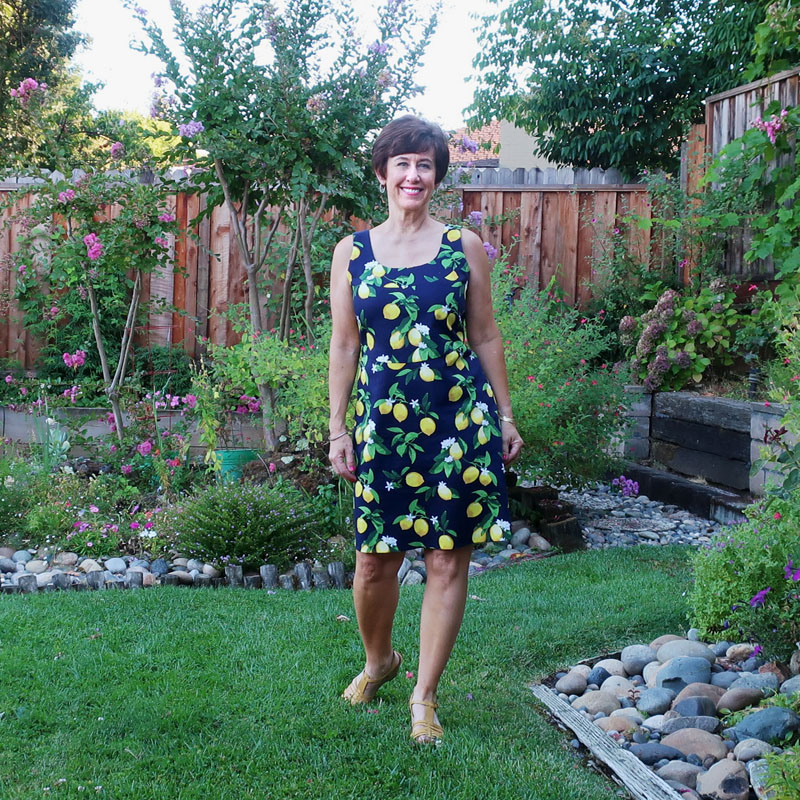
Whew! A sneak peek of this dress claimed more interest on my Instagram than anything else I've posted. Sometimes a print just resonates with a lot of people, or perhaps citrus prints are having a moment? To tell the truth, when ordering something else I tossed 1 yard of this fabric into my online order cart just to get free shipping:) I mean really, do I need another summer dress? Don't answer that! ha ha. It's a really nice cotton sateen and I figured I would get to it sometime, but then I went to the pattern swap meeting of our Bay Area Sewists group and came home with a couple of old Burda magazines. Glancing through the May 2006 I could hardly make up my mind. So many cute dresses!! But this one is so simple and but with details to make it irresistible.
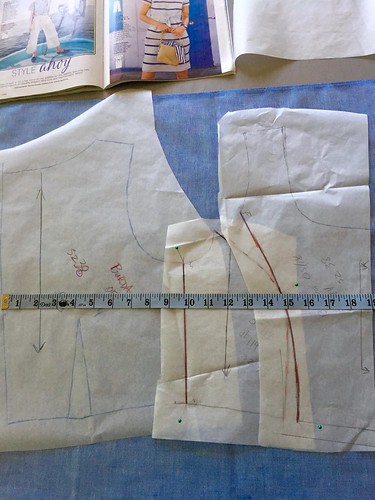
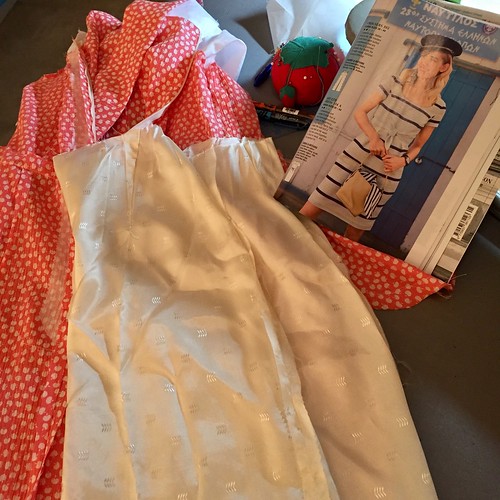
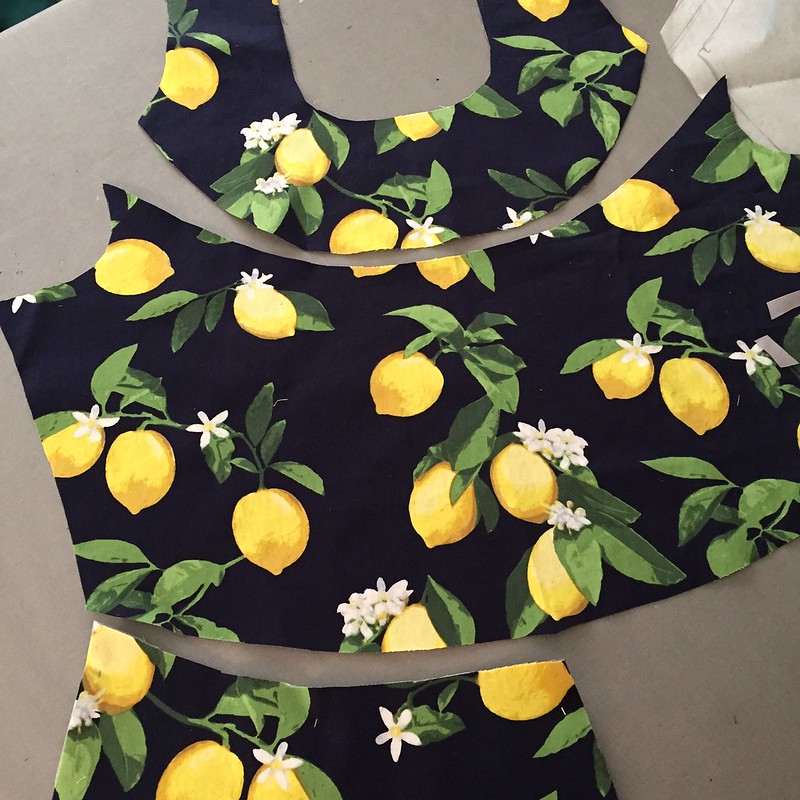
A few sewing and design details that I think elevate this from a basic shift dress to something with a little more style. Here are the front bodice pieces (and the skirt still folded in half). I mentioned on an Instagram post that this dress illustrates a dart hiding in plain sight. I love darts and shaping that are incorporated in seams (one of my favorites of this variety is this red wool Vogue jacket).
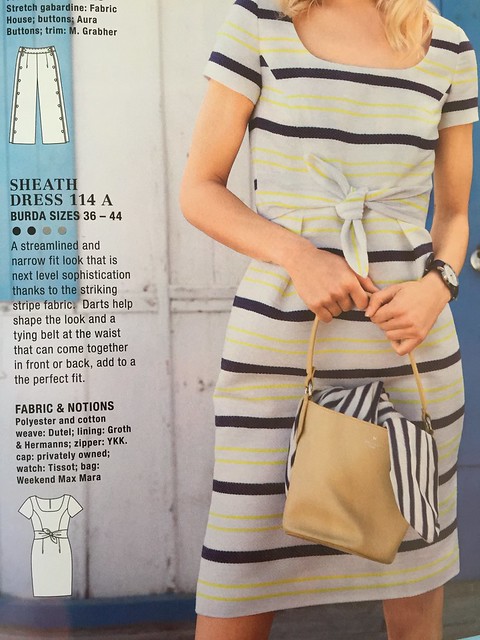
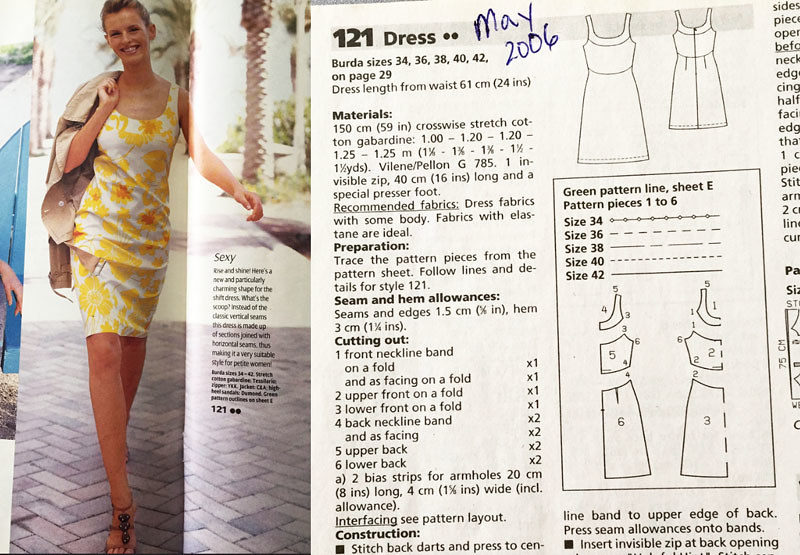
Here's the dress photo from the magazine and the technical drawing. The front only has shaping from the seams and the back has a little shaping plus some darts in the skirt. It's not supposed to be a fitted dress, but more of a shift style that skims the body. Pattern is Burda 05-2006-121.
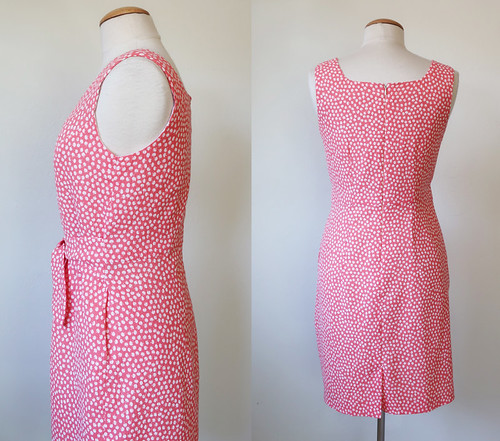
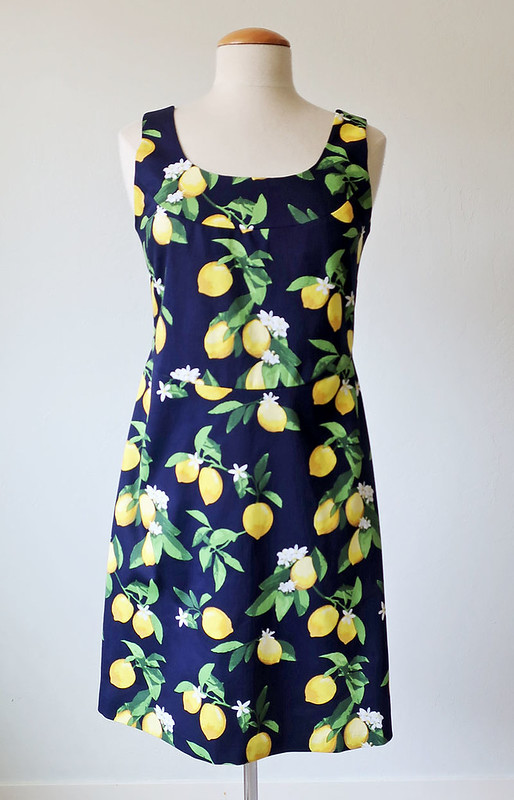
Dress form view
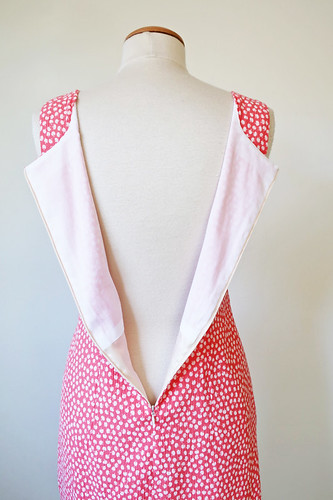
and back view on me
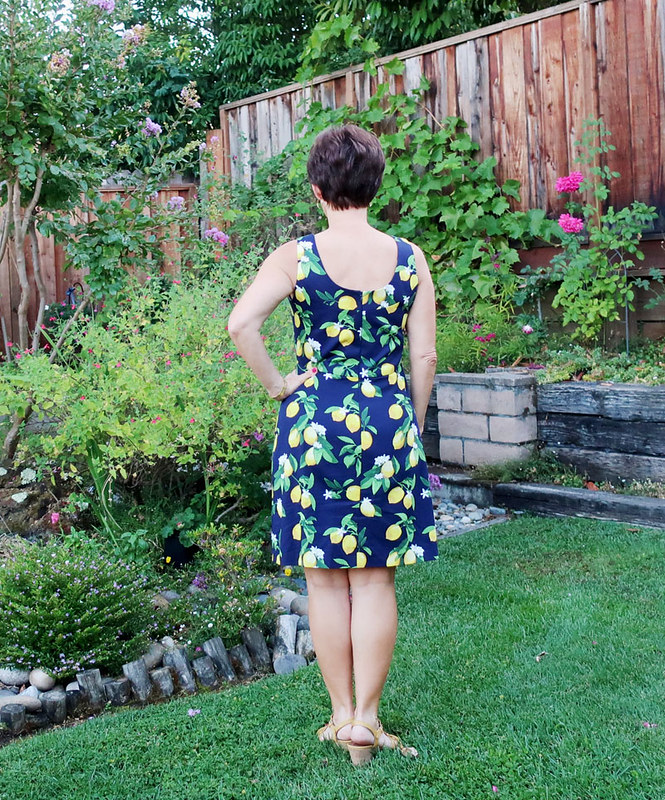
So...the center back seam could have been pattern matched. Frankly that is something that never occurs to me with florals. Ok - plaids I will go to the ends of the earth to match perfectly but florals it's just not something I fuss about. And for a super simple summer dress - sew it up quickly and wear it while the weather permits! On the other hand I'm quite pleased with the line up of the seams across the zipper. I do like this neckline - pretty how it matches front and back.
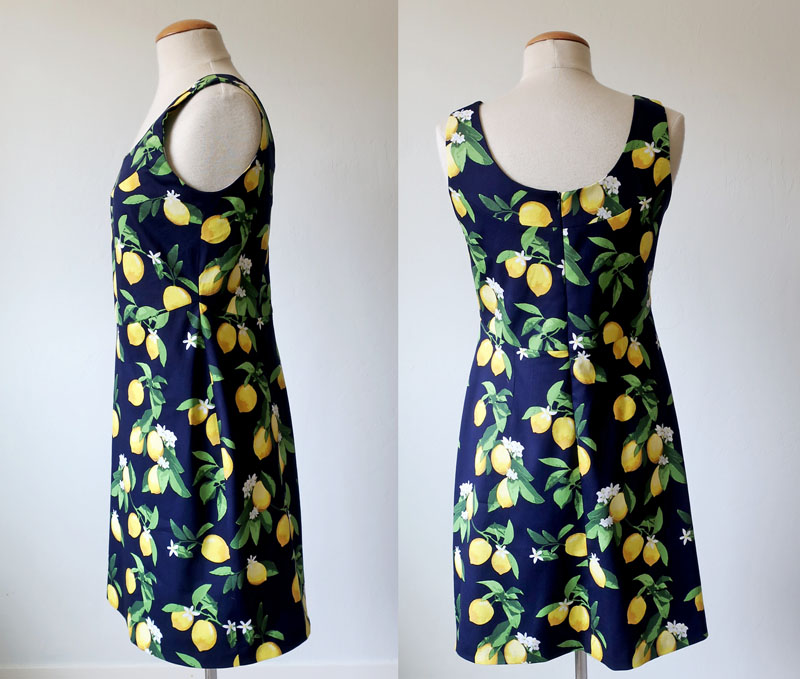
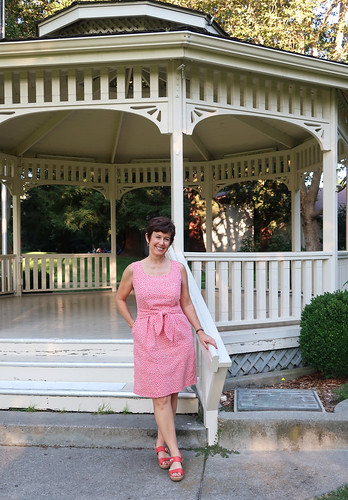
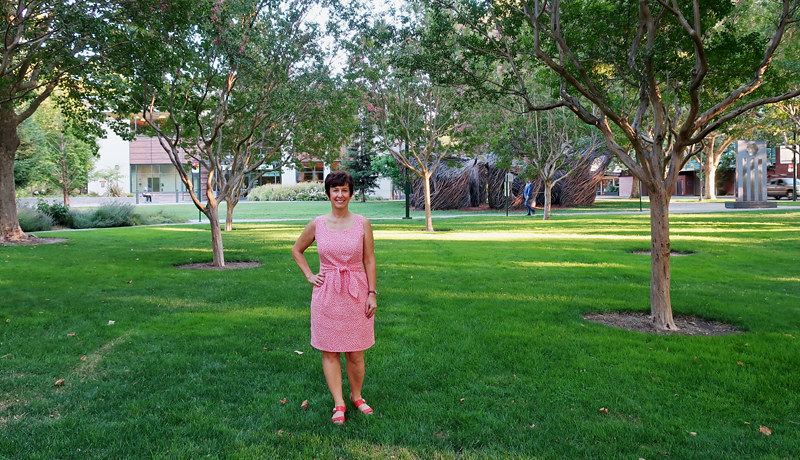
Well that is a slightly weird facial expression but a good side view of the dress so here it is. Moving on please....
I even made a muslin to test this pattern, as I couldn't pin those curvy paper pieces together to check fit and proportion. Which I usually do with the paper pattern pieces but you try to pin circles together, not going to happen. I used some scraps of quilting cotton I picked up who knows where, and found it needed to be taken up at the shoulders a good 3/4" although that is a common adjustment for me since I'm 5'3". I made a size 38 with some added seam allowance on the sides for fit insurance. Note all neck edges are stay-stitched, which helps keep them from distorting as well as letting you visualize where the actual seam edge will be on the finished item.
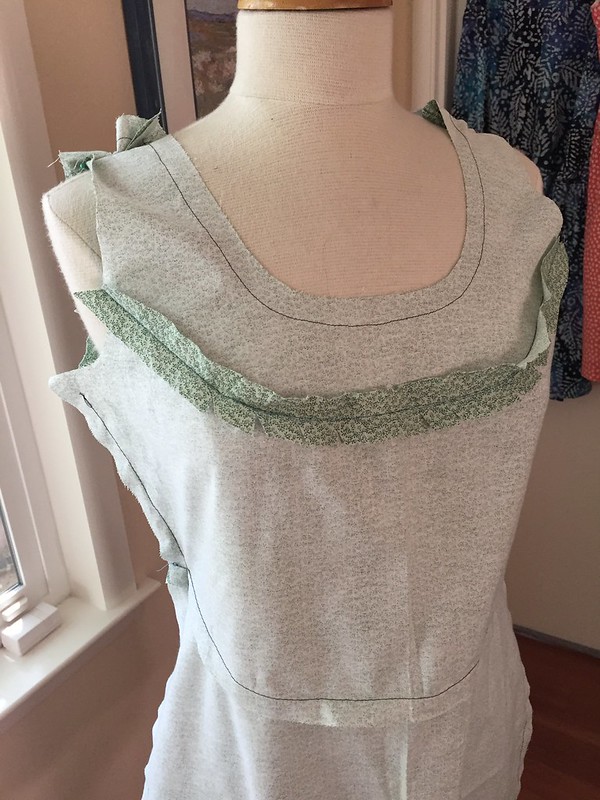
Inside peek, I lined the top half with some grey cotton voile. For neck facings I used the fabric and then sewed the lining only in the bodice.
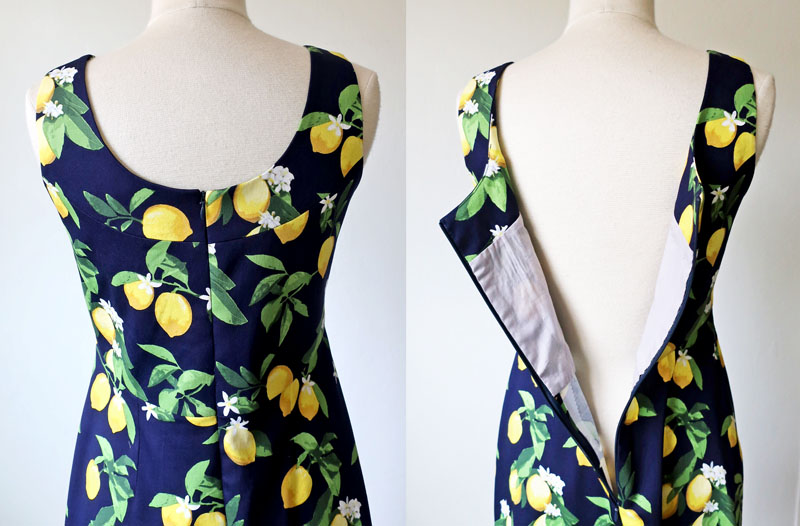
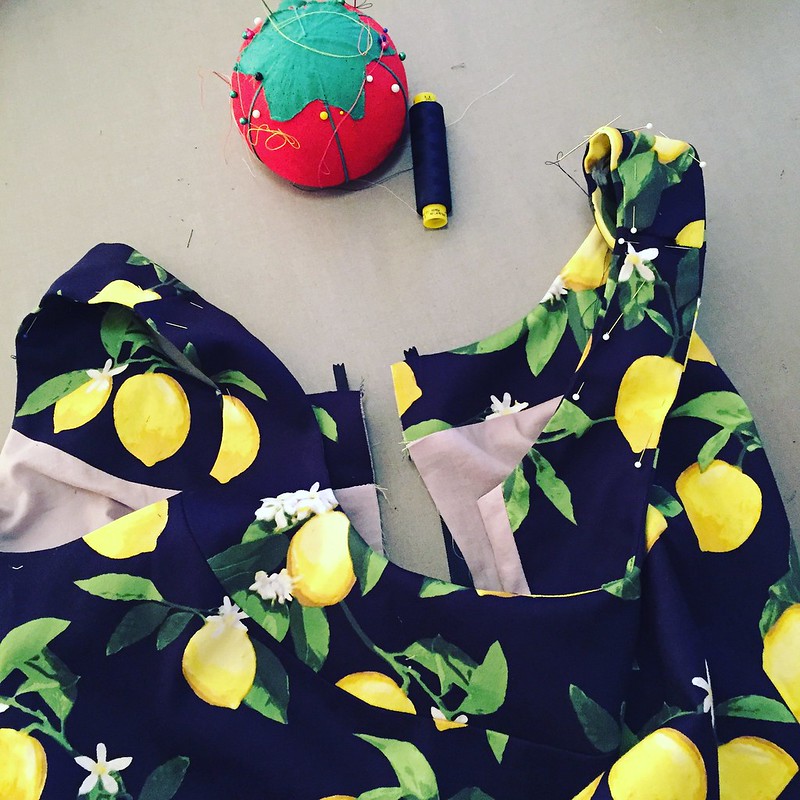
For any sleeveless dress I always add the lining and facings to the front and back, leaving the shoulder seam until last, plus a bit of the way down on either side of that shoulder seam on the outside edge. Then I sew up the shoulder seam checking for fit - and then hand sew the outer edge facing to dress fabric. Sounds more complicated than it is. It's all pinned together in this photo below, see the right side where it is being hand stitched.
Very happy with this one and I'm calling it my birthday dress for the year. I think almost every year since I started this blog I've sewn an end of summer creation which I can wear over Labor Day. Oh yes, I'm a Labor Day baby, cue a lifetime of jokes from my mom about her labors. All you other Labor day babies know just what I'm talking about. So I plan to wear this out to dinner and perhaps I'll order a 🍋🍸to go with it. Usually I'm in Hawaii for my birthday but I was just there a couple of months ago so San Francisco will just have to do. 😊
So to sum up - there are treasures in the pattern archives from every decade. I just found a great vintage coat pattern at a garage sale and it's taking all my will power not to sew it up. Oh, you know I will succumb and start that soon enough.
Happy Labor Day weekend and happy sewing,
Beth
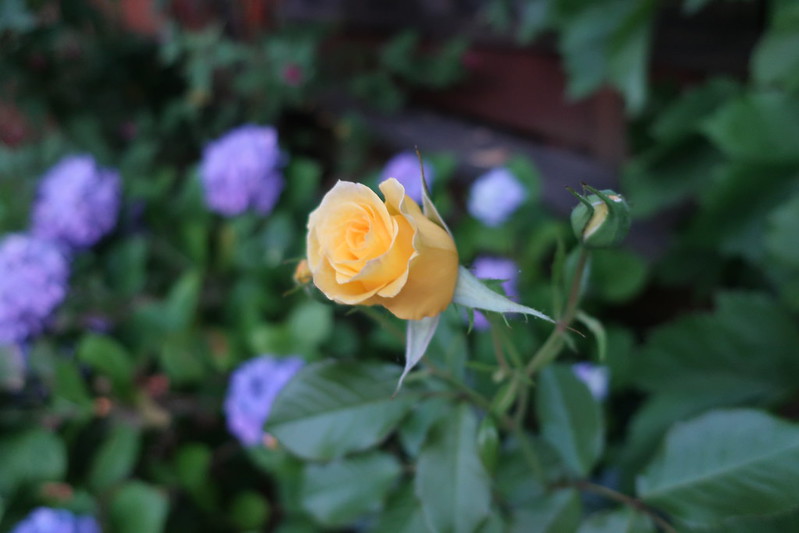
today's garden photo, a yellow and blue accent to go along with my lemony dress.
Wednesday, August 29, 2018
Monday, August 20, 2018
Fall schedule, sewing plans and current projects
Every time I teach a class at Hello Stitch I ask people how they found out about the classes and the studio. Quite often they tell me they read about it on my blog. So with that as a consideration here's a review of what classes are coming up in the next few months. I really appreciate hearing that plenty of you wish you could join in to a class but unfortunately a continent or ocean is in the way. I would love to do some sewing classes along with travel next year if anyone wants to get in touch about that.
🙂
I will mention that we've had a number of people from out of town take classes - what a good excuse to pay your N. Cal friends a visit or just treat yourself to a bay area mini-vacation.* And I'll let you in on a little secret, it's September and October when they take all those amazing postcard photos of SF and the Golden Gate bathed in sunshine (instead of fog) Once the official summer is over we often have a glorious stretch of lovely weather.
So here's the scoop on upcoming classes. And if you are more interested in actual sewing details, scroll down to see what I'm working on and planning for fall. All the class titles/dates are links taking you to the info and registration page for that class on the Hello Stitch website.
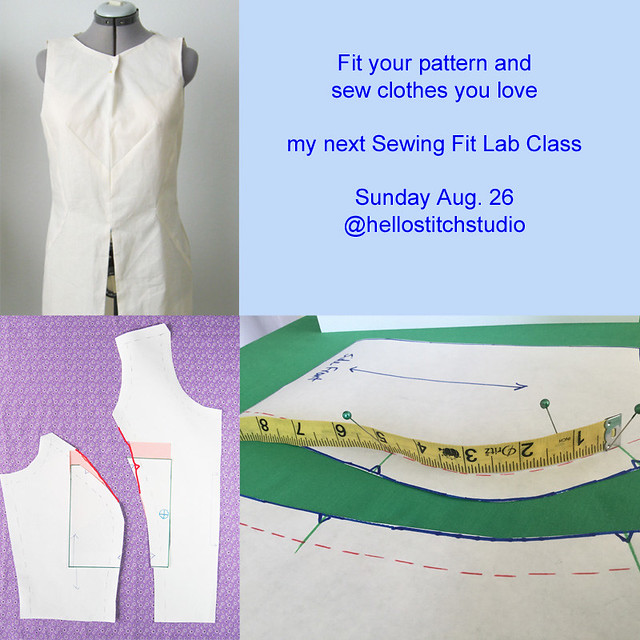
Pattern Fitting Sunday August 26 is the next class up. This class is part hands-on pattern adjustments, where I teach you a bunch of the most common adjustments and you work on 1/2 scale practice patterns, and then the optional 2nd part of the day is a Fit Lab where we will fit a specific pattern for you. If you're thinking of doing the jacket sewing class later in Nov. it might be a great way to get that coat or jacket pattern fitted perfectly beforehand.
Sat. Sept 8: Make the Lander Pants from True Bias.
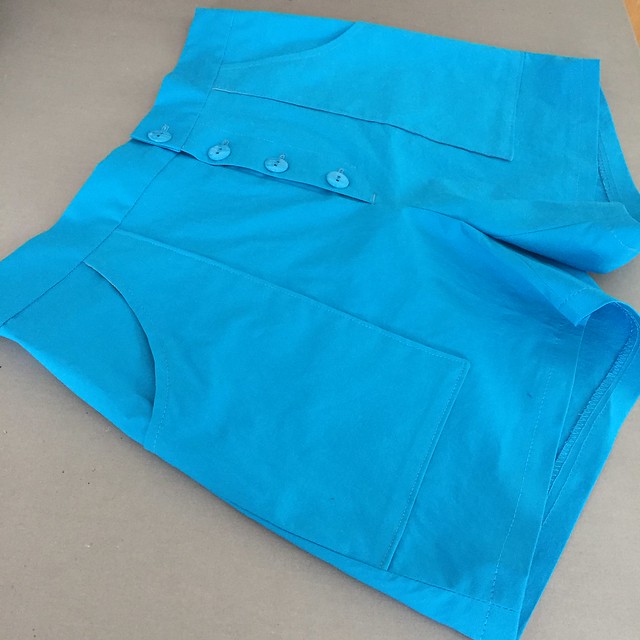
I just sewed up my Lander shorts this weekend and this pattern is quite easy. (and potentially versatile - of course I'm thinking about pocket and zipper variations). Anyway - I think it is just about sold out - might be one spot left. Based on the popularity I think we will probably offer this again but not until Dec. or Jan.
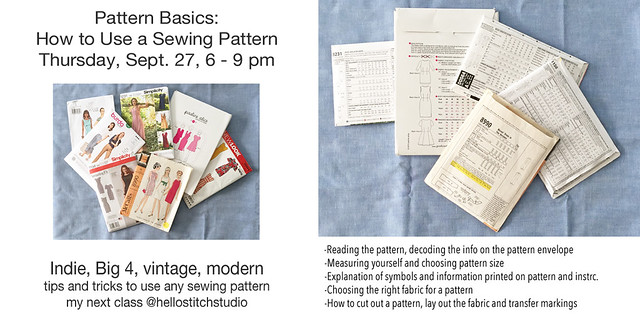
Thursday Sept. 27, 6-9 pm Pattern Basics: How to read sewing patterns
I love doing this class! Whether you are a beginner or getting back into sewing it's a great way to become familiar with current patterns. This class includes taking our measurements, reviewing the pattern sizing and how to choose a size. I'll do an explanation of symbols and terms, show how to cut out and mark your fabric pieces. And a discussion of what fabrics go with which patterns, pitfalls to avoid and tips for success in pairing fabric and pattern.
Sat. Sept 29: Sew a Wrap Dress
We just did this class a few weeks ago and the dresses everyone made were so pretty!! I made the Sew Over It Eve Dress and I think I might sew it up again, perhaps a winter version, in a ponte knit and a shorter length. (it says for wovens but I think a stable knit would be fine). Any wrap dress pattern, your choice.
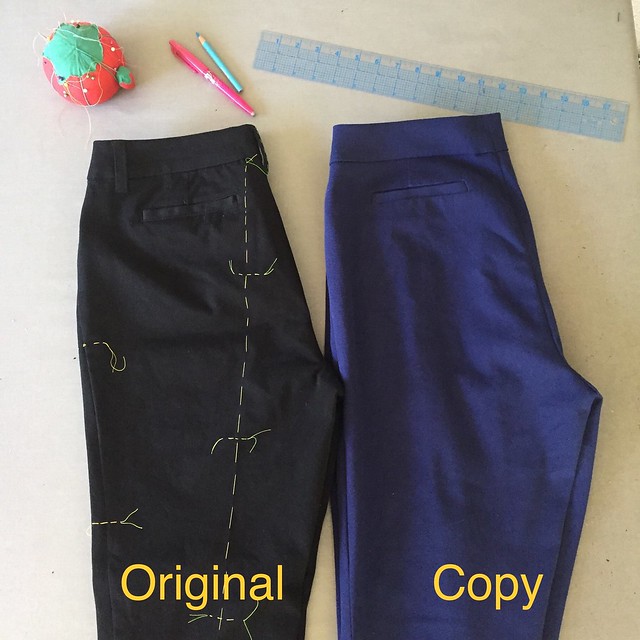
Sunday Sept. 30: Copy your Favorite Garment
This might be my most popular class and understandably so. We all have that perfect item in our closet we wish we could clone - and you can. Or a reasonable copy of. Or copy and then change the fit. So many options.
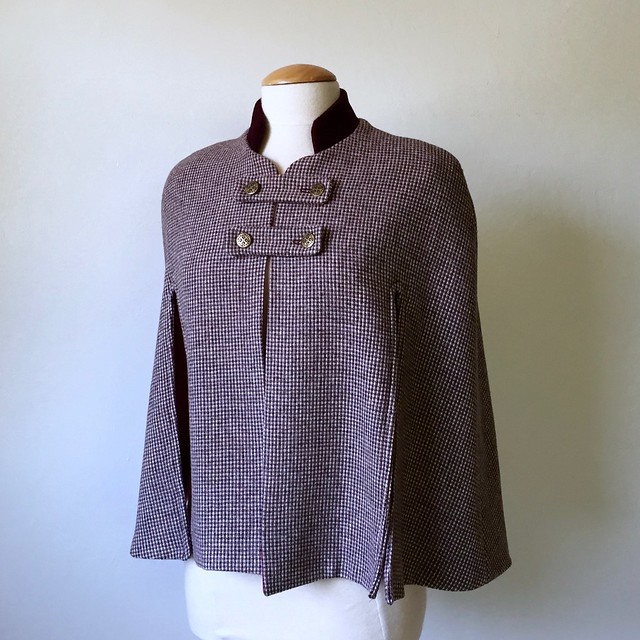
Oct. 13-14 Weekend Workshop: Cape Tailoring
Ready to dip your toe into sewing with wools? Putting in a lining? Buttonholes, pockets, a simple collar? Capes are definitely having a fashion moment and might be the perfect outerwear for our changeable bay area weather. This is a 2-day class with lunches included. On the class page we have a link to a Pinterest page of cape patterns. I am having a hard time choosing which one to sew!
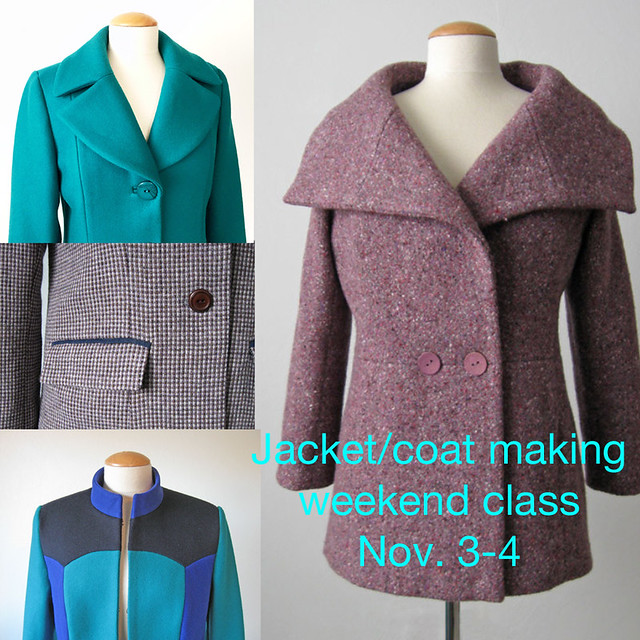
Nov 3-4 Weekend Workshop: Jacket or Coat Tailoring
You know you want to make a coat or jacket and I want to be your enabler :) Jackets and coats are so rewarding to sew and you can dazzle your non-sewing friends who will be amazed. I plan to do a LOT of demonstrations of various techniques for outerwear and tailoring, including welt pockets and bound buttonholes, how/where/why to use interfacing and which ones for which part of the garment. Plus pressing! so much pressing! but it's the key to a professional looking garment and quite easy when you know how to do it and when. Lapels, collars, lining. I'm getting excited already. I am going to permit myself to make one more jacket this year (meaning 2018 - all bets are off for 2019) and I am planning to sew and demo in this class. This is a 2-day class with lunches included.
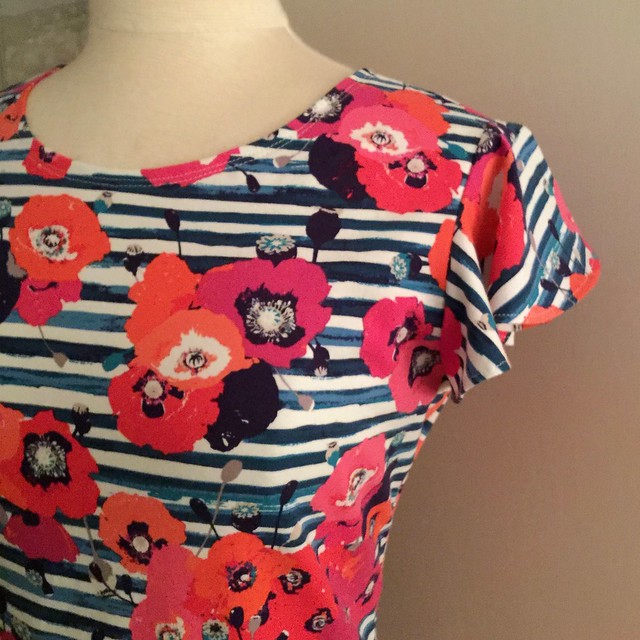
So that's my sewing class schedule for the next few months. It was scorching hot last week but I felt the need to sew up a new t-shirt so here's a sneak peek. This and the next item are fabrics I ordered as "add-on" items to get free shipping on two different orders from Fabric.com. And neither one made it onto a shelf - I cut them both out immediately. After all if you can wear wild florals and fruit prints in bright and sunshiny August then when can you?
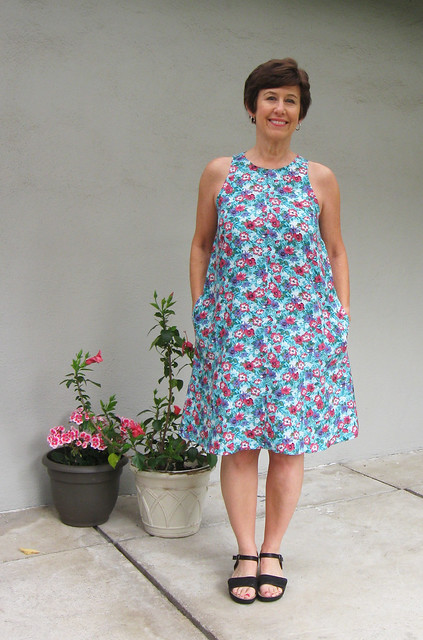
This dress will get it's own nice blog post - and I'm not one for late-night sewing selfies but I was taking photos of the back to see the fit and took this one as well. And you can see hints of a multitude of projects in progress. By the way, my brief look at this dress on Instagram was maybe my most liked image - lemon prints are really popular.
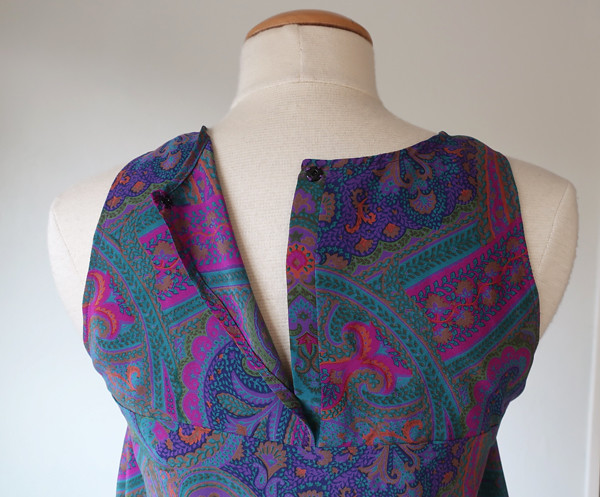
And a knit top. I had coveted that fabric for ages and finally ordered a yard.
OK - back to all my current projects, and it's pleasantly cool this evening, perfect sewing weather :)
Hope to see you in a class at Hello Stitch. The one thing that might not come across in all the class descriptions is that they are really fun - what wonderful people I've met there. People bring snacks to share - we talk about our fitting dilemmas, and generally have a great day hanging out with other sewing fanatics.
* I mentioned a bay area mini-vacation at the top. A few people have found really nice Air B&B's near the studio and of course you can do some shopping at Stone Mountain too.
Happy Sewing,
Beth
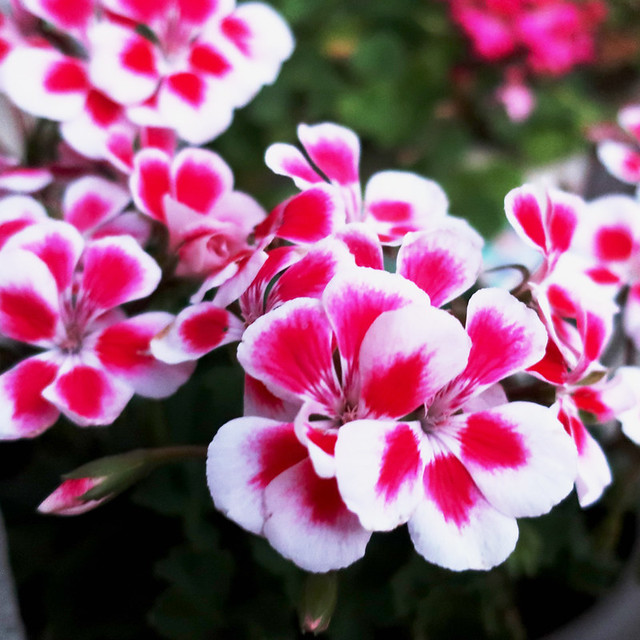
Today's garden photo is a little geranium that I bought (don't tell anyone) but I typically never buy geraniums but, ahem...find cuttings to plant. However this one I did buy, and now have plenty of cuttings rooting to make more plants.
🙂
I will mention that we've had a number of people from out of town take classes - what a good excuse to pay your N. Cal friends a visit or just treat yourself to a bay area mini-vacation.* And I'll let you in on a little secret, it's September and October when they take all those amazing postcard photos of SF and the Golden Gate bathed in sunshine (instead of fog) Once the official summer is over we often have a glorious stretch of lovely weather.
So here's the scoop on upcoming classes. And if you are more interested in actual sewing details, scroll down to see what I'm working on and planning for fall. All the class titles/dates are links taking you to the info and registration page for that class on the Hello Stitch website.
Pattern Fitting Sunday August 26 is the next class up. This class is part hands-on pattern adjustments, where I teach you a bunch of the most common adjustments and you work on 1/2 scale practice patterns, and then the optional 2nd part of the day is a Fit Lab where we will fit a specific pattern for you. If you're thinking of doing the jacket sewing class later in Nov. it might be a great way to get that coat or jacket pattern fitted perfectly beforehand.
Sat. Sept 8: Make the Lander Pants from True Bias.
I just sewed up my Lander shorts this weekend and this pattern is quite easy. (and potentially versatile - of course I'm thinking about pocket and zipper variations). Anyway - I think it is just about sold out - might be one spot left. Based on the popularity I think we will probably offer this again but not until Dec. or Jan.
Thursday Sept. 27, 6-9 pm Pattern Basics: How to read sewing patterns
I love doing this class! Whether you are a beginner or getting back into sewing it's a great way to become familiar with current patterns. This class includes taking our measurements, reviewing the pattern sizing and how to choose a size. I'll do an explanation of symbols and terms, show how to cut out and mark your fabric pieces. And a discussion of what fabrics go with which patterns, pitfalls to avoid and tips for success in pairing fabric and pattern.
Sat. Sept 29: Sew a Wrap Dress
We just did this class a few weeks ago and the dresses everyone made were so pretty!! I made the Sew Over It Eve Dress and I think I might sew it up again, perhaps a winter version, in a ponte knit and a shorter length. (it says for wovens but I think a stable knit would be fine). Any wrap dress pattern, your choice.
Sunday Sept. 30: Copy your Favorite Garment
This might be my most popular class and understandably so. We all have that perfect item in our closet we wish we could clone - and you can. Or a reasonable copy of. Or copy and then change the fit. So many options.
Oct. 13-14 Weekend Workshop: Cape Tailoring
Ready to dip your toe into sewing with wools? Putting in a lining? Buttonholes, pockets, a simple collar? Capes are definitely having a fashion moment and might be the perfect outerwear for our changeable bay area weather. This is a 2-day class with lunches included. On the class page we have a link to a Pinterest page of cape patterns. I am having a hard time choosing which one to sew!
Nov 3-4 Weekend Workshop: Jacket or Coat Tailoring
You know you want to make a coat or jacket and I want to be your enabler :) Jackets and coats are so rewarding to sew and you can dazzle your non-sewing friends who will be amazed. I plan to do a LOT of demonstrations of various techniques for outerwear and tailoring, including welt pockets and bound buttonholes, how/where/why to use interfacing and which ones for which part of the garment. Plus pressing! so much pressing! but it's the key to a professional looking garment and quite easy when you know how to do it and when. Lapels, collars, lining. I'm getting excited already. I am going to permit myself to make one more jacket this year (meaning 2018 - all bets are off for 2019) and I am planning to sew and demo in this class. This is a 2-day class with lunches included.
So that's my sewing class schedule for the next few months. It was scorching hot last week but I felt the need to sew up a new t-shirt so here's a sneak peek. This and the next item are fabrics I ordered as "add-on" items to get free shipping on two different orders from Fabric.com. And neither one made it onto a shelf - I cut them both out immediately. After all if you can wear wild florals and fruit prints in bright and sunshiny August then when can you?
This dress will get it's own nice blog post - and I'm not one for late-night sewing selfies but I was taking photos of the back to see the fit and took this one as well. And you can see hints of a multitude of projects in progress. By the way, my brief look at this dress on Instagram was maybe my most liked image - lemon prints are really popular.
And a knit top. I had coveted that fabric for ages and finally ordered a yard.
OK - back to all my current projects, and it's pleasantly cool this evening, perfect sewing weather :)
Hope to see you in a class at Hello Stitch. The one thing that might not come across in all the class descriptions is that they are really fun - what wonderful people I've met there. People bring snacks to share - we talk about our fitting dilemmas, and generally have a great day hanging out with other sewing fanatics.
* I mentioned a bay area mini-vacation at the top. A few people have found really nice Air B&B's near the studio and of course you can do some shopping at Stone Mountain too.
Happy Sewing,
Beth
Today's garden photo is a little geranium that I bought (don't tell anyone) but I typically never buy geraniums but, ahem...find cuttings to plant. However this one I did buy, and now have plenty of cuttings rooting to make more plants.
Wednesday, August 15, 2018
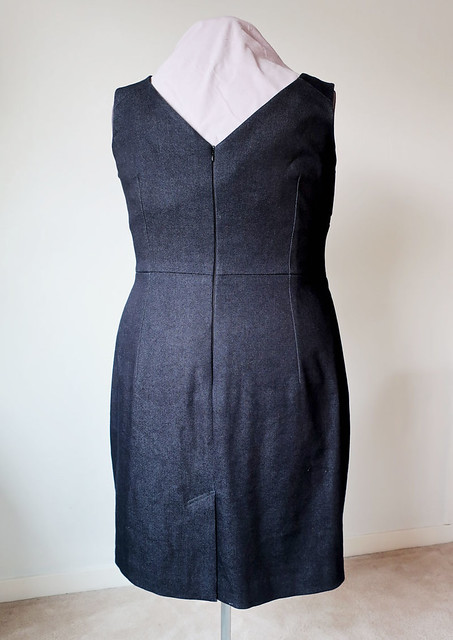
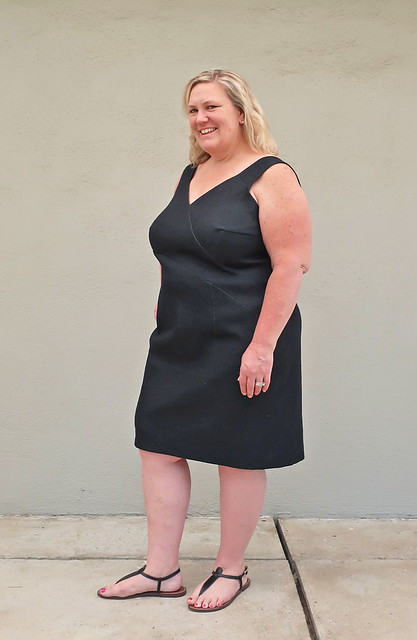
Casual version: BurdaStyle 07-2017-124 cocktail dress in stretch denim
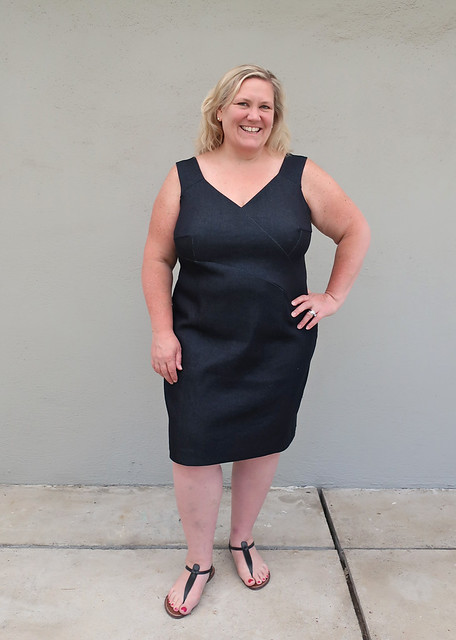
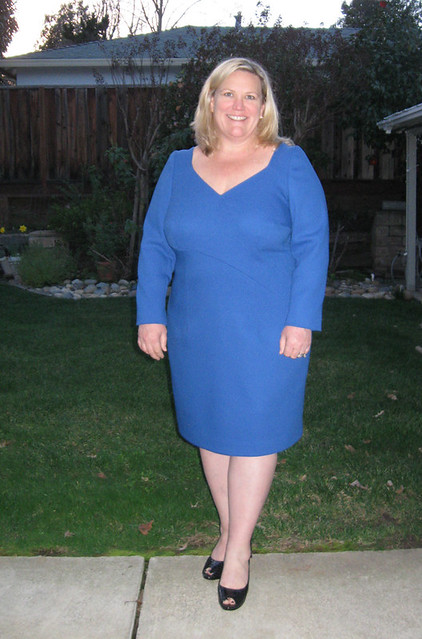
For some dresses, using a casual fabric for a garment with a glamorous style results in the best of both worlds. Sophisticated and yet wearable anywhere. Reflecting back on things I've made for myself over the years this combo has really worked well. When I made the blue wool version of this BurdaStyle Pattern 07-2017-124A last winter for my friend Heather I said "I think this would be great in denim". At the time I concentrating on completing that one in time for her event but the idea stuck in the back of my mind. Looking through my fabric recently I came across a denim fabric I bought at Joann's, maybe the summer before last? And so I made the executive decision - this dress will be!
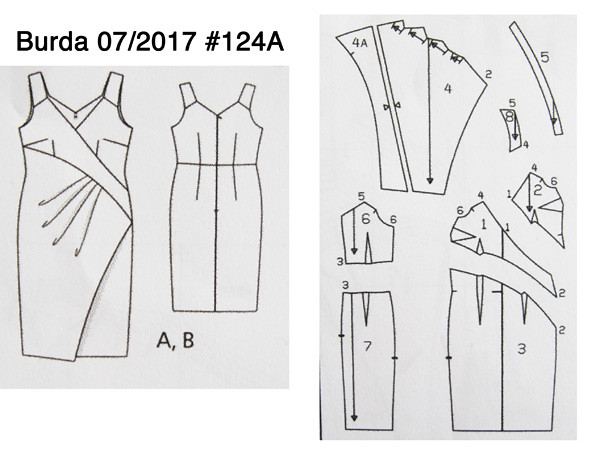
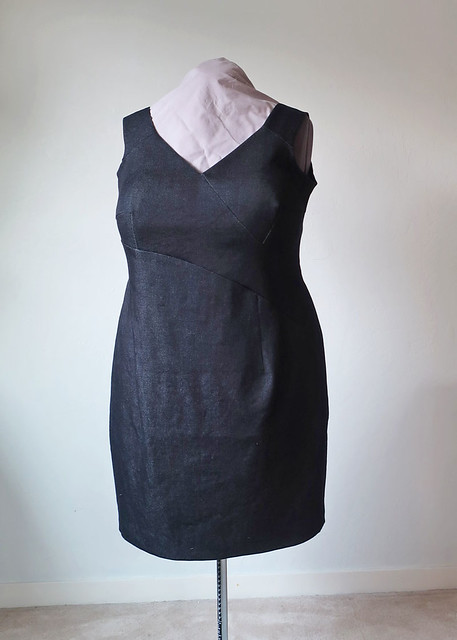
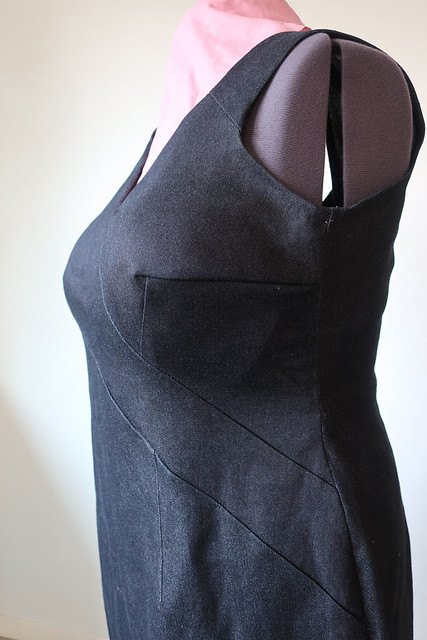
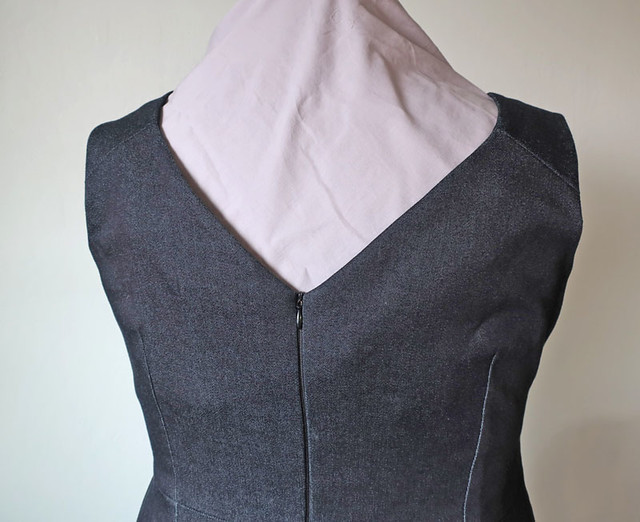
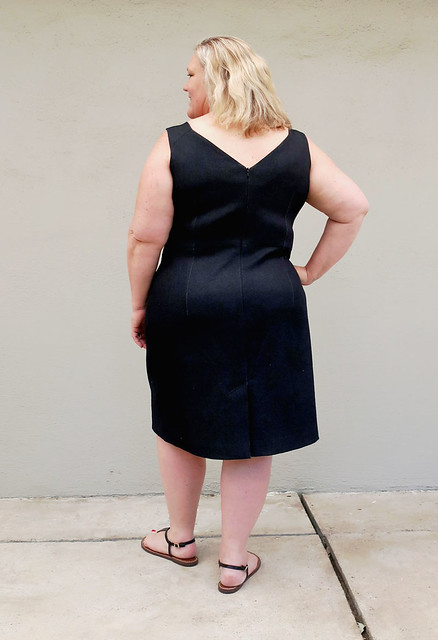
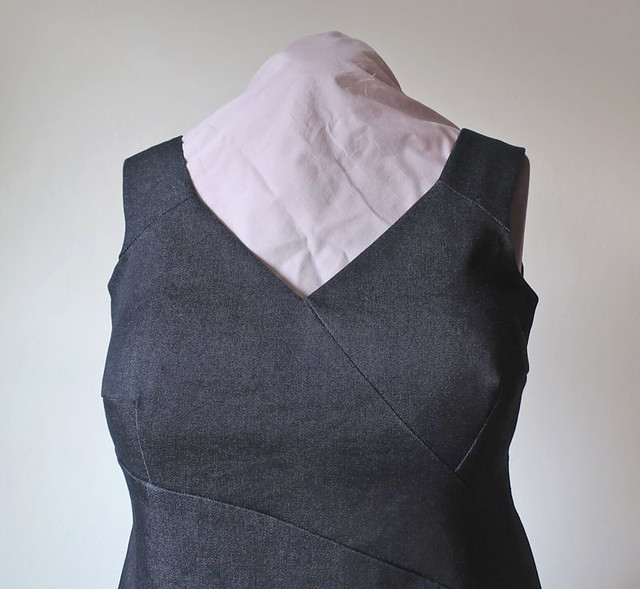
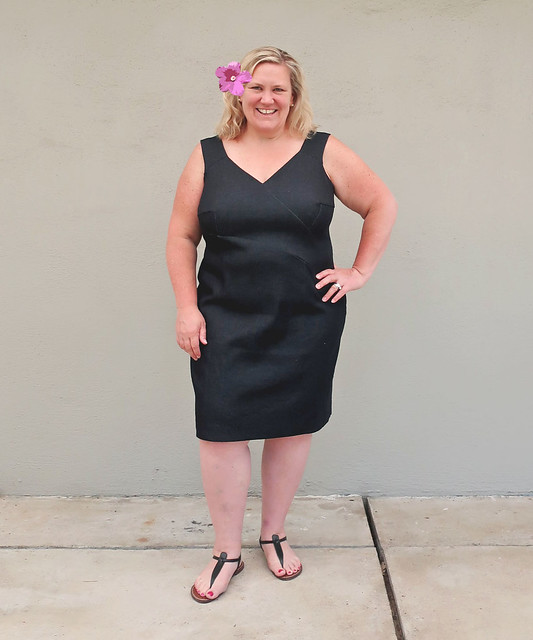
A blonde in a little black dress, ideal for vacation or a dinner out. I'm so happy I stitched this up. Sewing it in stretch denim, with no lining made it a bit quicker to sew. Plus I had already dealt with the pattern puzzle which is this pattern. And it is a bit of a puzzle, with asymmetrical seaming and darts.
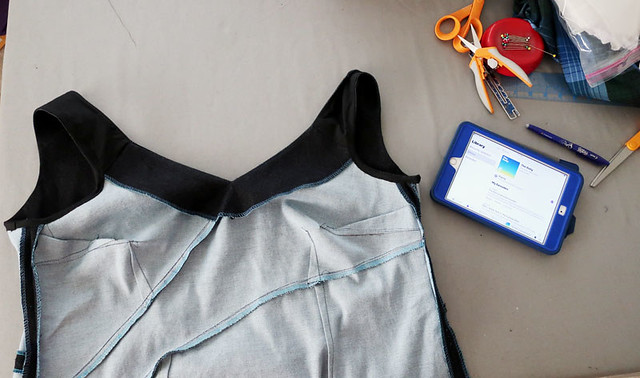
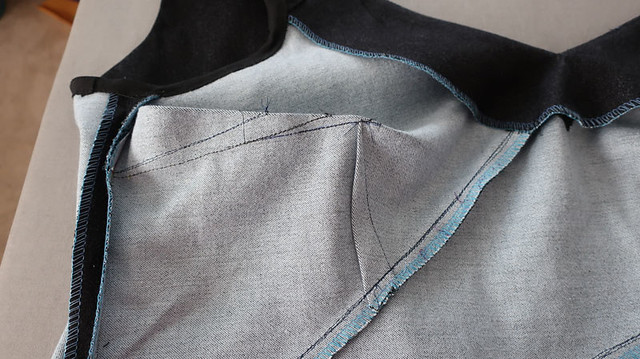
Actually this inside look shows the detail probably better than the outside. Also you can see that while the fabric looks black it's really woven from a combo of blue and black threads so I guess it gives you either/or in terms of accessories. Note: my constant conpanion when sewing during the day, podcasts. First up every morning is The Daily.
Previous version of this dress was sewn in blue wool, which had a touch of lycra but wasn't really stretchy. This denim was much more elastic, and I went for a tighter fit in this version.
Here's the drawing for this pattern. Both times I've left off that overlay, which is a good idea but coupled with the asymmetric shaping just didn't do anything for the dress, in fact if you look at my previous blog post on the blue wool dress, I tried it when doing the muslin and it wanted to poof out strangely. Not a look anyone wants!
A few dress form pictures of this denim version and scroll down for more sewing details.
This dress is definitely very "dart-y" with both small vertical darts and longer horizontal bust darts coming from the side seams. I didn't like how they first came out when I basted the dress together for a fitting, and even after the fitting played around with them quite a bit. The photo below shows my first attempts and then the final version.
I pulled out the pattern pieces and was trying to recall what I did with the darts on the first version. I always figure the pattern is just a guide and I often change the length or angle of the darts as I go to suit the fabric or the body shape. I keep trying to back off the dart point to keep it from being too prominent but that just made the whole apex area more pointy - which is not the look most of us are going for.
Examining the pattern pieces I realized that the two side darts weren't actually the same either, so there was no need to try and sew them both the same length and width, it was better to just take in the dart as needed for shaping. In the end I had a bit of fabric at the underarm in the front, but I just sliced that off and did the edge finish.
For this dress I did facings in self fabric for the front and back neckline, and then just made some bias binding out of black cotton batiste for the underarm binding.
I tried a new method of putting in the invisible zipper which I saw on the Threads website, it works quite well but does involve a bit of basting. Not that I mind that and to get it to line up perfectly on the first try makes that hand sewing worthwhile.
I lightened up the shadows in this photo below so the details of the seaming are more visible.
And while the casual sandals look fine I know this dress will look great with a bit of jewelry. I've seen her wear some cute hot pink leather wedge sandals so that might just be the pop of color this outfit needs.
In the meantime we will make do with my photoshop flower 🌺.
So that's the latest on this project. Glad I finished it with a couple months more of warm weather here so she can wear it.
What's next for me. Yes, I've made another summer dress....and today I vowed on Instagram that it will be the last for a while. My closet is bursting with summer dresses. But they are so fun to make! And fortunately I can wear them all the time. Hmmm maybe talked myself into more? Nope. Onto other stuff. Just cut out a t-shirt and about to make the Lander pants as I am teaching that class at Hello Stitch in early September, By the way - that class is filling up so if you want in, register soon!
Happy Summer Sewing,
Beth
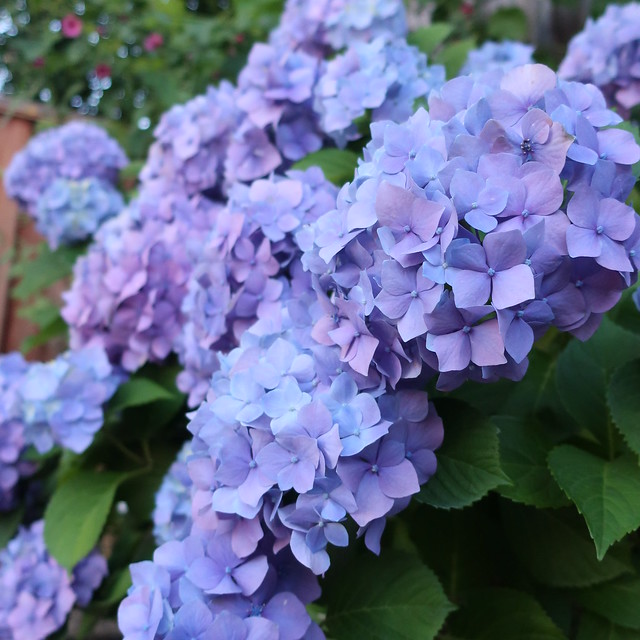
today's garden photo, it's getting past peak hydrangea time but every year one of the many I have goes into overdrive, this year it was this purpley-blue one. ooo that color 💜
Thursday, August 9, 2018
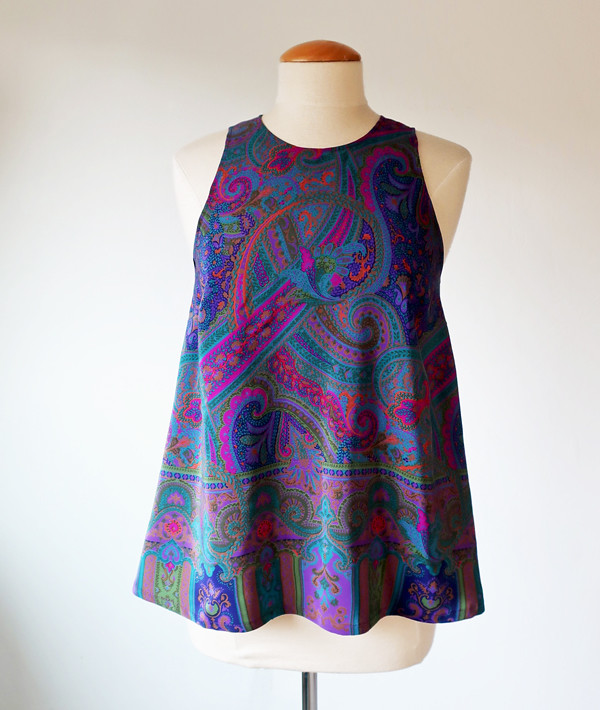
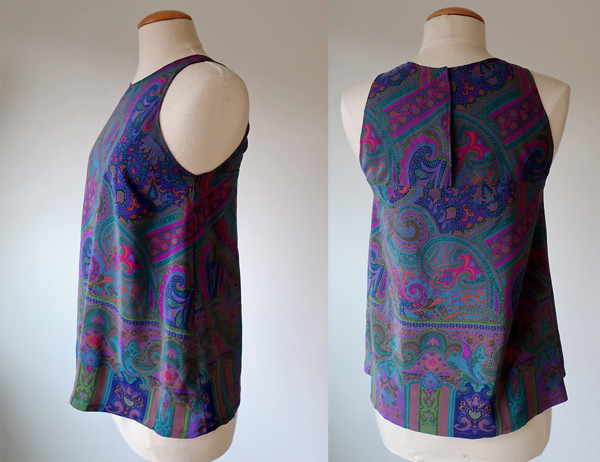
More mileage: Bondi Dress Pattern as a top in silk crepe
One of my favorite things in sewing is to find ways to get more mileage out of one pattern. Once I made the Bondi dress from Tessuti patterns I knew it would make a great top. It's ideal for any silk or a floaty rayon. Really for any lightweight fabric, and I predict a color block version in my future (as half the work is done already due to the back design).
Second only to getting more mileage out of a pattern has to be using fabric remnants to make another item. I just don't mean using the scraps for pocket lining, or testing, but sewing another garment in the same fabric from the remainder of the first project. Of course it helps if you bought a great big piece of fabric and in this case I had about 5/8 of a yard plus another sizable bit to work with. So now I have two tops out of this fabric that I absolutely love. And I was able to use the border print, so that was another level of sewing happiness...
If you want a Bondi dress or top of your own - our last Bondi Dress class of the summer is this upcoming Sunday 8/12, at Hello Stitch Studio in Berkeley. Here's the link. Note that the pattern comes with the class plus we have all the sizes sewn up in the studio so you can try on the samples and determine just which size to make. Then you trace off your pattern size (with everything you need supplied) and it's on to sewing! If you do plan to take the class sign up asap as sometimes we have more people that want to take a class but on a different day so we reschedule if that day turns out to work for more people. If that makes sense. Anyway if you want to do this Sunday class please register by Friday.
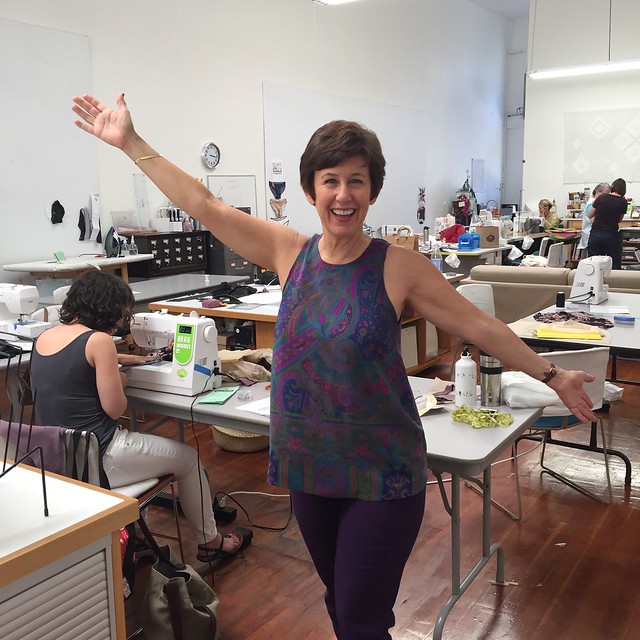
and here I am near the end of my class last weekend, which was our Wrap Dress class. Everyone made super cute dresses including a couple of versions of the Eve dress from Sew Over It (my version shown here).
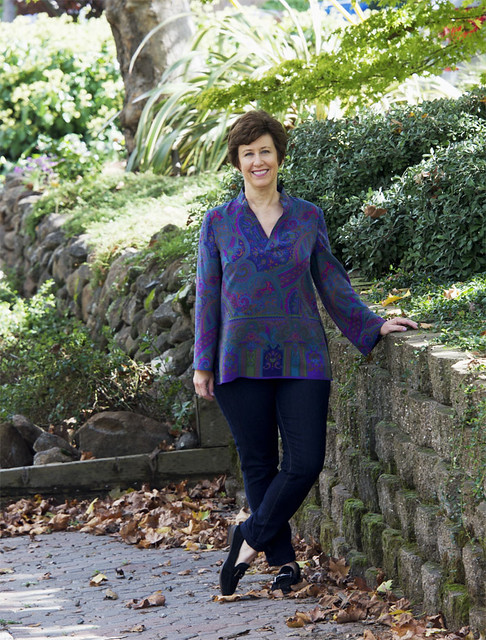
Sewing details: I played around with the length on this top, I think it needs to be long enough to keep the flowy shape and I'm not a fan of a crop top on me, although they look cute on some people. But too long and it looks like a dress that shrank, right? So I held up the paper pattern piece and took a gamble. Because I wanted to use the border edge, which is printed along the selvedges of this fabric. I figured if it was a bit too long I could do a narrow hem and still keep a bit of the border.
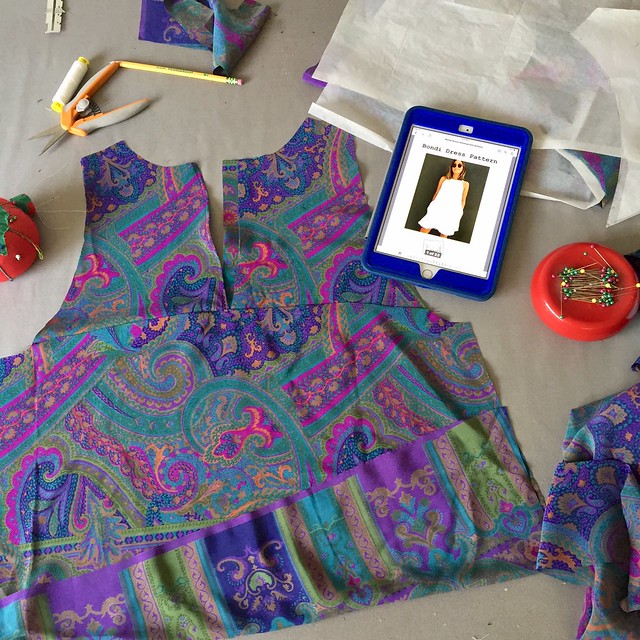
There's the Tessuti Bondi dress instructions on my iPad. They show a lot of versions in linen but I actually like it best in silk or rayon (perhaps because I'm just not a fan of linen). However with linen you can do the cool frayed edge hem treatment, so there is that.
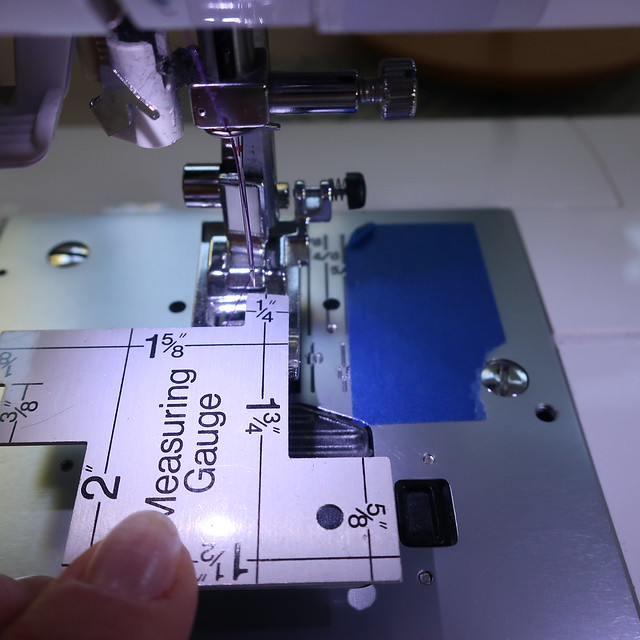
How about some macro lens type sewing detail? Truth be told I'm a straight stitch kind of sewer. I almost never change the stitch type, although I do change the length all the time. But one feature I do like is the capacity to move the needle to one side or the other.
Using the edge of the foot is the best way I've found to get a super even seam allowance stitched around bias binding. I'm sure everyone has their own method but this works for me. So the needle is moved to exactly 1/4 inch away from the edge of the foot (which might not be as shown in the above photo).
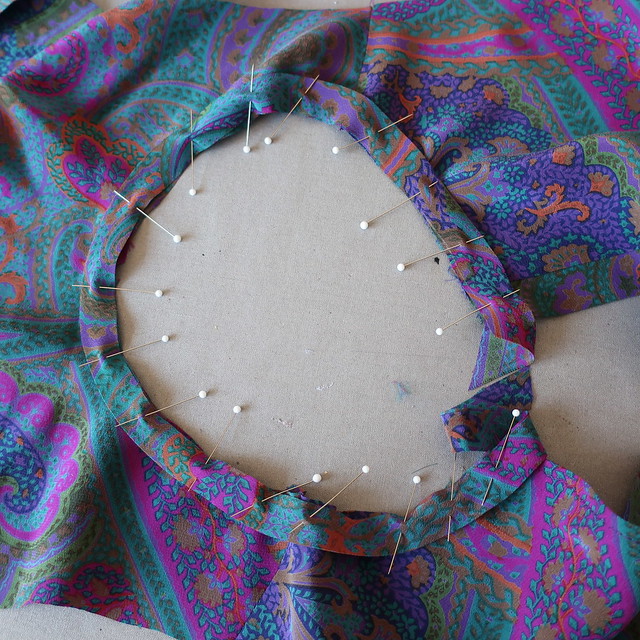
Then I pin on the bias binding which is cut about 1 1/8 wide and folded in half. I add that extra 1/8" due to the folding and when manipulated into place around the circle the binding is a fairly accurate 1/2" wide.
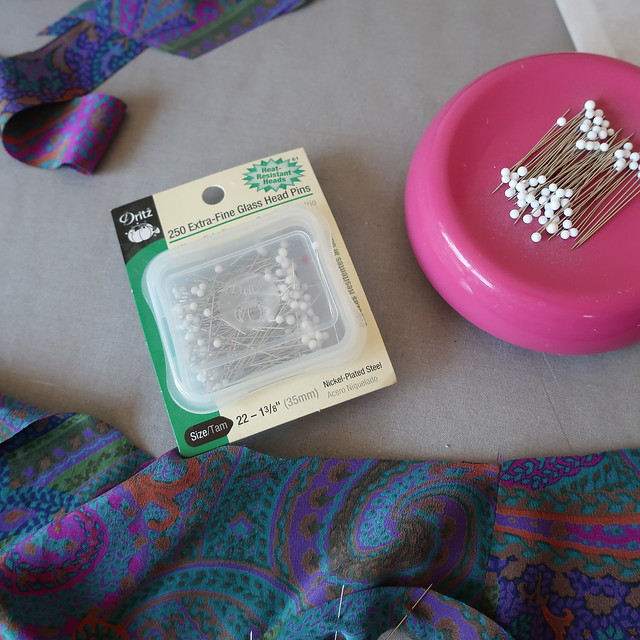
Not an ad but just a mention, I really like these pins for almost all sewing, but especially for silks they work so well. Also my treasured magnetic pin holder. Which I'm calling a pin holder so as to distinguish between that and a pin cushion. Whew I despise pincushions!!! I just cannot deal. All that poking pins in and out, it takes forever. I run around my sewing classes giving people little dishes or boxes to put their pins in and try to say "learn to wrangle your pins a different way if you want to sew a bit faster" But mostly people have their own way so I should let it go :) Breathe in, breathe out, let it go!
Back to stitching.
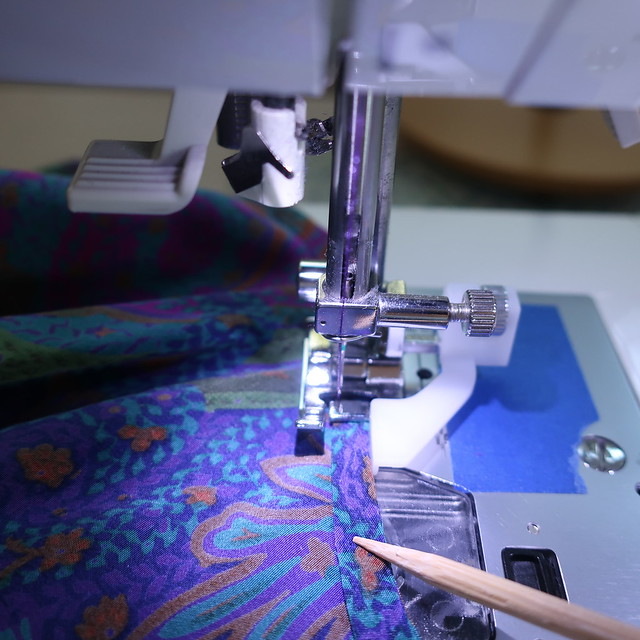
Changing the presser foot - another feature that I rarely use. But this tiny binding seemed to call for whatever this foot is. My machine manual says it is the blind hem foot, but I think that it works really well for keeping something aligned along the edge as shown. And then I use a wooden skewer to push the binding flat and in place, no pins needed as it is pressed in place and silk presses so well.
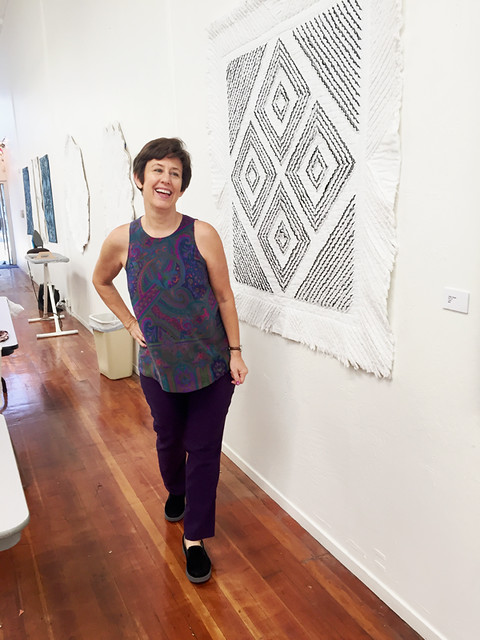
I ended up liking the length just fine so I was glad I could cut it out to use the border.
When I did the dress version I knew that my X -back bra straps peeked out a the middle so for this slightly more elegant version I put a small extra piece on one side so they back could overlap that. And then for a closure I used a snap.
Here's the dress version of this pattern:
And the tunic top version of this fabric:
So now I really have only small scraps left, just enough for pocket linings.
One more look at this top, and my purple jeans. Which I made using a pattern I made by copying a pair of jeans. It's now my go-to pattern for pants and needs to be a blog post, one of these days.
Other classes coming up for fall are:
Sewing Pattern Alteration: Tissue Fitting and Fit Lab on Sun. Aug. 26
Make the Lander Pants on Sat. Sept 8
Copy for favorite Garment on Sun. Sept 30
and then we are into Autumn sewing with
Cape Tailoring Weekend Workshop Oct 13-14 this is a great option if you want to make a fun outerwear piece, avoid some fitting headaches, but still learn how to work with heavier fabrics, interfacing, lining, buttonholes etc. On that registration page there is a link to a Pinterest board of all kinds of great cape patterns.
Jacket and Coat Tailoring Weekend Workshop Nov. 3-4 You can make a jacket! I plan to do lots of demos on techniques, explain interfacing, linings, sewing perfect sleeves, how to do bound buttonholes and welt pockets. Even if your pattern doesn't have each one of these details you will have a change to see and practice these techniques.
So what's up next in my sewing list? I gave a sneak peek on Instagram of my latest project and the fabric got a few raves so I am anxious to finish that one and wear it - because our weather is scorching and a summer shift dress will be just right.
And then I had better make some Lander pants to learn all about that pattern. And my Burda magazines are calling me. But today it's 100℉ so I think it's time for a swim.
Happy sewing,
Beth
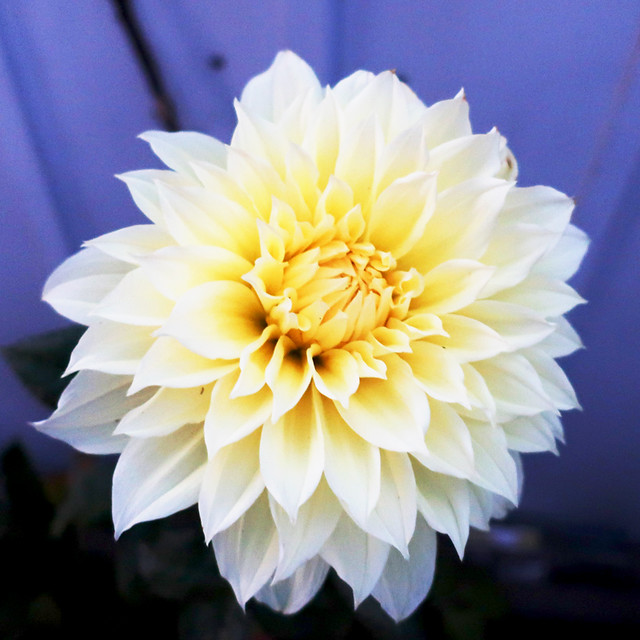
today's garden photo, a yellow dahlia that I've been waiting for all summer. Did not disappoint! So pretty in the evening light.
Friday, August 3, 2018
Dress: Burda 05-2018-114A sheath dress with waist tie in cotton gauze
News bulletin - I'm really liking the fact that I finally subscribed to Burda Magazine. I suppose after a few years I will have a big stockpile of the magazines as many long time Burda readers do. At that time I might be a bit uninterested, and wonder if I should keep it up. But since I am in the early phase of Burda infatuation I find it really fun to get that issue in the mail and page through it.
When the May issue arrived I saw a number of patterns that I really liked, but this one jumped out at me right away. Also I saw a fellow blogger (the fabulous Ellen in Norway) made the same dress and she blogged it on May 20. She so speedy!
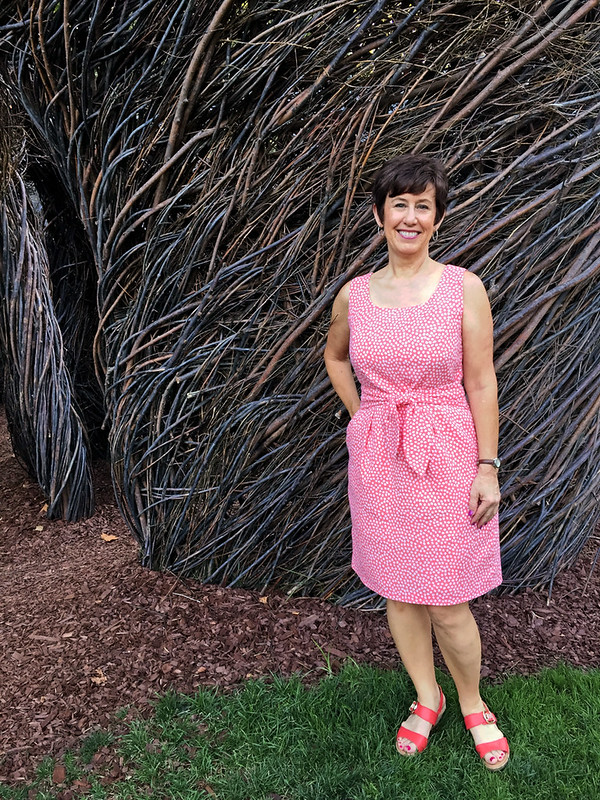
Here's my version, and for variety a new photo location. Which turned out to be far more interesting than I would have guessed. Consequently lots of pics in this post.
It's not really all that out of the ordinary, a simple princess seamed bodice, a straight skirt with some pleats at the waist, and then the sash tie which is sewn into the side seams. But I find it very appealing. This fabric is kind of a mystery item that I bought at a garage sale last month, it's a crinkly gauze, cotton presumably. Here's the magazine view. Oh how I wish they would include more photos of each item, maybe the back and at the least not obscure the item with some arty pose or an accessory. Oh well....
Left of the sleeves because that's my style in the summer. It's either sleeveless or long sleeves for me.
Dress form view.
Sewing details: I think raised the center front of the neckline about 3/8" of an inch. Since I'm short a lot of necklines end up a bit low, so I will either raise the neckline at the center front or sometimes I take the whole thing up at the shoulders, it just depends on the pattern. For this one I probably could have left it as is but I am happy with the proportions. I'm really partial to that neckline shape in both the front and the back, in my mind I always call it a "rounded square" neckline shape.
A closer look at the neckline and the fabric. You can see it is a bit crinkly like gauze which makes it quite nice to wear. The color looks different in every photograph. I asked on Instagram if the print was pumpkins or what, and most commenters thought apples. But due to the orangey color I still see pumpkins.
Interlude between serious sewing details for a slightly corny photo. I thought this bandstand would make a nice backdrop but had to tell some kids to scram before posing. Like all the other selfie taking dorks in the part that evening. But keep reading - a much better photo spot to follow. At least I thought so.
More sewing details: I cut a size 38 which is my usual size in Burda. I added a bit in the waist and hips for fitting purposes and I think retained only some of that when I sewed up the side seams.
When I trace out the Burda patterns and before I add seam allowance I try to measure the finished garment measurements to see how the fit will be and then do adjustments at that point. Below shows the bodice pattern pieces aligned so I can measure the finished circumference at bust and waist. This is the kind of thing I try to get people to become comfortable in my fitting classes, to know your way around a pattern before you even start with adjusting. Most people aren't using Burda patterns but a lot of patterns tell a finished measure but people don't really have an idea as to what that means. And it might not land on your body at the same place as they calculate, so it pays to do your own.
The whole bodice is lined with cotton batiste, and I put interfacing on the orange fabric around the neckline only, front and back. Also down the center back seam. I wasn't planning to line the skirt but the fabric was a bit see-through.
Rummaging through my lining box I came across a sewn together skirt lining in an ivory color that I must have extracted from something ages ago - and figured sometime I could reuse it. So score! Skirt lining sorted. Talk about a quick one, just had to attach it at the waist to the bodice lining.
Last but not least, I added pockets. Which you probably can't see in this photo but they are there, in the side seams. The pattern doesn't have them but they are easy to add and don't show at all due to the pleats (as opposed to a sleeker skirt style with darts where the pocket outline might show).
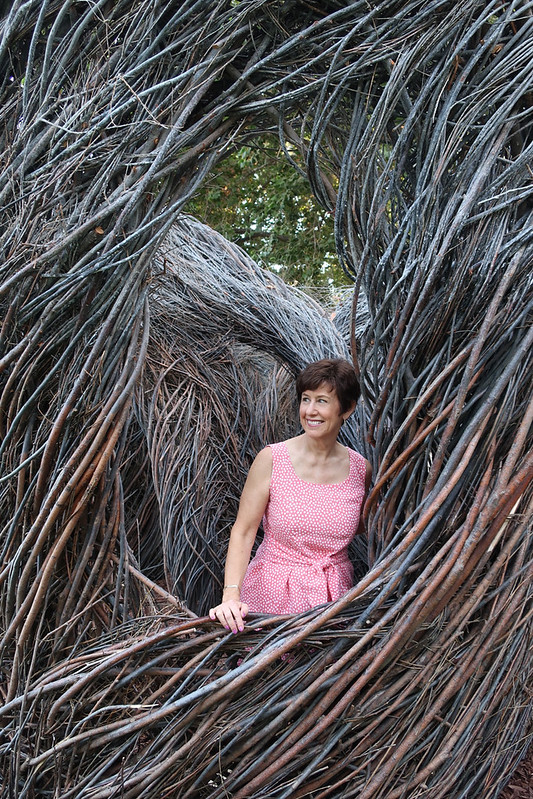
And what seems like a pleasant and quite park contains an interesting feature. Check out that strange sculpture ? behind me. Is it a nest? a Hobbit dwelling? I'm not sure how long it's been there and have probably driven by it never noticing. Or it could be new and will be gone in a few weeks. Actually I just googled and it will be there until 2020 so expect more on location photos. Perhaps on a dark and moody rainy day. Which seems very far off right now.
So that's the latest on finished projects. Actually today I made a top version of the Bondi dress in a remnant of silk. And I have plenty of other projects in the works.
Next weekend (Sun. Aug 12) we are doing the Bondi dress class again at Hello Stitch Studio. Here's my Bondi dress blog post, and I will post my top version soon as well.
Tomorrow is my Wrap dress class at Hello Stitch, which is sold out 😊 and after this month we are moving on to autumn and winter items (like a cape class, a jacket class, and the Lander pants).
Is it August already??? oh summer is flying by and I don't like that. Summer forever! although with the temps around the world lately that just might be the case and I don't wish for that.
Thinking cheerful weather thoughts for everyone.
Happy Summer Sewing,
Beth
Today's garden photo, this little very old rose that doesn't bloom all that much but I keep it around because the color is so lovely.
SaveSave
Subscribe to:
Posts (Atom)