
Here's a close up view of my latest jacket project. After a winter of teaching jackets classes, and then sewing a new coat plus some other jackets I figured it was time to turn to other items. In fact I did finish two pairs of Ash jeans and some tops which should appear here one of these days. But right before my state went into forced hibernation a friend of mine gave me a whole bolt of this fabric. Couple that with my recent project of organizing my traced Burda patterns and I decided to jump into another jacket.

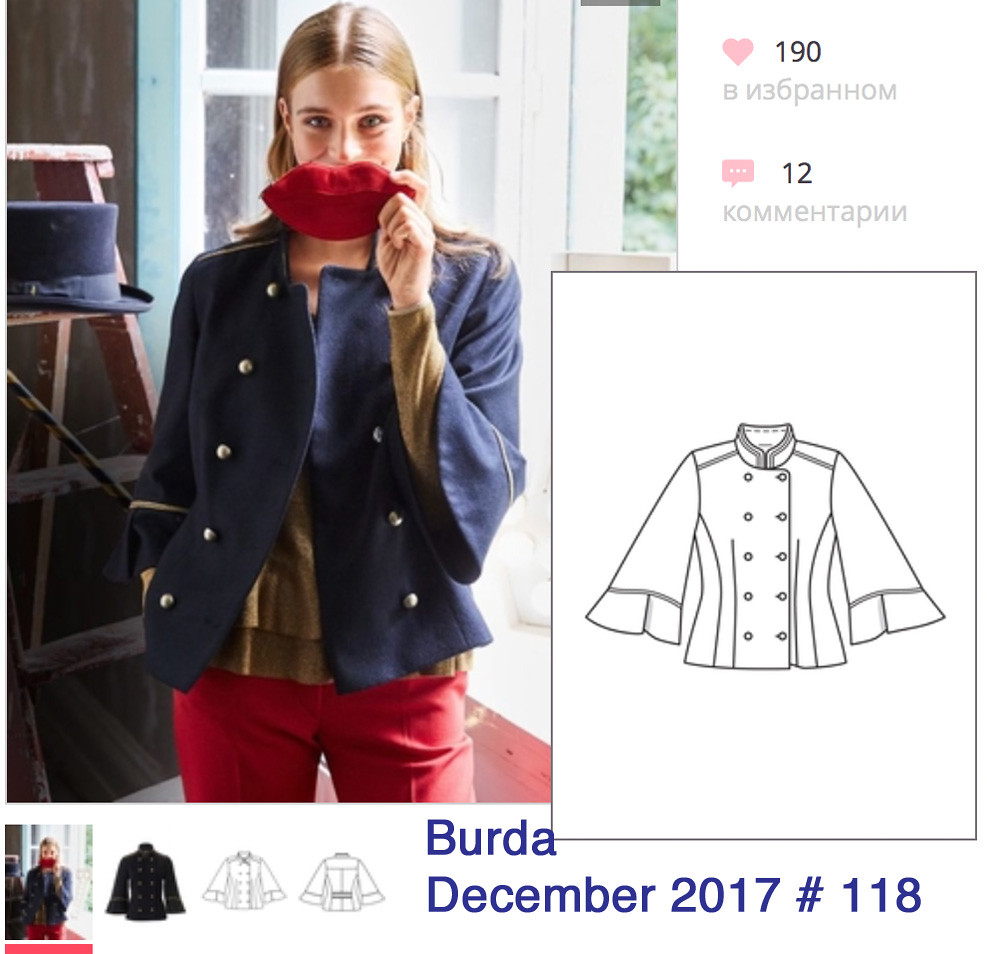
Turns out I had traced this pattern quite a while ago, and came across it when organizing. I think I was looking for something a bit different and ready to participate in the statement sleeve trend.Their example version is more of a military look with the gold buttons. And it almost looks like she is wearing a mask which is something we are done with soon!
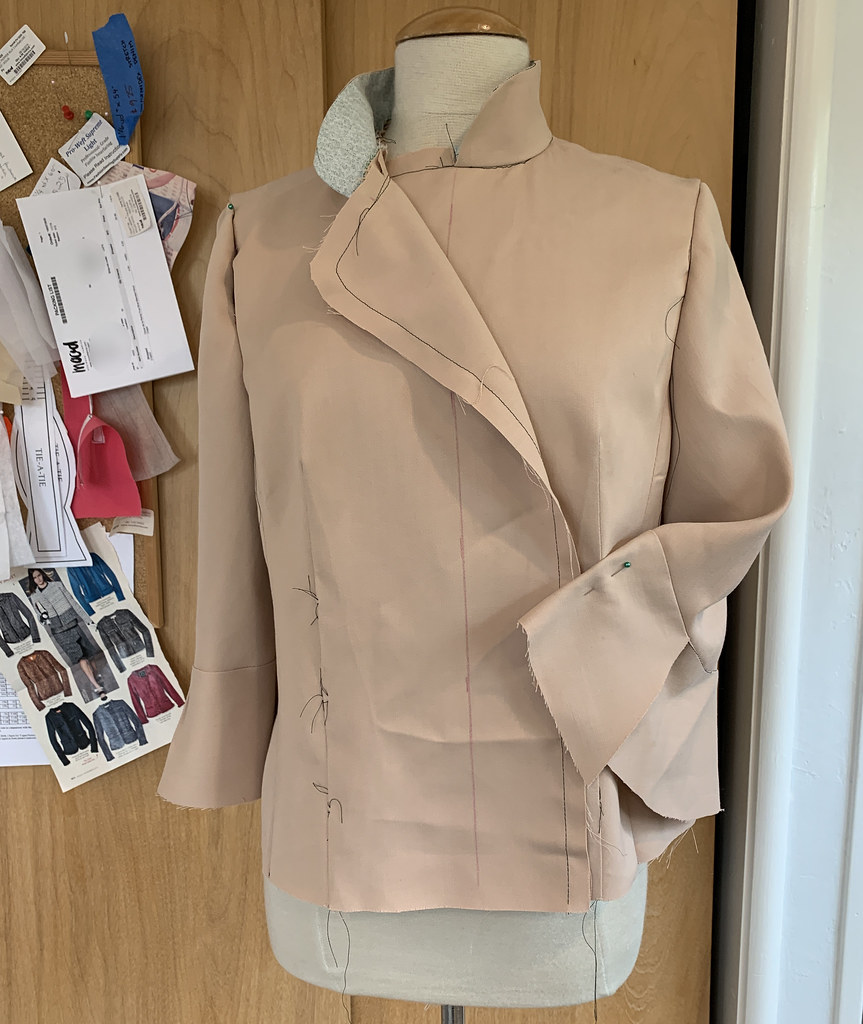
I did make a muslin because I really didn't want to cut into this fabric and end up disliking the shape. Even in this yucky color I liked the shape so onward with cutting out.

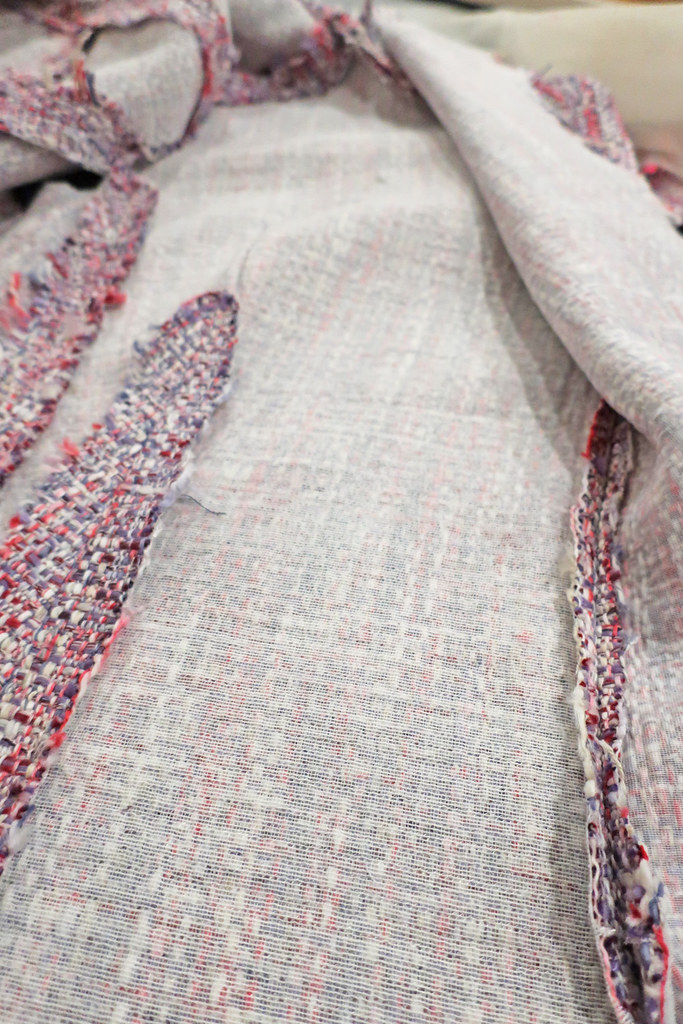
This fabric is very loosely woven and it seemed like it needed a bit of help to retain shape and not fall apart in wearing.
I decided to fully interface all the pieces with lightweight fusible. In this case I used the Pro-Sheer Elegance Light from Fashion Sewing Supply. Although in the front I did use the Pro-Weft Supreme Light (from the same supplier). Those are the two interfacings I use the most, plus their Pro-Sheer Elegance Couture which is perfect for silk shirts and tops.
As you can see, for a lined jacket I leave all the edges raw, I don't see any point in serging the edges for things that are going to be inside the lining. I think it adds bulk on the seam allowances which is the very spot where you are trying to reduce bulk showing on the outside.
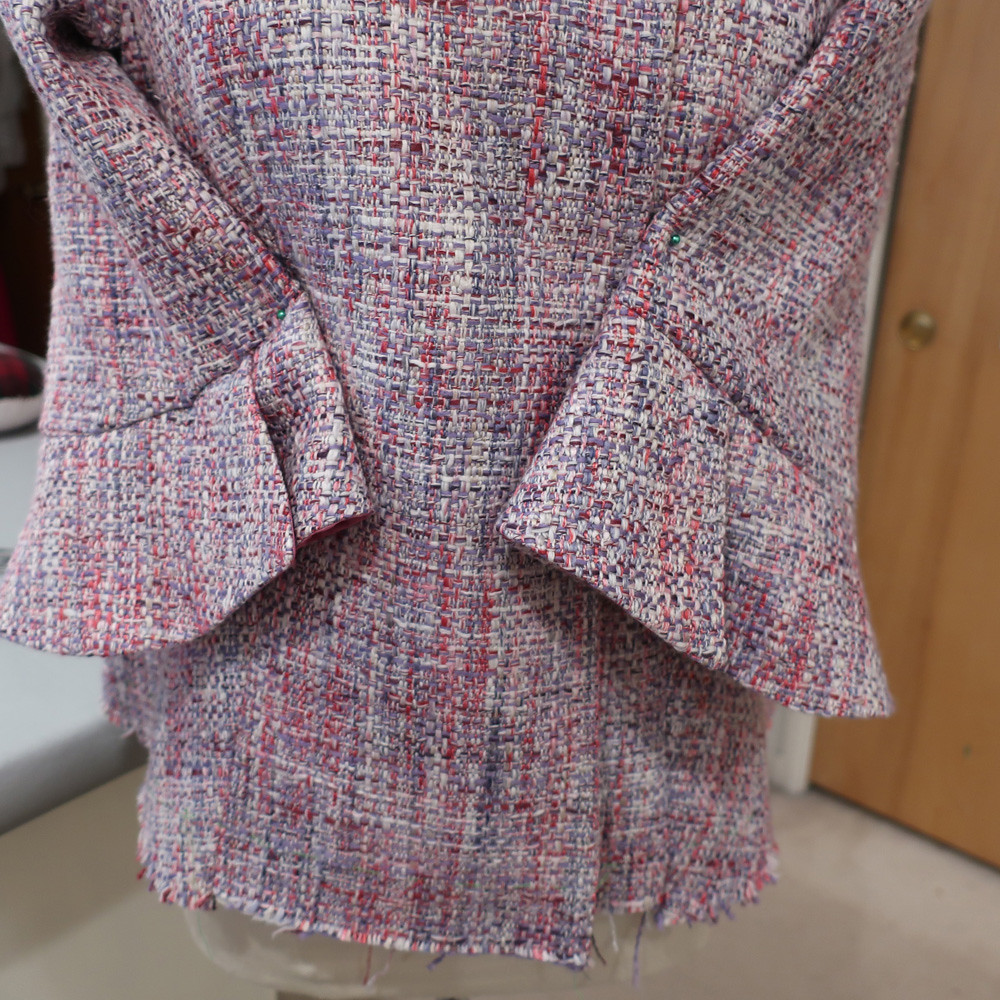
Let's talk about those sleeves. I was sure I was sewing them correctly based on the drawing but after finishing them and looking again I realized I had overlapped them in reverse as to how they were supposed to be. So the one on the right is how I originally did it, and the one on the left is unstitched and just pinned into place before sewing. But that's how the pattern is designed. Now that I changed them to be as the pattern I'm not sure it makes any difference or is any better.
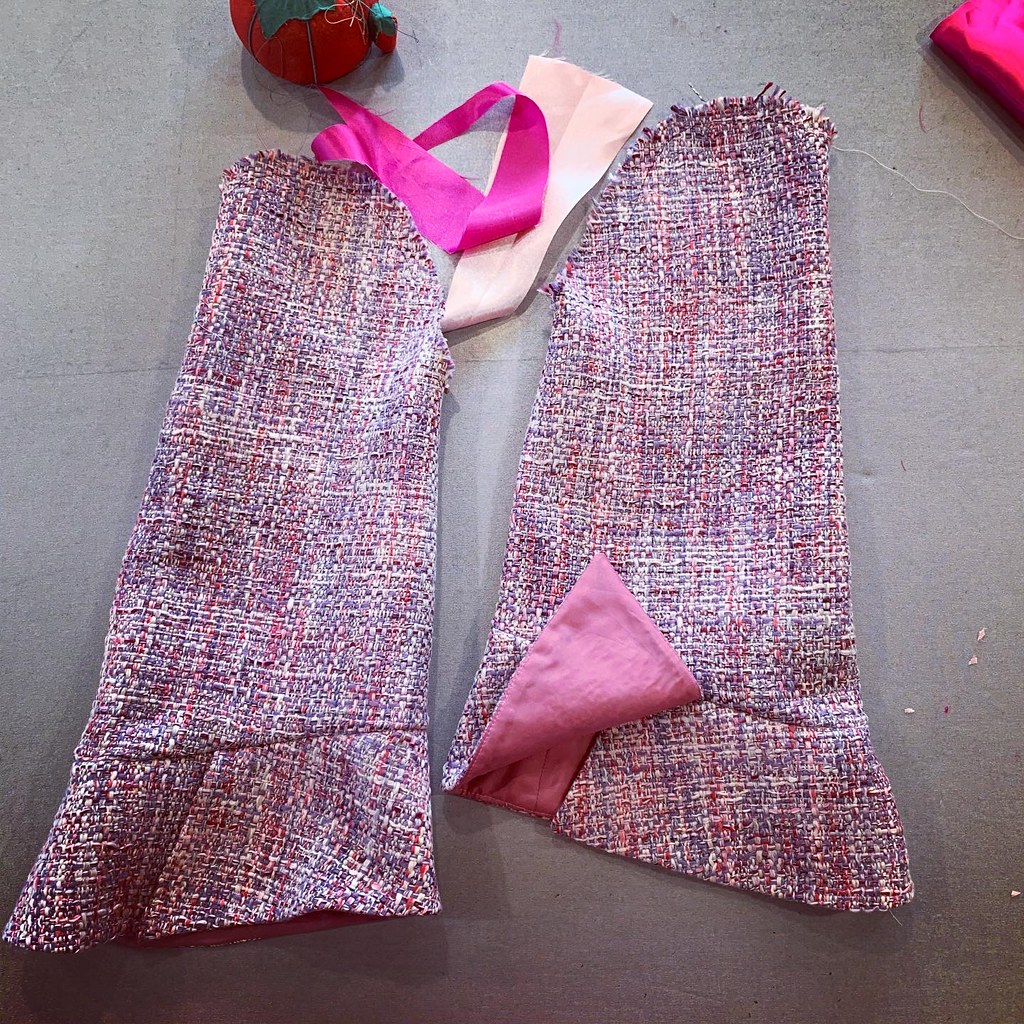
I took this picture before I changed the overlap of the bottom piece, just to show how they are fully lined at the cuff. Those two pink scraps are examples of what I used for the jacket lining. Use what's in the stash is the motto of these days, right? I later sewed the jacket body and sleeve lining together as on a typical jacket construction, and hand stitched the bottom of the sleeve lining to the top of the cuff.
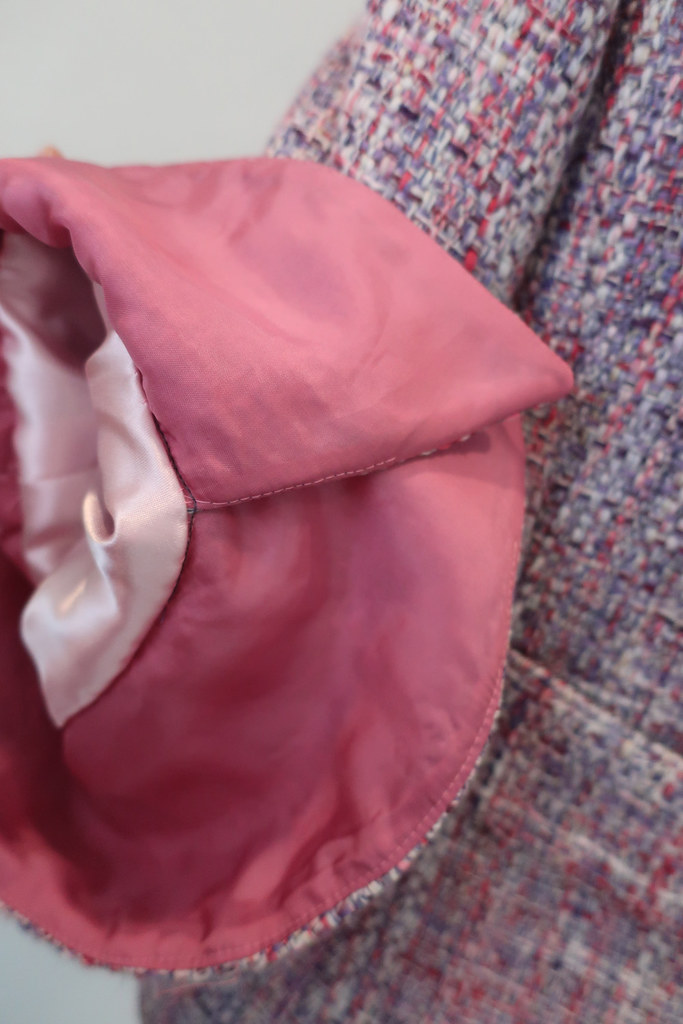
I under stitched the cuff lining so that it would have a good edge and stay inside. This fabric is probably some kind of poly or blend but it pressed surprisingly well and resulted in nice sharp edges which I didn't expect.
More scrap usage, the back has a belt feature so I lined that with a scrap of grey bemberg. Use all the scraps! After seeing it mentioned in their newsletter I decided to make a pouf for my sewing room with scraps and I'm kind of amazed how much I've accumulated since the lockdown - at this rate my cushion will be filled soon.

I think having this little belt band on the back gives it an extra bit of style, I was thinking of leaving it off but decided to add it and now I think it makes the back more interesting.
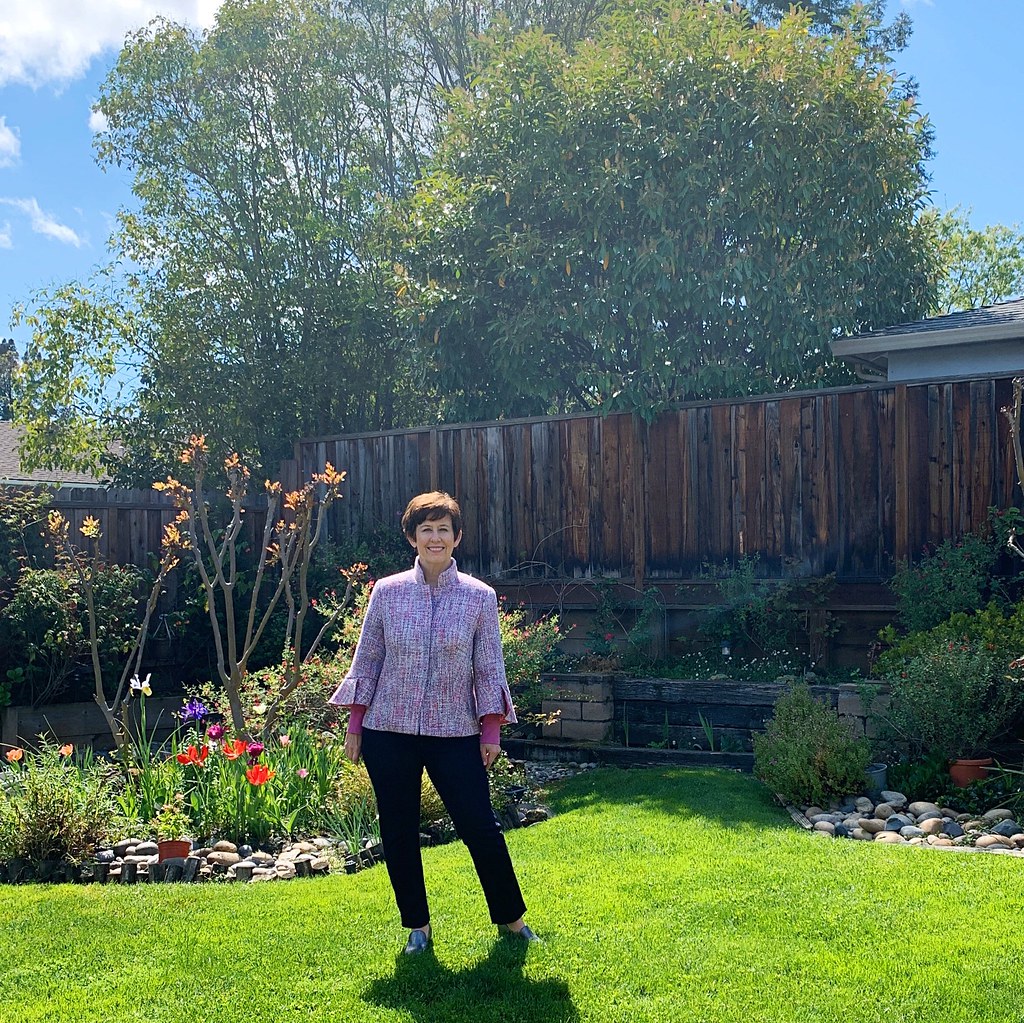
If you look at the first photo in this post you can see that this jacket is no longer double breasted as the pattern is designed. I generally don't like jackets that are double since I often wear things unbuttoned and then you end with with a lot of extra fabric in the front. I tried it on a few times and just came to the conclusion that I would like it better if it buttoned in the center front. In addition, I started doing some test buttonholes on scraps and they weren't great. So I decided to change the front and to achieve that just sewed the same edge about 2 inches in and cut off the extra.

This resulted in a nice piece that simulated the front edge of the jacket, so I tried a variety of buttonholes on that. Due to the thickness of the fabric I just couldn't get a good machine buttonhole and decided to abandon that idea. And I was so glad that I hadn't done bound buttonholes which I would later have cut off as well!

Large snaps seemed like a good solution so I painted them with nail polish and they blend it very well. Don't ask me the color because I am the person that pours the dregs of one bottle into another one to make a slightly lighter or darker color as led by my mood and miserly tendencies. I put 3 coats plus a clear topcoat, only on one side of the snaps as the other side which would be on the upper part of the inside jacket wouldn't show.
For the lining, I typically never use any of the lining pieces that come with a pattern, but make up my own after the item is sewn together. Here I've overlaid the front facing on the front jacket, and drawn a red line where I want the lining edge to come to.

Then I use the serrated wheel to make that line on the front jacket piece, add a bit more for a seam allowance, cut off the extra and use the jacket front (minus the cut away part) to make the front lining. If it's too much I trim it away when I pin the lining on.
This red coat project post shows how I drape the lining on and fine tune where it folds back and is hand stitched to the inside of the coat.
So that's a few of the details on this Burda Jacket, pattern 12-2017-118 and my next post will be the finished jacket. But here's a little peek from a sunny day about a week ago. This would be the perfect jacket to wear on Easter - however with all the news I'm just glad to say my family and friends are all healthy and I hope the same for everyone reading.
Happy Sewing, Beth
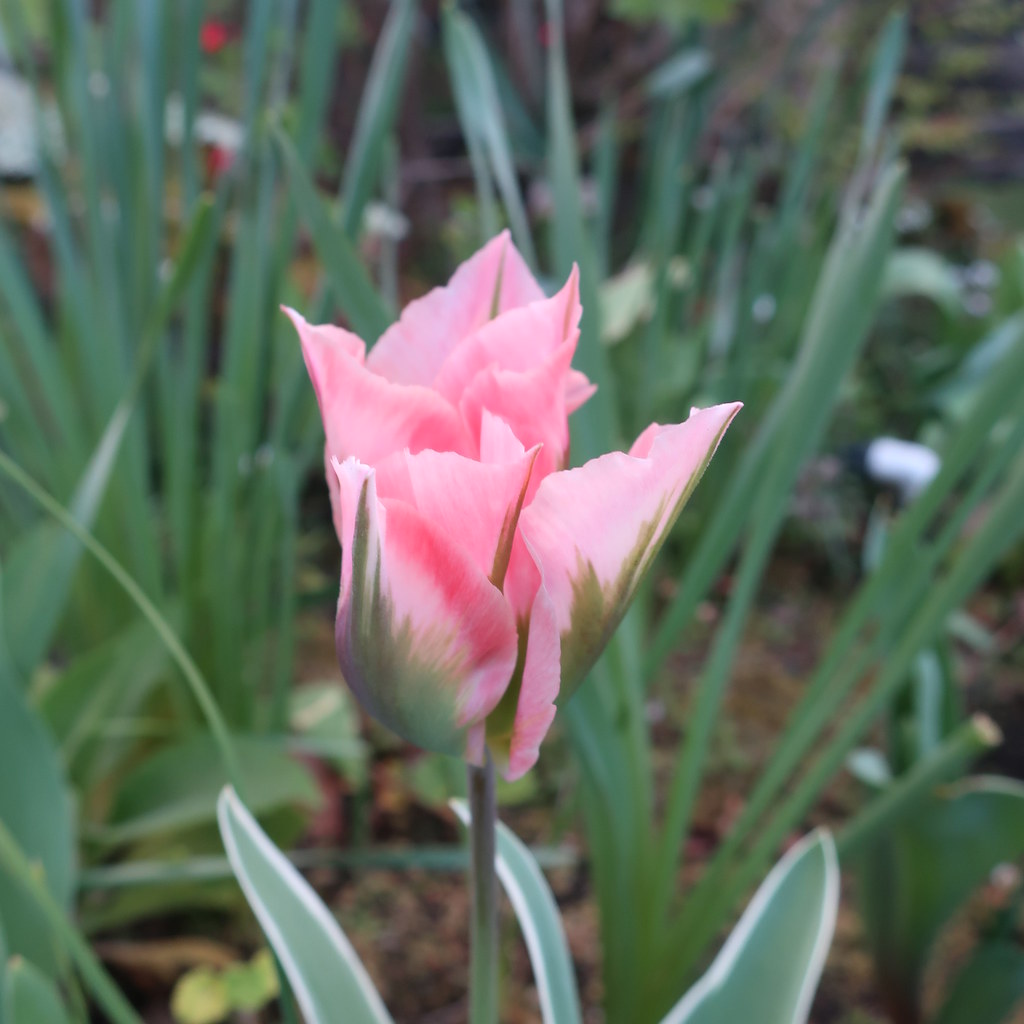
Here's today's garden photo, these stripey pink tulips were a bit of a surprise - I never remember which tulips I plant so it's always a treat to see what comes up.


Beautiful fit at the shoulders! Well done!
ReplyDeleteStunning job as usual!
ReplyDeleteBeatiful!
ReplyDeleteGorgeous jacket!
ReplyDeleteAbsolutely lovely
ReplyDeleteThose painted snaps are perfect! Such a lovely jacket. What are you going to do with the rest of the bolt?
ReplyDeleteYou do make beautiful jackets, this one looks terrific.
ReplyDeleteThis is such a delightful post!
ReplyDeleteProving, proofing, tomAto, tomahto, potAto, potahto!
The Brits ARE delightfully different with some common vocabulary and slang, aren't they? A flashlight is a torch, a sweater is a jumper. an elevator is a lift, and pudding is dessert.
And I get a kick out of their word for potato chips - "crisps". Geez! Say THAT five times fast and your tongue gets wrapped around your teeth!
You are SO clever! Painting snaps for a jacket - the result, both the snaps and the jacket is lovely. I'm not a fan of boucle, but you did such a lovely job with this and it looks perfect on you.
Thank for all the wonderful tutorials you share so generously.
Love your jacket and the tip about painting the snaps with nail polish. Your always include neat tips in your blog. Stay healthy. Karen
ReplyDeleteThanks for the sneak peek at the final result. The closeups are impressive too, such professionalism. What a lovely gift of fabric.
ReplyDeleteThat tulip is just amazing! I think mine have all been eaten by critters, most likely voles. They eat everyone but daffodils. In my part of Tennessee, the woods are full of clusters of daffodils early in spring, where, no doubt, a homestead once stood.
Lovely jacket and I am totally tickled with the miserly trick of combining nail polish dregs! Off to see what new colours I can concoct :)
ReplyDeleteFor converting from double-breasted to single, is it just a matter of adjusting the front and facing pieces? If it's more than this, perhaps you could drop a tutorial in the future? :) Your jacket looks really nice, as always, and I love reading about the little tailoring details you add to your projects. Hope you are well!
ReplyDeleteCute jacket, The perfect colors for spring and the flared sleeves are so fun. The Burda picture does look like the model is wearing a lip shaped mask. I have half a mind to try making one for myself.
ReplyDeleteIt looks so good! I love the fabric.
ReplyDelete