Sunday, July 27, 2014

Megan Nielsen pattern - Tania Culottes

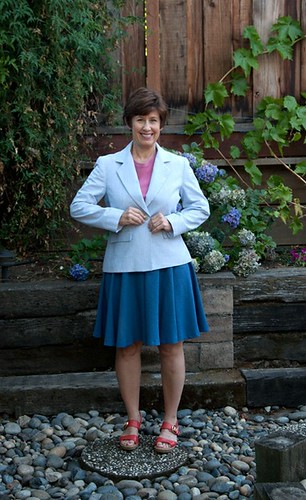
Summer is time for play clothes, and this pattern definitely fits in that category. Although at first glance it appears to be a skirt, but hiding in plain sight is a pair of culottes.

OK, I look like a dork here with the t-shirt tucked in but I am doing it for you :)  so you can see the waistband of this pattern. Believe me I will not wear them this way.

Tania culottes on me

The pattern is the Megan Nielsen Tania Culottes which I saw sewn up on a blog, the exact one eludes me but I thought, oh hey, those are kind of cute and easy-peasy plus I have this weird lightweight super drapey denim-ish fabric that would be perfect. The designer suggests a lot of lightweight fabrics including voile or lawn. I think it might be a bit see through and those fabrics don't strike me as quite strong enough for a garment such as a this but it definitely needs something drapey. And not too thick because it is a LOT of fabric swirling around. 

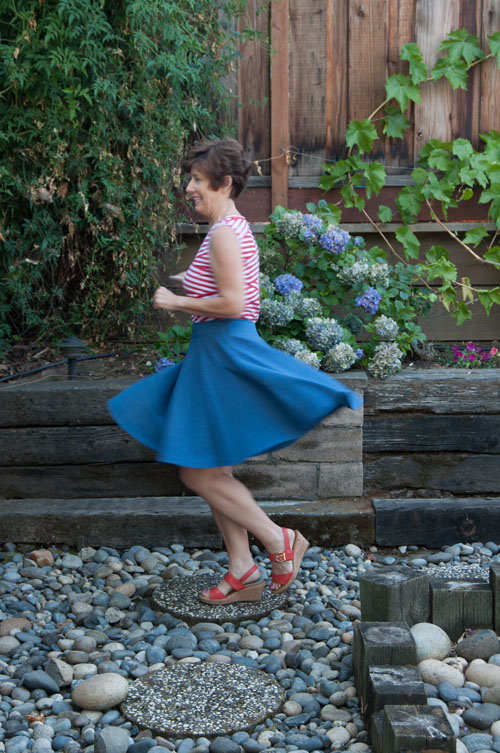
Swirling proof:

twirl pic Tania cullotes

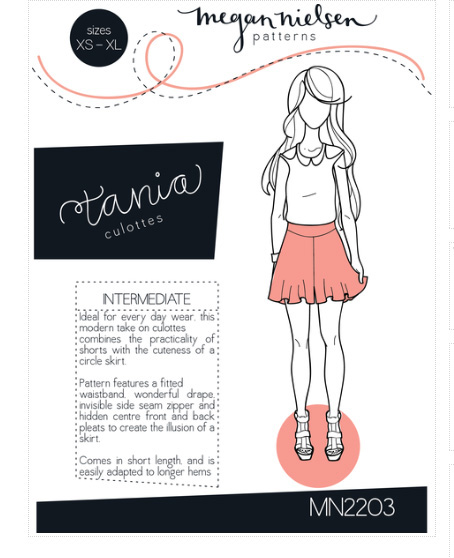
Here is a look at the pattern. They are super short and maybe I made them a bit too long but they look so much like a skirt that I figured I would wear it as a skirt, not as shorts.  Believe I added 6 inches and then maybe hemmed off about 2 inches. 

tania culottes pattern

Since they are really shorts I can't get them on my dress form so I just pinned them on here so you can see. The front and back look the same and they have an invisible side seam zipper. In reviews some people mentioned they were too short in the rise but I didn't have any issue. I cut out the size Medium and actually took them in some at the side seams. The hidden pleats are the clever part about this pattern, the center front and back seams form a box pleat that hides the fact that they are culottes.
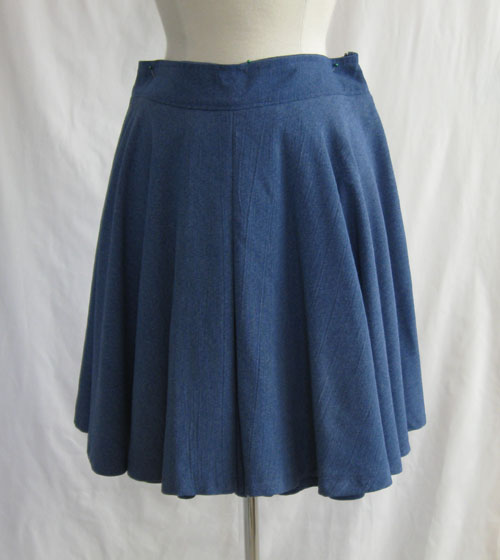
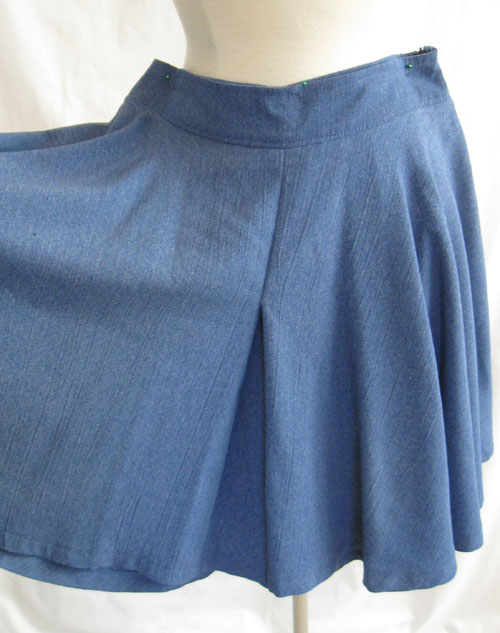
          culotte on formculotte on form showing pleat

Photo on the right I am holding the side skirt so you can see the center front pleat effect.

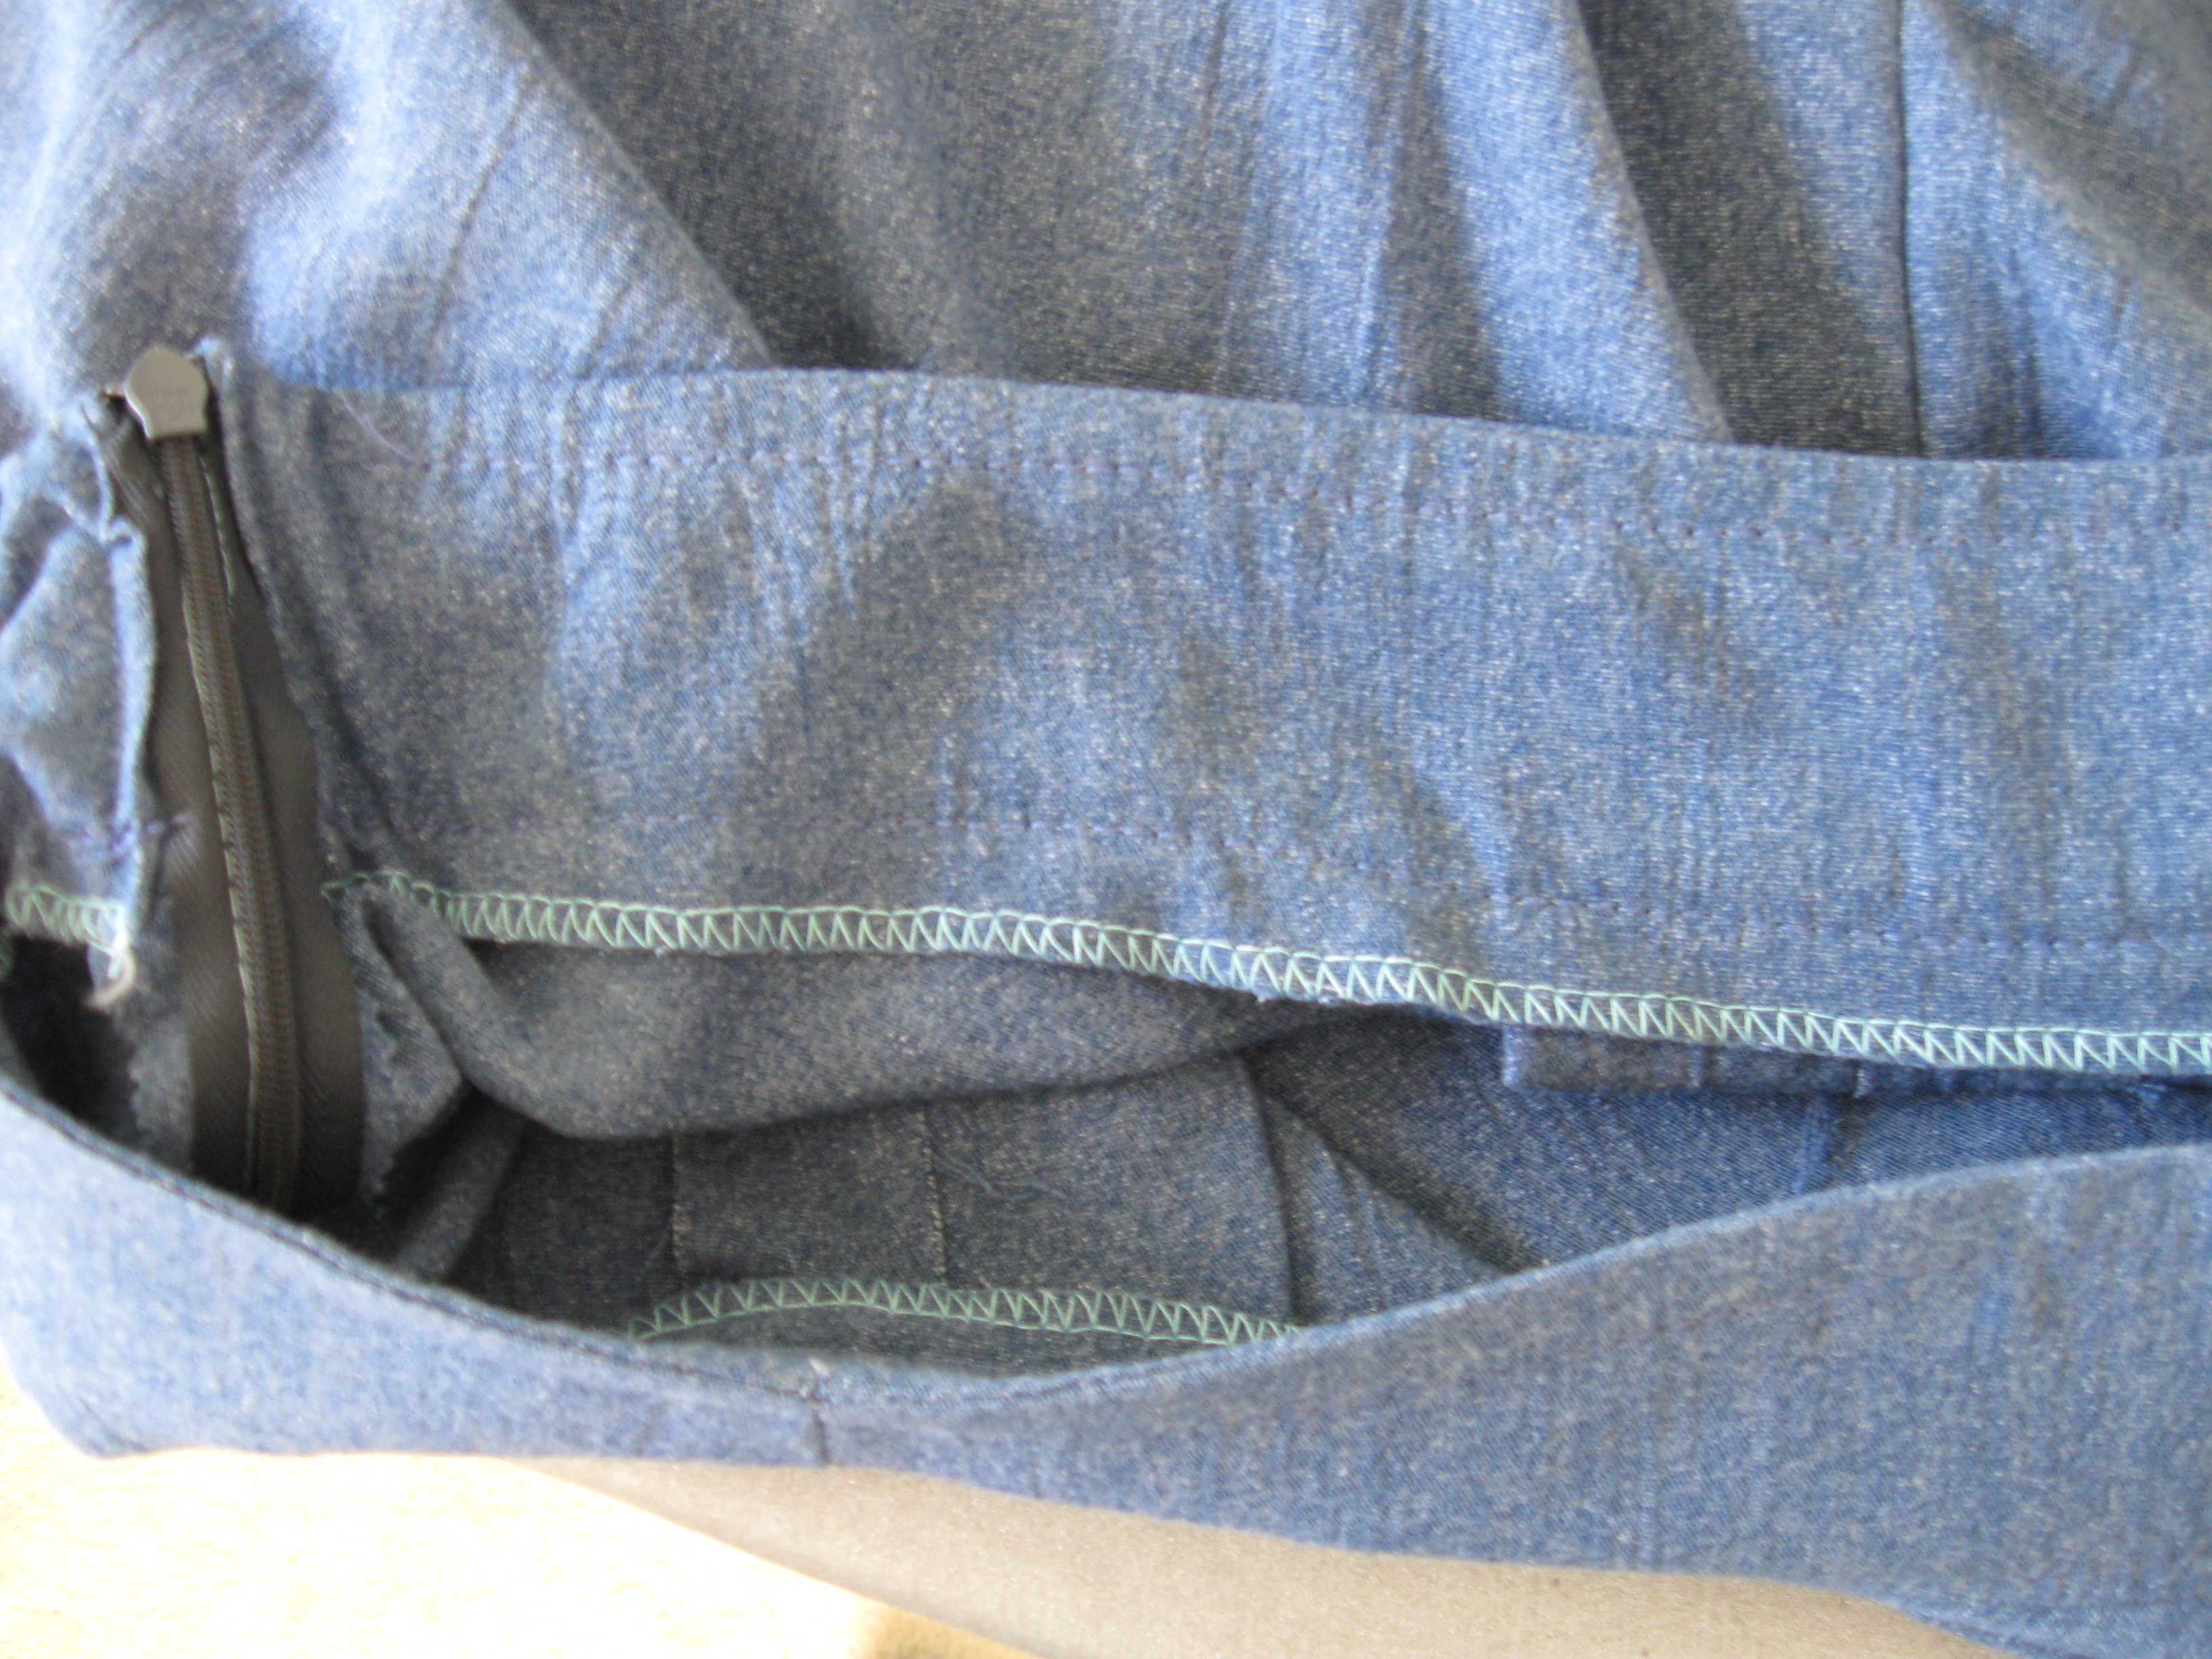
This is far from my most meticulous sewing, very quick construction and I just stitched in the ditch to hold down the waistband on the inside. I topstitched about 1/4" from the upper edge, also to hold the waistband together. I go this fabric at a garage sale or something like that, so unknown fiber, maybe a cotton poly blend but it is that faded denim color that goes with everything and seems unwrinkled-able. You know how much I like that.

culotte waistband inside

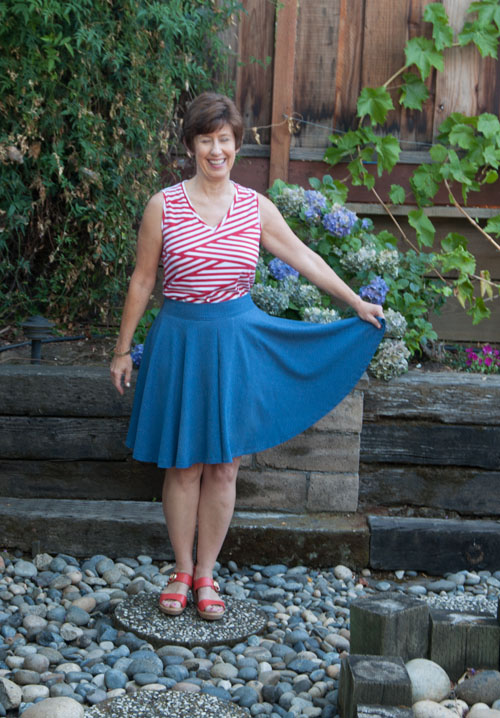
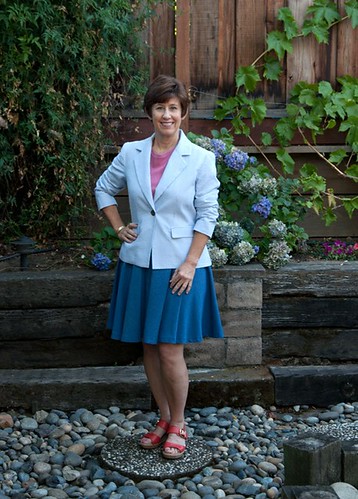
Another dorky photo but you can see how the skirt is basically a half-circle. So it does take a fair bit of fabric. I think they could easily be made with a reduction in the circumference. I would just take a triangle wedge out of the skirt. Maybe next summer for another version.  And if you noticed in my seersucker jacket post - I am wearing these in those photos as well.

culottes full skirt

Ooooo, it is hot here this week.  100 + degrees Fahrenheit at my house. But closer to 80F just 15 minutes away. Welcome to the bay area ! 

I am seriously thinking about cloning one of my swimsuits next week - my favorite one is getting a little worse for the wear and the style is my favorite. to be determined...

And a BIG Thank You to everyone who left a book recommendations on the previous post. SO many good suggestions. If you are looking for few books to add to your summer reading list check it out and keep adding the suggestions. Lots of commenters said they would return to check out the rest of the suggestions so I will do another post on that in a few weeks. 

happy summer sewing, stay cool,  Beth

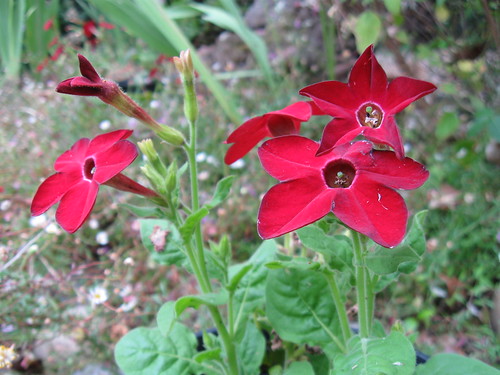
Today's SunnyGal garden photo, a red Nicotiana. I have to remember to plant these earlier next year.

red nicotiana

Thursday, July 24, 2014

Can you Recommend?

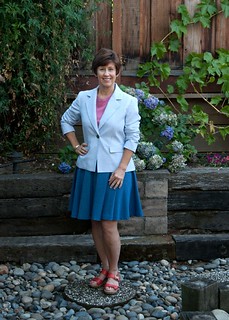
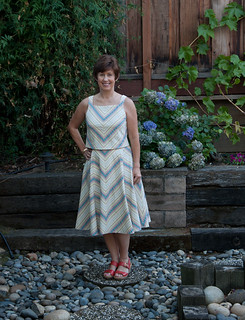
Hi all, and thank you so much for the wonderful comments on my last two item posts. I can report that I have worn the seersucker jacket and it is great, that fabric is kind of indestructible, remains unwrinkled which is great.  As for the bias stripe outfit, well, I have not worn that one yet. It was more of an experiment but you have convinced me.  Here are photos and links to those posts if you are curious. Apologies for the repeat photos, I have a LOT of items to blog in the next few weeks that are all sew up, photos taken and ready to go. But first.....please scroll down and give me your advice.

Seersucker jacket on me1             V1397 bias stripe top and skirt as worn

Sewing is not the only leisure / hobby / passion / obsession to hold my interest, and everyone needs to step away and recharge a bit. I have a lot of summertime rest and relaxation planned for the next few weeks and I need some recommendations on books.

I thought I would toss this out to you and see if you have any great books to suggest. But not without a little guidance. I love mysteries and have a bunch ready to go as well as some lighter reads. But in my other favorite category: literary Fiction, I need your help. Perhaps to many videos, tv, magazines, websites have taken over my eyeballs and I haven't paid much attention to book releases this year. While I have very mixed feelings about Amazon these days as it seems they are taking over everything, I do like that feature when you are looking at a book and it shows other items that customers bought. Consequently I decided I would list some of my favorite books in the literary fiction category, you can see what type I like, and if you have any recommendations  - please let me know.

Possession by A.S. Byatt
The Guernsey Literary and Potato Peel Pie Society by Mary Ann Shaffer and Annie Barrows
The Magus     by John Fowles (actually all his books)
The Remains of the Day     by Kazuo Ishiguro
The Namesake     by Jhumpa Lahiri
The Rule of Four: A Novel     by Ian Caldwell and Dustin Thomason
The Curious Incident of the Dog in the Night-Time     by Mark Haddon
The Imperfectionists     by Tom Rachman
Bel Canto     by Ann Patchett
Girl with a Pearl Earring     by Tracy Chevalier
Shadow of the Wind     by Carlos Ruiz Zafron

And some books that I thought were only so-so or couldn’t even finish
The Art of Fielding by Chad Harbach
A heartbreaking work of staggering genius by Dave Eggers
The Secret History by Donna Tartt

So recommend away !  I do have one book on my iPad which I started and then decided to save until summer, Beautiful Ruin, hope it is good.  And last summer I read Gone Girl in about two days (feeling obligated to take breaks for time with the family on vacation :)

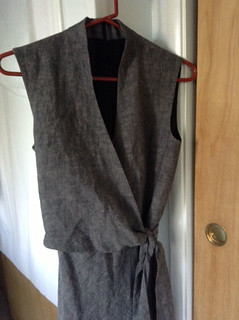
This weekend it will be back to sewing posts. Tomorrow I start on a silk jersey dress for my friend Alice. This is the test version, in a fantastic soft grey-black linen. It worked so well in this fabric so I am crossing my fingers for the silk jersey. Looks a bit wrinkly here but it is fantastic as worn so stay tuned for more details and better photos.

linen dress

Happy summer sewing, Beth

Wednesday, July 16, 2014

Vogue 1397 - Tracy Reese dress on the bias

This recent project doesn't fall into any of the neat mental categories that my sewing usually does. It started life as an experiment, morphed into a possible wearable muslin and now is edging toward the "maybe I will wear it" category.

Interestingly I have almost no striped clothes in my wardrobe. The only items I have are a t-shirt and a dress made from the same piece of fabric. So why I decided to do a blog post for Craftsy on sewing with stripes is a bit of a mystery, perhaps deep down I wanted to make some striped things (I do have 3 different striped knit fabrics in the stash that I keep eyeing). This recent interest in stripes and then having just watched the Craftsy class Inside Vogue Patterns: Tracy Reese V1397 sent me zig-zagging down the bias stripe path. I do love bias stripes or garments where the designer has really thought about the placement of stripes to create an effect. And there are so many possibilities. As result I have a post today on the Craftsy blog about sewing bias with stripes so if you are interested in some how-to's check that out.

Now remember - this started out as an experiment so don't expect much. And if you scroll down you can see how it looks when worn.

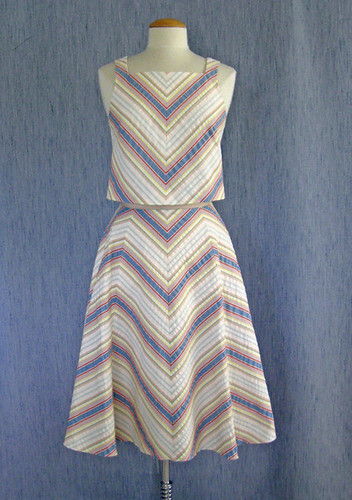
V1397 Front view top and skirt bias stripes

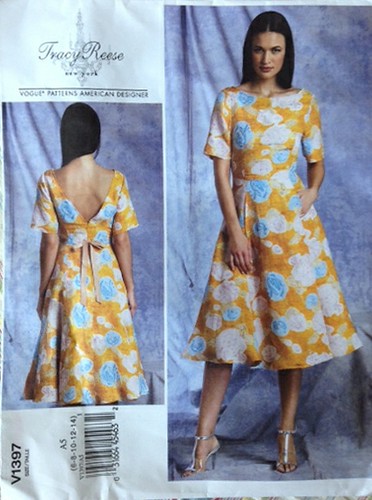
Here is the pattern envelope. Which shows a dress.  Yep, another dress exactly what I don't need. I was mostly interested in playing around with the chevron effect so I changed it to a skirt which actually worked beautifully. It is meant to be fitted at the waist so I just added a waistband, the fit was very good using a size 12. 
Vogue1397 pattern env

Once I had the skirt finished I had all kinds of fabric leftover, and was starting to think more kindly about it. Might even wear it. But with what? I rummaged through all kinds of blue chambray cotton, then some pink or red, possibly a blouse, or knit top? But nothing matched the color and I happened to see this idea of a two-piece outfit with a waist length top and decided to try it. I actually made the top in horizontal stripes thinking it would be an interesting contrast but it was hideous. Number two is the version you see here. I used my favorite sheath dress pattern (New Look 6643), added a center front seam and angled away! 

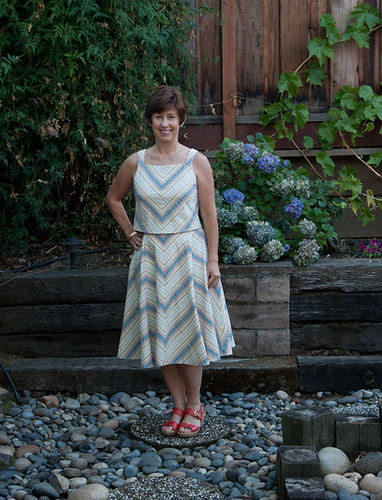
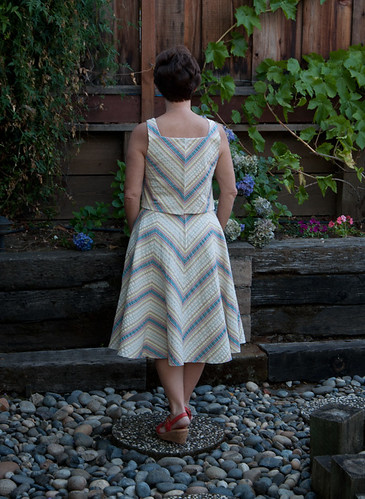
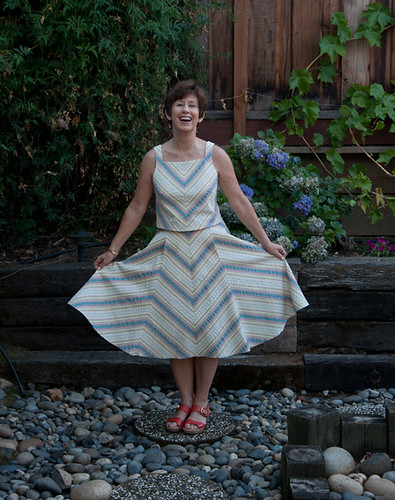
V1397 bias stripe top and skirt as worn

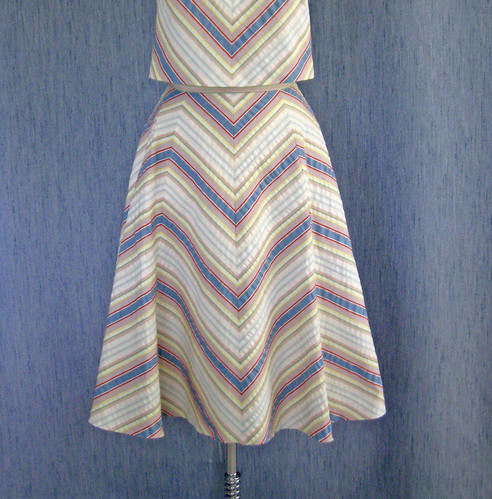
The skirt pattern matching gave me quite a thrill - it came out so well. The top is a happy accident, in the sense that the seamed stripes match fine, that I knew as I cut it out. But it is the placement of the blue stripes that I really did not think about when I cut it out, yet it did land nicely with the stripes continuing the spacing from the top to bottom. Sometimes you just get lucky! 

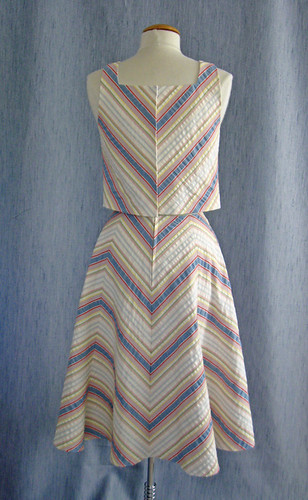
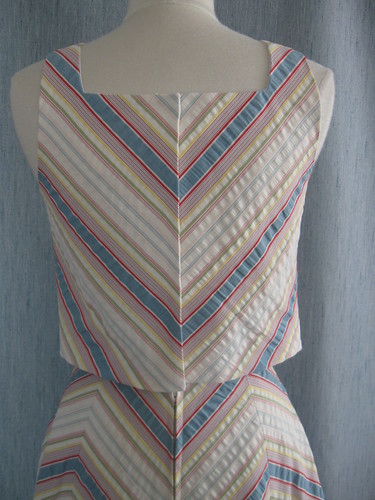
The back view. I made a slight mistake on the center back of the top, neglecting to account for where the overlap would hit when the buttons were done so the pattern was off. In the end I made a change to one side, which brought the edge to the actual center, allowed the chevrons to match again, and put snaps there so there  are no buttons or zipper at all.  
V1397 back of top and skirt 2 bias stripe

And a look at the back on me. Not on my skinny long-torso-ed dress form. So the top is a bit longer. The skirt hem is left raw which is very liberating! That is what is specified in the pattern, although I was thinking, hmm, that is weird and I am not gonna do it. But I did, and it looks good (won't ravel, on the bias).

V1397 Bias stripe top and skirt back view as worn

Two seersucker items in a row - how about that? Must be summer... OK, now I will tell you the scoop on this fabric and you can let me know if it is crazy, weird, or fun. I bought it at this home-dec fabric shop because I needed around 5 yards to experiment with and I didn't feel like breaking the bank on a maybe project. But $ 3.00/yard seemed about right. And it is a cotton, kind of a medium weight. would also work for a jacket. Not really my color, but it is growing on me. You can see the color better in this picture. 

Back of top bias stripe

V1397 bias stripe skirt front

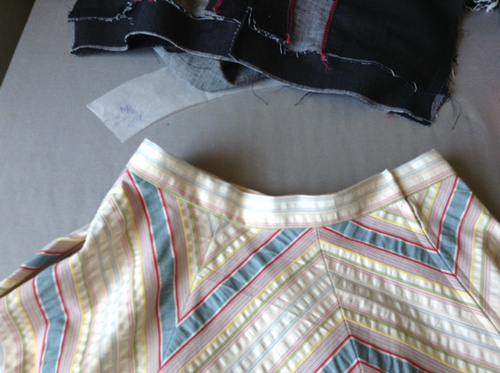
I am only showing you the last dorky photo so you can see the panels and the chevron effect :) Also there are pockets in the front seams (instead of the side seams) which is kind of nice. I was going to leave them off but in the scheme of things doing the pockets took no time at all so I talked my lazy self into doing them. Bonus sneek peek in this photo of a work in progress, a new to me indy pattern company, any guesses?

waistband bias stripe

bias stripe skirt view V1397

No, I am not taking up square dancing in my back yard. Although have you ever been to a square dance? I did go to one in college which actually was a blast. (theme parties were very big - there is not time to list the number of theme events I went to but there was a lot of speed sewing. Toga party, anyone? although that takes the least sewing, yay!) 

Before I forget, after this was all finished I saw this dress from the recent couture collections. Ok I am not a Parisian model but diagonal stripes are a thing. This one is fantastic. Perhaps I need a petticoat.

G Valli fall 2014

So I am done with stripes for the time being...I think. I do have some stripe-adjacent fabrics in the queue which should if things go as planned will be sewn up soon. 

Up next, something simple. After all it's summer, time to take it easy or so the thermometer has been telling me.
So this one - wearable or not? let me know. 

Happy sewing, Beth 


Saturday, July 12, 2014

Summer Blazer Jacket - Vogue 2853 - completed

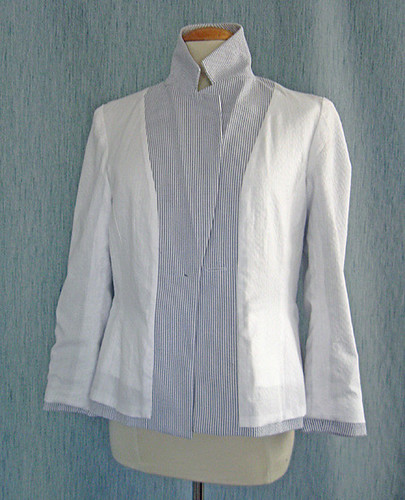
Third time is the charm for this pattern which qualifies for my pattern repeat summer series. Lots of those in the pipeline (or completed) but finally here is the finished seersucker jacket.

Seersucker jacket on me1

The first post in this series is here, so if you want to see the start and one of the other versions I have made, which was a winter plaid wool. I just realized that I forgot to mention I squared off the corners of the lapels on this version, the original pattern has a rounded lapel and collar. I like the square and there will probably be another version next year. I think I need a casual corduroy version, maybe in a wine color?

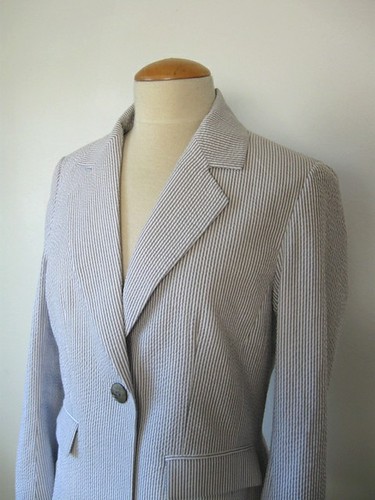
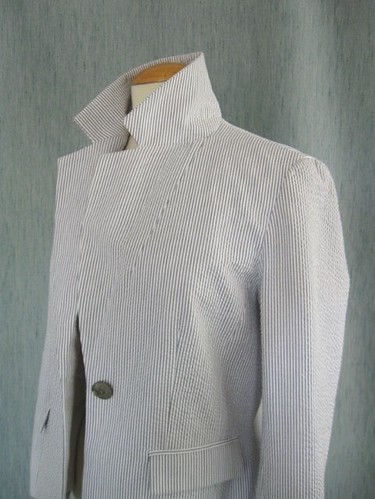
Here is a better look at the finished jacket, which doesn't look all rumply in real life, well maybe it does because that is how things actually look when worn, right?

Seersucker jacket lapels

This jacket has a dart under the lapel, in fact it has two darts in the front that are a bit unusual, the one under the lapel and the vertical dart that finished in the welt pocket. They give the jacket a really nice shaping and fit, at least for me. 
Seersucker jacket lapel

OK maybe this is way too many pictures but after all those construction posts why not?
The lining is a very lightweight cotton that has a slight seersucker texture - kind of perfect. I am sure I bought it at an estate sale or something like that so cost was minimal. Ordinarily I like a slippery lining but not for a summer jacket which I am wearing over a t-shirt or something sleeveless.

Seersucker jacket inside
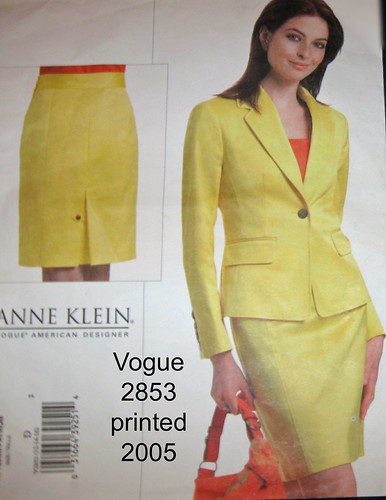
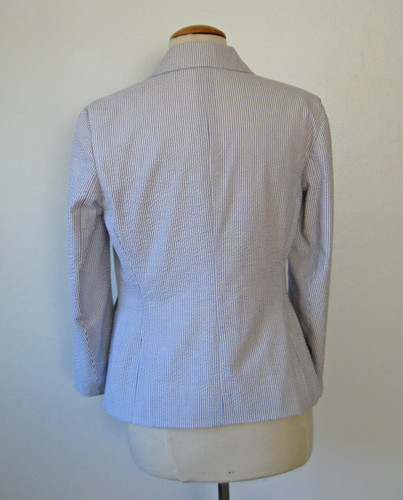
Here is the back view, which is very plain, no vent. What is with my dress form? Everything looks terrible from the back. Its shoulders are not my shoulders, that's for sure. Now that I see the pattern photo I remember that I squared off the center front bottom hem as well. Looks crisper with the seersucker I think.

V2853AK suitSeersucker jacket back view

Ok action shot, i.e. buttoning the jacket. Which I will never wear that way.

seersucker jacket buttoning

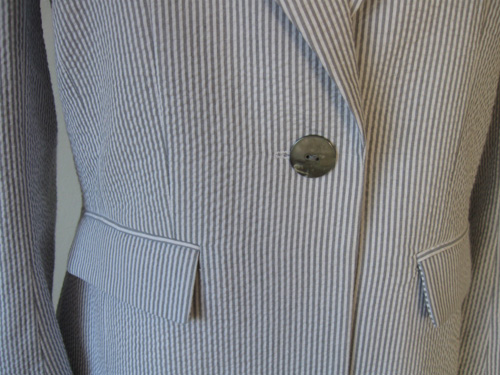
With one $ 4.00 shell button from Stone Mountain. Also the seersucker is from Stone Mountain, very nice quality. 


Seersucker jacket button

Seeing these photos I think it does look good with the sleeves pushed up, will have to remember that. Jeez in this picture I look like I am about to reach out and shake your hand. Welcome to Consolidated Amalgamated Business Industries, we are happy to serve you! Blech!  Not the casual summertime look I was going for. Slim ankle length pants are called for, like yesterday !

seersucker jacket closeup

Anyway - if you are interested in seeing how I got here, the first post in this jacket series is here.
The Flickr set is here if you want to see all the photos but I am lazy and never put any captions or details there. 

So many other things to show you since I started this jacket series! All kinds of pattern repeats. And lots of fabric sewn from the stack that was threatening to overtake the bed in the guest bedroom (that is where I let all fabric purchases marinate, they are spread out over the bed so I can pop in there and cast an eye for inspiration or desperation).

Happy weekend sewing, Beth

Today's SunnyGal garden photo which is getting perilously close to being the last for a while. We are under drought rules now and supposed to water at a minimum level. So the lawns will go and I will save my water portion for the hydrangeas, roses, tomatoes etc. 
Should have put in more drought tolerant things, or so I say every summer. Here is a lovely drought tolerant salvia with some tomatoes peeking out from behind.


purple salvia

Thursday, July 10, 2014

Summer Blazer Jacket -Vogue 2853 - part 7

This is the home stretch, the last construction post on this jacket! This one will be a bit of a quick run through as the two major steps left are the sleeves and the lining. This jacket pattern calls for shoulder pads which I have used in the previous two wool versions but for this summer jacket I wanted it to be soft and slouchy, so I skipped them.
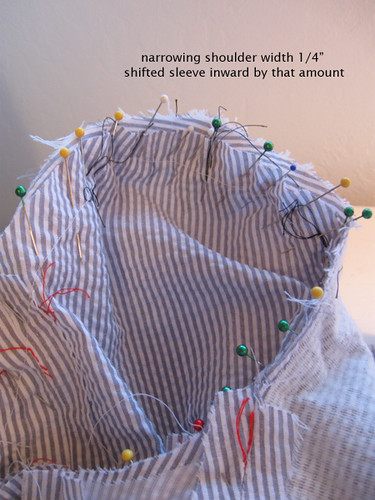
Leaving out the shoulder pads should have required a bit of adjustment at the shoulder seam but I decided to leave it as drafted and just narrow the shoulder width. If the shoulder/sleeve area collapses a bit I won't mind in this style.  Where that green pin is at the center of the picture is the center top dot on the sleeve, so I just shifted the sleeve inward by about 1/4 inch and that combined with adding the sleeve head was just right for this fabric.  As with all jacket sleeves, I sewed all around the sleeve with long basting stitches and then tried it on to check both the shape and the sleeve  - looked for puckers or places where the stitching didn't stay right on that 5/8" seam allowance. It is so much easier to machine baste in, then go around twice with regular stitch length once it is right.

pinning sleeve


For some other details on sleeve sewing, in particular seam allowance accuracy, see this post from December about my wool tweed jacket, Burda 08/2013 # 106. (a great pattern I should revisit next winter).

For photos showing trimming of the sleeve seam (less is more) check this post about my rose red wool crepe jacket, Vogue 8865.

For a really comprehensive roundup of the steps involved in sewing a jacket sleeve, this post from Feb 2012  has lots of details on sleeves and some good photos of the sleeve head. Same pattern on that jacket as on this seersucker one.

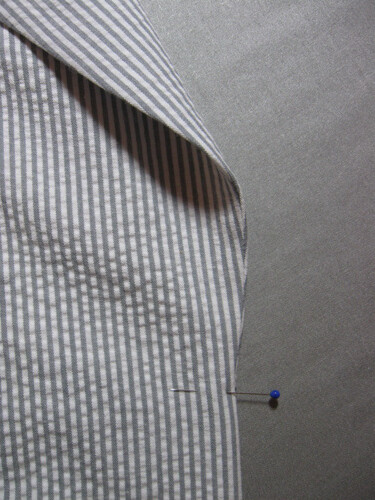
Going back to my previous post about pressing the lapels, here is a look at the "turn of the cloth" on the front where the lapel starts. This is one of those small things about tailoring that just makes me happy and I like to see the result. The pin is showing where the jacket front turns and creates the lapel. I have the lapel propped up a bit here so you can see the seam which hides from view. When giving the jacket front a good press you shift the seam at that point so it is favored on the underside of the lapel, or the backside of the jacket front. Well that is a run-on sentence but hopefully it makes sense. It is important to keep your tailor's tack or marking at the exact point so you know where to do the shift when pressing.

turn of cloth on lapel

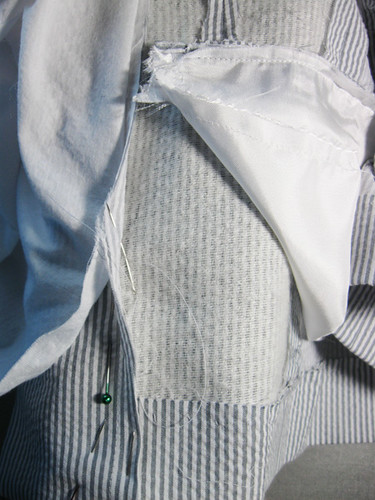
Here are two other things that I do with lined jackets, even if they have a partially bagged lining as this one does. Actually this is the reason I like to finish all the jacket and then hand sew in the lining, so I can do all these steps before putting in the lining. But in any case - here is the jacket front, I am catch stitching the front jacket facing down to the jacket front, so it doesn't separate when worn. Have you ever  had a coat or jacket with a loosey-goosey lining that seemed unrestrained except by the buttons and/or buttonholes? That is because the front facings are not secured in any way to the jacket front. Perhaps that is why I don't like to bag the lining - because I like to do these steps before lining.

catch stitch lapel

Last spot for a bit of hand sewing, another bit of catchstitching at the seam where the upper and under collars meet. Same reasons as above.

stitch collar to jacket

Next step for this pattern is hemming the jacket and the lining. I have done a few posts before about jacket hemming, and it fascinates me that a post on how I hem sleeves seems to have a very extensive life on Pinterest. 
For linings, on this post with my spring coat from the BurdaStyle Handbook, there are some good pictures on adding the center back lining pleat.

I am starting to think I make too many jackets! But they are my favorite thing to make and I have at least two more planned for this year. 

This weekend - final jacket photos, I promise. Took them this afternoon. Although I did recently buy some lightweight grey linen to make a skirt - but I won't wait for that.

Happy Sewing, Beth

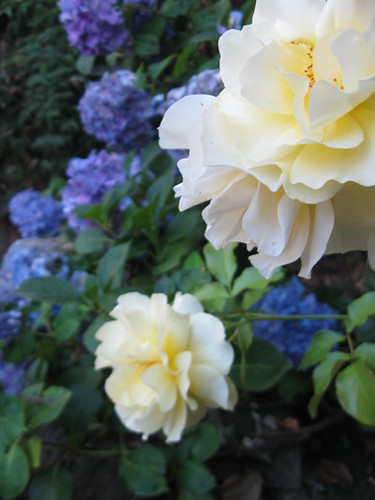
today's SunnyGal garden photo, a nice pale yellow rose that contrasts so nicely with its neighbor the purple hydrangea. 

yellow rose

Monday, July 7, 2014

Summer Blazer Jacket - Vogue 2853 - part 6

The call in my last post for you to tell about your sewing related injuries was not a competition but I am calling a winner anyway. Plenty of sewn-through fingers (not as bad as it sounds) but the one that topped the list was Jen L and her iron mishap. Jen, I'm glad you are no longer putting that iron on the floor!
Today I took some inside-out pictures of this cotton blazer, and writing this post I have a sense of that summer refrain we all have heard or said - "are we there yet?" Yes, almost there with this jacket.
Last post I showed my collar seam pressing, so now it's time to sew the lapels.
Before I pin the lapel and collar seams, I usually mark the seam line at all the corners with a light pencil or chalk line. Hey - I am all about sewing things quickly and just one time. If I can precisely turn that corner on the lapel on the first go then that is great.

facing marked
This picture above is slightly out of order as the upper collar has not been sewn on yet, but you can see where I have lightly marked the stitch line and corner angles with chalk. 
Next the upper collar and lapels get sewn to the under collar and jacket body. 

pencil line on lapel
I divide this part into three sections where I pin and sew separately one lapel, then the collar part, then the 2nd lapel. No reason to pin the whole thing at once since the stitching stops at the inner corner. It just makes it easier to deal with to divide this into three manageable chunks.
If you would like to see another example of collar and lapel construction, this post from Jan 2011 showed some of these details when I made a winter wool coat for myself.
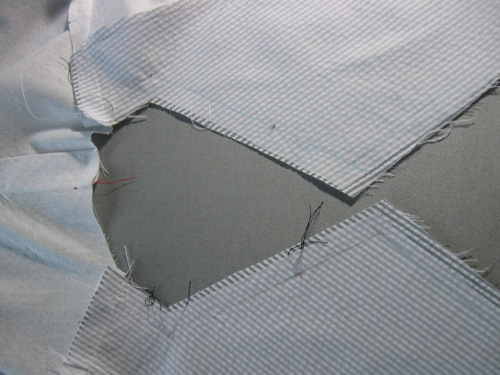
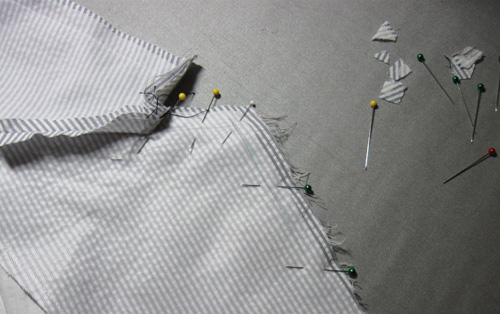
In the photo above are some of the many little squares created when I trim all the seam intersections. Depending on the garment it can look like fabric confetti around my work area. Trimming and pressing are two real keys to getting a tailored jacket to look right. 
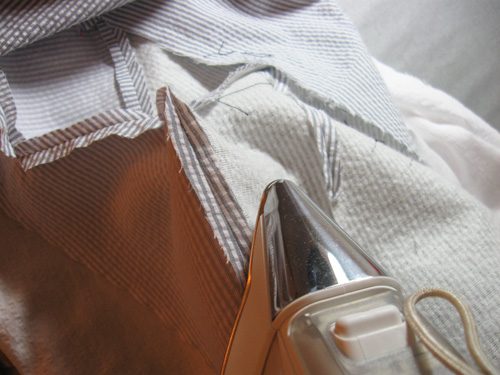
Speaking of pressing, I then press the entire seam allowance open on the lapel and collar. Sometimes I grade the seam allowances first and other times I press first and then grade, it depends on fabric. The thicker the fabric the more important it is to grade and eliminate the visible seam allowance outline that results from pressing an ungraded seam. There is a bit more about an interesting technique for seam grading in this post, scroll down to near the end. 
press seam open lapel

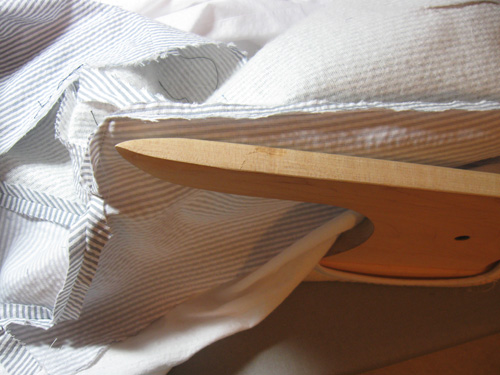
The pressing tool I use to support that seam is the 5 position June Tailor pressing board, see below. I also have a sleeve board where the top part comes off and you can use various accessories that came with it, one of which is a long (20" or so) version of the pointy part shown in this photo below (which is about 8" or so. The long one is really great for pants or long seams in coats and jackets. 

long sleeve board

After those steps it is all pressed up and ready for the sleeves.  I will wrap this up in two more posts so I can move on to other stuff. I have sewn a LOT of other things since I started writing this jacket series which I am ready to show. Including a very oddball bias stripe project that I started so I could write a Craftsy post, got involved in sewing an actual garment, started disliking it intensly and now have come around to being really happy with it, which I never would have predicted. (especially since I was trying to economize so purchased the fabric at the upholstery fabric outlet).  

It actually rained today, for about 5 minutes, so weird for us in July. Not that it did my garden any good. For today's SunnyGal garden photo - these dianthus that are staying alive through winter and summer for about three years. Oh, how I love a nice little plant that persists.

Happy sewing, Beth


dianthus

Friday, July 4, 2014

Summer Blazer Jacket - Vogue 2853 - part 5

Time for collar and lapels, yippee I see the end in sight. Now I know why I have never done an extensive series on my blog - I am fast losing interest and should just post the rest of these in quick succession. If only I was organized and wrote all the posts so I could just hit schedule. But that would be way too smart.
Speaking of not smart - spoiler alert for the squeamish - this morning I sewed through my finger (with the machine)  If you have never done it you are probably cringing right now but for those of you who have done it you know it is not that bad, and I consider it a rite of passage, perhaps a slightly stupid one but something that happens. The most annoying part is potentially bleeding all over whatever it was I was trying to shove under the presser foot. Anyway - briefly throbbed and now hardly noticeable. Not my first time. So raise your hand in the comments and tell me your sewing injury. After all, there are lot of sharp things, pointy things and seriously hot things involved in sewing, it is not for the faint hearted!

Back to jacket things. After the last post where I sewed the shoulder seams, then the undercollar goes on the jacket body. Sometimes I staystitch around the back neckline so I can clip and more easily pin.
Now I am going to use photos from a previous post where I made this exact same pattern in a grey plaid wool. I took better pictures back so I can illustrate the undercollar.
This is the jacket body with the undercollar sewn on, and then the seam pressed open and catchstitched down. Having this weft interfacing makes it very easy to do the stitching, as you catch the fibers of the interfacing and it never shows on the fabric.
grey jacket collar stitched on

Back of undercollar. Here you can better see the seam pressed open and then stitched down with blue silk thread. This wool jacket also has a black cotton stay across the back.
Grey jacket cross-stitch inner collar

Next up the upper collar and lapel are assembled. In this pattern the back lining piece goes all the way up to the collar which I really like, just a personal preference and I most always change my patterns to have this design.  So picture below; upper collar sewn to lapel and back lining.

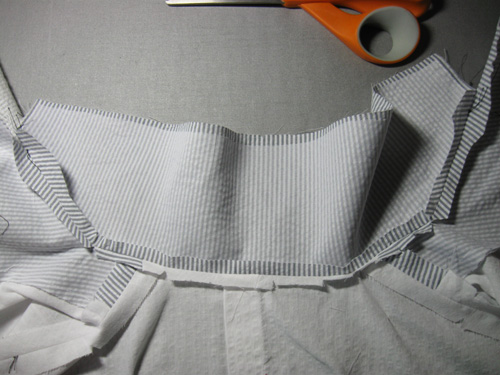
collar and lapel inside

Then it gets a good press open and the seam allowance is trimmed. If this were a very seriously tailored wool jacket then I would get super fussy about the seam allowance trimming and the upper collar would be at 3/8" and the under collar part trimmed to 1/4" so when they lay on top of one another the seam is graded and bulk is removed but whoa...this is my cotton summer blazer so let's save that for another time (like a cold November).  

collar seam trimmed
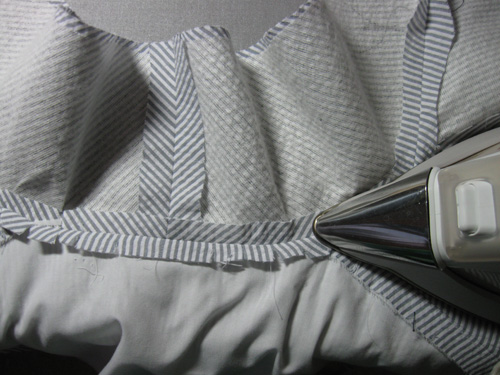
Upper collar pressed and trimmed. Note that the seam allowance trimming stops before you get to the inner lapel notch, leave that for later. 
I am serious about the pressing! Pressing all along the way is possibly the number one thing that makes a garment look really well tailored. OK, well also seam trimming and grading. Those two things!

collar and lapel pressed and trimmed

Next up it is time to sew the lapels. Fun! Wow, my idea of fun might seem a bit strange to non-sewers. But you know what I mean, right?

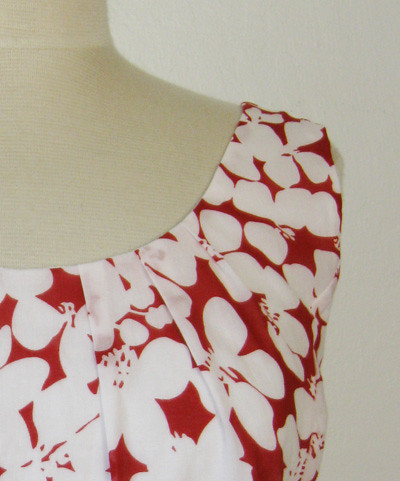
sneak peek red and whiteNo garden photo today, I will give you a sneak peek at something else floral, my latest finished garment and a summer pattern repeat - to appear here soon. 
So feel free to share your sewing related injury in the comments. 
Have a great weekend and everyone stay safe in the sewing room!
Beth